Category Archives: Recipes

Shortbread


The history of shortbread goes back to at least the 12th century and originally started life as ‘biscuit bread’; biscuits that were made from left-over bread dough that was sometimes sweetened and dried out in the oven to form a hard, dry rusk. This practise took place over the whole of the British Isles, not just Scotland.

Over time the leavening was lost and exchanged for butter, making it an expensive fancy treat that was only bought for celebrations such as Christmas and Hogsmanay (Scottish New Year). There are similar ‘breads’ outside of Scotland such as Shrewsbury cakes and Goosnagh cakes.

The large amount of butter is what makes shortbread short: the term short, when applied to biscuits and pastry, means crumbly, like shortcrust pastry should be. It is the reason why the fat added to biscuits and pastries is called shortening.

Mary Queen of Scots

Today, shortbread is made from flour, butter and sugar, though other flavourings are added. Caraway was particularly popular; Mary Queen of Scots was particularly fond of them. Other extra ingredients included almonds and citrus fruits like this 18th century recipe from Mrs Frazer:

Take a peck of flour…beat and sift a pound of sugar; take orange-peel, citron, and blanched almonds, of each half a pound, cut in pretty long thin pieces: mix these well in the flour; then make a hole in the middle of the flour, put in three table-spoons of good yeast; then work it up, but not too much…roll out; prickle them on top, pinch them neat round the edges, and strew sugar, carraways, peel, and citron, on the top. Fire it…in a moderate oven.

In George Read’s 1854 book The complete biscuit and gingerbread baker’s assistant, there are fewer ingredients, but includes eggs for some reason:

1 ¼ lb. of flour, ½ lb. of sugar, ½ lb. of butter, 3 eggs, ¼ oz. of volatile salts…a little essence of lemon

FYI: Volatile salts were smelling salts, that could also be used to leaven dough.

Shortbread usually comes in three different forms: small round biscuits, fingers or large rounds. To make the fingers, dough is cut into a large rectangle and the fingers are scored with the back of a knife so they can be broken up easily after cooking. A pattern made with fork marks is always made too.

To make large rounds, the dough is pressed into a round earthenware mould or a tart tin to make petticoat tails. When making the petticoat tails, the dough is scored into triangular slices like a pizza. The term petticoat tails comes not from the French petites gatelles (‘little cakes’) as many think (though Scottish cuisine did have more in common with French food than English food during the reign of Mary Queen of Scots), but from the term petticoat tallies – the name of the triangular pattern used to make bell hoop petticoats like Elizabeth I would have worn.

You can still buy the earthenware moulds – I’ll be buying one when I move back to England later in the summer.

Basic shortbread

This recipe makes enough for two petticoat tails rounds made in a seven inch tart tin. It’s hard to say how many biscuits or fingers – it depends on how wide and thick you make them. The important thing is to take them out before they start to brown.

To achieve a nice melt-in-the-mouth crumbliness use cornflour as well as normal plain flour to make your shortbread. Somewhere between a 1:1 and a 3:1 ratio of plain flour to cornflour works well. You don’t have to do this; they are still good with just good old plain flour.

6 ounces flour mix

4 ounces salted butter cut into cubes

2 ounces icing or caster sugar, plus extra

extra caster sugar

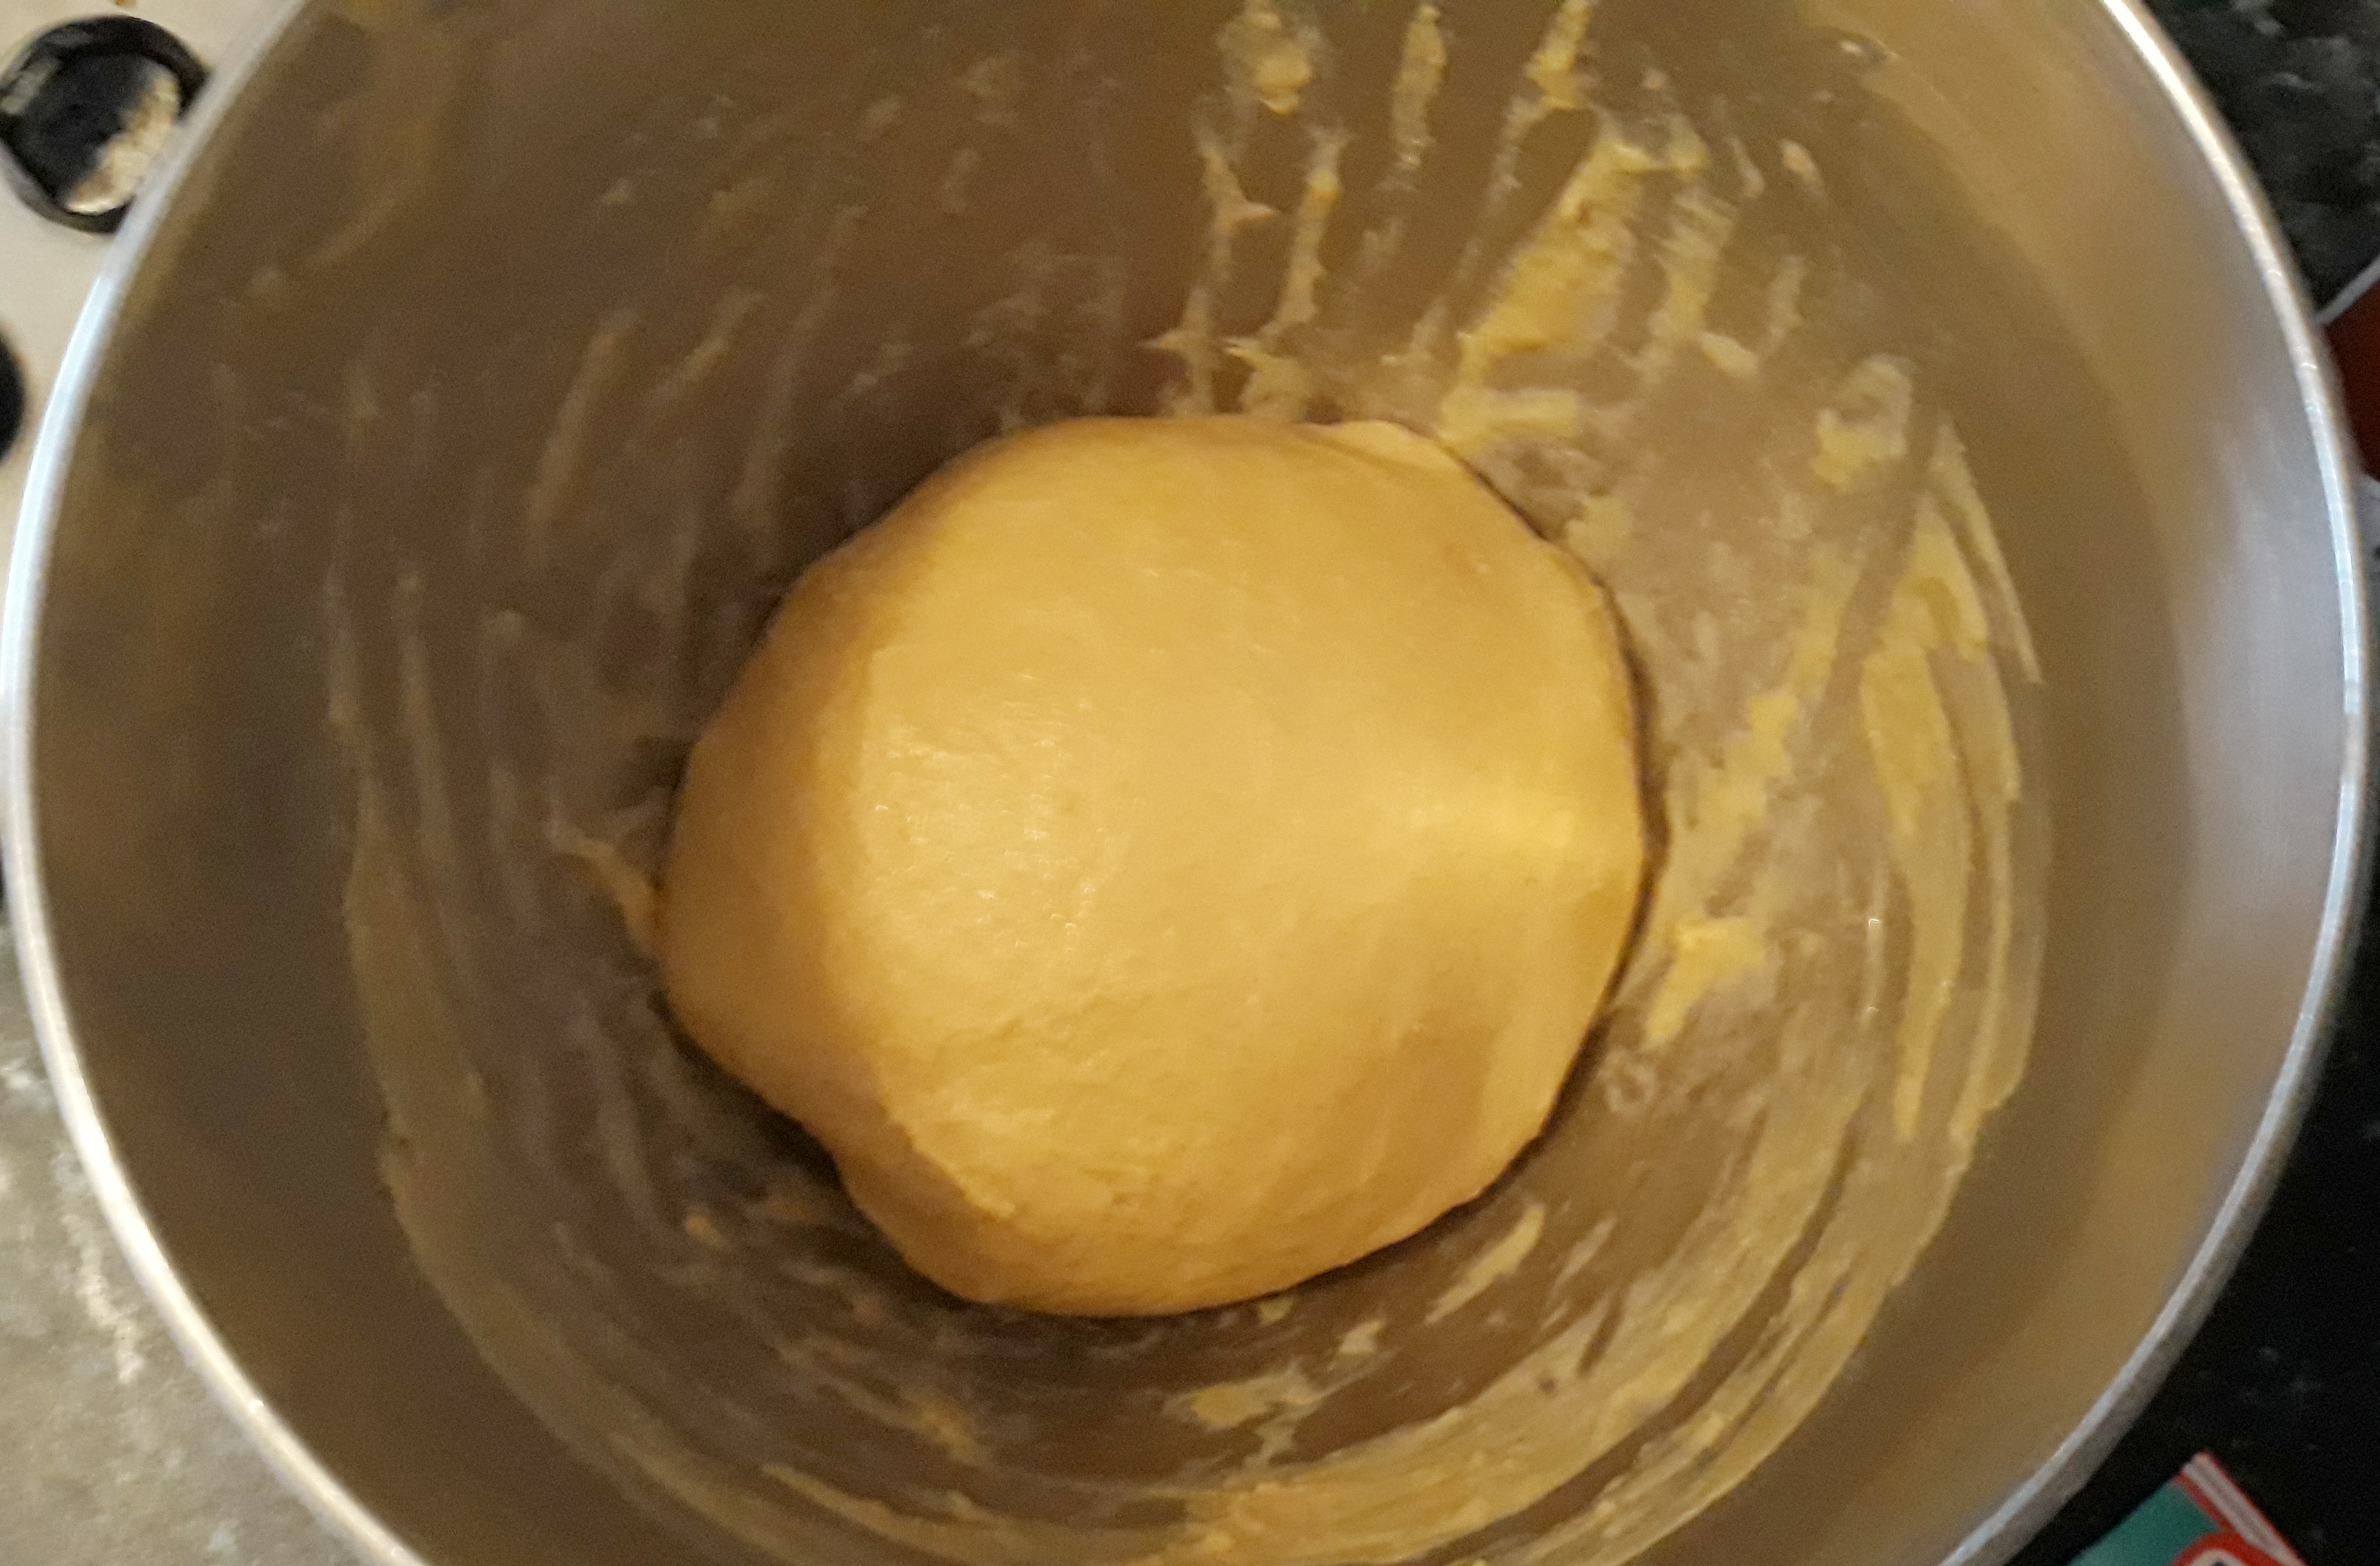
Rub the butter into the flour using fingers, pastry blender, food mixer or processor; be careful not to overwork things though if you’re using a food processor – shortbread dough doesn’t like being handled too much. Stir in the sugar and with your hand bring everything together to make a pliable dough – it’ll feel like it won’t form a dough at first, but as your hands warm it will.

Now you can roll or press out your dough into whatever shape you like and then place in the fridge for 20-30 minutes to harden:

For petticoat tails you are best diving the two into two halves and pressing the dough into your fluted flat tin. Score lines to mark out the slices, using a ruler if you want to be really precise. Make a nice pattern with a fork.

For fingers roll out the dough to half an inch thickness into a vaguely rectangular shape. Use a knife and a ruler to cut out a large rectangle and then score the lines with your ruler and knife, making patterns with your fork prongs.

For biscuits you can really do whatever you like; thick, thin, round, square. I think a little under half an inch is a good thickness. Cut out the biscuits and make your all-so-important fork marks.

Heat the oven to 180⁰C (350⁰F). Place the biscuits onto a baking sheet lined with greaseproof paper. Sprinkle with the extra sugar and bake until cooked but before any signs of browning. Petticoat Tails and fingers take about 15 minutes, individual biscuits can be variable, but usually about 12-15 minutes.

Variations:

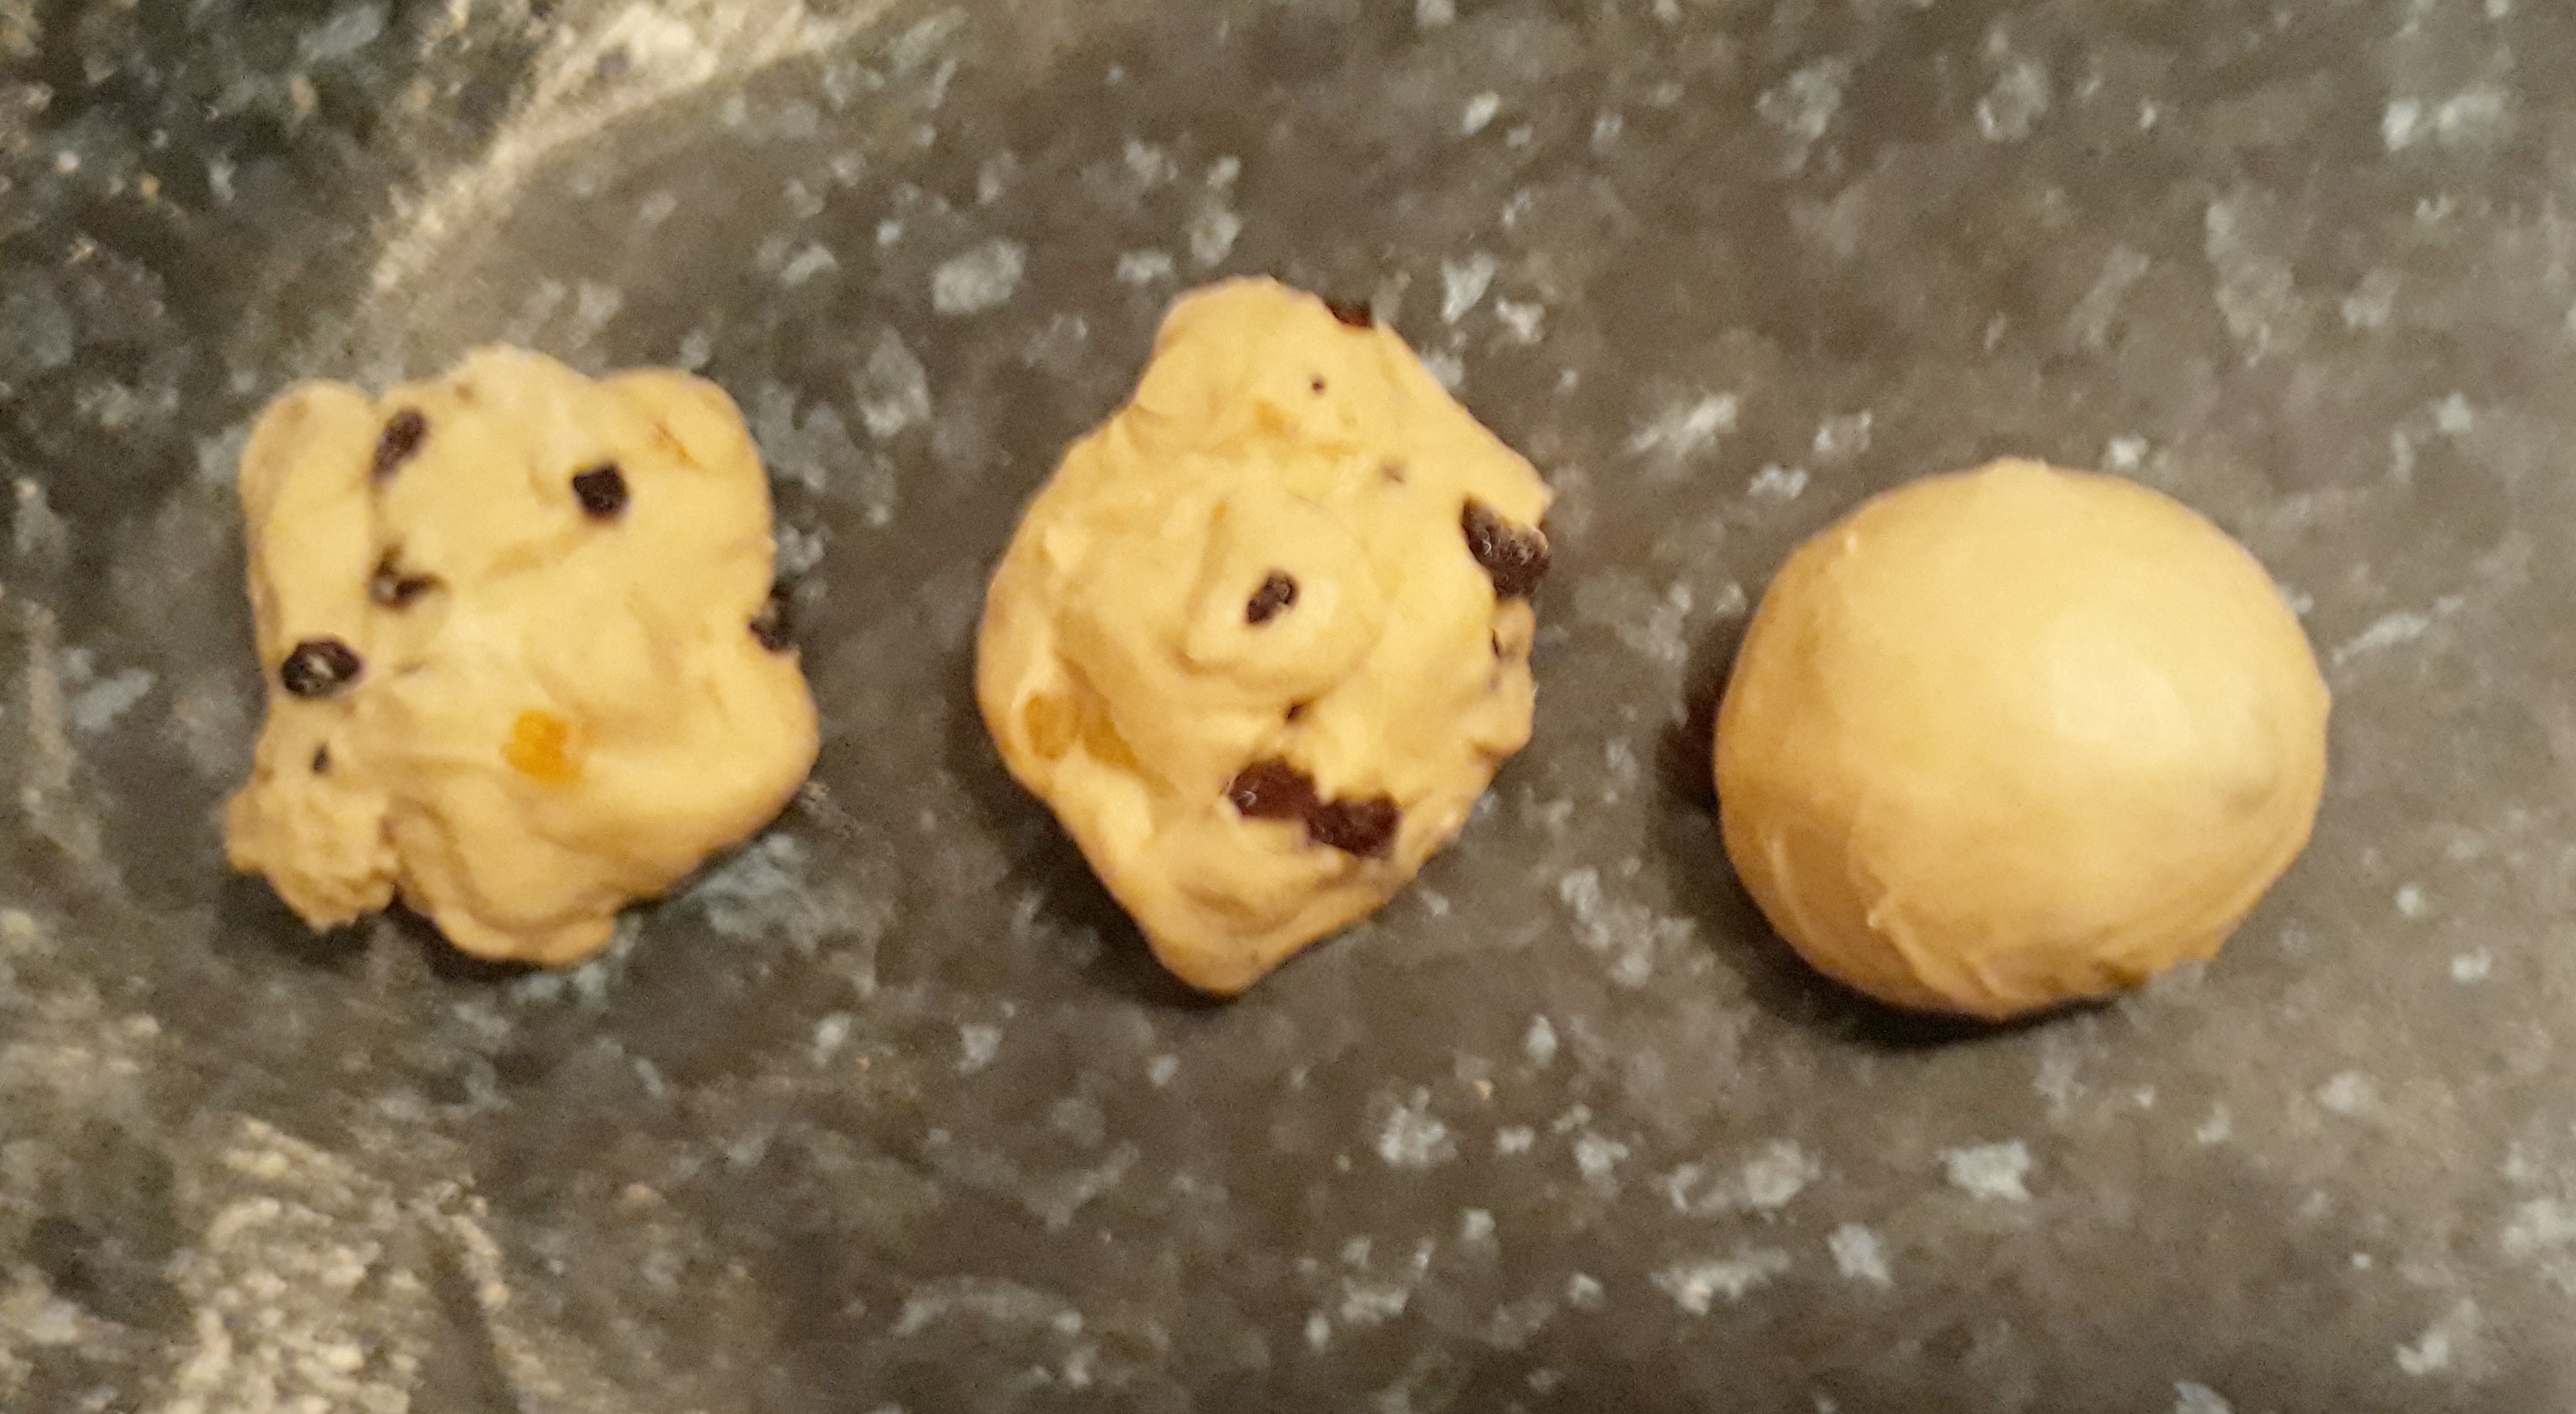
For lemon shortbread add the zest of one lemon when you add the sugar, and for almond shortbread add 5 or 6 drops of almond extract. If you want to try it with caraway, sprinkle in 2 teaspoons of caraway seeds at the same time you add the sugar.


If you like the blogs and podcast I produce, please consider treating me to a virtual coffee or pint, or even a £3 monthly subscription: follow this post for more information.


50 Comments

Filed under baking, Biscuits, Britain, Desserts, Festivals, food, history, Recipes, Scotland, Teatime, Uncategorized

Rillettes

A brief hop over the English Channel to France for this post…

I have a great love of potted meats – not the awful ones you get in those little glass jars on the supermarket shelves, but the proper job. Making them is easy and satisfying, but you can’t go too long flicking through the cook books and history books without eventually having to give a huge nod to French cuisine. Pâtés are of course well known and popular, but don’t forget the classic rillettes. They’ve been around for at least six hundred years, yet of recent times they have fallen out of favour in Britain, though they were very popular in Victorian and Edwardian Britain – the heyday for savouries such as these:

Rillettes: A French savoury meat preparation, used for hors-d’oeuvres and savouries

Charles Herman, Culinary Encyclopaedia 1898

See? I told you.

Rillettes are a classic, similar to a pâté in that you spread them on toast and eat them with some nice cornichons, but it is made in rather a different way; long slow cooking with plenty of fat is needed and, rather than being pulverised, they are stripped and potted along with their juices. They are subtly flavoured – the glory comes from the slowly cooked meat and the mild herbs. If I were to be a ponce, then I would say they are sublime. However I am not, so I shan’t.

Any kind of meat, or even fish, can be used to make rillettes but the classics are pork, duck, rabbit and goose. The best rillettes come from Tours and Reins.


If you like the blogs and podcast I produce, please consider treating me to a virtual coffee or pint, or even a £3 monthly subscription: follow this link for more information.


 Rillettes de Porc (Potted Pork)

Here’s the recipe I have tried out a couple of times now for rillettes de porc. I can’t wait to get back to England and try some rabbit rillettes (wild rabbits are a rarity in America). There is little variation in any recipe you see, whether found online today or in an eighteenth century cookbook.

Technically you can use any cut of meat as long as it has plenty of fat. I have been using pork belly, but neck would be okay, and for the less squeamish amongst you, the head.

Ingredients

2 lbs pork belly (weight after removal of rind and bones)

2 tbs salt

1 lb back fat

2 cloves of garlic, crushed

3 or 4 sprigs of thyme

2 bay leaves

Freshly ground black pepper

Freshly ground nutmeg

Around 10 fl oz water

Cut the pork belly into strips around 1 ½ inches wide, place them in a bowl and rub in the salt. Cover and leave for around 8 hours. Cut the back fat into cubes and place it, along with the pork belly, in an ovenproof casserole or similar. Tuck the herbs and garlic under the meat in the centre and sprinkle over a good seasoning of pepper and a little nutmeg then pour over the water. Cover with a tight-fitting lid or foil and bake in a very low oven, 140⁰C (290⁰F), for 4 hours.

Remove the foil and take out the bay leaves, garlic and thyme – they have imparted their flavours. Place a sieve over a good-sized bowl and toss the contents of the pan into the sieve so it can drain.

rillettes before

Next – and this the good bit – grab two forks and start stripping the meat and fat into shreds.

rillettes after

If it is easier, do this in a separate bowl. Pot lightly into jars, ramekins or earthenware pots and cover with the salty-fatty juices. Keep covered in a cool place, failing that the fridge.

Serve with thin toast and pickles.

It is very important that the rillettes are spreadable, so if they are kept in the fridge, make sure you let them get to room temperature before eating them.

10 Comments

Filed under food, French Cookery, General, Meat, Preserving, Recipes, Uncategorized

Treacle Tart

A classic British nursery pudding, the treacle tart is much-loved. It is probably the ultimate child’s dessert because it is so unbelievably sweet; it makes my teeth hurt just looking at one! That aside, I have never really lost my sweet tooth and I love treacle – meaning golden syrup of course in this case (see here for a post on treacle). Treacle tart was very popular with poorer families – the two main ingredients being bread and treacle – no expensive fruits and spices here.

The pudding itself as we know it has only been in existence since the late nineteenth century since golden syrup was invented in the 1880s. However, the earliest recipe I have found for a treacle tart actually dates to 1879 – before the invention of golden syrup! The recipe is by Mary Jewry and is a tart made up of alternating layers of pastry and treacle. The treacle here is black treacle, and this highlights the problem in researching the origins of this pudding; treacle meant any viscous syrup that was a byproduct of sugar refinery and specifics are not always pointed out, even after golden syrup became popular. The other problem is the recipe Mary Jewry gives is nothing like the beloved treacle tart from our childhood.

 The terrifying Childcatcher from Chitty Chitty Bang Bang

coaxing the children with shouts of  “treacle tart! All free today!”

Shudder.


Prior to the 17th century, treacle was used as a medicine; it was considered very good for the blood and was therefore used in antidotes to poisons. It starts cropping up in recipes for gingerbread in the mid-18th century. Jane Grigson mentions a gingerbread recipe from 1420 in her book English Food where spices and breadcrumbs were mixed together with plenty of honey to make a gingerbread that seems pretty similar a modern treacle tart, but without the pastry. Heston Blumenthal in his book Total Perfection also mentions a 17th century ‘tart of bread’ where bread and treacle are mixed with bread, spices and dried fruit and baked in an open pastry shell. Then just to complicate things further, Jane Grigson mentions that the predecessor to the treacle tart is the sweetmeat cake – again a 17th century invention – that uses candied orange peel, sugar and butter as a filling and no treacle or bread whatsoever!

All this confusing history waffle is giving me a headache. Here’s the recipe that I use for a treacle tart. It is adapted from Nigel Slater’s. I like it (and I have tried several recently) because it has a lot more bread in it than most other recipes – treacle tart should be chewy with a hint of   and must hold its shape when cut, many recipes fail in this respect. I use brown bread crumbs – it gives a good flavour and increases the chewiness level a little further.

There’s a pound and a half of golden syrup in this tart so the sweetness really needs cutting with some lemon juice and zest, and if you like, a tablespoon or two of black treacle; it’s not just a nod to treacle tarts of the past, its bitterness really does tone down the sweetness. This tart makes enough for ten people I would say. Be warned – if you go for some seconds, you may fall into some kind of sugar-induced diabetic coma…


If you like the blogs and podcast I produce, please consider treating me to a virtual coffee or pint, or even a £3 monthly subscription: follow this link for more information.


For the pastry

4 oz salted butter or 2 oz each butter and lard cut into cubes and chilled

8 oz plain flour

3 tbs chilled water

For the filling

1 ½ lbs golden syrup

2 tbs black treacle (optional)

juice and zest of a lemon

10 oz white or brown breadcrumbs

The pastry is a straight-forward shortcrust. Rub the fat into the flour with your fingertips, a pastry blender, the flat ‘K’ beater of a mixer or blitz in a food processor. Mix in two tablespoons of water with your hand and once incorporated, add the last tablespoon. The pastry should come together into a ball. Knead the dough very briefly so that it is soft and pliable. Cover with clingfilm and put in the fridge to have a little rest for 30 minutes or so.

Now roll out the pastry and use it to line a 9 inch tart tin. Put back into the fridge again – you don’t have to do this step, but sometimes the pastry can collapse a bit when it goes in the oven at room temperature.

Whilst the pastry is cooling, get on with the treacle filling. Treacle can be a tricky customer: weigh it out straight into a saucepan on tared scales and then pour the golden syrup straight in. Add the black treacle if using. Place the pan over a medium heat and stir until it becomes quite runny, then stir in the lemon juice and zest and the breadcrumbs.

Pour this mixture into the lined tart tin and bake in the oven at 200⁰C (400⁰F) for 15 minutes, then turn the heat down to 180⁰C (350⁰F) for another 15 or 20 minutes.

Best served warm with cream, ice cream or custard.

treacle tart

24 Comments

Filed under baking, bread, Britain, Desserts, food, General, history, Puddings, Recipes, Seventeenth Century, Teatime, Uncategorized

Fruit curd

I love fruit curds, they might be my favourite of all the preserves, sweet or savoury. In fact I’m not even sure if a curd is a true preserve or not; it isn’t chock-full of sugar like a fruit jam, plus there are eggs and butter in there too; the eggs technically make it a kind of custard. These ingredients mean that fruit curd doesn’t keep for very long, maybe two months in all. That said, they rarely last that long.

Looking in the recipe books, the earliest mention of the term lemon curd I have found goes back to 1844 in The Lady’s Own Cookery Book by the splendidly named Lady Charlotte Campbell Bury. The recipe is rather different though because the lemon curd is literally that; lemon acidulating cream to form curds which could then be separated from the whey through some cheesecloth.

You can go further back to find recipes for lemon curd, though it is called lemon cheese, and it seemed to generally be used for lemon cheese cakes which are what I would call nowadays lemon curd tarts. When you look in the books, the old recipes give the instruction to rasp the lemons’ skins “well with sugar” to extract the zest and aromatic oils. This seems rather a curious thing to do; perhaps the zester or fine-grater hadn’t been invented, or maybe it was terribly difficult to lay one’s hands upon such a thing. It all makes perfect sense in the end though because the sugar in the larder wasn’t granulated in a bag like we get it now, but was a solid, long, tapering palisade – a sugar loaf. You could simply crack a piece off and rub it against your lemons to get all the flavour out of that pesky zest. I have found these instructions for recipes as recent as 1974 (Jane Grigson, English Food), if you to attempt it buy those posh sugar lumps that are all irregularly shaped, normal ones will just crumble.

 A 19th century sugar loaf and tongs

Curds can be used for so many things: cakes, tarts, pies, steamed puddings, American muffins, as a pancake topping or filling, or at its best on hot toast. Though I have always thought lemon curd ripple ice cream would be good.

Curds don’t just come in lemon yellow of course, you can make one from any fruit that the juice can be easily squeezed from: orange, grapefruit, passion fruit and pineapple are all ones I have spotted at one time or another.

Here’s my recipe for lime curd. Have a go at making it; it’s very easy to make because it’s difficult to curdle the eggs as they are stabilised somewhat by the acid and egg whites. It is wonderfully tart and not too sweet. Honestly, you’ll never go back to the bought stuff.


If you like the blogs and podcast I produce, please consider treating me to a virtual coffee or pint, or even a £3 monthly subscription: follow this link for more information.


Lime Curd

This recipe makes around 1 UK pint (that’s 20 fl oz for any non-Brits). If you think things might be too sharp, add an extra egg and a couple of ounces of butter.

Ingredients

the zest and juice of 5 limes

5 oz salted butter

8 oz sugar cut into small cubes

4 large eggs

Set a mixing bowl over a simmering saucepan of water and add the lime zest and juice, butter and sugar.

Let it warm up, the sugar dissolve and the butter melt. Beat the eggs in a separate bowl and strain through sieve into the juice. Stir with a wooden spoon until the eggs have amalgamated and  thicken – this will take at least five minutes. When very thick, take off the heat but keep stirring for a minute or two as the eggs may carry on cooking if left in contact with the still hot bowl’s inner surface.

Pot into sterilised jars and allow to cool. Unless you have a nice cool larder, I would store them in the fridge, especially once opened.

Also see this other post with more curd recipes…

52 Comments

Filed under baking, food, Fruit, General, history, Preserving, Recipes, Uncategorized

Possets

I expected this post to be a simple recipe with a short history of the creamy dessert. However, as is so often in writing posts for this blog, it ends up being rather more complicated.

When I think of a posset, I think of a simple affair of sweetened cream thickened with an acidic fruit. However, this is very much a modern posset (by modern I mean twentieth century).

King Charles I

Originally the posset was a dessert or drink made from curdled milk enriched with sugar, alcohol (the most popular being sack, a sweet ale similar to sherry). It was often used as a curative for colds or fevers; it is mentioned in the Journals of the House of Lords in the year 1620 that King Charles I was given a posset drink from his physician. These drinks were kept warm and made in a special cup rather like a teapot so that the liquid could be drunk from beneath the foam that develops on the surface. Shakespeare mentions possets several times in his writings, in Hamlet, Act 1 Scene 5, he mentions the posset’s medicinal properties and that it is made from curds:

And with sudden vigour it doth posset,

And curd, like aigre [sour] droppings into milk,

The thin and wholesome blood.

Possets were eaten for pleasure too though:

Yet be cheerful knight: thou shalt eat a posset to-night at my house;

Where I will desire thee to laugh at my wife.

The Merry Wives of Windsor, Act 5, Scene 5

William Shakespeare

Kings and lords had their cream and curd possets, whereas we normal folk had to use bread to thicken ours.By the time we reach the mid-18th century, possets have changed; they are made from milk, but now are thickened with biscuits, bread, egg yolks or almonds, or a combination. Sack seems to still be the most popular and lemon possets make an appearance. Sack possets were drunk at weddings when it came to toasting the bride and groom around this time, though I don’t know where this originated from.

Possets 1769

Grate two Naples biscuits into a pint of thin cream, put in a stick of cinnamon and set it over a slow fire. Boil it till it is of a proper thickness, then add half a pint of sack, a slice of the end of a lemon, with sugar to your taste. Stir it gently over the fire, but don’t let it boil lest it curdle. Serve it up with dry toast.

Elizabeth Raffald, The Experienced English Housekeeper 1769

 Mrs Raffald also highlights the fact that you don’t want your posset to curdle: ‘always mix a little of the hot cream or milk with your wine, it will keep the wine from curdling the rest’. In the 19th century, Richard Cox in his Oxford Night Caps (1835) mentions those made from curds and those thickened with cream and egg yolks, so technically a custard, I suppose. Sometimes they were thick, and sometimes drinkable like egg nog. He mentions a black pepper flavoured posset that will ‘promote perspiration’ in order to sweat out a fever.

Here’s a strange thing though; if you rewind time back to Shakespearean days and look for a recipe for a trifle, what you seem to get is a recipe for a modern-day posset:

Take a pint of thick cream, and season it with sugar and ginger, and rose water. So stir it as you would then have it make it luke warm in a dish on a chafing dish and coals. And after put it into a silver piece or a bowl, and so serve it to the board.

Thomas Dawson, The Good Housewife’s Jewel 1596

You can see why a matter of no concern is called a mere trifle – they used to be so simple, but now they are complex and as the trifle changed over time so did the posset and it seems to have filled the niche left behind by the trifle. Possets, however, are no longer that popular. They are easy to make when cream is the sole thickener.


If you like the blogs and podcast I produce, please consider treating me to a virtual coffee or pint, or even a £3 monthly subscription: follow this link for more information.


Orange Posset 2012

Here’s the recipe I devised for an orange posset, which I think works very well. You can make a lemon one from two lemons and perhaps an ounce or two more of sugar. I have kept to its historical roots with the addition of a little orange flower water. This makes six helpings.

Ingredients

1 pint (20 fl oz) of double (heavy) cream

4 oz caster sugar

the juice of two oranges and the zest of one

juice of half a lemon

1 to 2 teaspoons of orange flower water (optional)

Bring the cream and sugar slowly to a boil and let it simmer very gently for 5 minutes. Allow to cool before adding the juices and zest whisking well; the acid thickens the cream noticeably. Add the first teaspoon of orange flower and taste, adding more if you like. Pour into six serving dishes and chill for several hours, or overnight. Eat with a crunchy crumbly almond biscuit or some shortbread.

29 Comments

Filed under food, history, Puddings, Recipes

The Gentleman’s Relish

The Victorians and Edwardians had a real thing for what they called savouries, which were small dishes served alongside or after the dessert course at dinner. We don’t do this any more, all that survives is the cheese option one sometimes finds on the pudding menu at restaurants. I expect the gout is to blame. Savouries need a whole post to themselves so I won’t go into them here…

For me, Gentleman’s Relish is the savoury that really conjures up romantic images of that era, I think just for the name alone. I can just imagine the bank manager or maybe a member of the British Raj eating a slice of toast, relish melting and seeping into it, as he reminisces of home.

Gentleman’s Relish is essentially potted anchovies that are heavily spiced – it also goes by another name Patum Peperium which is Latin for ‘pepper paste’, and it should only be used “very sparingly”.

It was invented in 1828 by John Osborn an expatriate living in Paris which, when he unveiled it the Paris Food Show in 1849 and again in 1855, won a Citation Favorable. High praise indeed. It is still made now in Elsham, Hertfordshire, but what exactly goes in there is a closely-guarded secret.

FYI: the company have started making a salmon version called Poacher’s Relish. I’ve never tried it, but I am sure it is wonderful too.

Now, Patum Peperium is not to everyone’s taste – saying it is piquant would be doing it a gross injustice – it is very fishy, very salty and very spicy, so some may consider it totally foul. However, I love strongly tasting robust food like this. To show it off as its finest, it should be scraped thinly across hot toast. When you first try it, the first thing that hits you is the fishy odour, then you take a bite and find the fish taste is actually a perfect marriage between anchovy, salt and spice. You can’t have a marriage between three things can you? Make that a love triangle between anchovy, salt and spice. It is addictive stuff; if it is to your tasting, like Marmite, you either love it or hate it.

Gentleman’s Relish is a cooking ingredient in its own right: the fish, salt and spices all provide a great seasoning to stews, especially lamb, and is great stirred into scrambled eggs. It can be melted upon steaks, or used as a simple sauce with pasta. It is also used to make another amazing savoury called Scotch Woodcock.

After doing a bit of research I found that major players in the spice mix seemed to be nutmeg, mace, Cayenne pepper and black pepper – all classically Victorian, the amounts used vary from pinches to teaspoons, with the spices sometimes mixed equally, other times, one spice dominated.


If you like the content I make for the blogs and podcast, please consider supporting me by buying me a virtual coffee, pint or even a subscription : just click on this link.


Here is my recipe – the dominant spice here is Cayenne pepper, because it provides a good punch of chili heat and not that much other flavour, which the other – what are often called warmer – spices do magnificently. You can include less of the mix in the relish, or change the ratios or even the spices to suit your own taste.

Ingredients

For the spice mix:

1 tsp Cayenne pepper

1/4 tsp ground cinnamon

1/4 tsp ground nutmeg

1/4 tsp ground mace

1/4 tsp ground ginger

1/4 tsp ground black pepper

For the relish:

1 x 50 g can of anchovies, drained

120 g softened butter

1 tsp spice mix

Start off by mixing together the spices. To get maximum flavour it is best to freshly grind your spices, but it is not essential. What is essential, however, is to cook your spices. Do do this, melt between 1/3  and 1/2 of the butter in a small saucepan. When hot and bubbling fry the spices for around 30 seconds; mind the butter doesn’t burn though. Now mix it with the anchovies and the remaining butter. The idea is to produce a paste – there are several ways to do this: blender, food processor, pestle & mortar or fork will do the job, it is a trade-off between how homogenous you like your relish and how much washing up you can be bothered doing. Spoon the mixture into a small pot, cover with a lid or some clingfilm, and allow to cool.

107 Comments

Filed under Britain, food, General, history, Nineteenth Century, Recipes, The Edwardians, The Victorians, Uncategorized

Hot Cross Buns

Tomorrow is Good Friday and in England it is traditional to eat hot cross buns, or rather it was;  supermarkets and bakeries bring them out as soon as Christmas is over these days. And why not? They are delicious after all. The reason that Good Friday is the day these buns are traditionally baked goes back to Tudor times, when the sale of spiced buns was illegal, except on Good Friday, at Christmas and at funerals.

The cross, people assume, is to denote the cross upon which Jesus was crucified. This is in fact nonsense; spiced buns with crosses were being produced throughout much of pagan Europe. Spiced buns have always been symbolic in worship and ones adorned with crosses were made for the goddess Eostre (where Easter get its name).

The Pagan goddess, Eostra

So that is the cross taken care of, but what about the hot? We don’t actually eat them hot that often. They were simply called cross buns, until that famous nursery rhyme was written sometime in the eighteenth century:

Hot cross buns, hot cross buns!

One ha’penny, two ha’penny, hot cross buns!

If you have no daughters, give them to your sons,

One ha’penny, two ha’penny, hot cross buns!

What if you have neither sons nor daughters? I suppose you eat them all to yourself like the miserable old spinster you are…

Ever since I started baking my own bread, I have sworn never to buy it again as it is just so delicious. Bought buns – like bread – are just shadow of their former selves, says Jane Grigson: ‘Until you make spiced hot cross buns yourself…it is difficult to understand why they should have become popular. Bought, they taste so dull. Modern commerce has taken them over, and, in the interests of cheapness, reduced the delicious ingredients to a minimum – no butter, little egg, too much yellow colouring, not enough spice, too few currants and bits of peel, a stodgy texture instead of a rich, light softness. In other words, buns are now a doughy filler for children.’

The recipe below asks for mixed spice, you buy a proprietary blend of course or make your own. I decided to make my own – simply because I didn’t have any. The good thing about making your own is that you can remove spices you don’t like, and enhance the ones you do. Typical spices are the warm ones: cinnamon, mace, allspice (pimento), nutmeg, cloves and ginger. I also think a little black pepper is good.

Here’s my recipe. It makes between 8 and 12 buns, depending upon how large you want to make them. The piped pastry cross is optional – cutting crosses with a serrated knife is fine, and closer to the original. I used to think the same as Elizabeth David, in that they ‘involve unnecessary fiddly work’, but that’s because I couldn’t get them right, I reckon to have worked it out now.


If you like the blogs and podcast I produce, please consider treating me to a virtual coffee or pint, or even a £3 monthly subscription: follow this link for more information.


Ingredients

500 g strong bread flour

5 g dried, fast-action yeast

10 g salt

60 g caster or soft dark brown sugar

1 tsp mixed spice

50 g softened butter

250 ml warm milk, or half-and-half water and milk

1 egg

100 g dried fruit (currants, raisins, sultanas, etc.)

25 g candied peel

For the crosses:

50g strong white flour

70-80 ml water

For the glaze:

60g sugar

70 ml water

Mix together the flour, yeast, salt, sugar and mixed spice in a bowl, then make a well in the centre. Beat an egg into the milk, and pour it into the well, adding the butter too. If you have an electric mixer, use the dough-hook attachment and mix slowly until everything is incorporated, then turn the speed up a couple of notches and knead for around 6 minutes. The dough should be tacky, glossy, smooth and stretchy. If you don’t have one, get stuck in with your hands and knead by hand on a lightly-floured worktop. It’s a very sticky dough at first, so it’s a messy job, but it will come together.

Grease a bowl, tighten the dough into a ball, pop it in and cover the bowl with cling film or a damp tea towel. Leave to prove until doubled in size – this can take anywhere between 1 and 3 hours, depending upon ambient temperature.

Knock back the dough to remove any air and mix in the dried and candied fruits – again, either by using your hands or your dough hook. Divide the dough into 8, 10 or 12 equally sized pieces and roll up into very tight balls on a very lightly-floured board. This is done by cupping your hand over a ball of dough and rolling it in tight circles, takes a little practise, but is an easy technique to learn.

Line a baking tray with greaseproof paper and arrange the buns on it, leaving a good couple of centimetres distance between each one. Cover with a large plastic bag and allow to prove again until they have doubled in size.

Meanwhile, make the cross dough. Simply beat the water into the flour to make a loose, but still pipeable batter. Put the batter in a piping bag (or freezer bag, with a corner cut away) and make your crosses. If you like, just cut crosses in the tops.

Put the tray in a cold oven, and set it to 200⁰C and bake for 20 to 25 minutes (you get a better rise if they go into a cold/just warm oven, if you have to put them into a hot over, knock 5 minutes from the cooking time).

When they are almost ready, make the glaze: boil the sugar and water to a syrup and when the buns come out of the oven, brush them with the glaze twice.

Eat, warm or cold with butter. To reheat them, bake in the oven for 10 minutes at 150⁰C.

22 Comments

Filed under baking, bread, Britain, Easter, Festivals, food, General, history, Recipes, Teatime

The Oriental Club’s Mid-19th Century “Mutton Curry”

The Duke of Wellington, the first (and only) President of the Oriental Club

In the mid-19th century, the British obsession with Indian curries and culture really started to take off (see this post for a brief history of Britain’s love of spice and India). It wasn’t just the spiciness, but the romance of the place. Queen Victoria loved the country and even had an Indian wing in the palace. Although she was the Empress of India, she never actually visited the country, leaving all that excitement to her sons.

Hanover Square in the 18th Century

Authentic – or very close approximations to authentic – curries were being made in one particular London gentleman’s club called the Oriental Club which could be found in Hanover Square. The club catered for high society – the Duke of Wellington was the President and all the chairmen seem to have been Sirs, Lords, Major-Generals or Vice-Admirals.  The Club was obviously a popular one; it opened in 1825 and in 1961 it moved from Hanover Square to Stratford House on Stratford Square, where it remains to this day. If you are a Londoner (and a man), you can still join, though it does cost between £240 and £850 per year to become a member.

Stretford House, the current home of the Oriental Club

In its hey-day, Chef Richard Terry was at the helm in the kitchen, who took full advantage of the first Asian grocery warehouses; Payne’s Oriental Warehouse on Regent Street and the Oriental Depot on Leicester Square. His recipes were ‘not only from [his] own knowledge of cookery, but from Native Cooks’ too. He published a book called Indian Cookery in 1861, where the recipe below is adapted from. The job of adaptation was not done by me, but Madhur Jaffrey, though I would like to get my hands on a copy.

To make the curry, you need to make a blend of curry powder and curry paste first.

Richard Terry’s 19th Century British Curry Powder

This makes 7 tablespoons of curry powder – enough for more than three curries using the recipe below. You can of course use it in any recipe that asks for ‘curry powder’ in its list of ingredients. All the spices required are ground, but don’t buy ground coriander, pepper, cumin, cardamom and cloves if you can avoid it. Instead, roast whole spices over a medium-high heat in a dry frying pan then grind using a coffee grinder after cooling. All you need to do is mix together the following:

2 tbs ground turmeric

5 tsp ground coriander seed

2 tsp ground ginger

2 tsp Cayenne pepper

1 ½ tsp ground black pepper

½ tsp ground cumin

½ tsp cardamom seeds

½ tsp ground cloves

Store in a cool, dry, dark place.


If you like the blogs and podcast I produce, please consider treating me to a virtual coffee or pint, or even a £3 monthly subscription: follow this link for more information.


Sir Ranald Martin’s British Curry Paste

Many old (and new!) recipes ask for curry paste, but don’t always give receipts for the paste itself.  This recipe from Ranald Martin, a Victorian doctor and foodie who lived in India during the 1840s provides us with this one below. He was told it was an old Madras concoction. According to Madhur Jaffrey, the ingredients are very common in Madras, but the combination is ‘totally alien’. Aside from being used in curries, it was also used in sandwiches. The recipe below makes around 12 fluid ounces of paste.

4 tbs whole coriander seeds

2 tbs lentils such as yellow split peas or chana dal

1 tbs whole black peppercorns

1 ½ tsp whole cumin seeds

1 tbs whole brown mustard seeds

1 tbs ground turmeric

1 tbs Cayenne pepper

1 ½ tsp ground ginger

2 tsp salt

2 tsp sugar

3 cloves of garlic, minced

4 fl oz cider vinegar

6 tbs flavourless cooking oil such as sunflower or peanut oil

Dry-roast the whole spices and lentils in a frying pan until they turn a shade darker and emanate a delicious roasted aroma.

Remove from the heat, cool and grind in a spice or coffee grinder. Add the remaining ingredients except for the oil and stir well. Heat the oil in a frying pan and when hot, add the spice mixture and fry for around five minutes until the paste turns darker. Cool and empty into a jar. Store in the refrigerator.

The Oriental Club’s 19th Century Mutton Curry

Okay, you have made the paste and blended your spices, now you can get on with the curry. You can use either lamb or mutton, but bear in mind, the mutton – although more flavourful – will take longer to cook. If lamb is tricky to get hold of, goat or kid could be used as an alternative. The curry is pretty pungent, but good, dark and rich; I added a couple of peeled, chopped potatoes to add much needed-blandness. This curry serves 4 people and goes very well with plain rice, yoghurt and mango chutney. Would you believe, I forgot to take a photograph!?

4 tbs flavourless cooking oil

1 medium-sized onion, thinly sliced

2 tbs 19th Century British Curry Powder

1 tbs 19th Century British Curry Paste

1 ½ lb cubed lamb meat, shoulder is a good cut for this

8 – 12 oz (i.e. a couple of medium-sized) potatoes, peeled and cut into large chunks

¾ – 1 tsp salt

Heat the oil in one of those wide, deep frying pans that come with a lid. Add the onions and fry until the onions have browned and become crisp. Add the paste and powder, stirring well for a few seconds. Now add the meat and half of the salt, stir, cover and turn the heat right down. Gently fry for around 10 minutes, stirring occasionally. Add a pint of water (that’s a British pint – 20 fluid ounces) and the potatoes, turn up the heat and when the curry comes to a boil, turn the heat back down, cover and simmer very gently until the meat is tender, around 60 to 90 minutes if using lamb, longer if using mutton. Taste and add more salt if needed.

9 Comments

Filed under food, history, Indian food, Meat, Nineteenth Century, Recipes, The Royals, The Victorians, Uncategorized

Pea Soupers

London, Parliament: Sun Through the Fog by Claude Monet 1903

London in the mid-to-late nineteenth century must have been an amazing place. There’s nothing I like more than walking around London Bridge and its environs; it is just like walking around a Dickens novel, with the romantic remains of the Marshalsea prison and roads named after his characters such as Clennam and Copperfield Street. There was however, one rather unromantic aspect to London life and that was the intense and deadly pollution created from the huge amount of coal being burnt at the time.

We talk of the smog that lie over the big cities of the modern world, Houston certainly had one, but they all pale in comparison to London smog; it had a very strong sulphurous smell and a green-brown colour to it. The Sun didn’t burn it off, but actually intensified it. Hung-out washing would be visibly dirtier once it had dried. Thousands died from heart and lung problems – it was said that a 30 second walk was the equivalent of smoking 20 cigarettes – and rickets was widespread due the lack of sunlight. A miserable place indeed:

The fog was so thick that the shops in Bond Street had lights at noon. I could not see people in the street from my windows. I am tempted to ask, how the English became great with so little daylight? It seems not to come fully out until nine in the morning, and immediately after four it is gone…On the 22nd of the month, accidents occurred all over London, from a remarkable fog. Carriages ran against each other, and persons were knocked down by them at the crossings. The whole gang of thieves seemed to be let loose. After perpetrating their deeds, they eluded detection by darting into the fog. It was of an opake, dingy yellow. Torches were used as guides to carriages at mid-day, but gave scarcely any light through the fog. I went out for a few minutes. It was dismal.

Richard Rush, 1883

On several occasions, people fell in the Thames and drowned because they could not see the river right in front of them.

Victorian link boys guide people home

through the London smog

And so, for obvious reasons, the thick London smog became known as a ‘pea souper’. Dried pea based soups and puddings were very popular at this time, especially in the winter when there were no few fresh vegetables around. The soup became known as London particular because of a line from Charles Dickens’ novel Bleak House: “This is a London particular…A fog, miss”, said the young gentleman.

The phrase London particular had actually been around for at least a century – it was used to describe food and drink particular to London, for example London Particular Madeira.


If you like the blogs and podcast I produce, please consider treating me to a virtual coffee or pint, or even a £3 monthly subscription: follow this link for more information.


London Particular

This soup is really more of a potage and is very simple and cheap to make. The best thing about it is the wonderful stock made from the addition of a nice ham hock. You can use smoked or unsmoked, or you could go for a couple of pig’s trotters. Either way, it shouldn’t cost you more than 50 pence at the butcher. He might even give you them for free if you bat your eye-lashes at him. The recipe also asks for two tablespoons of Worcestershire sauce, this might seem like a lot, but it really can take it.

Ingredients

1 lb dried split peas

2 oz butter

3 rashers of smoky bacon, chopped

1 onion, sliced

1 ham knuckle, ham hock or 2 pig’s trotters

pepper

salt

2 tbs Worcestershire sauce

Have a look at the packet of peas; see if they need soaking overnight. If they are non-soak but are particularly old, you might want to soak them.

Melt the butter in a stockpot or large saucepan, add the bacon and fry on a medium heat for five minutes. Add the onion and fry until softened. Drain the peas and stir them in, making sure they get a good covering of bacon fat and butter. In amongst the peas, place the hock, knuckle or trotters and cover with water. Add some pepper, but do not add salt at this stage. Bring to a boil and skim off any grey scum, then cover and simmer gently until the peas are all mushy; around 1 ½ to 2 hours. Give the potage a stir every now and then as the peas do tend to stick, particularly towards the end of cooking.

Take out the meat joint and place to one side. Liquidise or mill the soup and return it to the pan. Pick any meat from the joints and add to the soup. Season with salt (if needed), pepper and the Worcestershire sauce.

6 Comments

Filed under food, history, Nineteenth Century, Recipes, Soups, The Victorians, Uncategorized

The Rhubarb Triangle

It is just about the end of the short British forced rhubarb season, and it is always a treat to see it nestled, glowing pink in a crate at the marketstalls, and it is always sad to see it disappear, as I think it is one of the most wonderful vegetables.

In Britain, the long thin bright pink stalks are grown in an area called the Rhubarb Triangle, also known as the Wakefield triangle, a nine mile square area of land contained by Leeds, Morley and Wakefield in the West Riding of Yorkshire. Here, the rhubarb is grown in large, heated, low-ceilinged sheds in complete darkness. Because the plants want sunlight, they are forced stretch and grow long and thin in the vain hope of catching some of the Sun’s rays. Hence it is called forced rhubarb. It is also called Champagne rhubarb by some. The rhubarb never gets to attain the green colour like normal field or garden rhubarb has; I think the biological term is chlorosed. It also never gets the chance to develop the very astringent sourness too, but it does still has the wonderful rhubarb flavour. The plants grow so quickly in their desperation to find light that you can actually hear them pop and crack as they stretch and grow. I imagine that it is pretty scary in those dark, dank sheds harvesting the rhubarb by candlelight.

So what is special about West Yorkshire when it comes to growing rhubarb? Apparently, it is the unique mix of soil and climate. I know that that might sound rather trite, but I think in this case it might actually be true; Wakefield is the only place in the UK where one can successfully grow liquorice and the reason for that is because of its soil. Yorkshire-produced Forced Rhubarb has been given Protected Designation of Origin (PDO) status by the European Commission’s Protected Food Name scheme, just like Stilton Cheese, and famously not like Cornish pasties. That said the forced rhubarb I got was from Mexico.

It wasn’t until the discovery that rhubarb could be forced in the 1840s that the vegetable caught on as a ‘fruit’ in crumbles, pies &c. (it isn’t a true fruit as there are no seeds). Before then, like many plants, it was grown for medicinal purposes. It was such a revered drug for treating gut, lung and liver disorders that it was worth thrice the price of opium! It was first introduced into Europe by Marco Polo from Asia during the thirteenth century, and was first grown in Britain in the mid-seventeenth century.

Okay, that’s enough waffle, it is recipe time. Rhubarb is great for desserts and jams, and it is also great with fish, particularly oily fish. There are many recipes that I could add to the post, but the best has to be…


If you like the blogs and podcast I produce, please consider treating me to a virtual coffee or pint, or even a £3 monthly subscription: follow this link for more information.


Rhubarb Crumble

This is my favourite way of eating rhubarb: tart fruit, sweet crunchy topping and loads of proper custard (link here for a recipe for that). I like to include some ginger in my crumble, they are a classic combination. Here I use it twice, ground ginger in the topping, and preserved ginger in with the gently stewed fruit. Orange zest and juice also work well as an alternative.

Ingredients

10 sticks of rhubarb, forced if possible

2 knobs of preserved ginger, chopped, plus one tbs of the syrup

4 tbs caster sugar

4 oz butter

4 oz Demerara sugar, or half caster sugar and half soft dark brown sugar

6 oz plain flour

2 oz oats

1 tsp ground ginger

Slice the rhubarb sticks into one inch lengths. If buying forced rhubarb, there should be no need for peeling, but older, field grown sticks might need it. Place the rhubarb and caster sugar in a saucepan with the ginger and syrup, plus a couple of tablespoons of water. Cover, and simmer gently until the rhubarb is tender, about 10 minutes. Try not to stir the rhubarb too much, as it easily breaks up. If there is a lot of liquid, take the lid off and let it simmer away a little. Add more sugar if necessary; field-grown rhubarb may need more. Cool.

Meanwhile, make the crumble topping by rubbing the butter into the flour, using fingers, mixer or processor. Stir in the flour, oats and ginger.

Pour the rhubarb into a pie dish, or baking dish and pile on the crumble topping. I like loads of topping, but if there is too much for you, freeze the remainder for future crumbles.

Bake at 160⁰C for 45 minutes. Serve with custard, cream or vanilla (or even better, ginger) ice cream.

14 Comments

Filed under baking, food, Fruit, history, Puddings, Recipes, Uncategorized