Category Archives: cooking

Toast

toasting fork

from iggandfriends.wordpress.com

Hot buttered toast must be the most popular British breakfast item, whether eaten on the run to the bus stop, or served up with a full English breakfast or posh scrambled eggs and smoked salmon on a Sunday. Elizabeth David described it as a ‘peculiarly English…delicacy’.

It is true that the wafting smell of freshly made toast combined with the sight of the slow melting of a good covering of salted butter is so comforting. Indeed, the first thing offered up to you after you’ve come round from an operation on the NHS (and I unfortunately have had many times) is tea and toast. (Digressing slightly, the first thing offered up to you after an operation in the USA is the similarly comforting cookies and milk.)

Most toast today is, of course, made from the flabby Chorleywood processed white sliced loaf, which produces quite depressingly poor ‘wangy’ toast. Proper toast requires proper bread; bread that has gone a slightly stale. Perfect toast is in the eye of the beholder: thick, thin, crisp throughout, soft in the centre, pale, dark, a scraping of butter or lashings of it.

Making toast was a way of using up stale bread, of course, so toast shouldn’t even be required now that we have the invention of Chorleywood processed bread. It’s ironic that our love of toast means we, on the whole, now make it with a product unsuitable for making it.

It won’t surprise you that there are some very detailed descriptions in old cookbooks as to the best way for making toast.

soyer

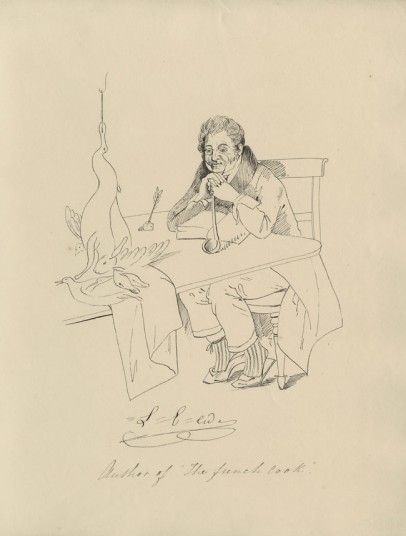
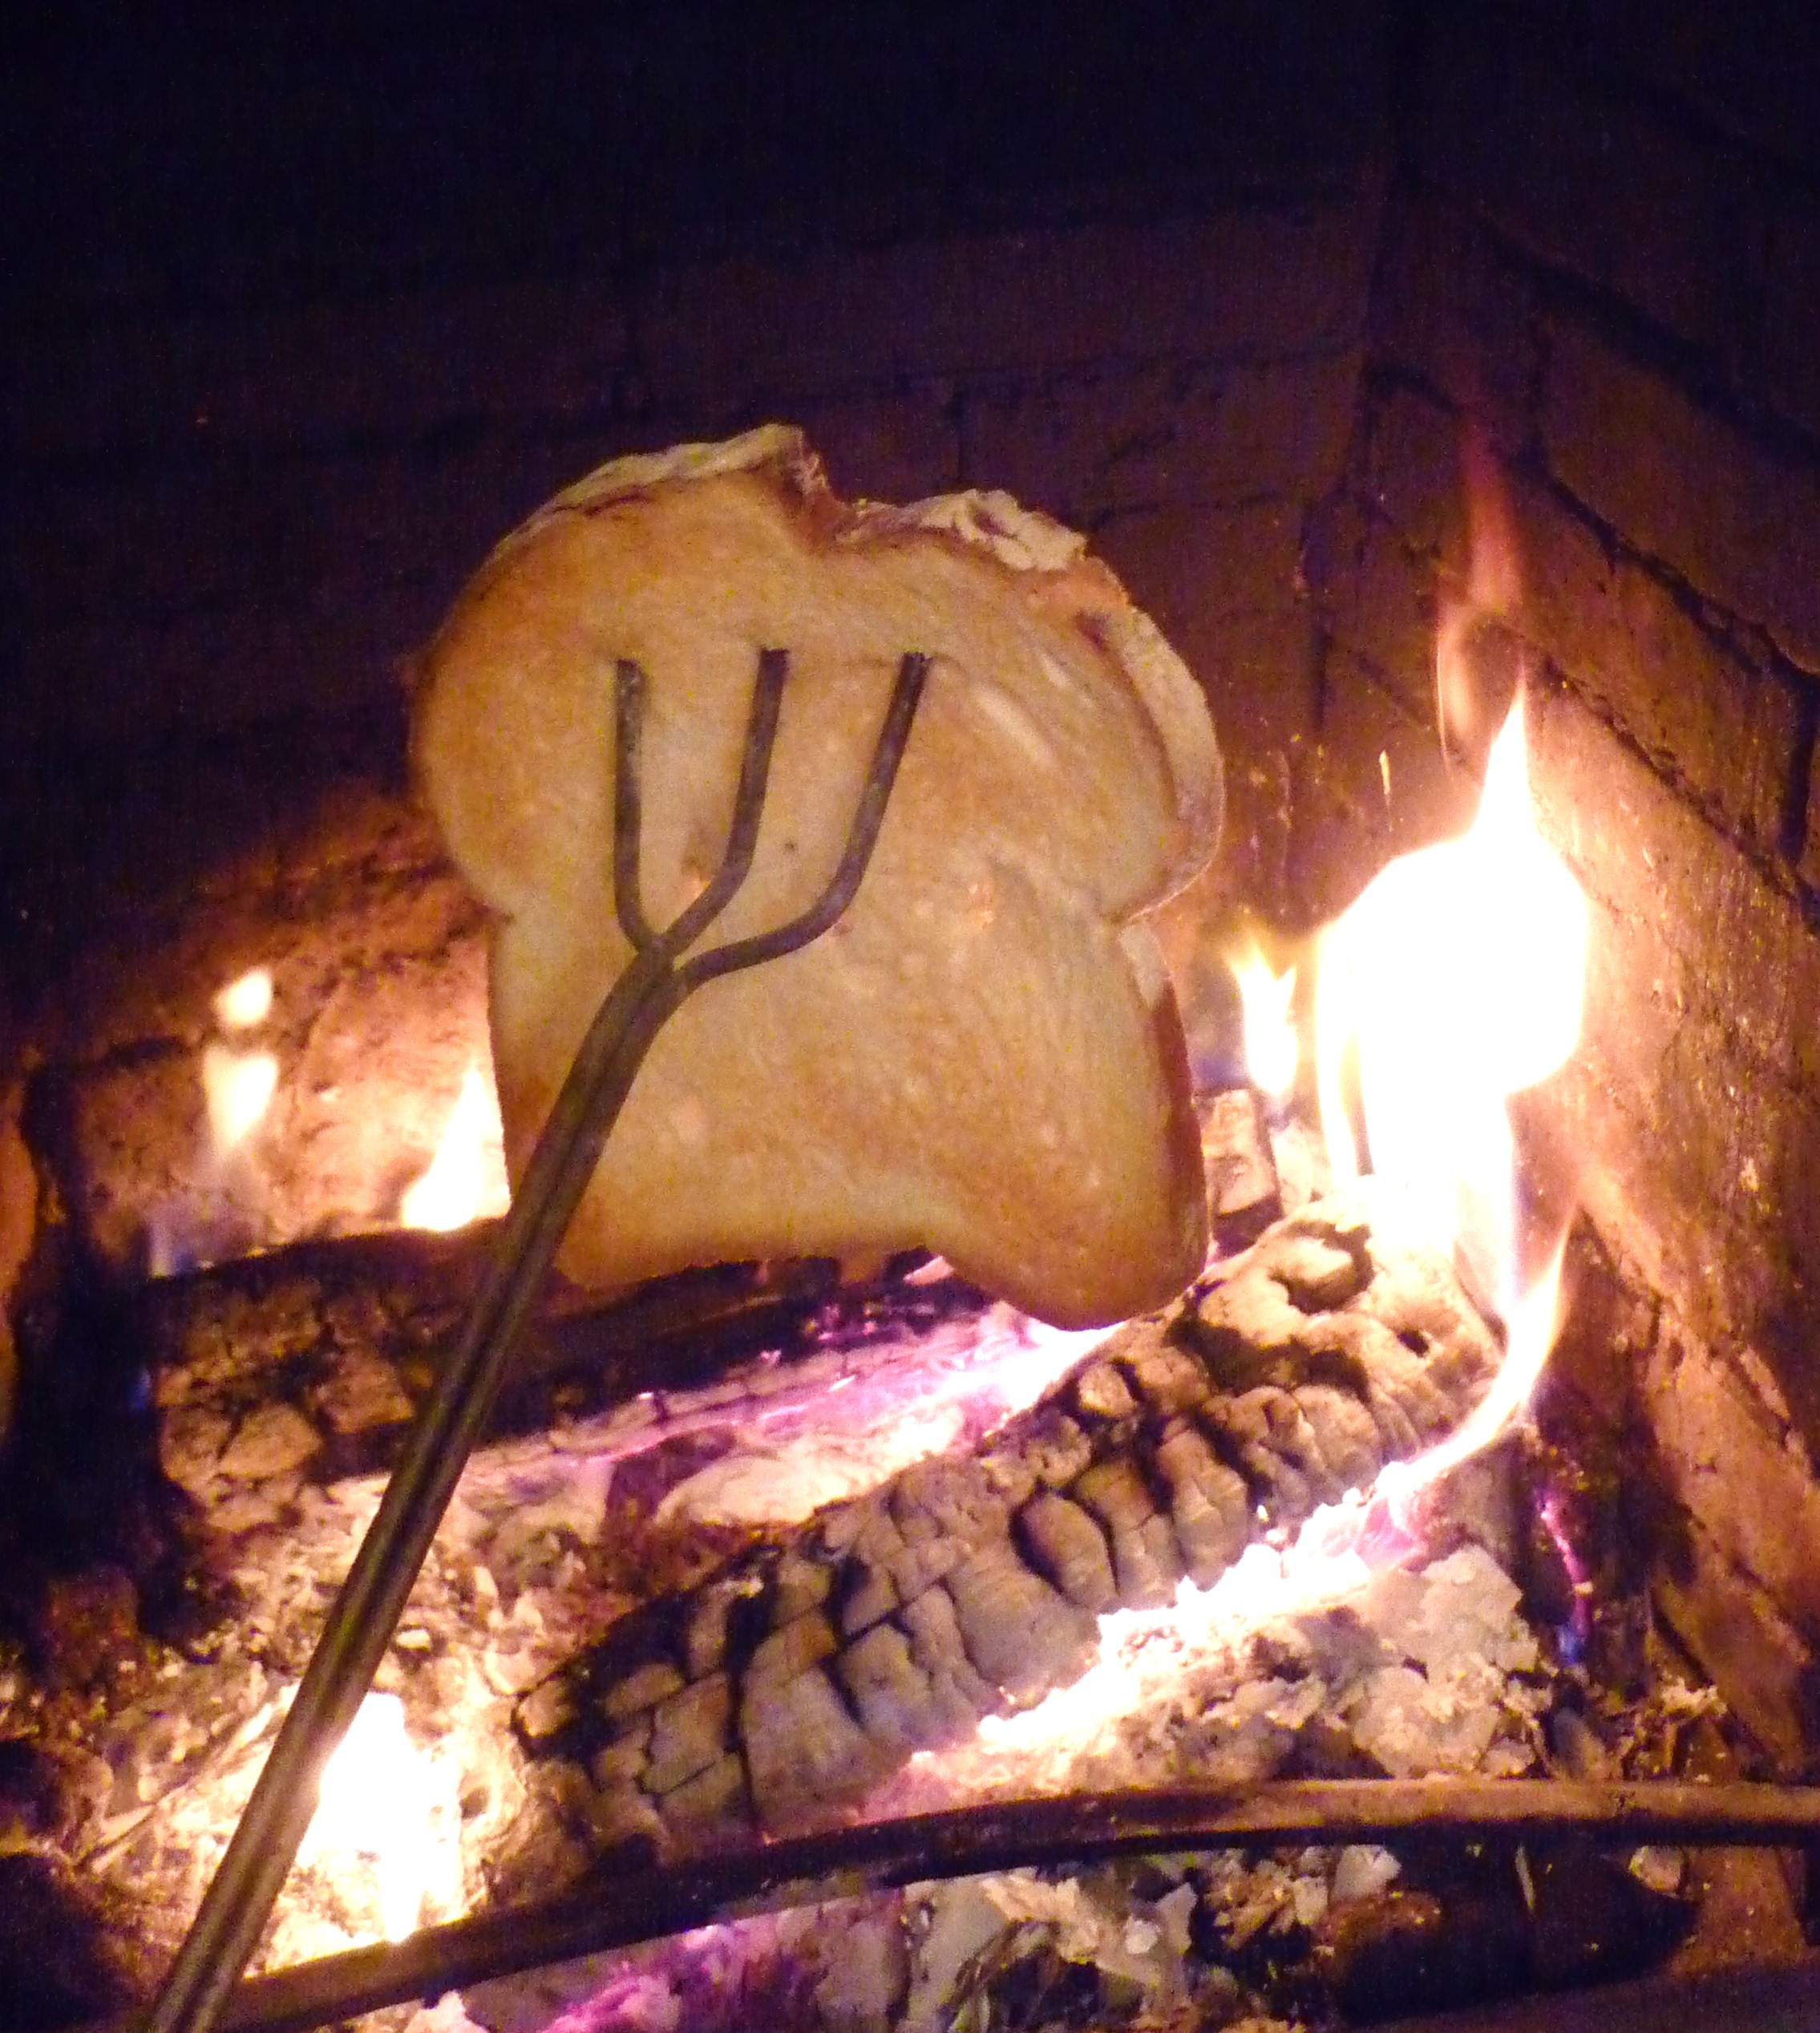
The earliest official piece of toasting equipment was the toasting fork. Here’s the flamboyant Victorian chef Alexis Soyer’s instructions from A Shilling Cookery for the People from 1854:

How to Toast Bread – Procure a nice square loaf that had been baked one or two days previously, then with a sharp knife cut off the bottom crust evenly, and then as many sliced you require, about a quarter of an inch in thickness. Contrive to have a clear fire: place a slice of the bread upon a toasting-fork, about an inch from one of the sides, hold it a minute before the fire, then turn it, hold it another minute, by which time the bread will be thoroughly hot, then begin to move it gradually to and fro until the whole surface has assumed a yellowish-brown colour, then turn it again, toasting the other side in the same manner; lay it then upon a hot plate, have some fresh or salt butter (which must not be too hard, as pressing it upon the roast would make it heavy),spread a piece, rather less than an ounce, over, and cut the toast into four or six pieces. You will then have toast made to perfection.

Coal range

Next rung up on the evolutionary ladder of toast-making was the invention of the toast plate, a cast iron rack that could sit in front of coal-powered range cooker. My friend Andreas actually has an original coal range cooker with a toast plate built in. I am very jealous.

range toasting plate

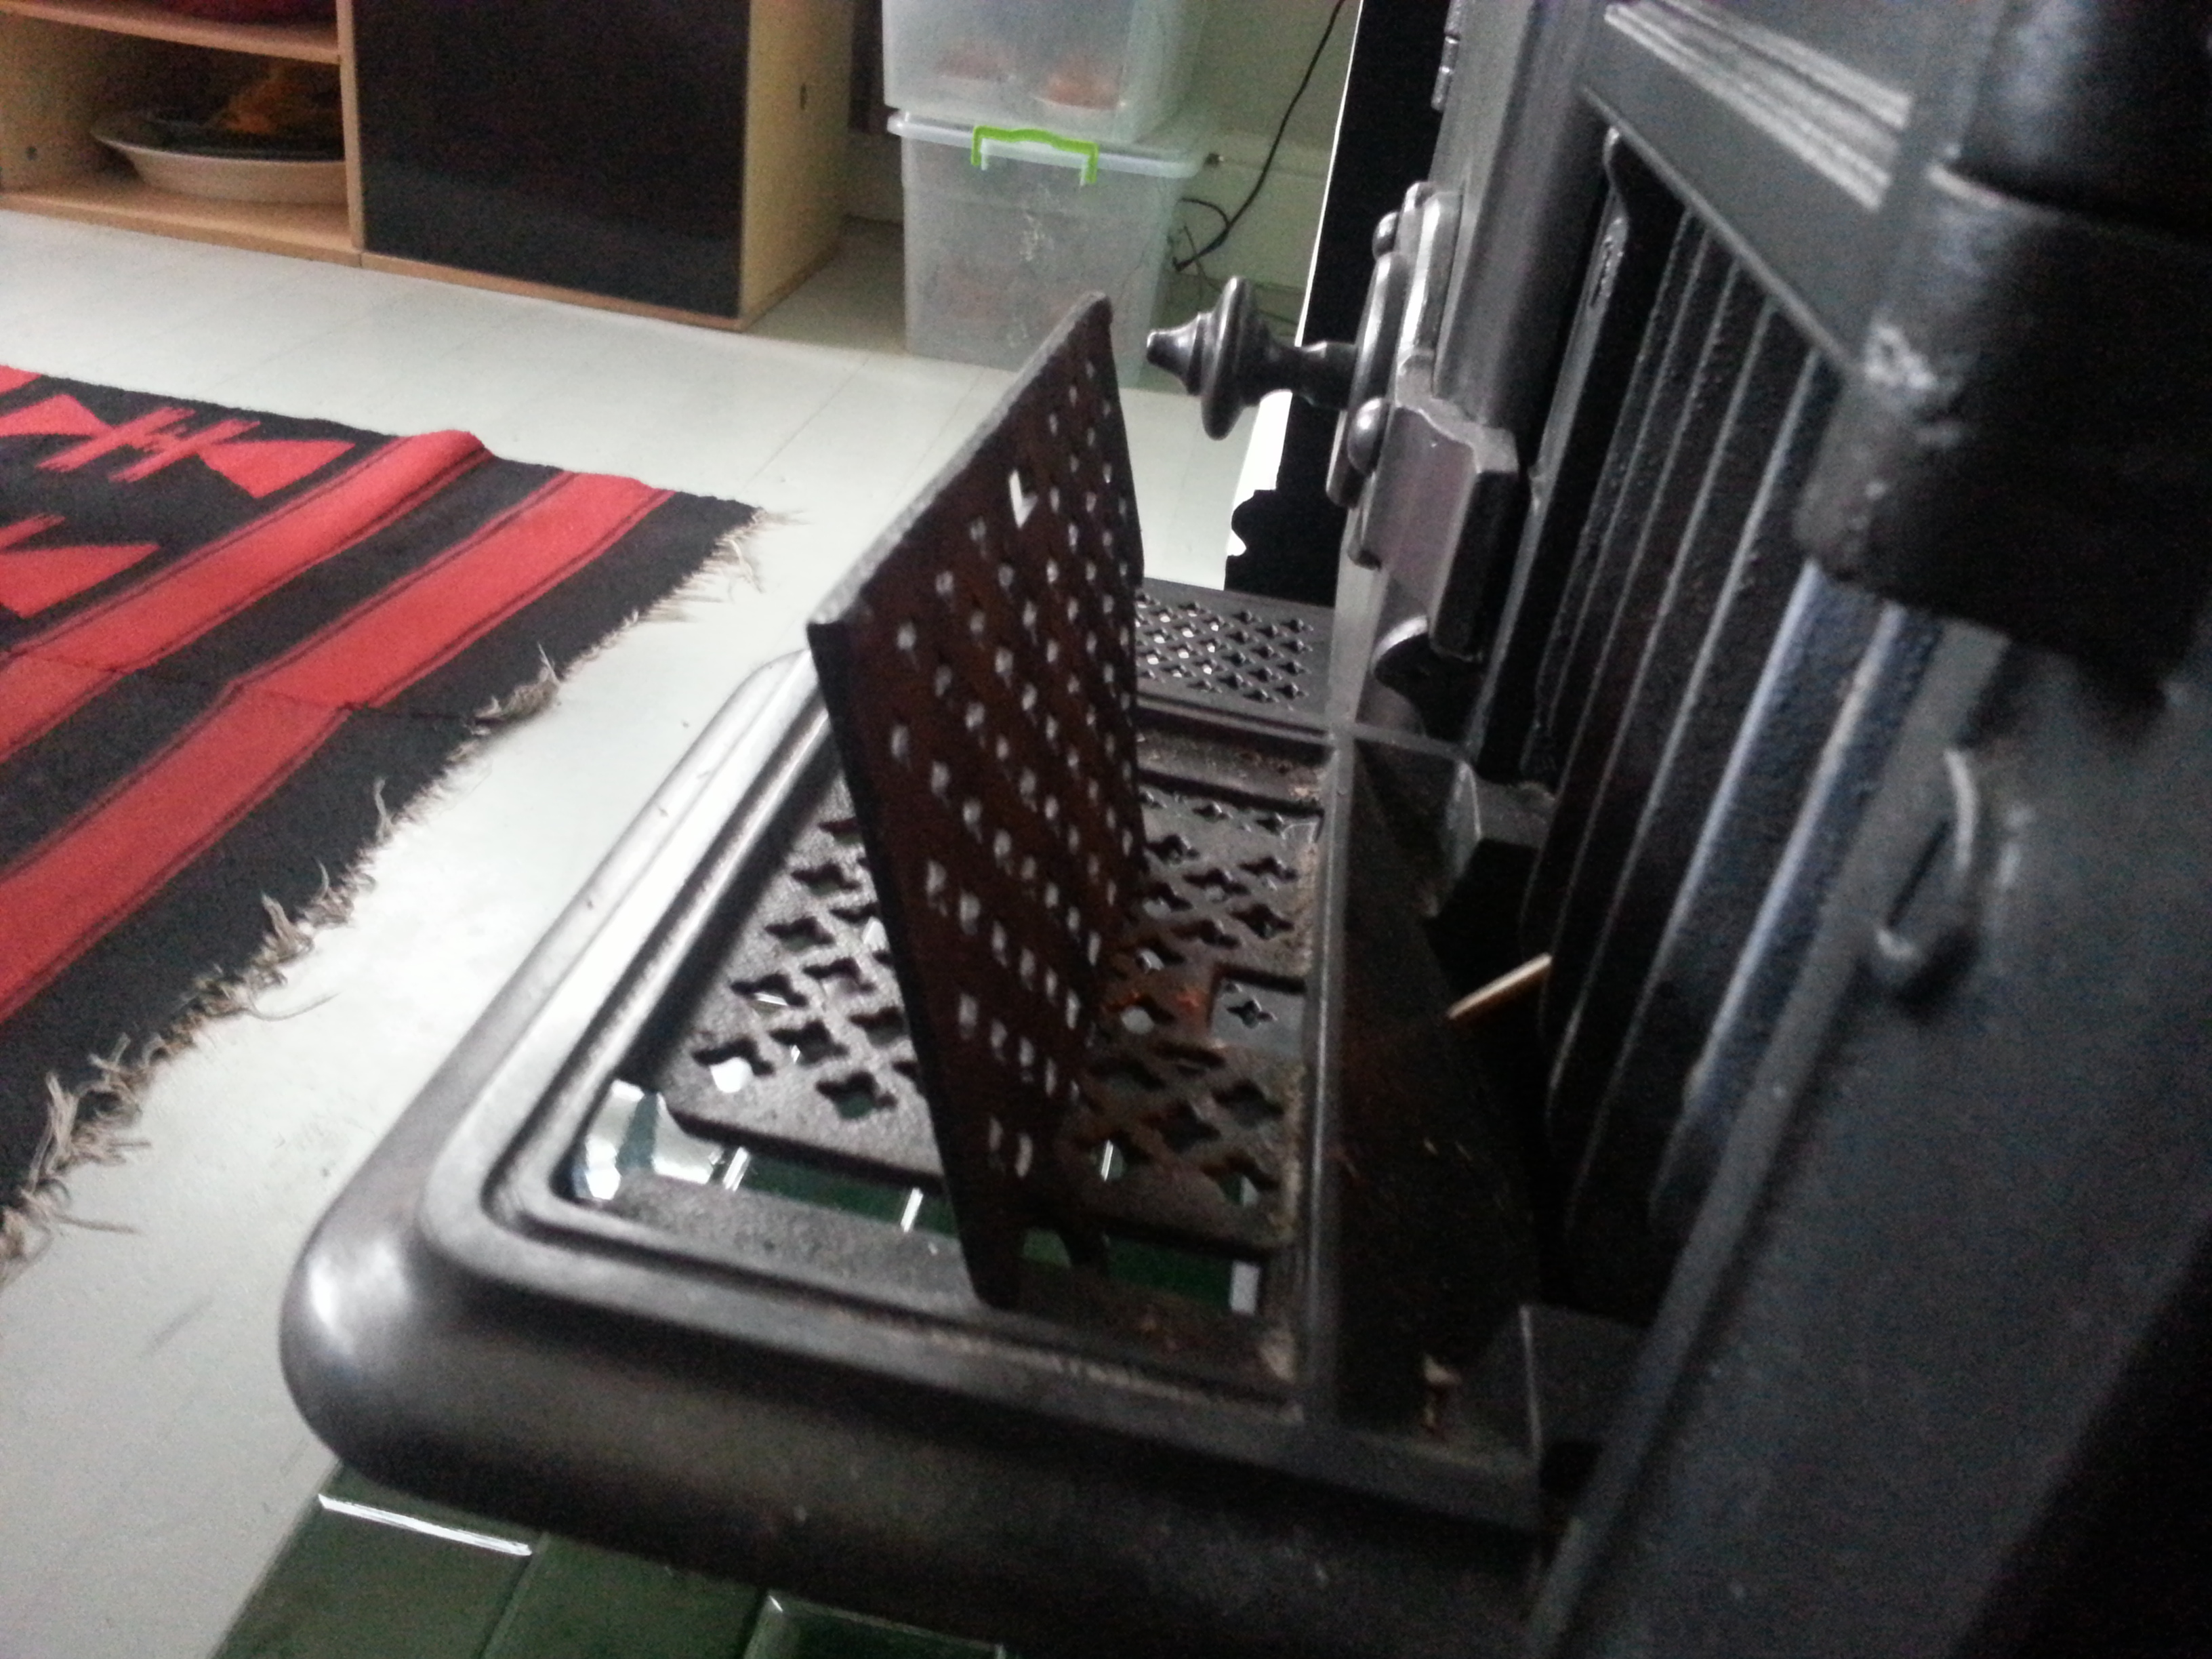
You can buy plates that lay over a gas burner on the stove top that I suppose achieves a flavour closest to the ones found on the coal ranges. Elizabeth David owned one (from English Bread and Yeast Cookery, 1977):

Elizabeth David

Part of the charm of the toast produced on this device is that every piece is different, and differently marked, irregularly chequered with the marks of the grill, charred here and there, flecked with brown and gold and black.

At home, the best way to make toast is by using a grill, preferably a gas grill; it produces a much more even heat and therefore even toasting than an electric grill. I love the flecked toast that David described, but an electric grill has hot spots that produce slices well done in one patch and hardly coloured in another.

THE WAY WE COOKED

You might think all you need to do is stick the bread under the grill and wait, right? Wrong. Here are Delia Smith’s instructions for making toast under a grill, though first you need to slice it (from How to Cook: Book One, 1998):

  1. The key to slicing bread is to use gentle, rapid saw movements with the knife and not to push down too hard on the loaf. For toast, cut the bread into slices about ½ inch (1 cm) thickness. The crusts can be on or off, depending how you like them.
  2. Pre-heat the grill for at least 10 minutes before making the toast, turning it to its highest setting.
  3. Place the bread on the grill rack and position the tray 2 inches (5 cm) from the heat source.
  4. Allow the bread to toast on both sides to your own preferred degree of pale or dark golden brown.
  5. While that is happening, keep an eye on it and don’t wander far.
  6. When the toast is done, remove it immediately to a toast rack…Putting it straight on to a plate means the steam is trapped underneath, making it damp and soggy. If you don’t possess a toast rack you really ought to invest in a modest one. Failing that, stand your slices of toast up against a jar or something similar for about 1 minute before serving.
  7. Always eat toast as soon as possible after that, and never make it ahead of time.
  8. Never ever wrap it in a napkin or cover it (the cardinal sin of the catering trade), because the steam gets trapped and the toast gets soggy.
  9. Always use good bread, because the better the bread, the better the toast. It is also preferable if the bread is a couple of days old.

The toast rack is an essential. Before I owned one, I leant the slices against each other as you would for a house of cards.

So there we go, a definitive guide to making toast, well, as long as you’re not using an electric toaster!


If you like the blogs and podcast I produce, please consider treating me to a virtual coffee or pint, or even a £3 monthly subscription: follow this link for more information.


17 Comments

Filed under baking, bread, Britain, cooking, food, General, history, Recipes, Teatime

Seftons

earl of sefton

The first Earl of Sefton

In my previous post, I gave you a recipe for a basic veal stock, so I thought I would give you another recipe that shows of these kinds of home-made stocks to their best.

The recipe comes from the distinguished French Cook Louis Eustache Ude, chef to the Earl of Sefton. He came from good cooking stock himself, his father was chef to King Louis XVI.

Ude was quite a character, there’s a great story of him being hauled in front of a magistrate after he had been found selling roast grouse on his menu before the 12th of August (the date from which the gamed season begins. See here for a post all about that). He was given a fine and sent on his way.

The next day, the Scottish Laird who had reported Ude to the police returned to Ude’s restaurant to make sure he was abiding by the rules. Pleased to see there wasn’t a morsel of the offending bird on the menu, he ordered Salami de fruit défendu, i.e. Salmi of Forbidden Fruit, which turned out – of course – to be grouse!

Louis-Eustache-Ude_2911477k

Louis Eustache Ude

There was none of this nonsense when he worked for ,and was handsomely paid by, the Earl of Sefton, except when he left his service because Ude spotted the Earl’s son adding salt to some soup he made. Offended by this, he turned on his heel and left.

This recipe is in essence a savoury custard, and may sound odd, but it is in fact subtle, delicious and light. It could only work with a home-made stock though. I imagine it would be excellent nourishing food for someone that is ill. The little custards can be served in their ramekins or turned out onto a plate.

The recipe below comes from Jane Grigson’s English Food, where she suggests serving it with thin dry toast. A very good idea, I can confirm.

It makes between six and ten portions depending on the size of your ramekins.

600ml of good, clear, home-made stock

6 beaten eggs

grated zest of a lemon

¼ teaspoon of ground mace

salt and Cayenne pepper

4 tablespoons of clarified butter

2015-01-19 19.39.55

Bring the stock to a boil and whisk into the eggs as you would with a regular custard. Add the lemon zest and mace and season with the salt and Cayenne pepper and whisk in the butter.

2015-01-19 19.56.02

Place your ramekins in a deep roasting tin and pour the custard into them and cover them with foil. Pour boiling water into the tin, technically turning it into a ban Marie. Carefully slide the tin into an oven already preheated to 180⁰C and bake for 12 to 20 minutes, or until the custards are just set and still have a good wobble on them. Serve straight away.

2015-01-19 20.33.13

If you like the blogs and podcast I produce, please consider treating me to a virtual coffee or pint, or even a £3 monthly subscription: follow this link for more information.


4 Comments

Filed under Britain, cooking, food, French Cookery, General, history, Recipes

How to Make a Basic Veal Stock

To me, life without veal stock…is a life not worth living

Anthony Bourdain

A while ago, I started up a series of posts on stock-making, and thought I should continue it.

When it comes to stock-making the home cook needs to keep out an eagle-eye for off cuts of meat and bones to sequester in the freezer ready to whip out for a stock. This I always do at Levenshulme Market (of which I am a Director), where the excellent Wintertarn has a stall selling organic cheese and –being good, sustainable dairy farmers – their organic rose veal too. I always have a nosey for any odd bits and I’ve managed to stockpile a few calves’ tails and a calf’s heart, amongst other things.

2015-01-15 16.48.38

These sorts of bits are great for making meat stocks – muscle for meaty flavour and bones for gelatinous body.

I thought I would give you my recipe to make a basic veal stock ready for classic soups, stews and sauces. It is the stock favoured in posh restaurants with kitchen run by French chefs, but it is easy to make, and cheap too, if you know where to look. It’s always a good idea to make friends with your local butcher, for this very reason. The reason it is liked so much is that it as there is no dominating flavour as there can be with beef stocks, yet there is plenty of body.

I have written a post already on general stock making, so it might be a good idea to have a look at that if you haven’t made stock very often.

This recipe is guidance really, most quote veal knuckle (the veal equivalent to a pig’s trotter) and veal shin, but you can use any cheap/free bone and muscle combination. You only need to the basic aromatics too – this is a simple, yet elegant stock, of course you can add other vegetables too. Notice there are no peppercorns; if you want a clear stock they need to be avoided as they can make the stock cloudy. If you don’t care, add half a dozen.

1 kg of veal knuckle, split, or tail, or other bones, chopped up

750g shank, or other well-used muscle cut into pieces (heart, tongue, skirt, osso bucco etc.)

2 carrots, peeled and halved lengthways

2 onions, peeled, halved and studded with 2 cloves each

2 sticks of celery, roughly chopped

2 whole garlic cloves

a bouquet garni made up of thyme, parsley stalks, 2 bay leaves

First, get a large pot of water on the boil, and blanche the meat for 5 minutes. This gets rid of the scum, that otherwise would rise to the surface and require skimming. Drain the meat and give it a quick rinse. Place in your stock pot with the vegetables, packing everything in tightly. Pour cold water to just cover, around 2 litres.

Bring to a simmer very slowly, it should take at least 20 minutes. If you do this correctly, you won’t get any more scum rising to the surface.

2015-01-15 17.27.27

Once the water is barely gurgling, move the pot onto the smallest hob on your cooker, set at its lowest heat. Keep the pot covered and let it tick over for 5 hours. It may seem like a long time, but it really needs this long slow bathe. It’s not like you have to stand over it. Tip your nets, grout the bathroom or take the dog out or something in the meantime.


If you like the blogs and podcast I produce, please consider treating me to a virtual coffee or pint, or even a £3 monthly subscription: follow this link for more information.


Strain the stock through a sieve into a clean pan, bring to boil and reduce by a third. Cool overnight and take away any fat that has solidified on the stock’s surface. You should have a pale coloured jellied stock that can be seasoned and used as required.

If you want a richer brown stock, the bones and vegetables can be browned in the oven first.

In the next post I’ll give you a recipe that needs a good, home-made stock like this.

2015-01-19 19.37.50

17 Comments

Filed under cooking, food, General, Meat, Recipes, Soups

Rice Pudding

 What is the matter with Mary Jane?

She’s perfectly well, and she hasn’t a pain,

And it’s lovely rice pudding for dinner again!—

What is the matter with Mary Jane?

AA Milne, Rice Pudding

 Rice pudding has been made in Britain ever since rice found its way there via those Asian European trade routes in the eleventh century. It’s a classic pudding and one of my very favourites, even eaten from a tin. In the Victorian times, it would have been put into the category of ‘nursery puddings’ along with all the other milky, custardy unrefined ones that everyone remembers from their childhood.

I love all of the milk puddings: semolina, macaroni, sago, the lot, but rice pudding is the best. I served it at one of my Pud Clubs, but it unfortunately scored low; it seems that people either love it or hate it.

Here’s an example of a rice pudding that is cooked in the oldest sense of the word pudding, i.e. it is stuffed into intestine (‘farnes’) and boiled. It appears in The English Huswife by Gervase Markham in 1615

Take half a pound of rice, and steep it in new milk a whole night, and in the morning drain it, and let the milk drop away; then take a quart of the best, sweetest and thickest cream, and put the rice into it, and boil it a little; then set it to cool an hour or two, and after put in the yolks of half a dozen eggs, a little pepper, cloves, mace, currants,dates, sugar and salt; and having mixed them well together, put in a great store of beef suet well beaten and small shred, and so put it into the farmes…and serve them after a day old.

The earliest recipe I could find is from 1400 from Food in England by Dorothy Hartley, but she doesn’t say which manuscript it’s from:

Nye ye ris whges hem clene, seethe them fort til hit breke, let it kele, do thereto almand mylke, and of Kyne colour yt salt, and gif it forth.

Roughly translated: rinse the rice and boil it until it will break easily. Let it cool, and add almond milk as well as cows’ milk (kyne). Add some salt and serve.

I think that a combination of almond and cows’ milk sounds quite delicious. Notice that there’s no sugar or spice; far too expensive in those days!


If you like the blogs and podcast I produce, please consider treating me to a virtual coffee or pint, or even a £3 monthly subscription: follow this link for more information.


Anyways, enough waffle, here is my recipe for rice pudding. It takes long and slow cooking, but these things are worth the wait. I use vanilla as my spice, but you could use cinnamon, nutmeg or allspice. Currants or sultanas make a good addition too.

The most important thing is to buy proper pudding rice – a short, fat grain similar to Arborio rice. If you can’t get hold of it, I’m sure any other glutinous rice will do, but don’t quote me on that!

If I have to put a number to it, I suppose I’d have to say it serves four, but in my house it’s probably more like two:

30g butter

100g pudding rice

60g caster or vanilla sugar

1 vanilla pod (if using regular caster sugar; you could, of course, use 1/2 tsp or so of vanilla extract)

1 litre Channel Island Gold Top or 850 ml whole milk and 150 ml cream

zest 1/2 lemon (optional)

pinch of salt

1 whole nutmeg

Jam (optional)

Preheat your oven to 160⁰C

Grease an ovenproof dish with a capacity of a little over 1 litre with butter and scatter in the pudding rice, followed by the sugar. Break up the remainder of the butter into little knobs and dot them about.

Deal with the vanilla pod if using: using a small pointed knife, carefully cut the pod lengthways so that you can scrape out the seeds. Put seed and pod in amongst the rice.

Pour on the milk, the lemon zest (if using) and the salt. Give it a gentle stir, poking down any grains of rich that refuse to sink. Now grate the whole entire nutmeg on the top of the pudding and and pop into the oven for 2 hours, but it may be more; it must look runnier than you would like as it continues to thicken outside of the oven. Every half an hour give the pudding a good stir so that the rice grains don’t clump together. Don’t mix it in the final 30 minutes or so if you want to achieve a good skin.

Make sure everyone gets some skin and a good blob of jam. I would go strawberry or raspberry here, but it is entirely up to you.

I ate this rice pudding with sour cherries in syrup

12 Comments

Filed under baking, Britain, cooking, Dairy, Desserts, food, General, history, Puddings, Recipes, Uncategorized

Favourite Cook Books no. 2: Good Things by Jane Grigson

good things

This is not a manual of cookery, but a book about enjoying food. Few of the recipes in it will contribute much to the repertoire of those who like to produce dinner for 6 in 30 minutes flat. I think food, its quality, its origins, its preparation, is something to be studied and thought about in the same way as any other aspect of human existence.

Jane Grigson, introduction to Good Things, 1970

Good Things was Jane Grigson second book and was published in 1971. Although she is known for her later extensive and very comprehensive writings, this is relatively brief.

All of Jane Grigson books are wonderful, and this book is no different: logical, creative, witty and sometimes austere, she weaves a tapestry of each ingredient’s culinary potential; and this is why the book is so great, for each chapter focusses upon a single main ingredient. She shows you just how inventive humans can be with a single ingredient and how it should be savoured in its seasonality to be fully appreciated; something we no longer do. This book has spurred me on in my own efforts to be seasonal. Take, for example, the chapter on celery – a vegetable that we generally either add to the stockpot or crunch on in a boring salad – she says:

The fine pleasure of buying celery in earthy heads, after the first improving frosts of winter, is slowly being eroded by the wash of enterprise and aviation. Almost the year round, cleaned and slightly flabby greenish celery…is on sale at inviting prices. It’s the wise cook who averts her eyes from this profuse and plastic display and waits for November. Then crispness and flavour are at their peak …In any case one of the greatest luxuries you can have in Britain today is simple food of the best quality.’

She then goes onto her first recipe which consists of celery stalks, good Normandy butter and sea salt. This is the genius of Good Things, you are being shown how good something can be if prepared properly, grown skilfully and eaten seasonality and sensibly; essentially Jane is teaching us how to eat.

(NB, click here for a post of my own on the humble celery stick).

Every chapter also perfectly reflects Jane’s own lifestyle; spending half her time between England and France, with a smattering of recipes from other European countries. It really showed how she lived her life, though I can imagine her family got a little sick of some of the focal ingredients when she was recipe testing.

2014-02-20 13.58.12 - Copy

Sweetbreads: a Jane Grigson – and Neil Buttery – favourite

So what did she pick? Some are probably quite obvious such as venison, asparagus, woodland mushrooms, strawberries and ice creams; others are common and, perhaps, overlooked, like celery, kippers, tomatoes and carrots; whilst some were becoming forgotten or seemed obscure, ones that leap to mind are snails, quince, sweetbreads and fruit liqueurs. Jane’s gift to me is a love of such foods that I never would have sought out, that has demonstrated to me just how good, exciting and varied British food can be, as well as how its history is interlinked inextricably with other countries’ food histories.

Sweetbread Pie

2014-02-20 20.14.38 - Copy

I think this recipe best sums up the essence and ethos of Good Things; it uses a delicious but forgotten meat cut, is French but you would think it quintessentially English. She discovered it in the charcuterie of a small town in Burgandy and it was the most expensive pâté in the shop. She made it into a pie, a pie so good it made it on my last Pop-Up Restaurant menu. The recipe requires you prepare some sweetbreads – if you’ve never eaten or prepared sweetbreads, have a look at this previous post all about them. In a nutshell, you poach them briefly in a light chicken or vegetable stock, or court-bouillon. For a post on stock-making click here. I am so self-referential these days! If you can’t get as much as the 500g given in the recipe, then use whatever you can get your hands on. I expect it would be excellent even with the sweetbreads omitted altogether!

I have changed only her Imperial weights and measures so that they are metricated…

For the pastry:

300g plain flour

150g of butter and lard

1 tbs icing sugar

water to bind

For the filling:

500g prepared lambs’ or calves’ sweetbreads

125g mushrooms, roughly chopped

2 tbs onion, finely chopped

1 garlic clove, crushed

75g butter

350g lean pork, or veal and pork mixed

225g hard back pork fat

2 rashers green (i.e. unsmoked) back bacon

2 eggs

heaped tbs flour

125g cream

salt, pepper and thyme.

‘Make the pastry in the usual way’, says Jane. I mean to write a post on pastry-making, I shall endeavour to do so soon. Whilst it rests in the fridge, cut up the sweetbreads into even-sized pieces, then cook the mushrooms onions and garlic in the butter, until softened but not brown. Next, make the forcemeat by mincing the pork and veal, if using, the back fat and the bacon through the course and then fine blades. Mix in the eggs, flour, cream and the mushroom mixture. Season with salt and pepper and add a good sprinkle of chopped thyme.

2014-02-20 14.35.20 - Copy

Line a 450g loaf tin (an old 1 lb tin) with 2 thirds of the pastry. Spread over one third of the mixture over the base of the tin, then a layer of half of the sweetbreads, then a second third of the forcemeat, then the remaining sweetbreads, and lastly the final third of the pork mixture.

2014-02-20 14.38.57 - Copy

Seal the pie with a lid, brush with egg wash and bake for 90 minutes in a moderate oven – around 180⁰C.

‘Serve warm’, she says, but it is also very good at room temperature. It keeps very well in the fridge if wrapped up tightly in foil or clingfilm.

2014-02-20 16.59.12 - Copy

If you like the blogs and podcast I produce, please consider treating me to a virtual coffee or pint, or even a £3 monthly subscription: follow this link for more information.


10 Comments

Filed under baking, Books, Britain, cooking, food, General, Meat, Recipes, Uncategorized

Yorkshire Curd Tart

Ah, Yorkshire. God’s Own Country and my home county (well, it’s 3 counties technically, but let’s not worry about that now). There are many delicious regional recipes to be found there, but this must be the best: Yorkshire curd tart. For some very strange reason it hasn’t really ever made its way out of Yorkshire. Essentially it is a baked cheesecake – something that Britain isn’t considered famous for, yet if you delve into the old cook books, you’ll find loads of recipes for them. The cheese in question here is, of course, curd cheese which is sweetened with sugar, and mixed with currants, allspice and sometimes rosewater.

2014-01-19 16.02.32

Now a few guiding words on the making of a curd tart: no matter what you read, and I want to be very clear on this, cottage cheese cannot be used. It must be curd cheese which is very different in taste and texture to cottage cheese. These days it is difficult to get your hands on it, but it is very easy to make yourself, as you’ll see below. Also, the only spice to be used must be ground allspice (or clove-pepper as it used to be called in Yorkshire). Not cinnamon, not nutmeg, and certainly not mixed spice. Another misconception is that lemon curd is spread on the pastry base of the tart. Well it’s not, Mr Michelin Guide. Lastly, and as already mentioned, it’s a kind of cheesecake, and not some kind of custard tart as some people seem to think (Mr Paul Hollywood, I’m looking at you).

Ok. Good. Glad we got those issues out of the way.

Curd tarts were traditionally made around Whitsuntide from left-over curds from the cheese-making process and seem to originate in the early-to-mid 17th century. Most families kept their own cow in those days. For those of you that don’t know (and who does?), Whitsuntide derives from the words White Sunday which is our name for Pentecost, which, if my memory serves me correctly, is the seventh Sunday after Easter. The important thing is that there’s a Bank Holiday the next day and a whole week off for half term for the schoolkids.

In dairy farms with several cows, special curd tarts would be made after the cows had calved, using the cows’ colostrum to make the curd for the tarts. Colostrum is the milk produced straight after a mammal gives birth. It is particularly rich in nutrients and fat, and is yellowish in colour. I’ve always thought of this as a bit mean of the dairy farmer’s wife, but then again, she’d also have to tuck into umbilical cord pie the next day, so I suppose it evens out.

To Make Curd Cheese

It’s really easy to make your own curd cheese. All you need is some gold top Channel Island milk, some rennet, salt, and some muslin or other cloth to drain the whey from the curds; I have used an old pillowcase in the past with much success.

Rennet is an enzyme that curdles milk. In the old days a piece of a freshly-slaughtered male calf’s stomach lining would have been popped into the milk (as still occurs in the production of some non-vegetarian cheeses). These days with the magic of science, we can produce it from bacterial culture.

This recipe makes around 750g curd cheese.

In a saucepan, warm a litre of Channel Island milk to 37⁰C, also termed ‘blood-heat’. Use a thermometer if you like. Pour the milk into a dish or bowl and stir in half a teaspoon of salt and your rennet. Follow the instructions on the bottle to see how much to add, as different brands vary. Stir it in, along with half a teaspoon of salt.

2014-01-18 20.14.10

Leave the milk to stand for 10 or 15 minutes. Upon your return, you’ll see that the milk had gone all wobbly and can be easily – and satisfyingly – broken into curds.

2014-01-18 20.30.58

Scald your straining cloth with water straight from the kettle, spread it out over a bowl so the edges hang over, and then pour in your curds and whey. Tie up the cloth with string and hang up the cheese above the bowl to strain for 4 or 5 hours. Hey presto! You have made curd cheese. It keeps for several days covered in the fridge.

2014-01-19 10.58.25

To Make a Yorkshire Curd Tart

Here’s the recipe I use which is based on the one that appears in Jane Grigson’s English Food. It makes enough filling for one 10 inch diameter tart tin, though you can make several small ones if you prefer. The recipe only requires 250g of cheese, so if you’re making your own, you might want to adjust the quantities in the recipe above, or just make three tarts.

The tart is not overly sweet and has a lovely soft centre and a golden brown colour.

125g salted butter

60g caster sugar

250g curd cheese

125g raisins

pinch of salt

2 eggs, beaten

¼ to ½ tsp ground allspice

1 tsp rosewater (optional).

blind-baked 10 inch shortcrust pastry shell (made or bought)

First of all, cream together the butter and sugar well, then mix in the cheese, raisins, salt and eggs. Season to taste with the allspice and rosewater.

2014-01-19 15.34.58

Pour the filling into the pastry shell and bake for 25 to 30 minutes at 220⁰C. Cool on a rack.


If you like the content I make for the blogs and podcast, please consider supporting me by buying me a virtual coffee, pint or even a subscription : just click on this link.


69 Comments

Filed under baking, Britain, cooking, Dairy, Desserts, food, General, history, Puddings, Recipes

Spotted Dick

It’s been a while since I wrote a post on a good old British steamed pudding, and this is one of my all-time favourites. Spotted Dick is a great pudding because it lies somewhere in between a suet pudding and a sponge pudding and is borne of that period of prolific pudding invention: the Victorian Era.

If British puddings are new to you, I’ve already written a couple of posts on the history of puddings (the first one here, and the second one here).

If you’ve never heard of Spotted Dick, it is a spongy steamed pudding that contains suet instead of butter. It is only slightly sweet and flavoured delicately with lemon. The spots on the Spotted Dick come from currants. You don’t want a pudding that is too sweet, the sweetness – I believe – should come from the currants and the custard that must be served with it (for a custard recipe, click here).

For some unknown and crazy reason, Spotted Dick doesn’t appear in my favourite cook book of all, English Food by Jane Grigson (to see why it’s my favourite, see my other blog).

Now for the big question: who the heck is Dick?

The pud is first mentioned in a book from the 1850s by the famous Chef Alexis Soyer called The Modern Housewife, or, Ménagère. Alexis Soyer was the first celebrity chef and he deserves a whole post just to himself! He mentions Spotted Dick in passing when listing a typical week’s meals during tougher times. This was Tuesday’s dinner:

Tuesday. – Broiled Beef and Bones, Vegetables, and Spotted Dick Pudding’

The ‘Dick’ in Spotted Dick seems to come from the shortened Old English names for pudding: puddog or puddick. In Scotland it is often called Spotted Dog Pudding.

Spotted Dick is a very simple pudding to make; it can be steamed in a basin or be rolled out like a sausage and covered in buttered foil and then steamed. Sometimes it takes the form of a roly-poly pudding with the currants and some brown sugar making the filling. Personally, I prefer to use a basin.

Anyways, here’s the recipe:

For a 2 pint/1 litre pudding basin, that serves 6 to 8 people:

300g self-raising flour

150g suet (fresh or packet)

75g caster sugar

100g currants

Zest 2 lemons

275-300 ml milk

butter, for greasing

In a bowl, mix together the flour, baking powder, suet, sugar, currants and lemons. Add the milk, mixing slowly until all is incorporated. You’re looking for a mixture of dropping consistency.

Liberally butter a 2 pint pudding basin and spoon in the mixture. Cover with a lid. It’s easiest to buy a plastic basin with a fitted lid. If you’re using a glass or porcelain basin, make a lid from a double sheet of pleated foil and secure with string. It is worth making a foil or string handle for the pudding so that you can get the basin out of the steamer safely.

Ready for the steamer!

Place in a steamer and steam for 2 hours. Make sure there’s a good brisk boil for the first 20 minutes and then turn the heat down to medium-low. If you don’t have a steamer, simply place an upturned saucer in the base of a deep saucepan and pour over it boiling water straight from the kettle. Gingerly place in the pudding.

Turn out the pudding onto a serving plate and serve immediately with plenty of custard.


If you like the content I make for the blogs and podcast, please consider supporting me by buying me a virtual coffee, pint or even a subscription : just click on this link.


41 Comments

Filed under baking, Britain, cooking, Desserts, food, General, history, Nineteenth Century, Puddings, Recipes, The Victorians, Uncategorized

Fruit Curds Revisited

2013-12-02 22.14.04

By recent request, I have written another post on fruit curds. I have come up with several more recipes since I wrote the original post and they all originate from a common source; a single recipe that pops up in River Cottage Handbook No.2: Preserves by Pam ‘the Jam’ Corbin. This is a truly excellent book (as are all the RC Handbooks), that deserves a post of its own as part of my rather irregular Favourite Cookbooks series.

Anyway, this recipe is the best I’ve come across, it is for lemon and Bramley apple curd – and it is ripe for modification. Apple purée is used, giving a great texture, making a light nicely-set curd that needs less sugar than your typical lemon curd. Below is the original recipe that I have only very slightly tweaked, and then there is a few more: blood orange, spiced orange and pink grapefruit.

Lemon and Bramley Apple Curd

This recipe makes around 1200ml of curd.

2013-12-01 18.09.14

500g Bramley apple curd, peeled, cored and chopped

150ml water

Zest and juice of 2 lemons

125g butter, cubed

350-400g granulated sugar

5 medium eggs

Put the apples and water in a small saucepan, cover and simmer until the apples break down into a purée. When cooked, put them into a large glass mixing bowl with all of the remaining ingredients except the eggs. Mix together – the heat of apples will dissolve the sugar and begin to melt the butter – and place the bowl atop a pan of briskly simmering water, making sure the water doesn’t touch the base of the bowl.

Whisk the eggs well and pass them through a sieve straight into the mixture, stirring them in well. Keep an eye on things and stir the curd frequently until it thickens; it doesn’t require constant stirring, but don’t be going off and dusting the sills. If you want to be scientific about it, eggs thicken at around 80⁰C, but temperatures of 75⁰C and above will thicken the curd sufficiently. Taste and add more sugar if liked – remembering that cold curd will taste much less sweet than hot curd.

2013-12-01 18.35.17

Pot in sterilised jars (25 minutes in a 125⁰C oven does the trick), cool and refrigerate. The curd will keep for 5 weeks.

Some variations

You can pretty much use any fruit juice you like, but you always need a little bit of lemon to add bite as well as to take advantage of its flavour enhancing properties.

Blood orange curd: as above but use the juice and zest of one lemon and two blood oranges.

Spiced orange curd: use the juice and zest of two lemons and two oranges, along with half a teaspoon of mixed spice. When the curd has thickened, add two teaspoons of orange flower water.

Pink grapefruit curd: use the juice and zest one lemon and two pink grapefruits.


If you like the blogs and podcast I produce, please consider treating me to a virtual coffee or pint, or even a £3 monthly subscription: follow this link for more information.


12 Comments

Filed under baking, cooking, food, Fruit, General, Recipes, Uncategorized

Dulse

brown_william_marshall-the_dulse_gatherers~300~10437_20110602_316_22

The Dulse Gatherers by William Marshall Brown, 1863-1936

Nobody really eats dulse, or any other seaweed for that matter, in England these days, though they used to. It is a pity because I do like the stuff. It is eaten in Ireland and parts of Scotland still; I ask friends to bring back a bag of it whenever they cross the seas. I recently received a bag from my friend Hugh.

Dulse had been eaten for over one thousand years in North-Western Europe, the ancient Celtic Warriors of old ate dulse as they were marching, and during the seventeenth century British sailors ate it to prevent scurvy (although it was originally used as an alternative to chewing tobacco). Even today, its healthful properties are noted; my friend Evelyn from Ballymena, Northern Island tells me:

When I was pregnant, the midwife thought I was very healthy as my blood pressure and iron levels were so good. Iron goes up to 17 mg/dl max but I was the first person she’d seen that had 15 – apparently quite unheard of for a lady, especially a pregnant lady! We put it down to the dulse (nothing else remotely healthy going on at that time in my diet), and she’s been recommending it to everyone.

Its popularity in Ireland as well as Scotland led to dulse being popular in the USA too when they emigrated over the Pond, although none of my American friends seem to have heard of it.

The dulse industry has obviously died a bit of a death in England, and the rest of the UK and Ireland, compared to days of yore. Charles Dickens, writing in 1858, reminisces about childhood holidays in Aberdeen where there were often over a dozen ‘dulse-wives’ selling dulse:

[O]f all the figures on the Castlegate, none where more picturesque than the dulse-wives. They sat in a row on little wooden stools, with their wicker creels placed before them on the granite paving stones. Dressed in clean white mutches, or caps, with silk-hankerchiefs spread over their breasts, and blue stuff wrappers and petticoats, the ruddy and sonsie dulse-women looked the types of health and strength… Many a time, where my whole weekly income was a halfpenny, a Friday’s bawbee, I have expended it on dulse, in preference to apples, pears, blackberries, cranberries, strawberries, wild peas and sugar-sticks.

He recalls a conversation:

A young one would say: “Come to me, bonnie laddie, and I’ll gie ye mair for yer bawbee than any o’ them.”

An old one would say: “Come to me, bonnie laddie, and I’ll tell what like yer wife will be.”

“Yer dinner ken yerself.”

“Hoot aye – I ken brawly: she’ll hae a head and feet, an mou’, and eyen, and may be a nose, and will be as auld as me, if she lives as lang.”

“Aye: but ye gie me very little dulse for my bawbee.”

“Aye,” replies the honest woman, adding another handful, “but sic a wife is weel worth mair siller.”

The dulse-wives exploded into laughter, when the woman suggested some one like herself, as the ideal wife which youth is doomed always to pursue and never to attain.

Oh! those dulse-wives.

My friend Evelyn reminisces:

It comes with shells and little crustaceans on it; my friend Maisie used to spend hours ‘cleaning’ dulse & would then give me nice little bags with no icky bits on them. Strangely it doesn’t seem to fall under any health and safety rules. Old men that live by the sea just grab a load and dry it on the rocks in the sun.

You can also buy it dried and flaked in sealed bags looking  like reddish tea leaves. Even better, of course, you can forage for it. I must say seaside foraging forms a hole in my knowledge. I should try and remedy that.

Cooking with Dulse

Dulse can be eaten as is, or used in salad and sandwiches. I personally think it is best eaten cooked so I’ve included a couple of simple recipes for you.

Mashed Potato with Dulse

This is a great recipe and much healthier than regular mash because it uses olive oil as opposed to butter. It’s vegan and gluten free too, so you shouldn’t get any complaints from anyone!

It could not be easier, really. First, scrub and then boil some potatoes in their skins without adding any salt. Remove the skins and mash them. Next, finely shred the dulse and fry it in olive oil – you’ll need about 15 grams of dulse for every kilogram of potatoes used. Of course, if you are using the flakes, you can sprinkle them straight into the hot oil. This takes just a few seconds. Add the oil and dulse to the spuds and mix, mashing in some extra olive oil if need be. Season.

Serve with lamb, beef, chicken or fish


 If you like the blogs and podcast I produce, please consider treating me to a virtual coffee or pint, or even a £3 monthly subscription: follow this link for more information.


Lamb & Dulse Broth with Dulse Shards

2013-09-16 19.15.26

I came up with this soup when I found some frozen lamb stock secreted at the back of a freezer-drawer recently. It draws on that classic combination of lamb and seaweed. This recipe requires the rock-dried dulse to make the sweet-tasting shards, but any dulse can be used for the soup itself.

Ingredients

1 tbs butter or olive oil

1 carrot, diced

1 stick celery, diced

a sprig of thyme

a sprig of rosemary

a bay leaf

60g red lentils

2 or 3 tbs dried, chopped dulse

1 litre well-flavoured lamb stock

salt & pepper

For the dulse shards:

‘leaves’ of dried dulse

sunflower, groundnut or rapeseed oil for frying

Melt the butter or oil in a saucepan, add the carrot, celery and herbs. Fry gently for 10 or 15 minutes until the vegetables are soft and translucent. Add the lentils and fry for another two minutes before adding the dulse and lamb stock. Bring to a simmer and cook for around 20-25 minutes until the lentils have cooked and broken up, thickening the broth. Season.

Meanwhile, prepare the dulse shards. Heat up some oil in a frying pan and when hot, throw just one or two dulse pieces into the oil. The dulse will immediately sizzle, crisp and change colour as if by magic. After just a few seconds, remove and drain on kitchen paper. Fry all your dulse pieces in this way, and break them up into shards and place them gently on top of your finished soup.

14 Comments

Filed under Britain, cooking, food, foraging, General, history, Ireland, Recipes, Soups, Vegetables

To Make Vegetable Stock

As promised in my last post a good recipe for a basic vegetable stock which is definitely robust enough to be swapped for chicken or fish stock in any recipe.

It is hard to be exact when making stock because it depends upon the vegetables you like, the vegetables you have and what the stock is to be used for. It’s also worth mentioning that if you don’t have tomatoes, for example, don’t worry, just include something else to make up for it.

The basics are fundamental. You need at least three of the following: onion, leek, carrot, celery and garlic and then everything else is a bonus. I would say you should use at least 3 more vegetables.

The good thing about a vegetable stock is that because it is only simmered for 20 minutes you can get away with cabbage, cauliflower, broccoli, or any other brassicas before they go all farty. Asparagus trimmings, sweetcorn, pea pods, and anything else you can think of all count. Keep your trimmings in a freezer bag until they are required.

The same goes for herbs: freeze parsley stalks and anything else that is looking a bit sad sat in the bottom of the fridge. Avoid mint as it tends to overpower vegetable stocks.

The spices I like to use are peppercorns, cloves and then either some fennel seeds or some allspice berries, but it’s up to you really; cumin or cardamom, nutmeg or mace, chillies or lemon peel have all worked successfully in the past.

Remember: the whole point of making your own stock is that you don’t get the same thing every time. I have never included a vegetable that hasn’t worked, even ones you won’t suspect like beetroots, cucumbers, lettuces and courgettes.

For more general information on stocks click here.

This recipe makes around 1 ¾ litres of stock.

2013-09-01 11.56.01

Ingredients

At least 3 of the following: 1 large onion, 1 carrot, 2 cloves of garlic, 2 sticks celery (with leaves), 1 leek (include the green top)

75g brassica – e.g. cabbage, broccoli, turnip &c

2 tomatoes

½ fennel bulb

Any other vegetable trimmings (if using all trimmings, go for at least 300g in weight)

30g butter or 2 tbs olive oil

2 bay leaves

6-10 parsley stalks

4 springs of thyme

1 sprig rosemary

6 peppercorns

6 allspice berries or a teaspoon of fennel seeds

3 cloves

around 2 litres of water

Begin by preparing your mirepoix; a mirepoix is just vegetables chopped very small so that the maximum amount of flavour can be extracted in the minimum amount of time. I go for the easy option and use a food processor.

2013-09-01 12.08.58

Heat the butter or oil in a pan and fry the vegetables for around 10 minutes so that they soften but don’t colour.

Tip the vegetables into a large saucepan or stockpot along with your herbs and spices. Cover them with cold water and slowly bring to a bare simmer. Try and make sure the stock doesn’t boil. Simmer the stock on the smallest hob on the lowest possible heat so that it merrily ticks away for around 20 minutes.

Let the stock cool slightly before straining it off. Avoid seasoning it with salt – wait until you’ve made the dish you are to use the stock for.

Your vegetable stock is now ready to use.

2013-09-01 20.06.34

If you want, you can reduce it, but you must be careful not to boil it hard as the subtle flavours will evaporate and the stock will look and taste like overcooked sprouts. The best way reduce it is to pour the stock into a wide pan and let it simmer and reduce gently.


If you like the blogs and podcast I produce, please consider treating me to a virtual coffee or pint, or even a £3 monthly subscription: follow this link for more information.


1 Comment

Filed under cooking, food, Recipes, Vegetables