Category Archives: Meat

Forgotten Foods #4: Cock Beer

cockerel

Recently I have been thinking of re-igniting my interest in home-brewing. Previous attempts to make alcohol have never been successful. I have made white wine that tasted of rotten eggs, and made dandelion wine that, when bottled, exploded spectacularly in my lounge. Now I have a couple of books that spell out the process, and I am a little more confident that I can do it.

Naturally I have been hitting the old cookbooks for some historical inspiration and came across this recipe for cock-beer. In this recipe from 1780, you essentially make a giant cock tea-bag to impart its essence into your brewing beer:

Take 10 gallons ale, a large cock (the older the better). Slay, caw and gut him, and stamp him in a stone mortar. Add spice and put all in a canvas bag. Lower him into the ale while still working [i.e. fermenting]. Finish working and bottle.

That is actually a toned down receipt – many times live cockerels were used. Goodness knows how people didn’t die. Perhaps they did!

It doesn’t stop at cocks in beer, oh no, in Cornwall sheep’s blood – hot from the slaughter – was added to cider; and what did it taste like? According to Andrew Boorde, the 16th Century physician and traveller: “[it] is stark nought, looking whyte and thicke as pygges had wrastled in it.”

There were many tales of men’s heads being thrown into the hogshead along with the beer, and perhaps they weren’t just tales, because the cockerel wasn’t added to the beer for flavour (I suspect that the spices were added to mask the flavour of the bird). The idea is that the animal’s strength, courage and vigour would be imparted into the brew. So these beers were in fact more remedies than proper drinks.

King William III

William III: Cock Beer Lover

That said, two brave brewers called Chris Thomas and Adam Cusick, brewed a batch from this very recipe, obviously with a certain amount of interpretation. They did welch a little bit by using a cooked chicken. However a delicious ale was produced that was mellow and ‘shared distinct similarities with a strong Belgian ale’. Apparently, William III’s drink of choice was cock beer, and it has been noted several times through the centuries for its superior quality.

My gut feeling is that is must be foul (no pun intended), yet it gets all this praise. Well, when I become a seasoned brewer of beer, I might just give it a go.

One last thing: tantalisingly, it has been suggested that the word cocktail (a work whose origin is famously unknown) comes from cock-ale. O how I wish it was true.


If you like the blogs and podcast I produce, please consider treating me to a virtual coffee or pint, or even a £3 monthly subscription: follow this link for more information.


6 Comments

Filed under Brewing, Britain, food, General, history, Meat, Recipes

Stock-making, a quick guide

Stock is the body and soul of soups – Lindsay Bareham

I have been making my own stocks for years now and it is part of my regular kitchen routine. I sequester bones, meat offcuts, fish heads and trimmings, vegetable peelings and herb stalks in bags in the bottom of my freezer so that I can combine them appropriately whenever I need to. It’s a thrifty way of living; often making a large batch of stock costs only the price of the fuel that cooked it.

For those that do not cook much at home, stock-making is sometimes regarded as some kind of alchemy, yet this is a misconception, and indeed there are many very complicated stock recipes, but the home cook (I include myself here) need not bother with these. The chances are you have made stock several times and have thrown it down the sink without a second thought, because in its most basic form, the water you cook your vegetables in is a good, light vegetable stock.

From a history point of view, one cannot pin-point when stocks were first made, and one cannot unravel the origins of stock from soup. Take this example from Good Things in England by Florence White:

[The soup] is nothing more than the water in which young cabbage has been boiled…It is extremely good and delicate and tastes very much like chicken broth. It is not merely an economy but a luxury; one of the best of health and beauty drinks.

Wise and thrifty cooks throughout the millennia used the water that their tough meat joints were simmered in or their fish poached in and used them as the base of another dish. One of my favourite dishes is poached silverside of beef which consists of beef, herbs, a couple of veg and water. The resulting broth makes beautifully-tasting soup.

2013-05-02 20.47.25

Poached Silverside of Beef

Seeing as we are trying to be thrifty folk, I thought I would give you a quick guide to stock-making. As I have mentioned, it will save you money, and – like when you make your own bread – you will see how sublime it can taste. Every stock you make will taste a little different each time and it can be tailored to suit its use, e.g. add a few fennel seeds to a stock for a fish soup. Best of all, your soups and stews won’t taste of stock cubes. There is nothing wrong with having a stash of them in your food cupboard, I would do too, but with my very frustrating onion and tomato intolerances, I usually have to do my own. The point is, that when you use bought stock cubes, every soup and stew ends up tasting the same.


If you like the blogs and podcast I produce, please consider treating me to a virtual coffee or pint, or even a £3 monthly subscription: follow this link for more information.

What makes up a stock?

This is the beauty of stock-making; there are no hard-and-fast rules with respect to ingredients.

All good stocks should contain some flavoursome vegetables and aromatic herbs and spices, often called a bouquet garni, as well as the main ingredient: this might be meat and bones, fish, or, more vegetables. The stock might be seasoned or enriched with salt, wine, soy sauce, Worcester sauce, tomato puree, mushroom ketchup or any number of other things, though it is usually best to do this once the soup or stew that the stock is being used for has been made.

Stock vegetables

2013-09-01 11.56.01

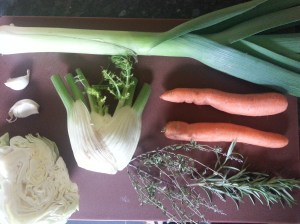
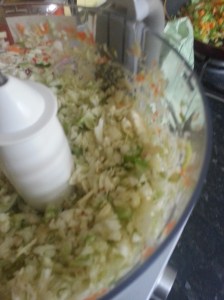
The vegetables used in your stock are often key to the quality as they add a lot of depth. The three basic vegetables used for most stocks are carrots, celery and onion, though I personally add garlic and leek to this ‘trinity’ (a trinity in five parts?). My general rule of thumb is to try and include at least three of the five. Anything else is a bonus, really. Fennel is a good addition, if used sparingly, as are tomatoes, mushroom peelings, pea pods. Lentils, parsnips and potatoes add an earthiness, but should be avoided if you don’t like your stock cloudy. Brassicas such as cabbage, cauliflower, of sprouts should be used very sparingly, especially in meat or poultry stocks that have a lengthy cooking time, they are great in vegetables stocks though. Vegetables need to be roughly chopped in long-cooked meat stocks, and chopped small (a mirepoix as it is called in the trade) in quick-cook vegetable and fish stocks. A food processor makes an easy job of it.

2013-09-01 12.08.58

Herbs, spices and other aromatics

Like the vegetables, the herbs and spices you add will depend upon what you have and they are essential. Must-haves herbs include bay leaves, parsley stalks, thyme and rosemary. Other herbs are great if you can get hold of them. Dill stalks in a fish stock are delicious as is a tiny mint sprig in a summertime lamb stock. I keep and freeze all my herb stalks to use later in stocks – there’s no need to throw them away. Must-have spices include black peppercorns, cloves and allspice berries.

The thinly-pared rinds of citrus fruits are also used quite a lot: a strip of orange peel transforms a game stock and lemon rind really lifts chicken, vegetable and fish stocks.

These herbs and spices are often tied up into a faggot or bouquet garni, though I never bother to tie mine up for stock, though I do for stews and soups where careful and efficient removal is required.

Poultry, meat and game

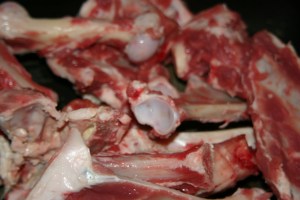
Use whatever you have – raw meat and bones, or bones from a roast. A little goes a long way: I have made game stock using a single woodcock carcass that still tasted great. It is best to avoid bones that have already been stewed as most of the flavour will already have leached out, but do add any left-over pan juices, jelly or gravy. Raw meat or bones will benefit greatly from a quick roasting in a hot oven for 20 minutes or so.

2013-01-11 17.40.58

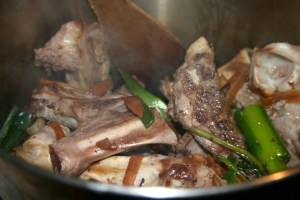
The important thing here is to treat your stock meat properly – if you boil the stock hard, the tasty amino acids and textural gelatine will not go into your stock, but will either form a nasty grey scum or will be trapped within the meat. Low simmers and long cooking times are essential.

2013-01-11 18.12.08

It is best to avoid kidneys and livers in stocks, as their flavour is far too strong, but hearts, tongues and heads all make good additions.

Fish

Fish stocks, in contrast to meat stocks, can be made in minutes. Use bones and trimmings in your stock, but avoid oily fish such as mackerel and sardines. Mussel, clam, cockle or oyster liquor would be delicious, if you ever have any.

Clarifying Stock

You might want to clarify your stock after straining it. This is straight-forward enough to do and there are several methods. The quick method is to whisk a mixture of egg whites and broken egg shells into the hot stock. The eggs grab hold of and magically mop-up the cloudy substances. The slow – and best – method is to freeze the stock, tie it in muslin and let the melting stock drip through. This method makes beautifully clear stocks.

There are a few tricks to avoid cloudiness in the first place: Don’t use starchy vegetables like potatoes, lentils and parsnips and avoid peppercorns. The best way is it leave the stock be; prodding, poking and rearranging items is the surest way to cloud it.

2013-03-21 20.18.50
Poaching sweetbreads in a light vegetable stock called a court-bouillon

Some stock-making rules:

  1. Start with cold water and bring to a simmer slowly. This is the most important rule of all. As the water gradually heats, the flavours leach out and don’t boil away and connective tissues break down to release their gelatine. The stock should never get hotter than a bare simmer; you want the odd gurgle, nothing more
  2. Remove the scum before you add the herbs and spices. If you don’t the scum gets all caught up in it, making a nasty grey mess. Skim the scum, then add the aromatics.
  3. Remove the layer of fat. Nobody wants greasy soup. The best way to do this is to let it cool and then scrape the fat layer away. If time is an issue, lay paper napkins on the stock’s surface.
  4. The amount of water you use depends on your pot. Don’t follow the recipe when it comes to adding water. Arrange the ingredients in your pan with few gaps and add enough water to just cover.
  5. Break the bones and cut up the meat. This increases the surface area and therefore increases the flavour of your stock.
  6. When storing stock, cool it quickly and keep in the fridge up to 2 or 3 days. Any longer than that, freeze it.
  7. Reducing stocks enhance the flavours and mean you can store more in the freezer. You must strain the stock and skim it of fat before reducing it. Meat stocks you can boil it quite heard, but vegetable and fish stocks need to be treated a little more gently.

Stock recipes

Every post I write a post with a stock recipe or information about stock I tag it appropriately. Click here to see the posts.

I will post a good vegetable stock recipe in the next day or so, as it is the most useful of all the stocks and I already have posted a duck stock recipe.

The best advice is really to use stock recipes as a guide only, use what you have to hand. Keep your vegetable and meat trimmings in a bag in your freezer and you’ll find that you’ll quickly fill them.

9 Comments

Filed under cooking, food, General, Meat, Recipes, Soups, Uncategorized, Vegetables

Forgotton Foods #3: Umbilical Cord

umbilical cord

I have been writing posts of late on the huge variety of cuts we can get from meat, whether prime cuts or more humble (or should that be umble?) cuts, but I fear I may not be able to cook you all this one!

The umbilical cords of calves born on dairy farms were often collected by thrifty farmers and turned into a dish known as ‘muggety pie’ by famers’ wives. There’s a description of it in the excellent book Food in England by Dorothy Hartley; she says:

The umbilical cord of the calf was washed, soaked in salt water, and cut into short lengths which were then split open end to end twice, and cut, so making small oblong pieces. These were then boiled, till soft, with onions and seasoning, chopped again and made into a pie, using the gelatinous stock and some milk to make the filling gravy. The whole white pie was then covered with crust and baked.

Muggety pie was popular in the West Country, particularly in Gloucestershire and Cornwall, “all jelly soft it was…it was the jelly gravy was the best part – some did put taters and a turnip and sech, but ‘twas best plain, and good cold,” told old farm-hand.

Foods like muggety pie are dishes that probably never travelled much further than the dairy or cattle farmers’ houses and quickly forgotten. It was borne out of a necessity that no longer exists, but why kill an animal for meat that can be sold on when there is good protein laying there in the hay?

So, if there are any diary or cattle farmers that have a spare umbilical cord or two hanging around, let me know and I’ll bake you a delicious pie!

Don’t worry though, you don’t have to miss out on muggety pie because it can also be made out of sheep’s intestines or a sheep’s pluck (i.e. lungs, heart and liver) that latter of which should easily be found at butchers given a little notice…


If you like the blogs and podcast I produce, please consider treating me to a virtual coffee or pint, or even a £3 monthly subscription: follow this link for more information.

1 Comment

Filed under baking, Britain, cooking, Dairy, food, General, history, Meat

Have a Heart?

I am aiming to write at least one recipe on every cut of meat, cheap or expensive, regular or odd (see here for the main post). At Levenshulme Market a few months ago, I came across a calf’s heart at the dairy farm Wintertarn’s stall, so I bought it and stole it away in my freezer until I found a recipe I wanted to try.

Heart crops up in many recipes such as pork faggots or haggis, but these days is rarely eaten as a cut of meat in its own right. In the war-time home stuffed pig’s or lamb’s hearts were pretty popular because offal cuts were not rationed. This naturally has damaged the reputation of the heart as something that is good eating. Prior to the 20th century, heart was a very popular cut of meat, even with the middle and upper classes. I like this recipe that appears in Elizabeth Raffald’s book The Experienced English Housekeeper (1769) ‘To make a Mock Hare of a Beast’s Heart’:

Wash a large beast’s heart clean and cut off the deaf ears [see below], and stuff it with forcemeat…Lay a caul of veal…over the top to keep in the stuffing. Roast it either in a cradle spit or hanging one, it will take an hour and a half before a good fire; baste it with red wine. When roasted take the wine out of the dripping pan and skim off the fat and add a glass more of wine. When it is hot put in some lumps of redcurrant jelly and pour it in the dish. Serve it up and send in redcurrant jelly cut in slices on a saucer.

elizabeth raffald

Elizabeth Raffald

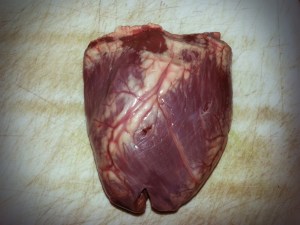
I think this sounds like a delicious recipe to try, and perhaps I will when I come across a large beast’s heart in the butcher’s shop window. However, it might be a little bit of a challenge for someone not used to eating such things. Instead, I give a recipe for a delicious and simple marinated calf’s heart, as a good introduction to the texture of heart which is not as tough as old boots as you may first expect, but firm and has the familiar taste of meat.  However, before you cook a heart, you need to know how to get it ready.

Preparing Heart

FxCam_1358467420942

The hearts of small animals such as ducks and chickens can simply have any large blood vessels removed and you are done.

Preparing a larger heart such as calf, ox, lamb or pig might appear to be a little daunting at first, but it is really quite simple. First of all the large blood vessels as well as the two large flaps that used to be known as ‘deaf ears’ are trimmed away from the top of the heart as well as any obviously sinewy parts. This should leave the heart looking neat with two cavities within. If you want, trim away the fat, but if it is to be roasted, the fat provides a natural basting. In fact, there is so little fat within the heart itself that often it needs to be larded with strips of fatty bacon. Large ox hearts are often quartered and frozen away to be used over several meals.

Pop the heart in some salted water until you are going to cook it.

Grilled & Marinated Calf’s Heart

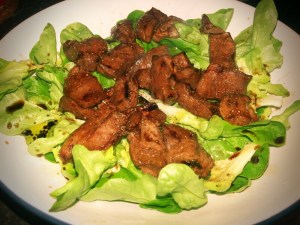
This recipe is a modern one and it comes from the Nose-to-Tail chef Fergus Henderson. It is very simple and very healthy – pieces of calf’s heart that have been marinated in Balsamic vinegar, quickly griddled then served up with a nice salad.

For four

Ingredients

1 calf’s heart

around 6 tbs Balsamic vinegar

salt

pepper

1 tbs chopped fresh thyme

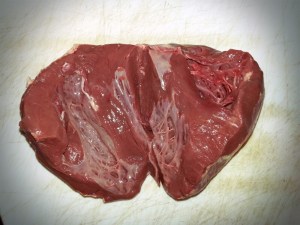
First of all prepare the heart: trim it as explained above and remove any thicker pieces of fat. In this case, the heart is cooked quickly, so it doesn’t require the fatty basting. Cut it open and lay it out flat and cut into 2 or 3 centimetre (1 inch) squares.

FxCam_1358467450898

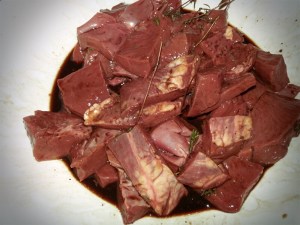
You need each piece of meat to be about half a centimetre (¼ of an inch) thick, so some very thick parts, such as the ventricles, will need to be sliced horizontally. Tumble the pieces of heart into a bowl along with the vinegar, salt, pepper and thyme, making sure everything gets coated well. Cover and marinate for 24 hours.

FxCam_1358468271386

To cook the meat, you need a red-hot griddle – either on a barbeque or over a hob – that has been lightly greased with some rapeseed oil. Place pieces of heart on the griddle and turn after 2 or 3 minutes and cook the same time on the other side.

Serve straight-away with ‘a spirited salad of your choice’, says Mr Henderson, ‘e.g. waterctress, shallot and bean, or raw leek.’

FxCam_1358535726575

If you like the blogs and podcast I produce, please consider treating me to a virtual coffee or pint, or even a £3 monthly subscription: follow this link for more information.

4 Comments

Filed under Britain, cooking, food, General, history, Meat, Recipes, Uncategorized

Sweetbreads

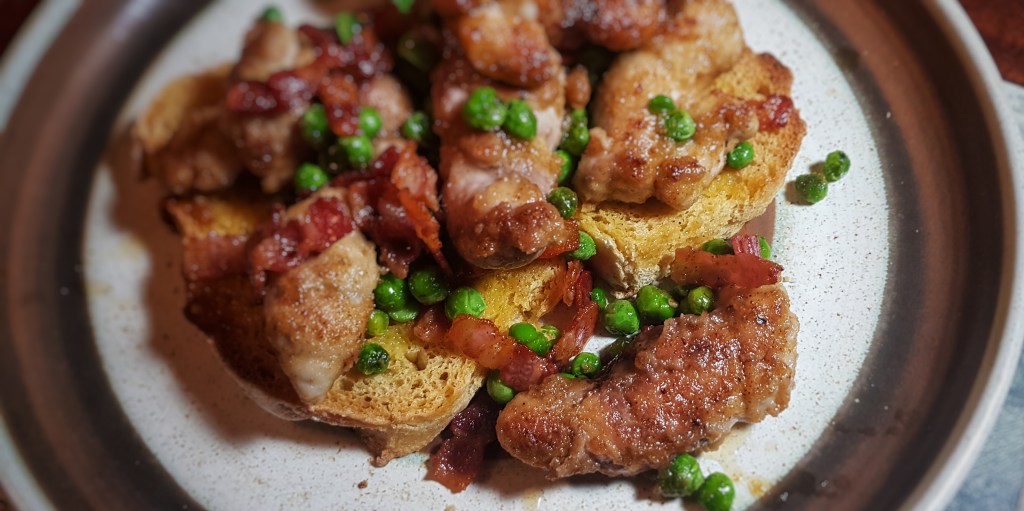
Sweetbreads with bacon and garden peas

One of my irregular offal-themed posts (see main post Tail to Nose Eating):

For those that are not aware, sweetbreads are a type of offal and come from the thymus, situated at the base of the throat, of either calves or lambs. For this reason they are often called throat sweetbreads. The thymus produces T cells which help us to attack any pesky germs that try and make us ill. The pancreas is commonly sold as heart or stomach sweetbreads, there are other rarely used sweetbreads too such as tongue and cheek sweetbreads. Most people think that sweetbreads are the testicles of calves and lambs; in fact, very rarely are testicles sold under the name of sweetbreads, they are more commonly sold as fries or stones.

Don’t be put off by the thought of eating a gland – they taste light, with a suspicion of iodine and do not have a strong offal flavour. If you are new to offal, or fear it a little, sweetbreads are a good place to start I reckon. But why are they called sweetbreads? Well, they are sweet because they taste richer and sweeter compared to typical meat, and they are bread because the old English word for flesh is bræd.

Sweetbreads were once very, very popular, but have now died a comparative death. Though, like many of the old forgotten cuts of meat, there is a slight resurgence, but nowhere near the dizzy heights of the 18th and 19th centuries. Almost every meat dish seems to have been decked out with breaded sweetbread garnishes. In those days; they were cheap and they were plentiful and they were delicious. Sweetbreads are not the easiest of cuts to get hold of these days, with most of them being snapped up by restaurants, and the few that get to your butcher are snaffled very quickly by those in the know. This, in some ways, in a good thing – they become, not a mere garnish, but the star of the show, something to be savoured. In Jane Grigson’s book Good Things, they have a whole chapter to themselves!

Sweetbreads are best served simply: grilled or fried alongside some dry-cured streaky bacon. Sweetbreads love bacon. They also love black pudding and sweet vegetables such as beans and peas.

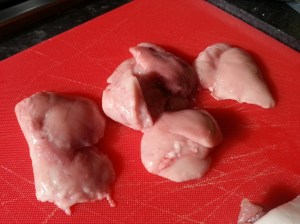
I got lambs’ sweetbreads from my butcher WH Frost in Chorlton. For some bonkers reason we can’t sell British calves’ sweetbreads in this country, but we can sell those that have come from mainland Europe.

20201204_133419-01.jpeg
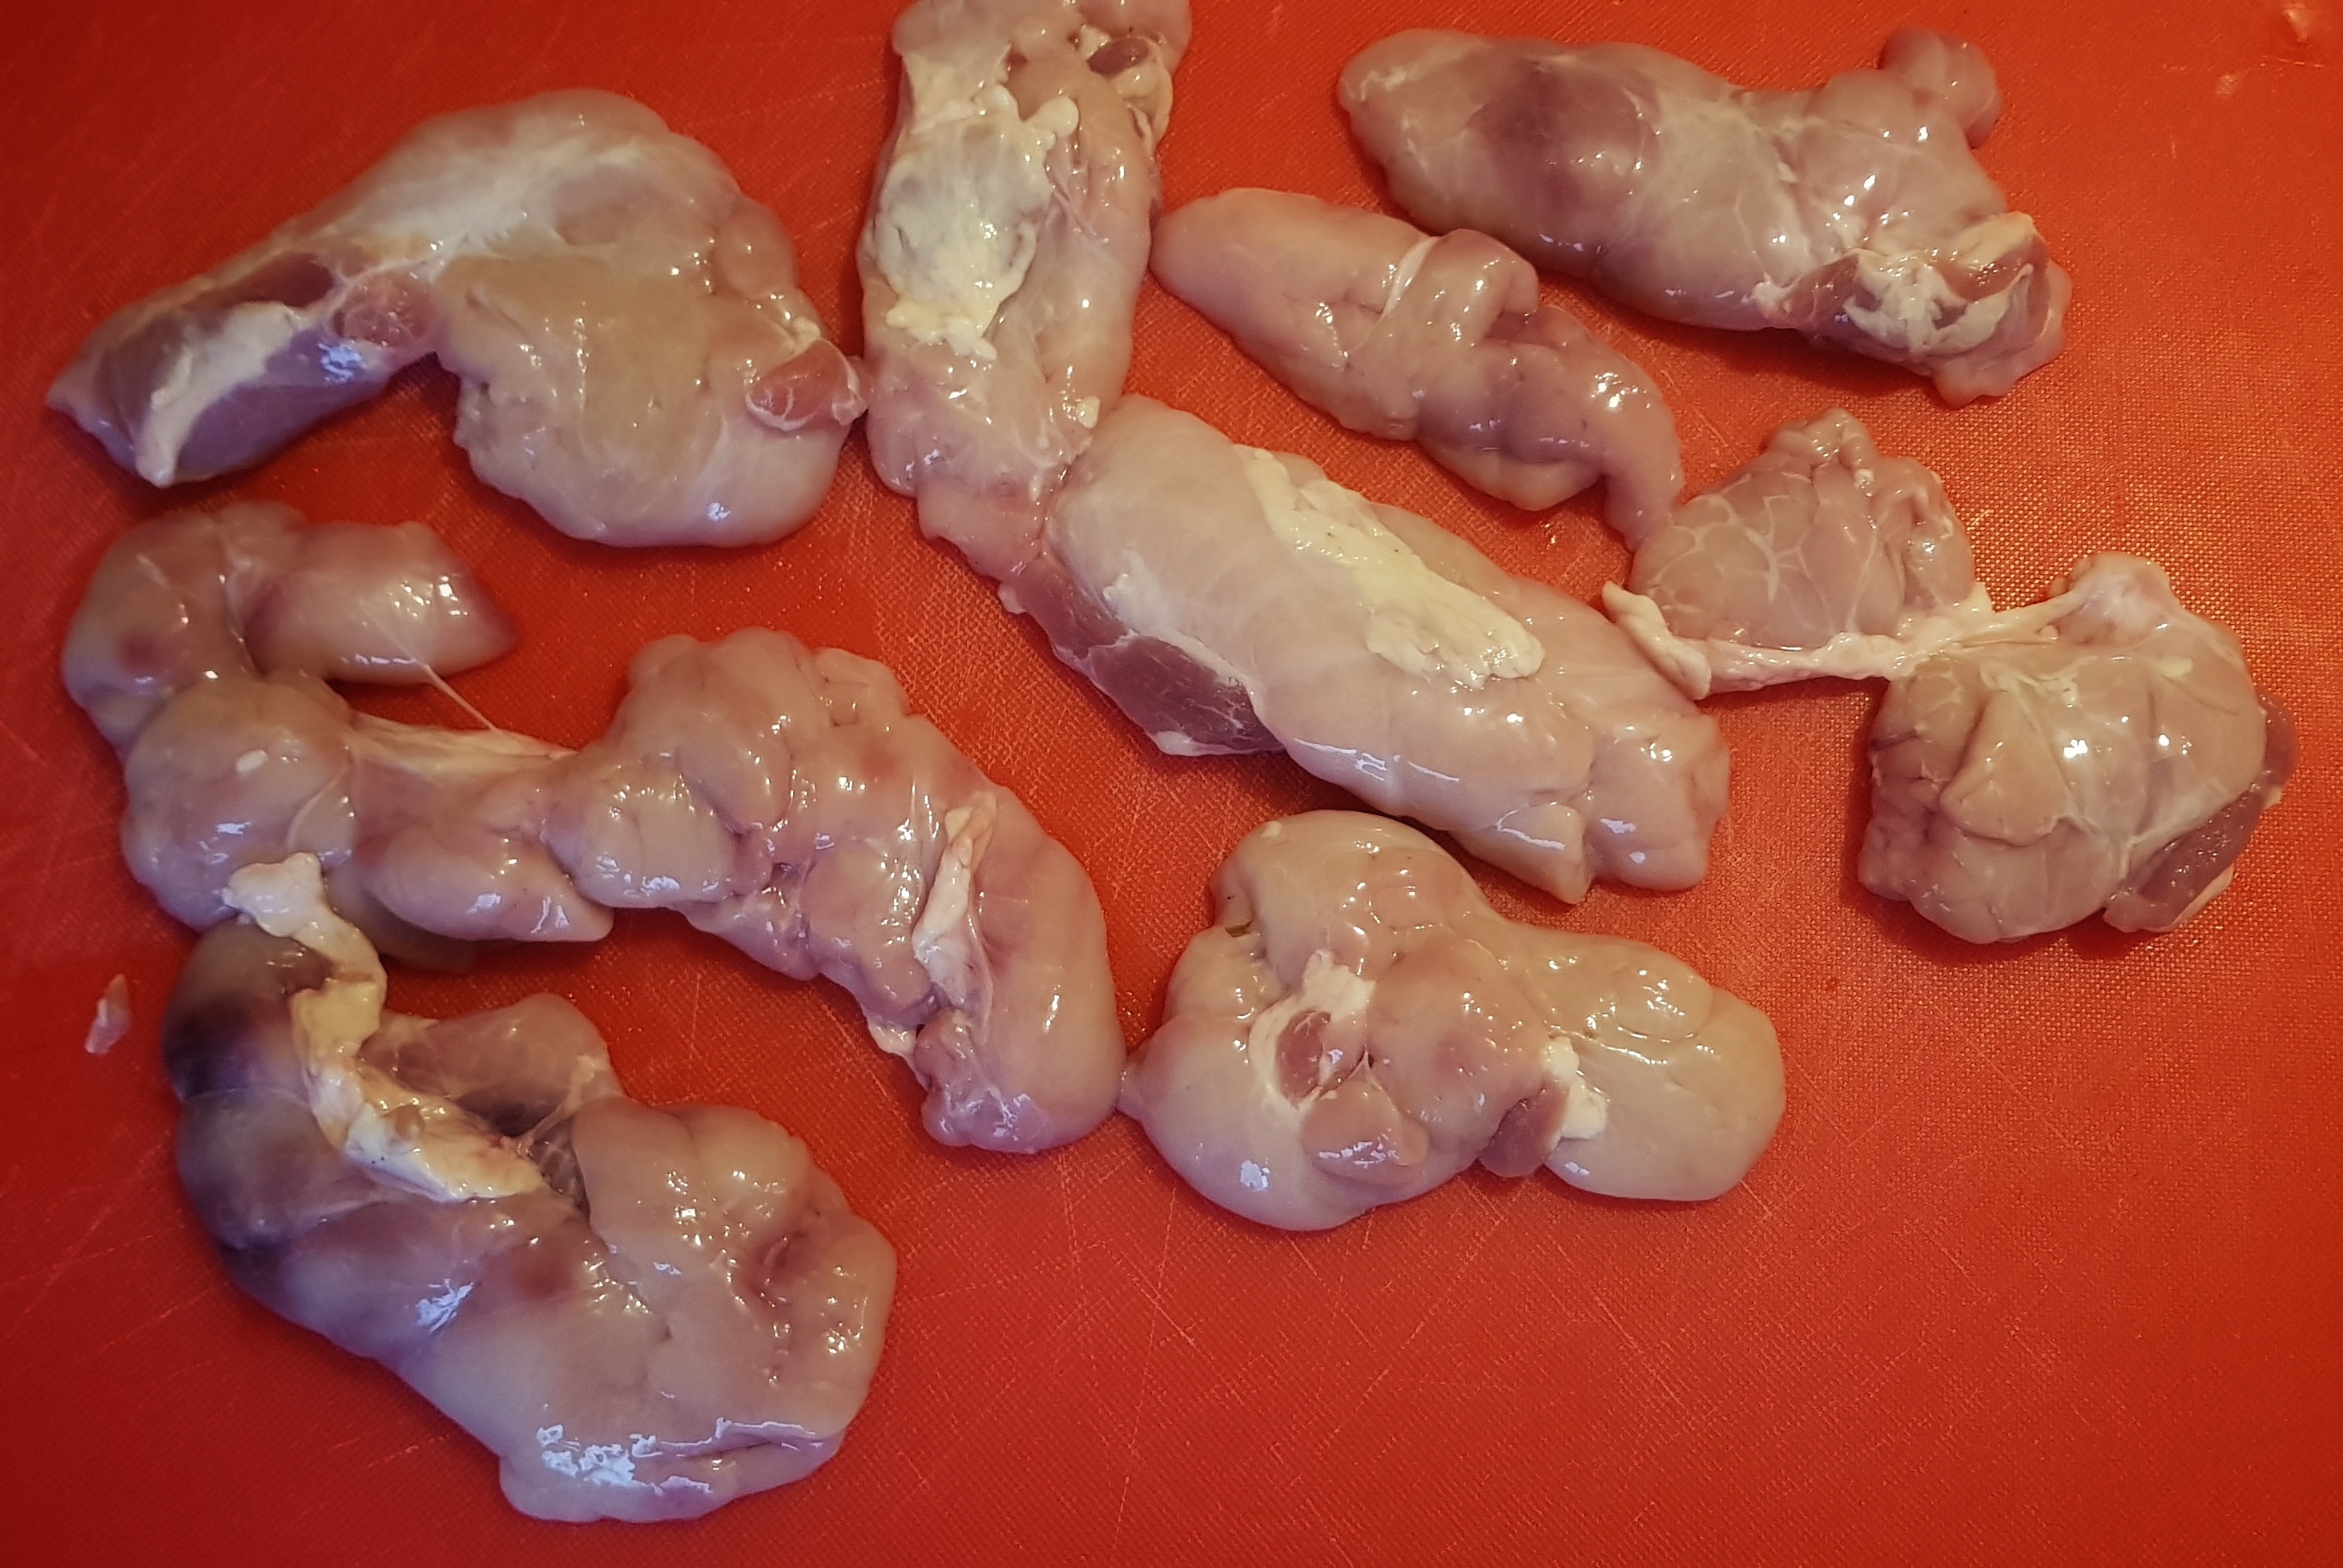
Lambs’ sweetbreads in their raw state

Preparation of sweetbreads

Whether you get calves’ or lambs’ sweetbreads they first need to be soaked in salted water for a few hours. This gets rid of any impurities. If you can, change the water a couple of times, but it is no big deal if you do not.

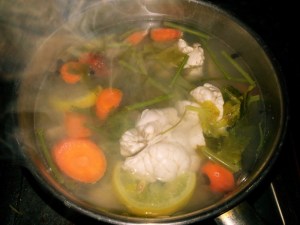
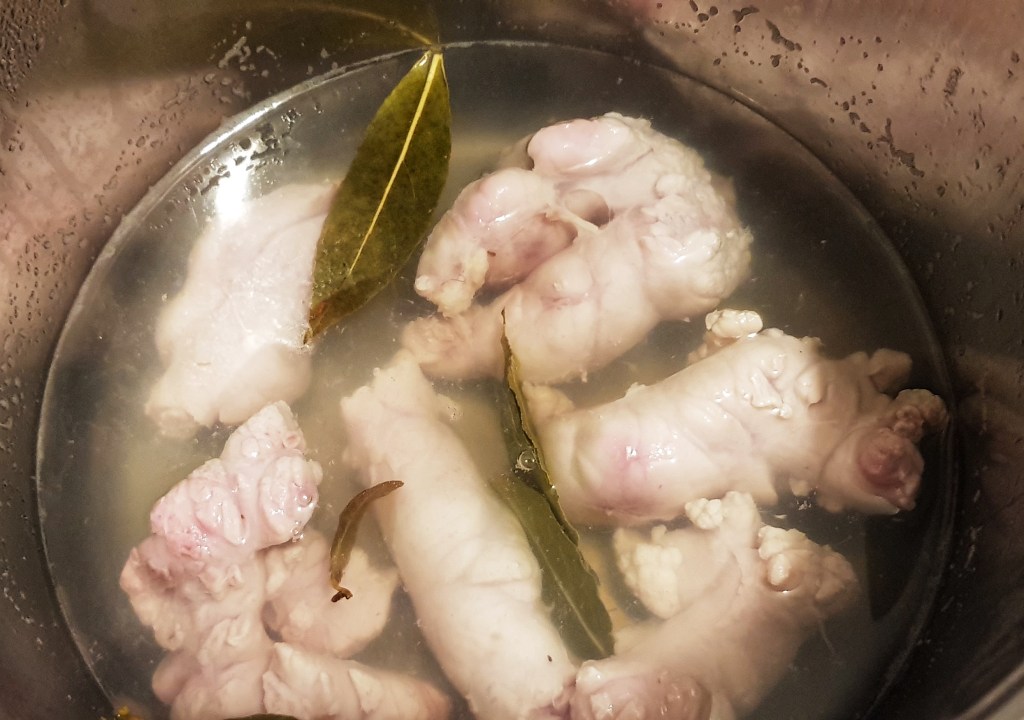
Next, the sweetbreads are poached. This can be in simple salted water, but more normal is a light stock such as chicken or vegetable or in a court bouillon of herbs and vegetables.

Simply pop your sweetbreads into the water or stock, bring to the boil and simmer gently for five minutes. Remove, drain and cool before removing any gristly bits. The tricky part is doing this whilst keeping them whole.

Sweetbreads gently poaching in a simple court bouillon

If you like the blogs and podcast I produce, please consider treating me to a virtual coffee or pint, or even a £3 monthly subscription: follow this link for more information.
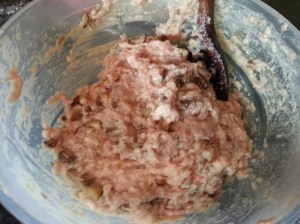

Fried Sweetbreads with Peas and Broad Beans

This recipe is great if you’ve never cooked with sweetbreads before – they are sliced up, so if they do fall apart when preparing them, it doesn’t matter. This recipe is also a very quick dinner – taking only 10 minutes or so to cook. I don’t think it needs to be served with anything, except perhaps a slice of wholemeal bread and butter. By the way, there is nothing wrong with using frozen peas and beans here. This recipe is adapted from The River Cottage Meat Book by Hugh Fearnley-Whittingstall and it serves four people.
Ingredients

around 150g (6 oz) garden peas, fresh or frozen

around 150g (6 oz) broad beans, fresh or frozen

3 tbs olive oil

100g (4 oz) dry-cured smoked streaky bacon, cubed

500g (1 lb) prepared lamb’s or calf’s sweetbreads, sliced

plain flour seasoned extremely well-seasoned with salt, pepper and a little Cayenne pepper

1 garlic clove, very finely chopped

salt and pepper

Plunge the beans and peas into boiling water for one minute, then drain and tip into cold water. Heat the oil in a frying pan and fry the bacon begins to crisp.

Meanwhile, toss the sweetbreads in the seasoned flour and tip them into the pan along with the bacon. A minute later, add the garlic and fry everything a nice golden brown. Tip away any excess oil and stir in the beans and peas. Cook for another minute, season with salt and pepper and serve piping hot.

21 Comments

Filed under Britain, cooking, food, General, Meat, Recipes, Uncategorized

Tail to Nose Eating: Oxtail Soup

‘Nose to tail’ eating is en vogue these days and thank goodness it is. The stigma that offal and cheap cuts of meat are of poor quality has been around since at least the Victorian era. The anglophile French chef Alexis Soyer despaired that so much good food was going to waste; he couldn’t understand why we turned our noses up at it whilst countries like France ate the whole animal without worrying about such things. This was all compounded further during the rationing people faced, where there was no choice but to eat cheaper cuts and offal.

Alexis Soyer

Now that times are tough these cuts are appearing in our butchers’ shops once more; hopefully it is also because of the good work of today’s chefs and food writers promoting and cooking with these ingredients and showing us all that good food does not mean expensive food. When our counry’s finances turn around, I do hope that offal doesn’t get dropped for the expensive cuts again. It is so important that we treat our animals with respect by eating the whole thing, after all it helps the environment by reducing waste, and whilst we are doing this, we are opening ourselves to whole other gastronomic world previously veiled by sirloins and silversides. It can only be a good thing.

I have always been an offal fan and I can honestly say whether liver, kidney, sweetbread or brain, I have never eaten a bit of animal that I have not liked. All those odd bits, wobbly bits and squidgy bits have such an amazing range of textures and flavours and I thought I would add my favourite recipes to the blog. I am going to start this a little backwards with oxtail soup – I suppose I am championing tail to nose eating…


If you like the blogs and podcast I produce, please consider treating me to a virtual coffee or pint, or even a £3 monthly subscription: follow this link for more information.


Oxtail Soup

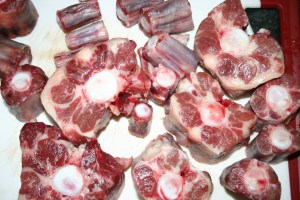
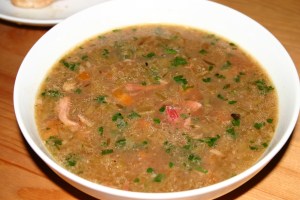
My favourite soup of all time. A few years ago this was actually quite an expensive dish to make – offal was unpopular, inflating the price. These days you can pick one up for about £4 from your high-street butcher. This soup is full of rich beefy flavour that is heightened by the inclusion of a bottle of stout – the darkest you can find, Guinness works well though I like to use Marston’s Oyster Stout. The most important ingredient here is time – to make a good soup with large tender pieces of meat you need the soup to be barely simmering for at least 2 hours. A full simmer often leads to tough meat that loses too much of its flavour to the surrounding stock.

The recipe itself only seems to appear in the latter half of the eighteenth century and apparently came from France. I can’t believe this recipe is so recent, I imagined that we’d been eating a version of it for a millennium. If anyone can find an earlier reference, please let me know.

beef dripping or lard

2 oxtails, cut into 2-3 inch pieces and trimmed of very large pieces of fat

2 onions, finely chopped

2 leeks, finely sliced

3 carrots, peeled and diced

3 sticks of celery, diced

3 or 4 cloves of garlic, peeled and crushed

4 healthy sprigs of thyme

2 bay leaves

300 ml stout

1.5 litres (2 ½ pints) beef stock

salt and black pepper

1 tbs Worcestershire sauce

1 tbs mushroom ketchup (optional)

4 tbs finely chopped parsley

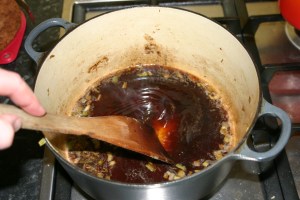
Heat a small amount of dripping or lard in a heavy-based stockpot or large cast-iron casserole on a high heat – the highest you dare go – add the pieces of oxtail and brown thoroughly on all sides – this should release their fat, quickening the whole process. Don’t overcrowd the pan; cook in batches if need be. Remove the oxtail and set aside before browning the onion, leek, carrot and garlic. Add the thyme and bay leaves then the stout, making sure you get all the burnt bits scraped off that will have built up from all that hard-frying.

Add the stock and browned oxtail and bring to a simmer. The soup needs to quietly tick over for at least two hours, three if you can.

Strain the soup into another pan and remove the pieces of oxtail, picking out the meat which should come away easily from the bone. Cut into small pieces of you do so wish. Return the meat to the rich stock. If you want you can throw away the vegetables, but I prefer to pop them back into the pot too. We need our roughage now, don’t we? It’s best to let the soup cool so that you can skim off any unwanted fat – plus a little waiting time helps the flavours to develop.

Reheat and season well with salt and pepper, add the Worcestershire sauce and mushroom ketchup if using. Taste and add more if you like. Finally stir through the parsley and serve hot with buttered toast and a glass of stout.

8 Comments

Filed under Britain, cooking, food, Meat, Recipes, Soups

Potted Chicken Livers

Now I know you’re thinking that I am dressing up something French as British by saying ‘potted chicken livers’ instead of pâté but the British have been potting meats like beef, game and salmon, and also liver, for a long time now. Potting helps preserve meat if covered with an airtight layer of clarified butter and kept in a cool place. I am going to write a post very soon on potting meats as well as some other methods of meat preservation soon; the point of this post was for me to write a little diatribe about how the word pâté has the same roots as pot so I could feel a little smug and say that I was right. You know like those people who say raspberry coulis, when they just mean sauce. It turns out that I was a little wrong: my French is worse than pidgin and I just assumed the two words had the same root. I am blaming Elizabeth David for this gaff: she talks of potted chicken livers as though that’s what everyone calls them down her way.

Pot or pâté? Ms David knew which side of her toast was buttered

So as it turns out that the word pâté has the same roots as the words pastry and pasta, coming from Greek words meaning ‘small particles and fine textures’ according Harold McGee in his tome On Food and Cooking. So potted livers have a fine texture as they are a mixture of butter and liver, and pastry is made up of particles of flour and butter. Actually, pâté started life more as a chopped assemblage of meats, rather than the refined smoothness we think of today. Oddly enough pâté and pie eventually became interchangeable words in medieval times because chopped meat was often cooked in pastry on both sides of the English Channel. As I have said before, the food histories of Britain and France blend so much there is sometimes no point in trying to discern between the two.

Anyway, I have chuntered on enough now so I shall give you two recipes for potted chicken livers. First, a couple of mentions on preparation and storage: in this recipe the livers are fried in butter until pink, about 4 or 5 minutes on a high heat. It is very important that they should be cooked through and only slightly pink, not just seared and bloody and rare. I don’t want you coming down with Campylobacter or some other nasty food poisoning microbe. The other thing is to cover your potted livers with a good layer of clarified butter along with a lid or a covering of cling film, especially if being kept in a cold larder. The butter isn’t necessary if you are keeping them in the fridge, but they should be covered with something; butter is best though as it stops the livers from oxidising and turning from rich brown to muddy gray (oxidising is harmless, they’re still good to eat).

To make clarified butter, slowly melt some butter in a saucepan over a low heat. Skim off any froth or foam with a spoon and then decant the butter into a jug making sure none of the butter solids get poured out with it.


If you like the blogs and podcast I produce, please consider treating me to a virtual coffee or pint, or even a £3 monthly subscription: follow this link for more information.
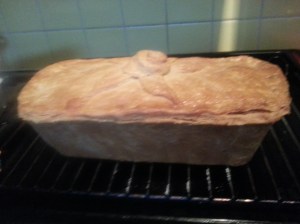

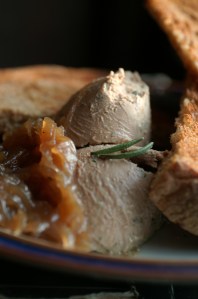
Potted chicken livers with brandy and peppercorns

This is the classic recipe for potted chicken livers, though I find that there is never enough brandy. I use quite a lot compared to many recipes because I like to be able to taste it; brandy is very rich and it can be a bit too much, especially with all that liver and butter too. To counteract this is I add a good dose of piquant pickled green peppercorns which are available at delicatessen’s shops or online. You can of course omit the peppercorns and reduce the amount of brandy if you’d rather.

Ingredients

8 oz chicken livers

6 oz butter

2 to 4 tbs brandy

3 tsp rinsed and drained pickled green peppercorns

salt and black pepper

clarified butter (optional)

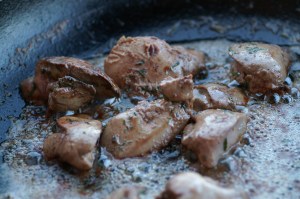
Pick over the chicken livers, removing any large pieces of gristle, carefully removing any little green bile ducts that may be left on them. Get a frying pan nice and hot and add 2 ounces of the butter. When the butter stops foaming, add the livers and fry for a total of 4 or 5 minutes, turning them half-way through.

The idea is for the livers to be cooked, but still a little pink, so cut inside one to check after 4 minutes of frying. Tip the livers and butter into a blender or food processor and return the pan to the heat whilst you deglaze it with the brandy. Tip the brandy and burnt bits into the blender along with the rest of the butter and blitz until the required smoothness (I like mine very smooth). Mix in the peppercorns and the seasoning before potting in one large earthenware pot of several smaller ones. Pour over the clarified butter to form an airtight seal.

Potted chicken livers with gin, rosemary and thyme

My attempt at a recipe rather more Scottish in its flavours, which I think works very well. These livers are much more savoury and less rich than in the recipe above: a good shot of gin provides a subtle aromatic bitter hit of juniper, and the fresh herbs mellow it nicely.

The method is exactly the same as the above except 2 teaspoons each of finely chopped rosemary and thyme are fried along with the livers. Of course exchange the brandy for the gin and omit the pickled peppercorns.

8 Comments

Filed under Britain, food, French Cookery, history, Meat, Preserving, Recipes

The Duck Press

The duck press was invented in France during the 1800s by a chef called Mechenet to make what is one of the most extravagant and macabre dishes ever created: Caneton de Rouen à la Presse, also known as Duck in Blood Sauce. It was popularised by Chef Frèdèric who was head chef at the famous restaurant La Tour d’Argent where it became the signature dish. It is reckoned over a million were served there. What is particularly impressive is that the dish was made at the table in front of the guests.

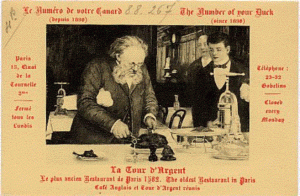
At La Tour d’Argent you are given a card

telling you the ‘number of your duck’

The dish became very popular in Britain during that famously excessive (and thankfully brief) period of history, the Edwardian Era. London’s high society went to huge efforts to appear sophisticated; French cuisine has always been associated with sophistication and the dish Caneton de Rouen à la Presse was one of the best. The Savoy in the 1900s, which then had the formidable chef Escoffier at the helm, regularly served it.

Escoffier

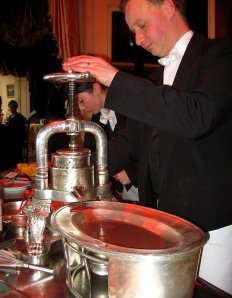
To make the dish you first of all need a duck press which a large metal press usually made of bronze. It contains a spout low down on the press itself so that the blood and bone marrow can be collected easily and it stands on two our four heavy feet so that the whole thing remains stable; you don’t want to cover some count in blood goo unless you can really help it. Some of them have webbed duck feet. If you want to buy a duck press though it will set you back around £1000.

Once you have procured your press you need to prepare your duck. The best for this recipe would be a Rouen duckling, but a mallard would be a good substitute. First of all kill your duck by strangulation so that the blood remains inside the tissues than pluck it. Next day remove the innards, keeping aside the heart and liver, and roast it on the very highest setting on the oven for 15 to 20 minutes. Liquidise the bird’s liver and heart. This is the point where the press and the duck are wheeled to the dining table for the guests to watch.

Remove the legs and set them aside for later, then remove the breast meat cutting it thinly and keeping it warm and covered on a serving dish with a cloche. Push and shove the carcass in the press to extract the blood and bone marrow from the bird, collecting it in a jug placed beneath the spout.

Make a sauce by gently warming the blood with the liquidised liver, some duck or veal stock and some brandy or cognac. Lastly, whisk in a good knob of butter to thicken the sauce and make it glossy. Pour the sauce over the sliced duck breast. Serve with a green salad.

The legs are usually taken away and grilled to be served up during the next course.

So there you have it; a simple and affordable family meal. I have to say, I am a lover of rare meats and I don’t find this sort of food scary at all and it is being served in some restaurants today. If I make my millions, I’ll buy a press and get you all round for dinner.

I found this YouTube video of one being used, but if you’re squeamish, you’re best not looking, I’d say.

For more duck history and recipes, click upon this very link.


If you like the blogs and podcast I produce, please consider treating me to a virtual coffee or pint, or even a £3 monthly subscription: follow this link for more information.


8 Comments

Filed under Britain, food, French Cookery, General, history, Meat, Nineteenth Century, Recipes, The Edwardians

Rillettes

A brief hop over the English Channel to France for this post…

I have a great love of potted meats – not the awful ones you get in those little glass jars on the supermarket shelves, but the proper job. Making them is easy and satisfying, but you can’t go too long flicking through the cook books and history books without eventually having to give a huge nod to French cuisine. Pâtés are of course well known and popular, but don’t forget the classic rillettes. They’ve been around for at least six hundred years, yet of recent times they have fallen out of favour in Britain, though they were very popular in Victorian and Edwardian Britain – the heyday for savouries such as these:

Rillettes: A French savoury meat preparation, used for hors-d’oeuvres and savouries

Charles Herman, Culinary Encyclopaedia 1898

See? I told you.

Rillettes are a classic, similar to a pâté in that you spread them on toast and eat them with some nice cornichons, but it is made in rather a different way; long slow cooking with plenty of fat is needed and, rather than being pulverised, they are stripped and potted along with their juices. They are subtly flavoured – the glory comes from the slowly cooked meat and the mild herbs. If I were to be a ponce, then I would say they are sublime. However I am not, so I shan’t.

Any kind of meat, or even fish, can be used to make rillettes but the classics are pork, duck, rabbit and goose. The best rillettes come from Tours and Reins.


If you like the blogs and podcast I produce, please consider treating me to a virtual coffee or pint, or even a £3 monthly subscription: follow this link for more information.


 Rillettes de Porc (Potted Pork)

Here’s the recipe I have tried out a couple of times now for rillettes de porc. I can’t wait to get back to England and try some rabbit rillettes (wild rabbits are a rarity in America). There is little variation in any recipe you see, whether found online today or in an eighteenth century cookbook.

Technically you can use any cut of meat as long as it has plenty of fat. I have been using pork belly, but neck would be okay, and for the less squeamish amongst you, the head.

Ingredients

2 lbs pork belly (weight after removal of rind and bones)

2 tbs salt

1 lb back fat

2 cloves of garlic, crushed

3 or 4 sprigs of thyme

2 bay leaves

Freshly ground black pepper

Freshly ground nutmeg

Around 10 fl oz water

Cut the pork belly into strips around 1 ½ inches wide, place them in a bowl and rub in the salt. Cover and leave for around 8 hours. Cut the back fat into cubes and place it, along with the pork belly, in an ovenproof casserole or similar. Tuck the herbs and garlic under the meat in the centre and sprinkle over a good seasoning of pepper and a little nutmeg then pour over the water. Cover with a tight-fitting lid or foil and bake in a very low oven, 140⁰C (290⁰F), for 4 hours.

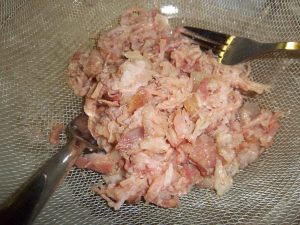
Remove the foil and take out the bay leaves, garlic and thyme – they have imparted their flavours. Place a sieve over a good-sized bowl and toss the contents of the pan into the sieve so it can drain.

rillettes before

Next – and this the good bit – grab two forks and start stripping the meat and fat into shreds.

rillettes after

If it is easier, do this in a separate bowl. Pot lightly into jars, ramekins or earthenware pots and cover with the salty-fatty juices. Keep covered in a cool place, failing that the fridge.

Serve with thin toast and pickles.

It is very important that the rillettes are spreadable, so if they are kept in the fridge, make sure you let them get to room temperature before eating them.

10 Comments

Filed under food, French Cookery, General, Meat, Preserving, Recipes, Uncategorized

The Oriental Club’s Mid-19th Century “Mutton Curry”

The Duke of Wellington, the first (and only) President of the Oriental Club

In the mid-19th century, the British obsession with Indian curries and culture really started to take off (see this post for a brief history of Britain’s love of spice and India). It wasn’t just the spiciness, but the romance of the place. Queen Victoria loved the country and even had an Indian wing in the palace. Although she was the Empress of India, she never actually visited the country, leaving all that excitement to her sons.

Hanover Square in the 18th Century

Authentic – or very close approximations to authentic – curries were being made in one particular London gentleman’s club called the Oriental Club which could be found in Hanover Square. The club catered for high society – the Duke of Wellington was the President and all the chairmen seem to have been Sirs, Lords, Major-Generals or Vice-Admirals.  The Club was obviously a popular one; it opened in 1825 and in 1961 it moved from Hanover Square to Stratford House on Stratford Square, where it remains to this day. If you are a Londoner (and a man), you can still join, though it does cost between £240 and £850 per year to become a member.

Stretford House, the current home of the Oriental Club

In its hey-day, Chef Richard Terry was at the helm in the kitchen, who took full advantage of the first Asian grocery warehouses; Payne’s Oriental Warehouse on Regent Street and the Oriental Depot on Leicester Square. His recipes were ‘not only from [his] own knowledge of cookery, but from Native Cooks’ too. He published a book called Indian Cookery in 1861, where the recipe below is adapted from. The job of adaptation was not done by me, but Madhur Jaffrey, though I would like to get my hands on a copy.

To make the curry, you need to make a blend of curry powder and curry paste first.

Richard Terry’s 19th Century British Curry Powder

This makes 7 tablespoons of curry powder – enough for more than three curries using the recipe below. You can of course use it in any recipe that asks for ‘curry powder’ in its list of ingredients. All the spices required are ground, but don’t buy ground coriander, pepper, cumin, cardamom and cloves if you can avoid it. Instead, roast whole spices over a medium-high heat in a dry frying pan then grind using a coffee grinder after cooling. All you need to do is mix together the following:

2 tbs ground turmeric

5 tsp ground coriander seed

2 tsp ground ginger

2 tsp Cayenne pepper

1 ½ tsp ground black pepper

½ tsp ground cumin

½ tsp cardamom seeds

½ tsp ground cloves

Store in a cool, dry, dark place.


If you like the blogs and podcast I produce, please consider treating me to a virtual coffee or pint, or even a £3 monthly subscription: follow this link for more information.
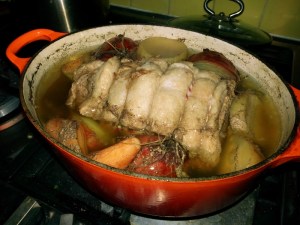

Sir Ranald Martin’s British Curry Paste

Many old (and new!) recipes ask for curry paste, but don’t always give receipts for the paste itself.  This recipe from Ranald Martin, a Victorian doctor and foodie who lived in India during the 1840s provides us with this one below. He was told it was an old Madras concoction. According to Madhur Jaffrey, the ingredients are very common in Madras, but the combination is ‘totally alien’. Aside from being used in curries, it was also used in sandwiches. The recipe below makes around 12 fluid ounces of paste.

4 tbs whole coriander seeds

2 tbs lentils such as yellow split peas or chana dal

1 tbs whole black peppercorns

1 ½ tsp whole cumin seeds

1 tbs whole brown mustard seeds

1 tbs ground turmeric

1 tbs Cayenne pepper

1 ½ tsp ground ginger

2 tsp salt

2 tsp sugar

3 cloves of garlic, minced

4 fl oz cider vinegar

6 tbs flavourless cooking oil such as sunflower or peanut oil

Dry-roast the whole spices and lentils in a frying pan until they turn a shade darker and emanate a delicious roasted aroma.

Remove from the heat, cool and grind in a spice or coffee grinder. Add the remaining ingredients except for the oil and stir well. Heat the oil in a frying pan and when hot, add the spice mixture and fry for around five minutes until the paste turns darker. Cool and empty into a jar. Store in the refrigerator.

The Oriental Club’s 19th Century Mutton Curry

Okay, you have made the paste and blended your spices, now you can get on with the curry. You can use either lamb or mutton, but bear in mind, the mutton – although more flavourful – will take longer to cook. If lamb is tricky to get hold of, goat or kid could be used as an alternative. The curry is pretty pungent, but good, dark and rich; I added a couple of peeled, chopped potatoes to add much needed-blandness. This curry serves 4 people and goes very well with plain rice, yoghurt and mango chutney. Would you believe, I forgot to take a photograph!?

4 tbs flavourless cooking oil

1 medium-sized onion, thinly sliced

2 tbs 19th Century British Curry Powder

1 tbs 19th Century British Curry Paste

1 ½ lb cubed lamb meat, shoulder is a good cut for this

8 – 12 oz (i.e. a couple of medium-sized) potatoes, peeled and cut into large chunks

¾ – 1 tsp salt

Heat the oil in one of those wide, deep frying pans that come with a lid. Add the onions and fry until the onions have browned and become crisp. Add the paste and powder, stirring well for a few seconds. Now add the meat and half of the salt, stir, cover and turn the heat right down. Gently fry for around 10 minutes, stirring occasionally. Add a pint of water (that’s a British pint – 20 fluid ounces) and the potatoes, turn up the heat and when the curry comes to a boil, turn the heat back down, cover and simmer very gently until the meat is tender, around 60 to 90 minutes if using lamb, longer if using mutton. Taste and add more salt if needed.
9 Comments

Filed under food, history, Indian food, Meat, Nineteenth Century, Recipes, The Royals, The Victorians, Uncategorized