Category Archives: Teatime

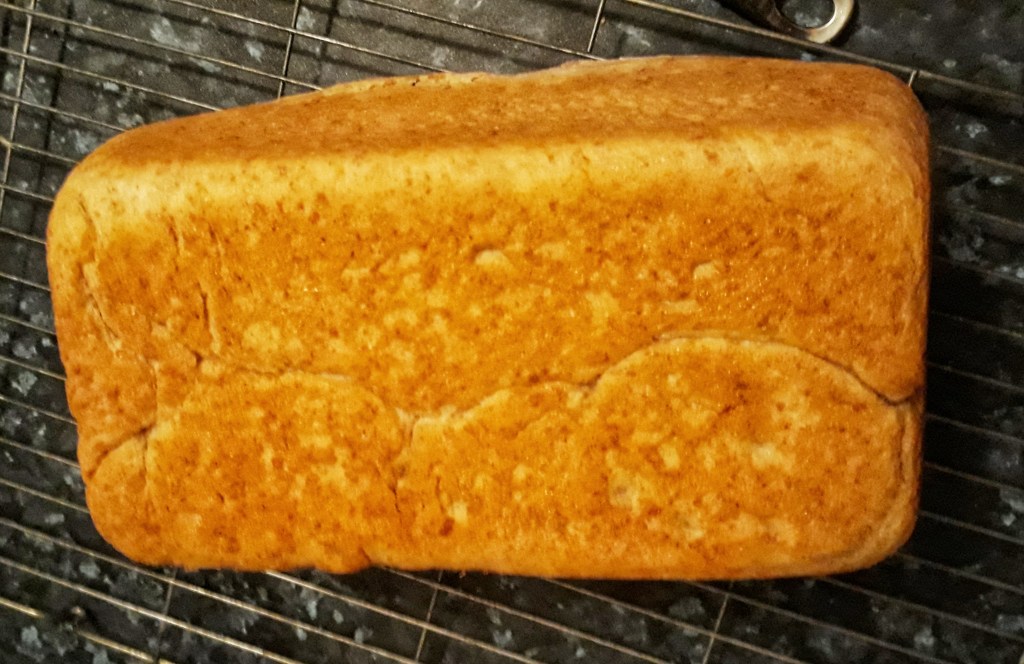
Toast

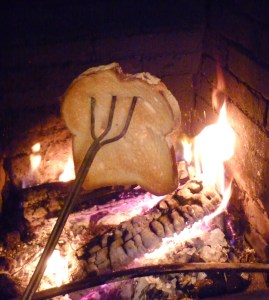
toasting fork

from iggandfriends.wordpress.com

Hot buttered toast must be the most popular British breakfast item, whether eaten on the run to the bus stop, or served up with a full English breakfast or posh scrambled eggs and smoked salmon on a Sunday. Elizabeth David described it as a ‘peculiarly English…delicacy’.

It is true that the wafting smell of freshly made toast combined with the sight of the slow melting of a good covering of salted butter is so comforting. Indeed, the first thing offered up to you after you’ve come round from an operation on the NHS (and I unfortunately have had many times) is tea and toast. (Digressing slightly, the first thing offered up to you after an operation in the USA is the similarly comforting cookies and milk.)

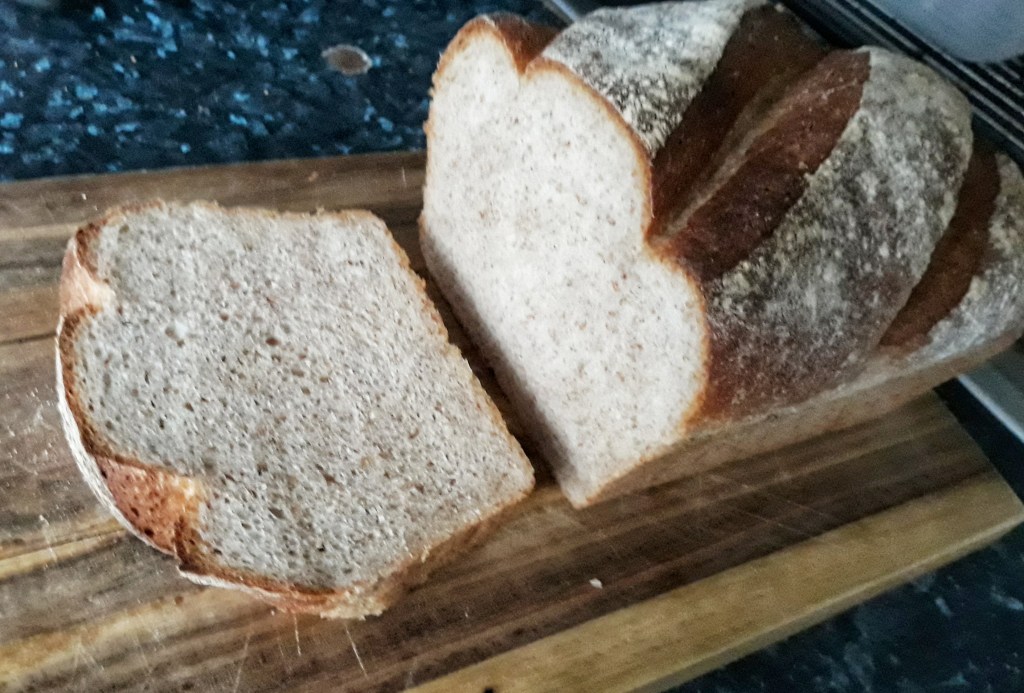
Most toast today is, of course, made from the flabby Chorleywood processed white sliced loaf, which produces quite depressingly poor ‘wangy’ toast. Proper toast requires proper bread; bread that has gone a slightly stale. Perfect toast is in the eye of the beholder: thick, thin, crisp throughout, soft in the centre, pale, dark, a scraping of butter or lashings of it.

Making toast was a way of using up stale bread, of course, so toast shouldn’t even be required now that we have the invention of Chorleywood processed bread. It’s ironic that our love of toast means we, on the whole, now make it with a product unsuitable for making it.

It won’t surprise you that there are some very detailed descriptions in old cookbooks as to the best way for making toast.

soyer

The earliest official piece of toasting equipment was the toasting fork. Here’s the flamboyant Victorian chef Alexis Soyer’s instructions from A Shilling Cookery for the People from 1854:

How to Toast Bread – Procure a nice square loaf that had been baked one or two days previously, then with a sharp knife cut off the bottom crust evenly, and then as many sliced you require, about a quarter of an inch in thickness. Contrive to have a clear fire: place a slice of the bread upon a toasting-fork, about an inch from one of the sides, hold it a minute before the fire, then turn it, hold it another minute, by which time the bread will be thoroughly hot, then begin to move it gradually to and fro until the whole surface has assumed a yellowish-brown colour, then turn it again, toasting the other side in the same manner; lay it then upon a hot plate, have some fresh or salt butter (which must not be too hard, as pressing it upon the roast would make it heavy),spread a piece, rather less than an ounce, over, and cut the toast into four or six pieces. You will then have toast made to perfection.

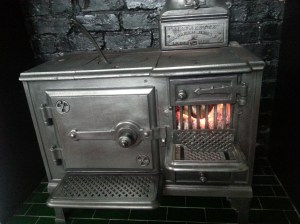
Coal range

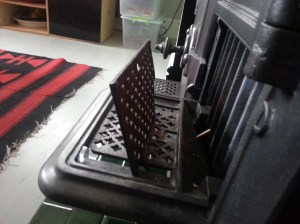
Next rung up on the evolutionary ladder of toast-making was the invention of the toast plate, a cast iron rack that could sit in front of coal-powered range cooker. My friend Andreas actually has an original coal range cooker with a toast plate built in. I am very jealous.

range toasting plate

You can buy plates that lay over a gas burner on the stove top that I suppose achieves a flavour closest to the ones found on the coal ranges. Elizabeth David owned one (from English Bread and Yeast Cookery, 1977):

Elizabeth David

Part of the charm of the toast produced on this device is that every piece is different, and differently marked, irregularly chequered with the marks of the grill, charred here and there, flecked with brown and gold and black.

At home, the best way to make toast is by using a grill, preferably a gas grill; it produces a much more even heat and therefore even toasting than an electric grill. I love the flecked toast that David described, but an electric grill has hot spots that produce slices well done in one patch and hardly coloured in another.

THE WAY WE COOKED

You might think all you need to do is stick the bread under the grill and wait, right? Wrong. Here are Delia Smith’s instructions for making toast under a grill, though first you need to slice it (from How to Cook: Book One, 1998):

  1. The key to slicing bread is to use gentle, rapid saw movements with the knife and not to push down too hard on the loaf. For toast, cut the bread into slices about ½ inch (1 cm) thickness. The crusts can be on or off, depending how you like them.
  2. Pre-heat the grill for at least 10 minutes before making the toast, turning it to its highest setting.
  3. Place the bread on the grill rack and position the tray 2 inches (5 cm) from the heat source.
  4. Allow the bread to toast on both sides to your own preferred degree of pale or dark golden brown.
  5. While that is happening, keep an eye on it and don’t wander far.
  6. When the toast is done, remove it immediately to a toast rack…Putting it straight on to a plate means the steam is trapped underneath, making it damp and soggy. If you don’t possess a toast rack you really ought to invest in a modest one. Failing that, stand your slices of toast up against a jar or something similar for about 1 minute before serving.
  7. Always eat toast as soon as possible after that, and never make it ahead of time.
  8. Never ever wrap it in a napkin or cover it (the cardinal sin of the catering trade), because the steam gets trapped and the toast gets soggy.
  9. Always use good bread, because the better the bread, the better the toast. It is also preferable if the bread is a couple of days old.

The toast rack is an essential. Before I owned one, I leant the slices against each other as you would for a house of cards.

So there we go, a definitive guide to making toast, well, as long as you’re not using an electric toaster!


If you like the blogs and podcast I produce, please consider treating me to a virtual coffee or pint, or even a £3 monthly subscription: follow this link for more information.


17 Comments

Filed under baking, bread, Britain, cooking, food, General, history, Recipes, Teatime

Bath, Buns & Sally Lunns

No, I haven’t died, so cancel the wake. I’ve been a little busy of late and the poor old blog has suffered from scant postings. For that I apologise. I need to catch up with a heck of a lot of food stories, recipes and history with you all; I may not have been blog-writing, but I have been eating!

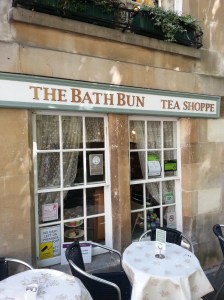
At the end of June, I popped down to the beautiful city of Bath for the weekend to visit friends and had a jolly old time. The great thing about Bath is that it has such history; you cannot help but find something to be amazed by at the turn of every street corner.

2013-06-28 16.25.28

Entrance to the Roman Baths

The spa at Bath has attracted people for millennia – there is archaeological evidence of human settlement going back 10 000 years. The city of Bath itself was founded in 863BC by a chap called Bladud. Suffering from leprosy, he had been ostracised from society and found that bathing in the warm, muddy springs, after seeing pigs doing the same, cured him. It must have put him in fine fettle because he later went on to become the ninth King of the Britons and to father King Lear.

2013-06-28 16.25.58

Of course it was the Romans that really transformed the place, creating Aqua Sulis with the baths that are still there today in fine working order.

From the point of view of food, however, Bath really came into its own in the eighteenth and nineteenth centuries when it was deluged by the middle classes that wanted to get away. The Roman Baths and Pump Room were restored to their former glories after centuries of neglect, making Bath the best of all the spa towns. This wasn’t just because of its locality to London, or that it was in a lovely part of England; it was because Bath simply had the best of everything. Bath was a trade epicentre: excellent salt marsh lamb from Wales, a seemingly endless supply of fruit and vegetables from Tewkesbury, cider from Glastonbury, apricots, cherries and plums from the Cotswolds, cream and junkets from Devon and Somerset, excellent freshwater fish – especially elvers – from the Severn Valley as well as sea fish from the ports of Cornwall, all came to one place. And that was just British produce! I haven’t mentioned the French brandy, the Spanish wine or the exotic spices from further afield.

All this has made Bath what it is today. Its food heritage, however, seems to have been boiled down into two things: Bath buns and Sally Lunns.

2013-06-30 15.09.17

I’ve never seen either Bath buns or Sally Lunns anywhere other than Bath itself, which just goes to show that we still have regional cooking in an age with a seemingly swirling and mixing population. I like that you don’t see them everywhere; it makes eating one a rare treat to be relished. There are, of course, stories attached to the invention of these enriched breads which should be taken with a huge pinch of salt.

Bath Buns

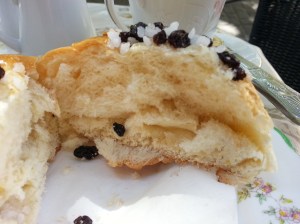
A bath bun is a large fruit bun, made with dough similar to that of a Chelsea bun or hot cross bun. The bread dough is enriched with eggs, sugar and currants. At the bottom of each bun is a lump of sugar and the freshly-baked bun is finished with a sticky wash, extra currants and crushed loaf sugar or sugar nibs.

2013-06-30 15.16.46

Anatomy of a Bath bun

The Bath bun is said to have been invented by a doctor called William Oliver in the 18th century. After his patients visited the Roman baths he would give them a nourishing Bath bun. It was soon apparent that his plan was not working as he expected when he realised
his patients were getting somewhat portly. He withdrew the buns and replaced them with hard, dry water biscuits.

I must say that I would have become a hypochondriac if I was one of Oliver’s patients! I would have used any excuse to get my hands on one. They are so delicious – sweet and sticky and very bad for you. I can’t put the attractiveness of the Bath bun better than W Chambers, writing in his Edinburgh Journal of 1855:

The Bath-bun is a sturdy and gorgeous usurper – a new potentiate, whose blandishments have won away a great many children, we regret to say, from their lawful allegiance to the plum-bun. The Bath-bun is not only a toothsome dainty, but showy and alluring withal. It was easier for ancient mariners to resist the temptations of the Sirens, than it is for a modern child to turn away from a Bath-bun…Large, solid, and imposing, it challenges attention, and fascinates its little purchasers.

We can see from this quote that the Bath bun was popular, not just in Bath, but England and Scotland, so what happened to it? Enriched breads are still pretty popular in Britain, even with the advent of comparatively modern chemically-aerated sponge cakes. Strange.


If you like the blogs and podcast I produce, please consider treating me to a virtual coffee or pint, or even a £3 monthly subscription: follow this link for more information.

The Sally Lunn

2013-06-30 15.07.17

Oh no she didn’t!

A Sally Lunn is a large, round enriched bread, much plainer than a Bath bun, rather like French brioche. The story of its invention goes something like this:

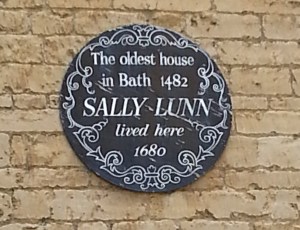
A young French immigrant lands in Bath during the 17th century and gets herself a job in a bakery where she shows off some of her recipes and one in particular becomes very popular indeed. Her name? Solange Luyan.

2013-06-30 15.07.37

The recipe went missing in the 1800s, but was apparently found during the 1930s when it was discovered in a ‘secret cupboard’ in her original home. The owner of the house then decided to open up the original Sally Lunn Tea Room.

This is, of course, all complete nonsense. The most likely explanation is that Sally Lunn is a corruption of the French solielune, or sun and moon cake.

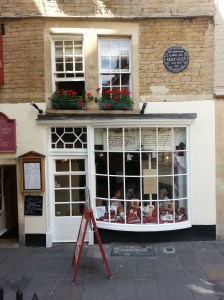
I visited the tea rooms and ate a delicious lightly-toasted Sally Lunn spread with sweet cinnamon butter and it was delicious. Like the Bath bun, its popularity had faded in the rest of the country.

2013-06-29 11.24.11

3 Comments

Filed under baking, bread, Britain, cooking, food, General, history, Teatime, Uncategorized

Jane Grigson’s Orange Mincemeat

It’s just occurred to me that I haven’t put on a Christmas recipe and it is only just over two weeks until the special day. This month has flown by at a scarily quick pace.

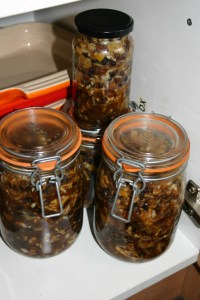
Luckily two weeks is just enough time to make this delicious orange flavoured mincemeat. Last year I gave you Mrs Beeton’s recipe, but this one comes from the wonderful Jane Grigson. It is very moist and because of the brandy, orange juice and orange liqueur. It is also vegetarian if you want it to be; the suet can be the vegetable-based sort, or you can leave it out altogether. Give it a go.

Jane Grigson

Jane Grigson

It is extremely easy to make: there is no cooking required so all you need to be able to do is chop, grate, mix and weigh. When you pot the mincemeat, it is very important you sterilise your jars. To do this first wash them in soapy water, then rinse and allow them to dry. Place the jars on a tray, with their lids sat beside them, facing upwards and pop them in the oven for 30 minutes at around 130⁰C. Let them cool a little before potting. If this seems a lot to make in one go, you can easily reduce the amounts as you see fit.


If you like the blogs and podcast I produce, please consider treating me to a virtual coffee or pint, or even a £3 monthly subscription: follow this link for more information.


Click here for the recipe I use for making mince pies.

Ingredients

250 g (8 oz) chopped candied peel

1 kg (2 lb) peeled, cored and grated apples

500 g (1 lb) suet (fresh or packed is fine, but fresh is best)

500 g (1 lb) currants

500 g (1 lb) raisins

500 g (1 lb) sultanas

500 g (1 lb) soft dark brown sugar

1 freshly grated nutmeg

125 g (4 oz) slivered almonds

Juice and zest of 2 oranges

4 tbs brandy

6-8 tbs orange liqueur

Mix all the ingredients together in a huge mixing bowl, then pot into sterilised jars. Store somewhere dark and cool, but not the fridge! Leave the mincemeat to mature for at least together before using it.

IMG_2519

9 Comments

Filed under baking, Britain, Christmas, cooking, Desserts, Festivals, food, Fruit, General, Preserving, Recipes, Teatime

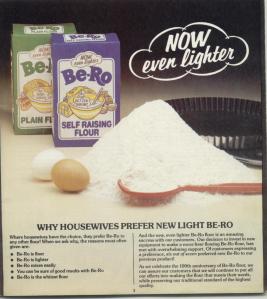
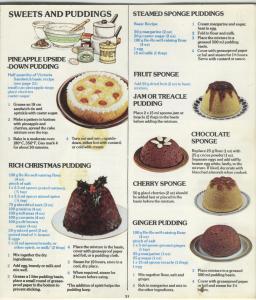
Favourite Cook Books No. 1: The Be-Ro Book

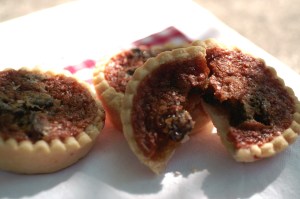
I thought I would start a series of posts on the cook books – and books of cookery writing – that I think are the best out there. I end the post with my favourite recipe from the book – Butter Tarts.

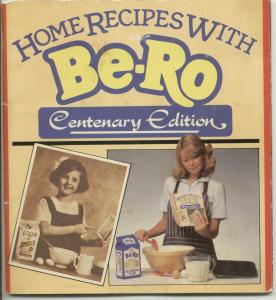
So many of you might be thinking, why the heck is the first one up Home Recipes with Be-Ro (or as it is known to me, The Be-Ro Book)? Well it is this book that got me into cookery in the first place because it was the one my Mum used when I was growing up. Before I was even thought of my Mum owned a bakery and so we had the luxury of having most things baked or cooked from scratch. This was the go-to book for all the family staples, and when I was off school on holiday and it was raining outside she would entertain me and my brother by giving us pastry trimmings to cut out. As we got older we chose recipes from The Be-Ro Book and cooked them with help from Mum. So I was essentially brought up on this book and its recipes, and it is certainly where I got my enthusiasm for cooking; I have been conditioned to feel at home in the kitchen.

The copy I have is the Centenary Edition, though it doesn’t say anywhere in the book when in was printed. I know that the Be-Ro Flour Company was formed in the 1880s, so it dates the book to the 1980s. My Mum has an even older copy this one, though the recipes are identical. Be-Ro still makes flour and Be-Ro recipe books are still printed today, these days of course you can go onto the Be-Ro website you will find the same recipes, which haven’t changed.

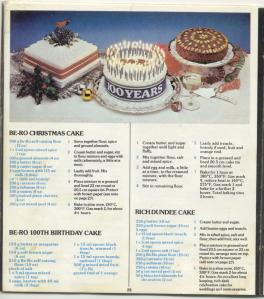
Well almost; the main difference between my copy of The Be-Ro Book and the modern version is that it suffers rather from a post-war rationing complex – most recipes ask for margarine rather than butter. Luckily shortbread escapes this, but buttercream does not. In fact there’s a lot of nasty margarine-based buttercream.

You are forgiven for not holding this book in as high esteem as I do, yet the classics are here, and they bring back great childhood memories. I also have to say it has really good basic skills teaching too, so don’t underrate it.

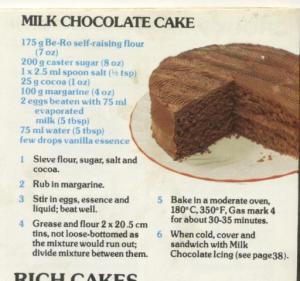
Many of the recipes are coming back into fashion, especially now that budgets are a little less flexible and the weather is cold and wet. Personal favourites of mine include a really excellent moist and light milk chocolate cake; its secret is the inclusion of evaporated milk and my Mum still bakes it. The steamed sponge puddings are excellent too as are the many tea loaves. It does fail on a terrible recipe for flapjacks that uses cornflakes instead of oats. You can’t win them all though, can you?


If you like the blogs and podcast I produce, please consider treating me to a virtual coffee or pint, or even a £3 monthly subscription: follow this post for more information.


Butter Tarts

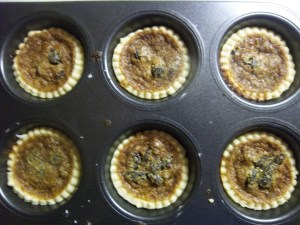
In my opinion these butter tarts are the best things in this book, though I have made a few changes to the original recipe. The filling is a mixture of raisins in a sweet caramel sauce that forms a delicious chewy crust as it bakes.

This recipe makes 12 butter tarts.

Ingredients

shortcrust pastry made with 8 oz flour and 4 oz of butter (or butter and lard)

1 oz butter

2 oz caster sugar

2 oz soft dark brown sugar

4 oz raisins

a few drops of vanilla extract

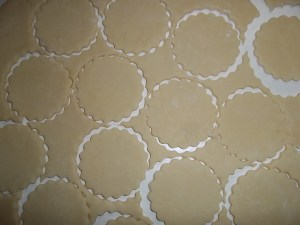
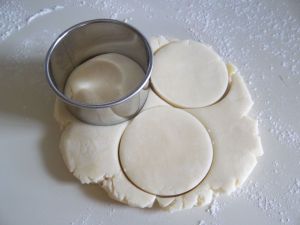
Roll out the pastry thinly and cut out circles using a pastry cutter measuring 3 ½ inches in diameter and line a steep-sided patty pan tray. You can use a tart tin, but I find you can’t get enough of the filling in.

Melt the butter in a saucepan, take off the heat and stir in the remaining ingredients. Add 2 teaspoons of mixture per tray – this should be just enough for 12 tarts.

Bake for 15-20 minutes at 200⁰C (400⁰F) and cool on a wire rack.

91 Comments

Filed under baking, Books, Britain, food, General, Recipes, Teatime

Shortbread


The history of shortbread goes back to at least the 12th century and originally started life as ‘biscuit bread’; biscuits that were made from left-over bread dough that was sometimes sweetened and dried out in the oven to form a hard, dry rusk. This practise took place over the whole of the British Isles, not just Scotland.

Over time the leavening was lost and exchanged for butter, making it an expensive fancy treat that was only bought for celebrations such as Christmas and Hogsmanay (Scottish New Year). There are similar ‘breads’ outside of Scotland such as Shrewsbury cakes and Goosnagh cakes.

The large amount of butter is what makes shortbread short: the term short, when applied to biscuits and pastry, means crumbly, like shortcrust pastry should be. It is the reason why the fat added to biscuits and pastries is called shortening.

Mary Queen of Scots

Today, shortbread is made from flour, butter and sugar, though other flavourings are added. Caraway was particularly popular; Mary Queen of Scots was particularly fond of them. Other extra ingredients included almonds and citrus fruits like this 18th century recipe from Mrs Frazer:

Take a peck of flour…beat and sift a pound of sugar; take orange-peel, citron, and blanched almonds, of each half a pound, cut in pretty long thin pieces: mix these well in the flour; then make a hole in the middle of the flour, put in three table-spoons of good yeast; then work it up, but not too much…roll out; prickle them on top, pinch them neat round the edges, and strew sugar, carraways, peel, and citron, on the top. Fire it…in a moderate oven.

In George Read’s 1854 book The complete biscuit and gingerbread baker’s assistant, there are fewer ingredients, but includes eggs for some reason:

1 ¼ lb. of flour, ½ lb. of sugar, ½ lb. of butter, 3 eggs, ¼ oz. of volatile salts…a little essence of lemon

FYI: Volatile salts were smelling salts, that could also be used to leaven dough.

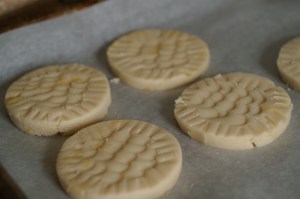
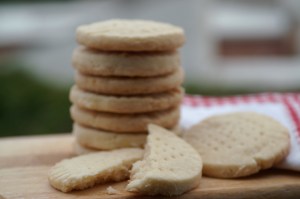
Shortbread usually comes in three different forms: small round biscuits, fingers or large rounds. To make the fingers, dough is cut into a large rectangle and the fingers are scored with the back of a knife so they can be broken up easily after cooking. A pattern made with fork marks is always made too.

To make large rounds, the dough is pressed into a round earthenware mould or a tart tin to make petticoat tails. When making the petticoat tails, the dough is scored into triangular slices like a pizza. The term petticoat tails comes not from the French petites gatelles (‘little cakes’) as many think (though Scottish cuisine did have more in common with French food than English food during the reign of Mary Queen of Scots), but from the term petticoat tallies – the name of the triangular pattern used to make bell hoop petticoats like Elizabeth I would have worn.

You can still buy the earthenware moulds – I’ll be buying one when I move back to England later in the summer.

Basic shortbread

This recipe makes enough for two petticoat tails rounds made in a seven inch tart tin. It’s hard to say how many biscuits or fingers – it depends on how wide and thick you make them. The important thing is to take them out before they start to brown.

To achieve a nice melt-in-the-mouth crumbliness use cornflour as well as normal plain flour to make your shortbread. Somewhere between a 1:1 and a 3:1 ratio of plain flour to cornflour works well. You don’t have to do this; they are still good with just good old plain flour.

6 ounces flour mix

4 ounces salted butter cut into cubes

2 ounces icing or caster sugar, plus extra

extra caster sugar

Rub the butter into the flour using fingers, pastry blender, food mixer or processor; be careful not to overwork things though if you’re using a food processor – shortbread dough doesn’t like being handled too much. Stir in the sugar and with your hand bring everything together to make a pliable dough – it’ll feel like it won’t form a dough at first, but as your hands warm it will.

Now you can roll or press out your dough into whatever shape you like and then place in the fridge for 20-30 minutes to harden:

For petticoat tails you are best diving the two into two halves and pressing the dough into your fluted flat tin. Score lines to mark out the slices, using a ruler if you want to be really precise. Make a nice pattern with a fork.

For fingers roll out the dough to half an inch thickness into a vaguely rectangular shape. Use a knife and a ruler to cut out a large rectangle and then score the lines with your ruler and knife, making patterns with your fork prongs.

For biscuits you can really do whatever you like; thick, thin, round, square. I think a little under half an inch is a good thickness. Cut out the biscuits and make your all-so-important fork marks.

Heat the oven to 180⁰C (350⁰F). Place the biscuits onto a baking sheet lined with greaseproof paper. Sprinkle with the extra sugar and bake until cooked but before any signs of browning. Petticoat Tails and fingers take about 15 minutes, individual biscuits can be variable, but usually about 12-15 minutes.

Variations:

For lemon shortbread add the zest of one lemon when you add the sugar, and for almond shortbread add 5 or 6 drops of almond extract. If you want to try it with caraway, sprinkle in 2 teaspoons of caraway seeds at the same time you add the sugar.


If you like the blogs and podcast I produce, please consider treating me to a virtual coffee or pint, or even a £3 monthly subscription: follow this post for more information.


50 Comments

Filed under baking, Biscuits, Britain, Desserts, Festivals, food, history, Recipes, Scotland, Teatime, Uncategorized

Treacle Tart

A classic British nursery pudding, the treacle tart is much-loved. It is probably the ultimate child’s dessert because it is so unbelievably sweet; it makes my teeth hurt just looking at one! That aside, I have never really lost my sweet tooth and I love treacle – meaning golden syrup of course in this case (see here for a post on treacle). Treacle tart was very popular with poorer families – the two main ingredients being bread and treacle – no expensive fruits and spices here.

The pudding itself as we know it has only been in existence since the late nineteenth century since golden syrup was invented in the 1880s. However, the earliest recipe I have found for a treacle tart actually dates to 1879 – before the invention of golden syrup! The recipe is by Mary Jewry and is a tart made up of alternating layers of pastry and treacle. The treacle here is black treacle, and this highlights the problem in researching the origins of this pudding; treacle meant any viscous syrup that was a byproduct of sugar refinery and specifics are not always pointed out, even after golden syrup became popular. The other problem is the recipe Mary Jewry gives is nothing like the beloved treacle tart from our childhood.

 The terrifying Childcatcher from Chitty Chitty Bang Bang

coaxing the children with shouts of  “treacle tart! All free today!”

Shudder.


Prior to the 17th century, treacle was used as a medicine; it was considered very good for the blood and was therefore used in antidotes to poisons. It starts cropping up in recipes for gingerbread in the mid-18th century. Jane Grigson mentions a gingerbread recipe from 1420 in her book English Food where spices and breadcrumbs were mixed together with plenty of honey to make a gingerbread that seems pretty similar a modern treacle tart, but without the pastry. Heston Blumenthal in his book Total Perfection also mentions a 17th century ‘tart of bread’ where bread and treacle are mixed with bread, spices and dried fruit and baked in an open pastry shell. Then just to complicate things further, Jane Grigson mentions that the predecessor to the treacle tart is the sweetmeat cake – again a 17th century invention – that uses candied orange peel, sugar and butter as a filling and no treacle or bread whatsoever!

All this confusing history waffle is giving me a headache. Here’s the recipe that I use for a treacle tart. It is adapted from Nigel Slater’s. I like it (and I have tried several recently) because it has a lot more bread in it than most other recipes – treacle tart should be chewy with a hint of   and must hold its shape when cut, many recipes fail in this respect. I use brown bread crumbs – it gives a good flavour and increases the chewiness level a little further.

There’s a pound and a half of golden syrup in this tart so the sweetness really needs cutting with some lemon juice and zest, and if you like, a tablespoon or two of black treacle; it’s not just a nod to treacle tarts of the past, its bitterness really does tone down the sweetness. This tart makes enough for ten people I would say. Be warned – if you go for some seconds, you may fall into some kind of sugar-induced diabetic coma…


If you like the blogs and podcast I produce, please consider treating me to a virtual coffee or pint, or even a £3 monthly subscription: follow this link for more information.

For the pastry

4 oz salted butter or 2 oz each butter and lard cut into cubes and chilled

8 oz plain flour

3 tbs chilled water

For the filling

1 ½ lbs golden syrup

2 tbs black treacle (optional)

juice and zest of a lemon

10 oz white or brown breadcrumbs

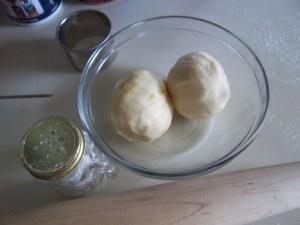
The pastry is a straight-forward shortcrust. Rub the fat into the flour with your fingertips, a pastry blender, the flat ‘K’ beater of a mixer or blitz in a food processor. Mix in two tablespoons of water with your hand and once incorporated, add the last tablespoon. The pastry should come together into a ball. Knead the dough very briefly so that it is soft and pliable. Cover with clingfilm and put in the fridge to have a little rest for 30 minutes or so.

Now roll out the pastry and use it to line a 9 inch tart tin. Put back into the fridge again – you don’t have to do this step, but sometimes the pastry can collapse a bit when it goes in the oven at room temperature.

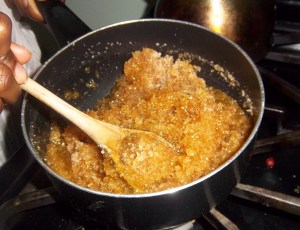
Whilst the pastry is cooling, get on with the treacle filling. Treacle can be a tricky customer: weigh it out straight into a saucepan on tared scales and then pour the golden syrup straight in. Add the black treacle if using. Place the pan over a medium heat and stir until it becomes quite runny, then stir in the lemon juice and zest and the breadcrumbs.

Pour this mixture into the lined tart tin and bake in the oven at 200⁰C (400⁰F) for 15 minutes, then turn the heat down to 180⁰C (350⁰F) for another 15 or 20 minutes.

Best served warm with cream, ice cream or custard.

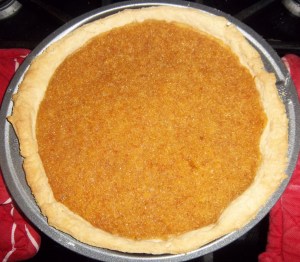
treacle tart

24 Comments

Filed under baking, bread, Britain, Desserts, food, General, history, Puddings, Recipes, Seventeenth Century, Teatime, Uncategorized

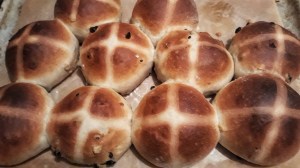
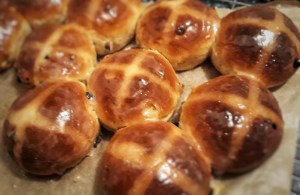
Hot Cross Buns

Tomorrow is Good Friday and in England it is traditional to eat hot cross buns, or rather it was;  supermarkets and bakeries bring them out as soon as Christmas is over these days. And why not? They are delicious after all. The reason that Good Friday is the day these buns are traditionally baked goes back to Tudor times, when the sale of spiced buns was illegal, except on Good Friday, at Christmas and at funerals.

The cross, people assume, is to denote the cross upon which Jesus was crucified. This is in fact nonsense; spiced buns with crosses were being produced throughout much of pagan Europe. Spiced buns have always been symbolic in worship and ones adorned with crosses were made for the goddess Eostre (where Easter get its name).

The Pagan goddess, Eostra

So that is the cross taken care of, but what about the hot? We don’t actually eat them hot that often. They were simply called cross buns, until that famous nursery rhyme was written sometime in the eighteenth century:

Hot cross buns, hot cross buns!

One ha’penny, two ha’penny, hot cross buns!

If you have no daughters, give them to your sons,

One ha’penny, two ha’penny, hot cross buns!

What if you have neither sons nor daughters? I suppose you eat them all to yourself like the miserable old spinster you are…

Ever since I started baking my own bread, I have sworn never to buy it again as it is just so delicious. Bought buns – like bread – are just shadow of their former selves, says Jane Grigson: ‘Until you make spiced hot cross buns yourself…it is difficult to understand why they should have become popular. Bought, they taste so dull. Modern commerce has taken them over, and, in the interests of cheapness, reduced the delicious ingredients to a minimum – no butter, little egg, too much yellow colouring, not enough spice, too few currants and bits of peel, a stodgy texture instead of a rich, light softness. In other words, buns are now a doughy filler for children.’

The recipe below asks for mixed spice, you buy a proprietary blend of course or make your own. I decided to make my own – simply because I didn’t have any. The good thing about making your own is that you can remove spices you don’t like, and enhance the ones you do. Typical spices are the warm ones: cinnamon, mace, allspice (pimento), nutmeg, cloves and ginger. I also think a little black pepper is good.

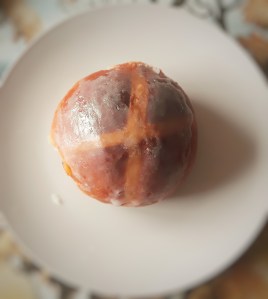
Here’s my recipe. It makes between 8 and 12 buns, depending upon how large you want to make them. The piped pastry cross is optional – cutting crosses with a serrated knife is fine, and closer to the original. I used to think the same as Elizabeth David, in that they ‘involve unnecessary fiddly work’, but that’s because I couldn’t get them right, I reckon to have worked it out now.


If you like the blogs and podcast I produce, please consider treating me to a virtual coffee or pint, or even a £3 monthly subscription: follow this link for more information.

Ingredients

500 g strong bread flour

5 g dried, fast-action yeast

10 g salt

60 g caster or soft dark brown sugar

1 tsp mixed spice

50 g softened butter

250 ml warm milk, or half-and-half water and milk

1 egg

100 g dried fruit (currants, raisins, sultanas, etc.)

25 g candied peel

For the crosses:

50g strong white flour

70-80 ml water

For the glaze:

60g sugar

70 ml water

Mix together the flour, yeast, salt, sugar and mixed spice in a bowl, then make a well in the centre. Beat an egg into the milk, and pour it into the well, adding the butter too. If you have an electric mixer, use the dough-hook attachment and mix slowly until everything is incorporated, then turn the speed up a couple of notches and knead for around 6 minutes. The dough should be tacky, glossy, smooth and stretchy. If you don’t have one, get stuck in with your hands and knead by hand on a lightly-floured worktop. It’s a very sticky dough at first, so it’s a messy job, but it will come together.

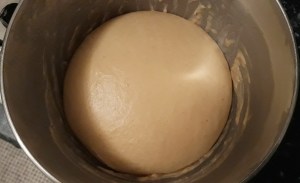
Grease a bowl, tighten the dough into a ball, pop it in and cover the bowl with cling film or a damp tea towel. Leave to prove until doubled in size – this can take anywhere between 1 and 3 hours, depending upon ambient temperature.

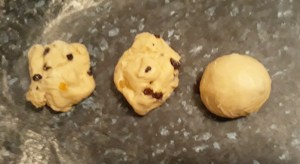
Knock back the dough to remove any air and mix in the dried and candied fruits – again, either by using your hands or your dough hook. Divide the dough into 8, 10 or 12 equally sized pieces and roll up into very tight balls on a very lightly-floured board. This is done by cupping your hand over a ball of dough and rolling it in tight circles, takes a little practise, but is an easy technique to learn.

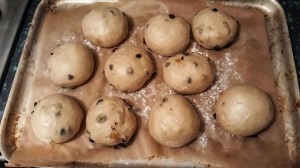
Line a baking tray with greaseproof paper and arrange the buns on it, leaving a good couple of centimetres distance between each one. Cover with a large plastic bag and allow to prove again until they have doubled in size.

Meanwhile, make the cross dough. Simply beat the water into the flour to make a loose, but still pipeable batter. Put the batter in a piping bag (or freezer bag, with a corner cut away) and make your crosses. If you like, just cut crosses in the tops.

Put the tray in a cold oven, and set it to 200⁰C and bake for 20 to 25 minutes (you get a better rise if they go into a cold/just warm oven, if you have to put them into a hot over, knock 5 minutes from the cooking time).

When they are almost ready, make the glaze: boil the sugar and water to a syrup and when the buns come out of the oven, brush them with the glaze twice.

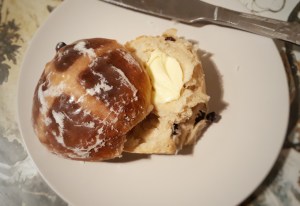
Eat, warm or cold with butter. To reheat them, bake in the oven for 10 minutes at 150⁰C.

22 Comments

Filed under baking, bread, Britain, Easter, Festivals, food, General, history, Recipes, Teatime

To Make a Coburg (or Cob) Loaf

Here’s another recipe to add to the series of posts on bread and bread-making (see main post here).

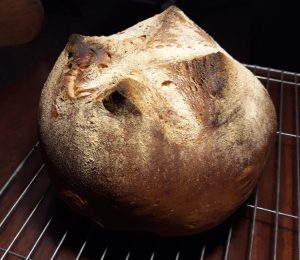
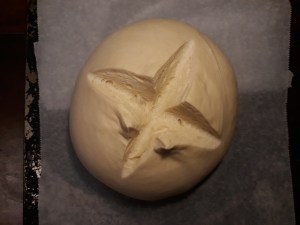
Coburg loaves are a common sight in traditional bakeries, but are rarely spotted outside of them these days. A Coburg is a round loaf that is not baked in a tin like your basic loaf (see recipe here), but as a round plump crusty loaf on a tray. On the top there are cuts in a cross shape that open up when it bakes. It can be made with pretty much any flour you like – white, whole-wheat, rye, oat, or whatever takes your fancy. I class it as one of the basic loaves because it contains just flour, yeast, salt and water.

Technically, a Coburg is a kind of cob, the only difference being that a cob does not get cut before going in the oven, though these days, there is no real distinction really. There are variations on the Coburg cuts though; sometimes several cuts are made in a chess board fashion which expands to make a porcupine loaf, which is also known as a college loaf or a Manchester loaf. Alternatively, the top of the dough gets quickly stabbed with a piece of wood spiked with lots of nails. A bit hardcore that one.

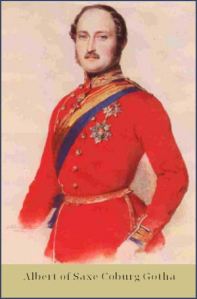
The Coburg loaf became popular in the Victorian era, and I assumed the loaf was named after Queen Victoria’s hubby Prince Albert Saxe-Coburg-Gotha, as many things were in those days. The British public were fascinated by the royal couple, and really took to many German traditions (especially a Christmastime). However, it may not be the case. There was such a thing as Coburg material; cheap and coarse and used for making mourning clothes that predated Albert so the word is older. The most likely explanation is that a German baker living in London, as many did, gave it his family name, though no baker actually knows who this was. The loaves themselves were certainly around before the Victorian era, centuries earlier in fact. They were made from courser grains than today and went by the name of a Brunswick loaf. So it seems all that occurred was a name change.

The good thing about baking these loaves is that you need no tin and consequently you achieve a good crust all over the surface. The recipe below is based on one from Elizabeth David and I haven’t provided massive detail on the making of the dough as I have already done that in the recipe for baking a basic loaf, so if you are new to bread-making, it might be worth having a little of that post first (you’ll find it here).

Also, this method asks you to put the loaf in a cold oven and then timing the bake from the time it gets to temperature, this way you get an extra-fluffy loaf. There is a little oil or butter to add if you like too; fat helps the bread keep fresh an extra day.


If you like the blogs and podcast I produce, please consider treating me to a virtual coffee or pint, or even a £3 monthly subscription: follow this post for more information.


Ingredients

up to 15 g fresh yeast or 8 g easy-bake yeast (see method)

400 g strong white flour (or a mix of up to 50% other flour(s) if you like)

10 g salt

25 g softened butter or olive oil (optional)

250 g blood-heat water

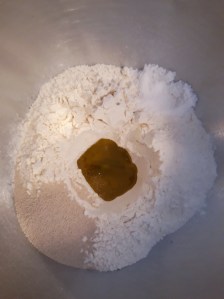
If using fresh yeast, cream it in a little of the warm water, adding a pinch of sugar and leave about 10 or 15 minutes until it is alive and foaming. Put the flour in a bowl, make a well in the centre and tip the yeast in along with the remainder of the water and the oil or butter.

If using dried yeast, make a well in the flour adding the salt to one side of the bowl and the yeast on the other side. Pour the warm water into the well along with the butter or oil.

Mix together with a wooden spoon and then bring the dough together with your hands. Alternatively, you can use the dough hook on a mixer to bring it together. Knead well until the dough becomes tight and springy, around 5 minutes in a mixer, or 10 or so minutes if kneading by hand. It will be sticky, but persevere, sprinkle a little flour or a smear a little olive oil on your work surface if you like. Bundle the dough into a tight ball and place in an oiled bowl and cover to allow it to double in volume in a warm place.

Knock the dough back lightly and give it a brief knead. If you want, give it another rising.

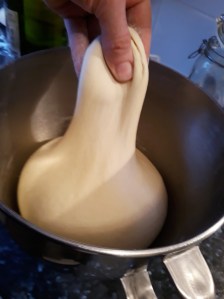
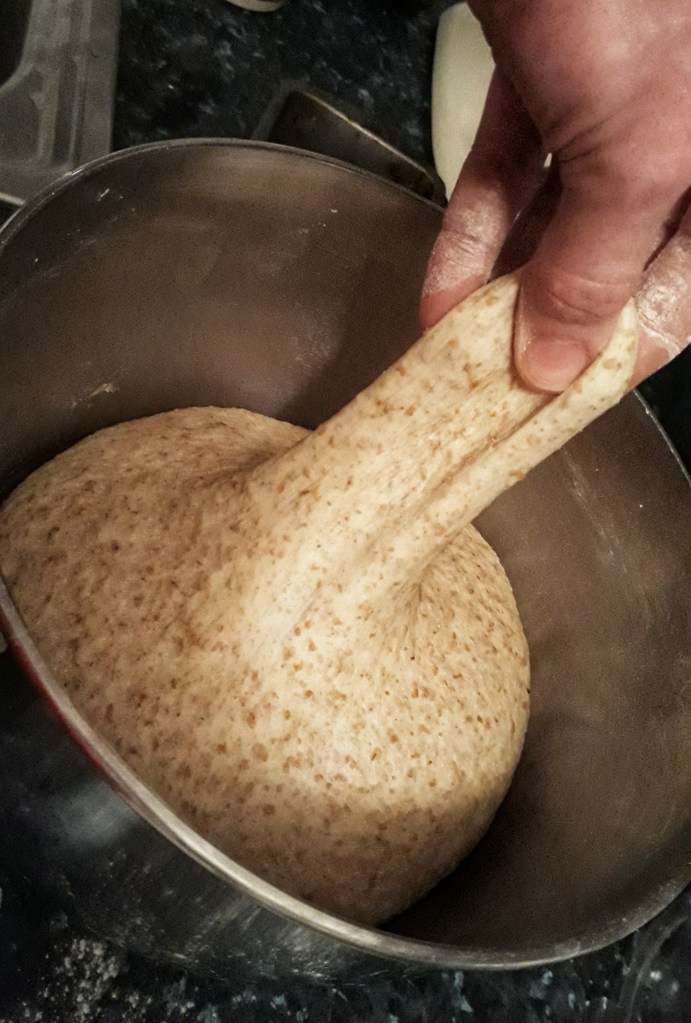
The super-stretchy dough after its first proof

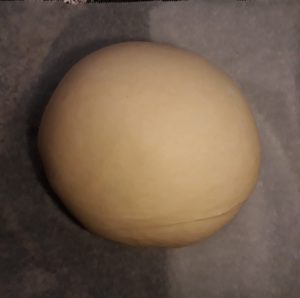
On a lightly-floured work surface, make the cob shape by forming a ball with the dough by tucking your hands under it, tightening the dough. If you twist the ball of dough slightly as you do this, it will be extra tight.

Place the dough on a floured baking tray and cover with a large plastic bag or large bowl or pot.

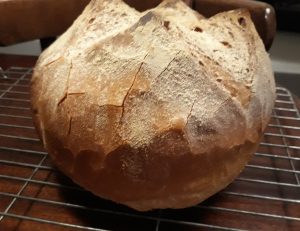
Slash the top of the loaf with a sharp serrated knife to make a cross shape and place in a cold oven. Set the oven to 220°C and once the oven has got up to temperature, bake for 15 minutes. Turn the temperature down to 200°C and bake for a further 15 – 20 minutes, until brown and crusty. Check the loaf is cooked by knocking its underside and listening for a hollow sound. Cool on a rack and listen carefully for the sound of the crusts cracking!

A close-up of the cracking crust

29 Comments

Filed under baking, bread, food, history, Nineteenth Century, Recipes, Teatime, The Victorians, Uncategorized

Pancake Day

Happy Shrovetide!

Today is Shrove Tuesday, the day before the 40 day long fast-a-thon that is Lent, so we best have a big-old festival, no?

No.

Where do you think this is? France? America? This is Britain, and whilst the rest of the Christian world is dancing, drinking, feasting and parading, we do not bow to such vulgarities, instead we have some pancakes and a nice cup of tea.

I jest of course; though between you and me, I would happily swap Mardi Gras for Pancake Day any day.

In Britain and Ireland, we make and eat pancakes before Lent because it is a very good way of using up main staple ingredients: flour, fat, eggs and sugar before the onset of Lent. By pancakes, we typically mean crepe-style pancakes, but the UK has a wide variety of different pancakes which are all delicious. I suppose you could add the griddle/girdle cakes to the list too as they typically use the same ingredients, but they are a little hit-and-miss, in my opinion.

These days, of course, we don’t really fast for the run up to Easter, but I do like to follow traditions, at least when it comes to eating food (I happily ignore the abstinence bits). I remember as a child, my family always had pancakes for tea on Shrove Tuesday and I don’t think we ate them any other day, I remember thinking you weren’t allowed to eat them unless it was Pancake Day. I have made up for this as an adult, especially now I am living in America.

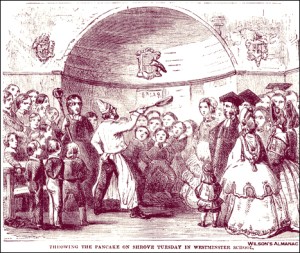
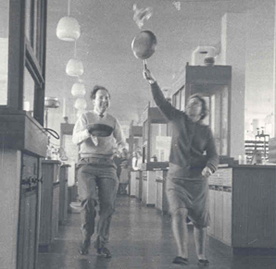
It is traditional to take part in a pancake race on Pancake Day, which involves running a course whilst flipping pancakes. I have very hazy memories of doing this when I was little, but I don’t think that I have seen nor heard anything about pancake racing in the last 20 years, maybe more. It’s a shame that these things are dying out, I know many think it’s a little naff or twee, but I love stuff like that. It enriches life. Next year I shall hold a pancake race I think.

Pancake racing in the chemistry lab of

Westfield College, London, 1963

Shrove Tuesday is really the final day of a two-day period known as Shrovetide which was part of an unofficial festival called Carnival that ran from Epiphany. It was essentially a period of time for a lot of gluttony and frivolity in order to prepare for the nightmarish 40 days of misery beginning on Ash Wednesday.


If you like the blogs and podcast I produce, please consider treating me to a virtual coffee or pint, or even a £3 monthly subscription: follow this link for more information.


Welsh Light Cakes

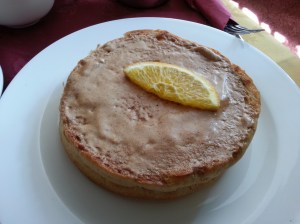
I love all types of pancakes, but the best ones come from Wales. This recipe from Jane Grigson for Welsh light cakes is excellent; they are made with soured cream, which gives them a wonderful tang. I have never found a pancake recipe to beat it, so I urge you to give it a go. If you make these with British soured cream, the resulting pancake batter is thin, giving them a frothy frilly texture. If you make them with American soured cream, the batter is much thicker, making them fluffy. Either way results in deliciousness.

Ingredients:

6 rounded tbsp. flour

2 rounded tbsp. sugar

3 tbsp. soured cream

a pinch of salt

3 eggs

½ tsp. bicarbonate of soda

1 rounded tbsp. cream of tartar

4 tbsp. water

¼ pint buttermilk or milk

fat or oil

butter

golden syrup

Beat together the flour, sugar, cream, salt and eggs. Next, mix together the bicarbonate and cream of tartar with the water and as it froths, tip it into the batter and stir it in. Add the milk or buttermilk to produce the desired consistency. Less for thick and fluffy, more for thin and lacy.

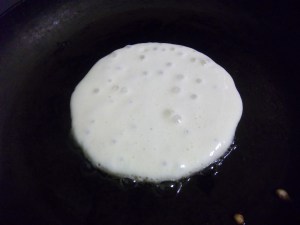
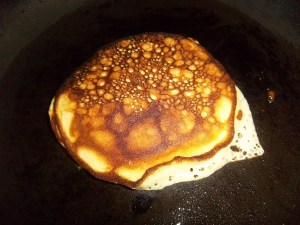
Heat the fat or oil on a suitable frying pan, swirl it around so the pan is coated and pour out any excess. Add a ladelful of batter and fry until golden brown, then carefully, quickly and confidently flip the pancake and cook the other side.

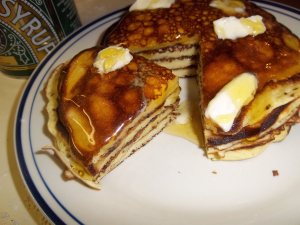
Stack the pancakes on top of one another and keep them warm in the oven, adding a pat or two of butter to each one.

Cut the stack into quarters and eat with golden syrup and more butter if you like.

8 Comments

Filed under baking, Festivals, food, General, history, Puddings, Teatime, Uncategorized

How to Make an Everyday Loaf

All that bread wants is time and warmth.”

After writing a post on bread a while ago, I thought I should follow it up with some bread recipes. I was going to go in a chronological order and find the earliest recipe for bread I could, but then I thought against that idea; a recipe for a delicious, but basic loaf is what we need to start with.

I try to bake all my own bread these days, but admittedly, I don’t eat a large amount of it, making a loaf every couple of weeks. However, I do believe that baking your own bread several times a week is possible and not the huge pain the arse you might expect. For many years, I tried to bake bread and it always had good flavour, but it was always a little tough or stodgy. I was rather disappointed thinking one had to practise, ptractise, practise to get the knack. It turns out that I was doing everything correctly, the only ingredient I was missing out was time

…and this is the problem with today’s factory-made bread; it is mass produced to the extreme, hurredly leavened, containing additives that preserve, emulsify and rise. The slices are always far too light and fluffy – “flabby” is the word I think Jane Grigson used. Of course, these days there are bakery sections in our supermarkets, but Elizabeth David was very suspect of them even in 1977.

Now don’t be thinking me a big old snob: I actually like some factory bread, and much instore bakery bread is very nice and crusty, but having realised I can make bread that is better tasting and so much cheaper, I can’t go back. Admittedly, it doesn’t last as long in the bread bin, but then bread shouldn’t!

Here is the recipe I use for a basic loaf – it requires little elbow grease, unless you have a food mixer with a dough hook. The best thing is that it should be made the evening before you actually want to eat it, so there’s no getting up at the crack of dawn. It contains only four ingredients too: flour, water, salt and yeast. There is the option of adding a little fat to keep it fresh and soft an extra day. You can enrich the bread by swapping some or all of the water for milk, but I think there’s no need. There are so many variations on the theme and as I discover them and try to perfect them, I shall add them to the blog.

It is very important to use the appropriate amount of water. A cob loaf which just sits on a baking tray needs 60% water per volume, in other words 600 g of water for every 1000 g of flour, any more and you risk it spreading out as it proves and bakes. This loaf is going to be baked in a tin, so we can add a little more water – 62.5% for white bread flour. If you are using a mixture of wholegrain strong and white strong, you will need a little more water, around 65% water.


If you like the blogs and podcast I produce, please consider treating me to a virtual coffee or pint, or even a £3 monthly subscription: follow this link for more information.


You will also need a 2 pound, or 900 g loaf tin.

Ingredients:

400 g strong white bread flour, or a mixture of at least half white, and a wholegrain bread flour

8 g salt

4 to 5 g grams of dried instant yeast

250 – 260 g warm water

25 g oil or very soft butter

Mix the flour(s), salt and yeast in a bowl, make a well and add the oil or fat if using, then pour on the water. Mix together using your hand or a wooden spoon. If you have a mixer with a dough hook, just mix on a slow speed until it comes together to form a dough.

Important note no. 1: try to make the dough more on the wet side, rather than the dry; just keep your hands well-floured so you can handle the dough. Work it for a few minutes whilst in the bowl. Of course, if you have a mixer with a dough hook, you can simply use that on a slow to moderate speed to mix and briefly knead it.

You’ll have a sticky dough that is hard to work with, but don’t worry. It is now time to knead the bread. You can sprinkle a little flour or spread a little oil on the work surface to help if you like, but really you don’t need anything. Use whichever you might prefer. I tend to go for a light sprinkle at the beginning of the kneading process.

To knead by hand, push out the dough with the heel of your hand, and then roll it up, give it a quarter turn and repeat. The dough will quickly start to become more stretchy and smooth, and soon you’ll find you don’t need any oil or flour to knead it.

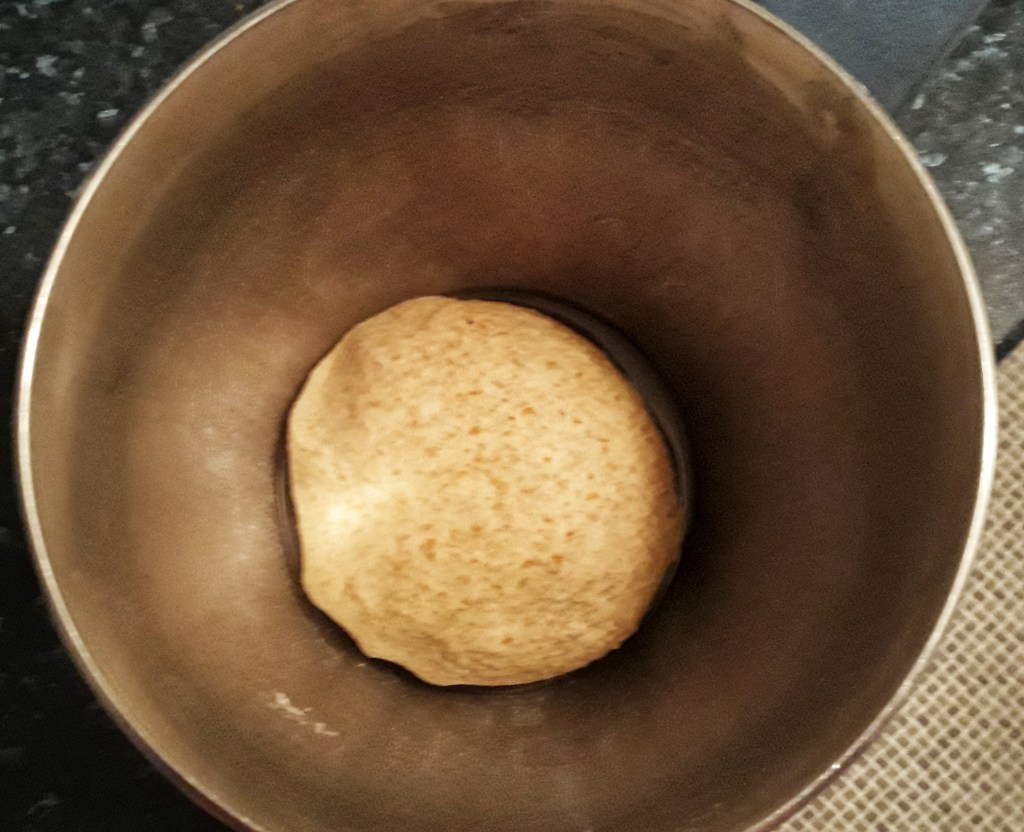
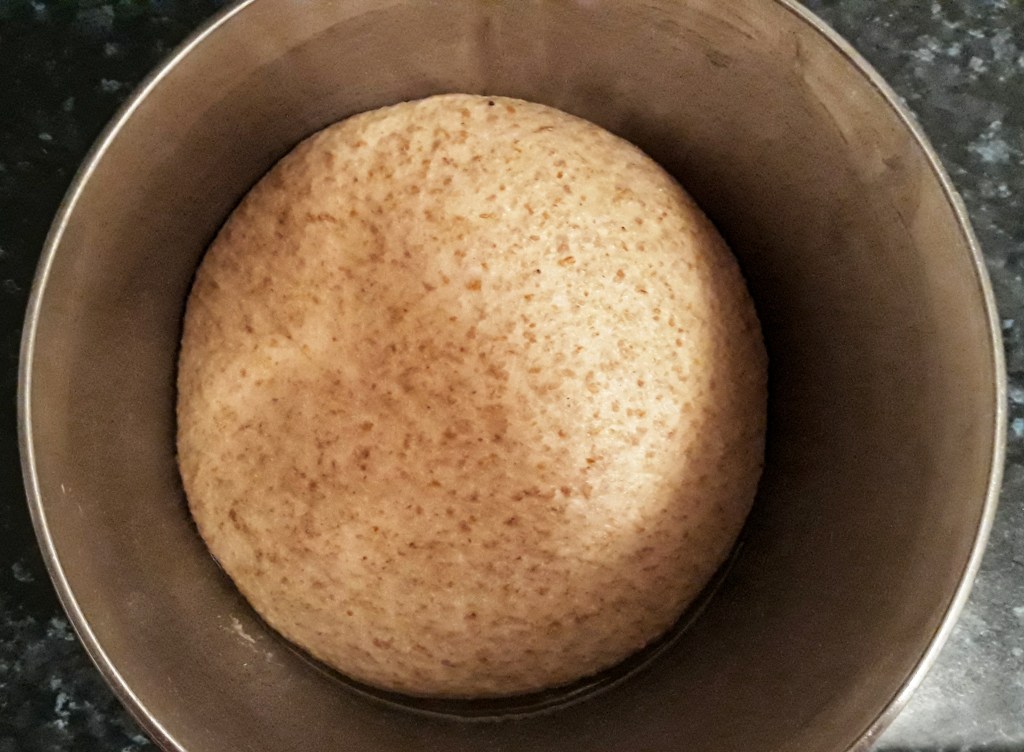
Before rising…
….after!

After around 10 minutes, you’ll feel the dough suddenly get more difficult to knead; it’s a bit like when you chew gum too long and it suddenly becomes more effort to chew it. 

Using a dough hook, turn up the speed a couple of notches and mix around 6 minutes. Keep guard though, your mixer may tend to go for a dance or walk over your worktop and off the edge!

Form the dough into a tight ball by tucking it under itself. Pop it into a grease bowl, cover with a plastic bag or damp tea towel and leave it to rise in a warm place.

Important note no. 2: Do not leave it near a radiator or anything like that – unequal heat will not do the job – you need ambient warmth. I let my dough rise in my airing cupboard. If you don’t have a warm place, do not worry for the quickly-metabolising yeast will begin to generate its own heat.

The stretchy dough after its first prove

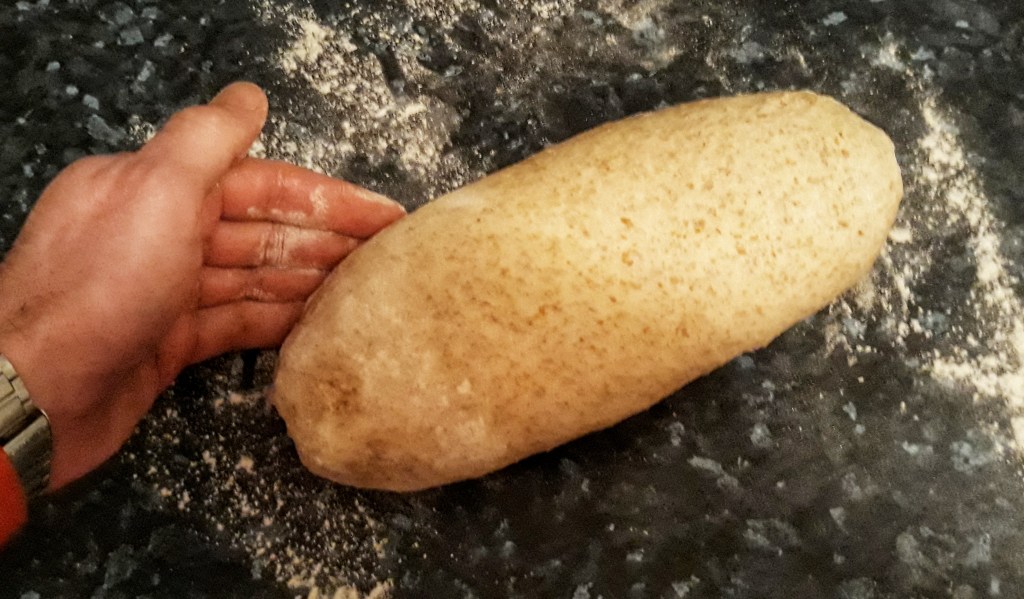
When it has doubled in size, knock it back, i.e. press the air out with your fingertips – a very satisfying thing to do. It should be squidgy and much more elastic. Make a ball with the dough by pushing the edges into the centre. Once it is round, stretch the circle into an oval shape, long side toward you.

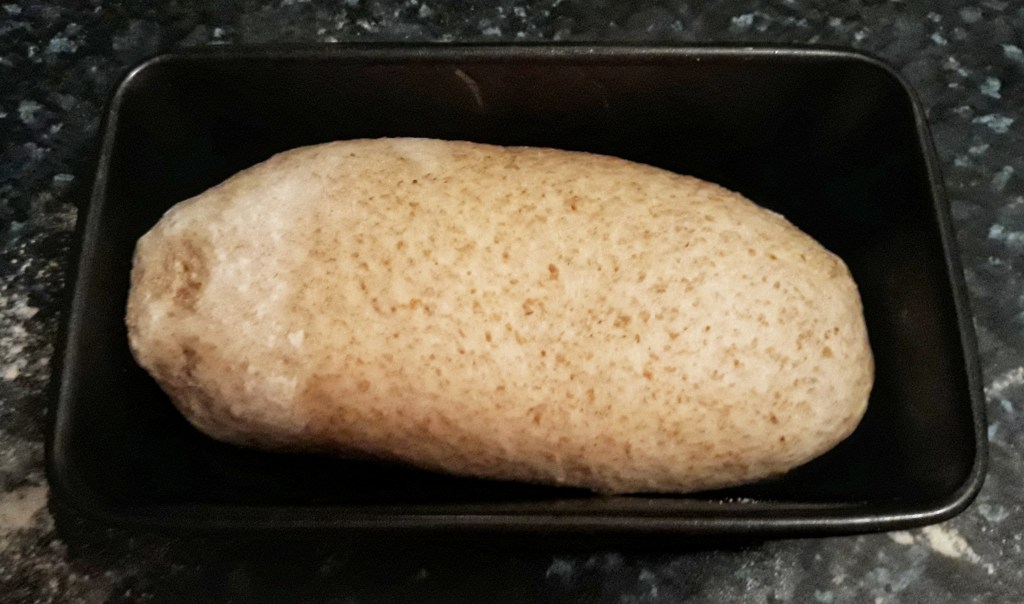
Now roll the dough towards you from the far end, tucking in everything tight all around, like tucking in your bed. This ensures that the seam is at the bottom of the bread and so that the top is nice and tight.

Cover with a plastic bag and allow to prove again, until doubled in size – it should have risen above the rim of the tin and should spring back when pushed by your finger.

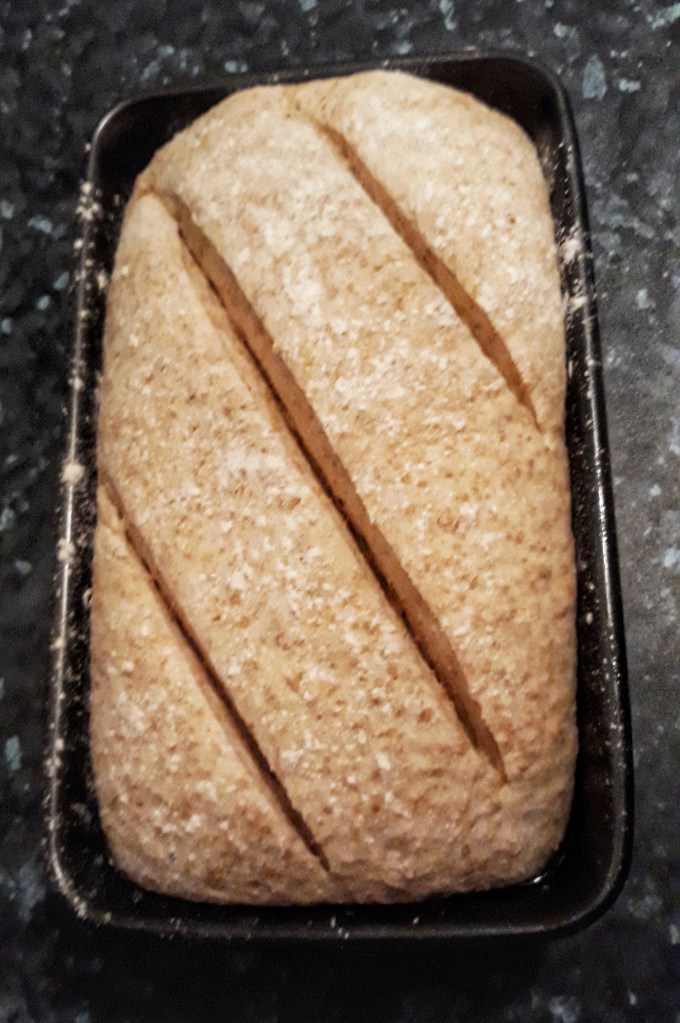
Sprinkle with flour and make some cuts on the crust so that it can unfurl as it bakes – I go for diagonal slashes. It’s important to do it quite quickly and in one direction. A sharp serrated knife like a bread knife is best for this.
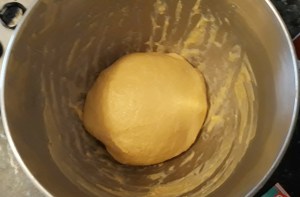
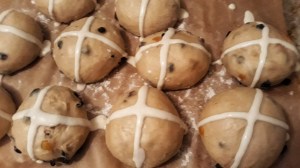
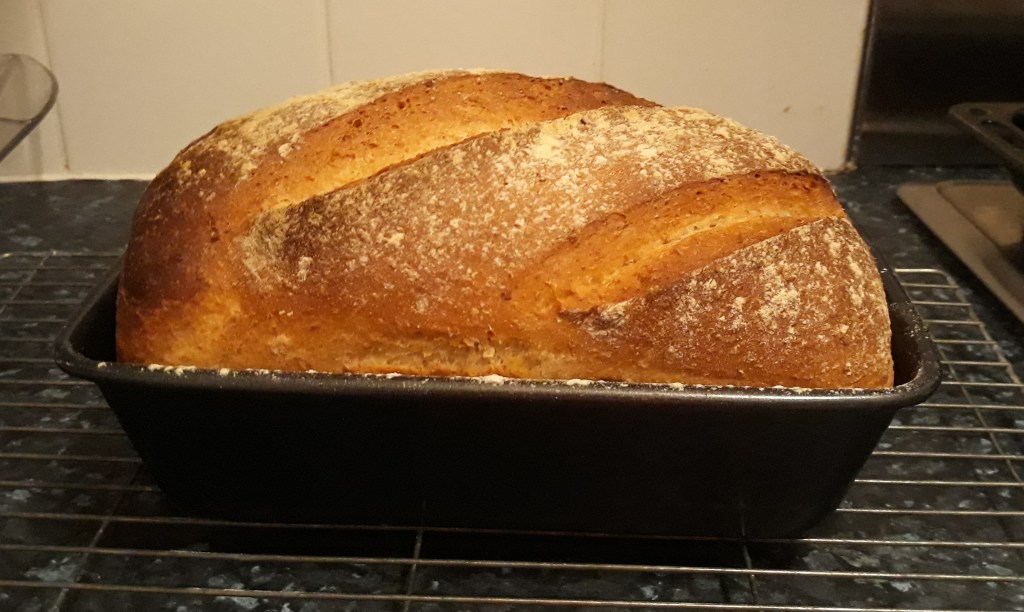
There are many methods for baking your bread, and some require a lot of messing around with trays of hot water and crazily-high temperatures. I do something much less dramatic: I put the bread in a cold oven and then turn it on – you get some extra rise without faffing about altering temperatures and giving yourself steam burns. If you have to use a hot oven, spray the dough with water to stop it forming a crust too early.

Set the oven to 220-230⁰C and bake for 40 minutes. When ready, the loaf will sound hollow when knocked with a knuckle.

The seam you made can still be seen on the underside of the loaf

Important note no. 3: do not eat the bread when hot – try to resist! The still-hot steam can make it stodgy.

There it is – sorry it’s rather long, but hopefully it is a good guide to baking proper bread. If anyone has any extra tips, let me know…

16 Comments

Filed under baking, bread, food, Recipes, Teatime