I am very pleased to announce that I have a new book out next month. It’s called Knead to Know: A History of Baking, published by Icon Books and out in the shops on 12 September 2024.
Notice it’s A history, not THE history of baking. I’ve taken what I think are the most important parts, or thing I have found the most interesting with respect to the history of this huge sprawling subject. I’ve broken it up into five broad chapters: Griddlecakes & Pancakes; Biscuits & Cakes; Bread; Pies & Puddings; and Patisserie. Really, I could have written a whole chapter on each of these subjects!
It’s in a different format to my previous books in that the chapters are broken up into short pieces, the length of a blog post. This means that you can dip in and out of it like a coffee table book, or read it cover to cover.
It’s not a recipe book, but there are lots of baking tips and rules of thumb. Of course, recipes for many of the foods that crop up in the book you can find on this blog, and I’ll be adding more as the year goes on, so keep a look out.
It is available to preorder from your favourite bookseller.
There are several upcoming events: online and in-person talks, plus festival appearances, details of which can be found on the Upcoming Events tab of the blog.
Read more of this content when you subscribe today. A monthly subscription costs just £3 (about $3.80 USD). You get access to my premium blog content, my Easter eggs page (with hours of clips to listen to!) and my monthly newsletter.
I have to admit something: I have never made proper puff pastry. If a recipe calls for it, I buy some or make rough puff pastry instead, and I tell myself that I have neither the time nor the space to go ‘full-puff’. The truth, I think, is that I don’t have the inclination, otherwise I would have got around to it by now. Modern puff pastry is made by rolling out a rectangle of dough, then sitting atop it a square of butter, thoroughly beaten flat with a rolling pin. The dough is folded around the butter, the dough and butter are then rolled out, rotated 90 degrees, folded, then rested and chilled. This single ‘turn’ is repeated six more times to produce a laminated pastry dough containing 729 layers of butter.
Rough puff pastry, on the other hand, is not made with a single layer of folded butter, instead very cold diced or grated butter is used, a non-continuous layer of butter means that those great sheets of crispy pastry are not made, hence rough puff, or flaky, pastry. The process of making it is similar to puff, except there are fewer turns, though it still needs to be rested in the fridge between them. My method (see below) is much easier than this, however.
The differences and semantics break down if we hit the historical cookbooks because at one point all ‘puff pastes’ were what we would call ‘rough puff’ today. There are many stories and theories regarding who invented puff pastry and when, and they are either apocryphal or impossible to confirm. When it comes to British cookery books, the earliest example I can find is the late Tudor classic The Good Houswifes Jewel by Thomas Dawson (1596). Here, a dough made from flour, water, egg yolks and some rubbed-in butter, is rolled out, peppered with diced butter, folded and rolled. More butter is added after each turn. This basic method seems to remain the same for the next two-and-a-half centuries: Sarah Harrison (1751), Elizabeth Raffald (1769) and Eliza Acton (1845) all have puff pastry recipes just like it.[1] The first time I find a puff pastry recipe that uses a single layer of bashed-out butter is in Alexis Soyer’s classic A Shilling Cookery for the People (1855 edition).
Sarah Harrison’s 1751 recipe for Puff Paste: it would be considered rough puff today.
I admit that my search was not a comprehensive one, but I think it’s safe to say that in recipes older than c.1850 if puff pastry is asked for, what we should be making is a rough puff.
If you like the blogs and podcast I produce and would to start a £3 monthly subscription, or would like to treat me to virtual coffee or pint: follow this link for more information.Thank you.
Recipe
My recipe is based on a Jane Grigson’s for Quick, Foolproof Puff or Flaky Pastry, from her book English Food,[2] which is, in turn, adapted from a recipe by New York pastry chef Nicholas Malgieri. I’m not sure if it is foolproof, but it is by far the easiest method I know. The reason for this is that the cubes of very cold butter are mixed into the dough. As you roll and fold, you can see the cubes of butter eventually turn into large, flat discs within the dough. Very satisfying. Mixing the butter into the dough itself also means that the butter is evenly distributed and doesn’t end up leaching out of the sides.
I have given instructions to make this dough by hand, but you can use a machine. However, you must mix the ingredients very slowly and add liquid in a steady stream, so the lumps of butter don’t turn into breadcrumbs.
This type of rough puff pastry doesn’t need to be rested between rolling and folding unless it is very hot where you are, then you may need to pop it in the fridge for 15 minutes or so between turns.
This pastry only needs two ‘turns’ before it is ready for rolling and use, however, if you want a pastry that is just flaky, then do a third turn before rolling it out for use.
250 g strong white flour, plus extra for dusting
½ tsp salt
250 g very cold, unsalted butter, cut into 1 cm dice (approx.)
Juice of half a lemon
Water (see recipe)
Mix the flour and salt and add the butter, squashing the pieces between your thumb and forefinger, without rubbing them in or breaking them up.
Next, place a jug on a weighing scale add the juice from the lemon and then top up to a weight of 125 grams.
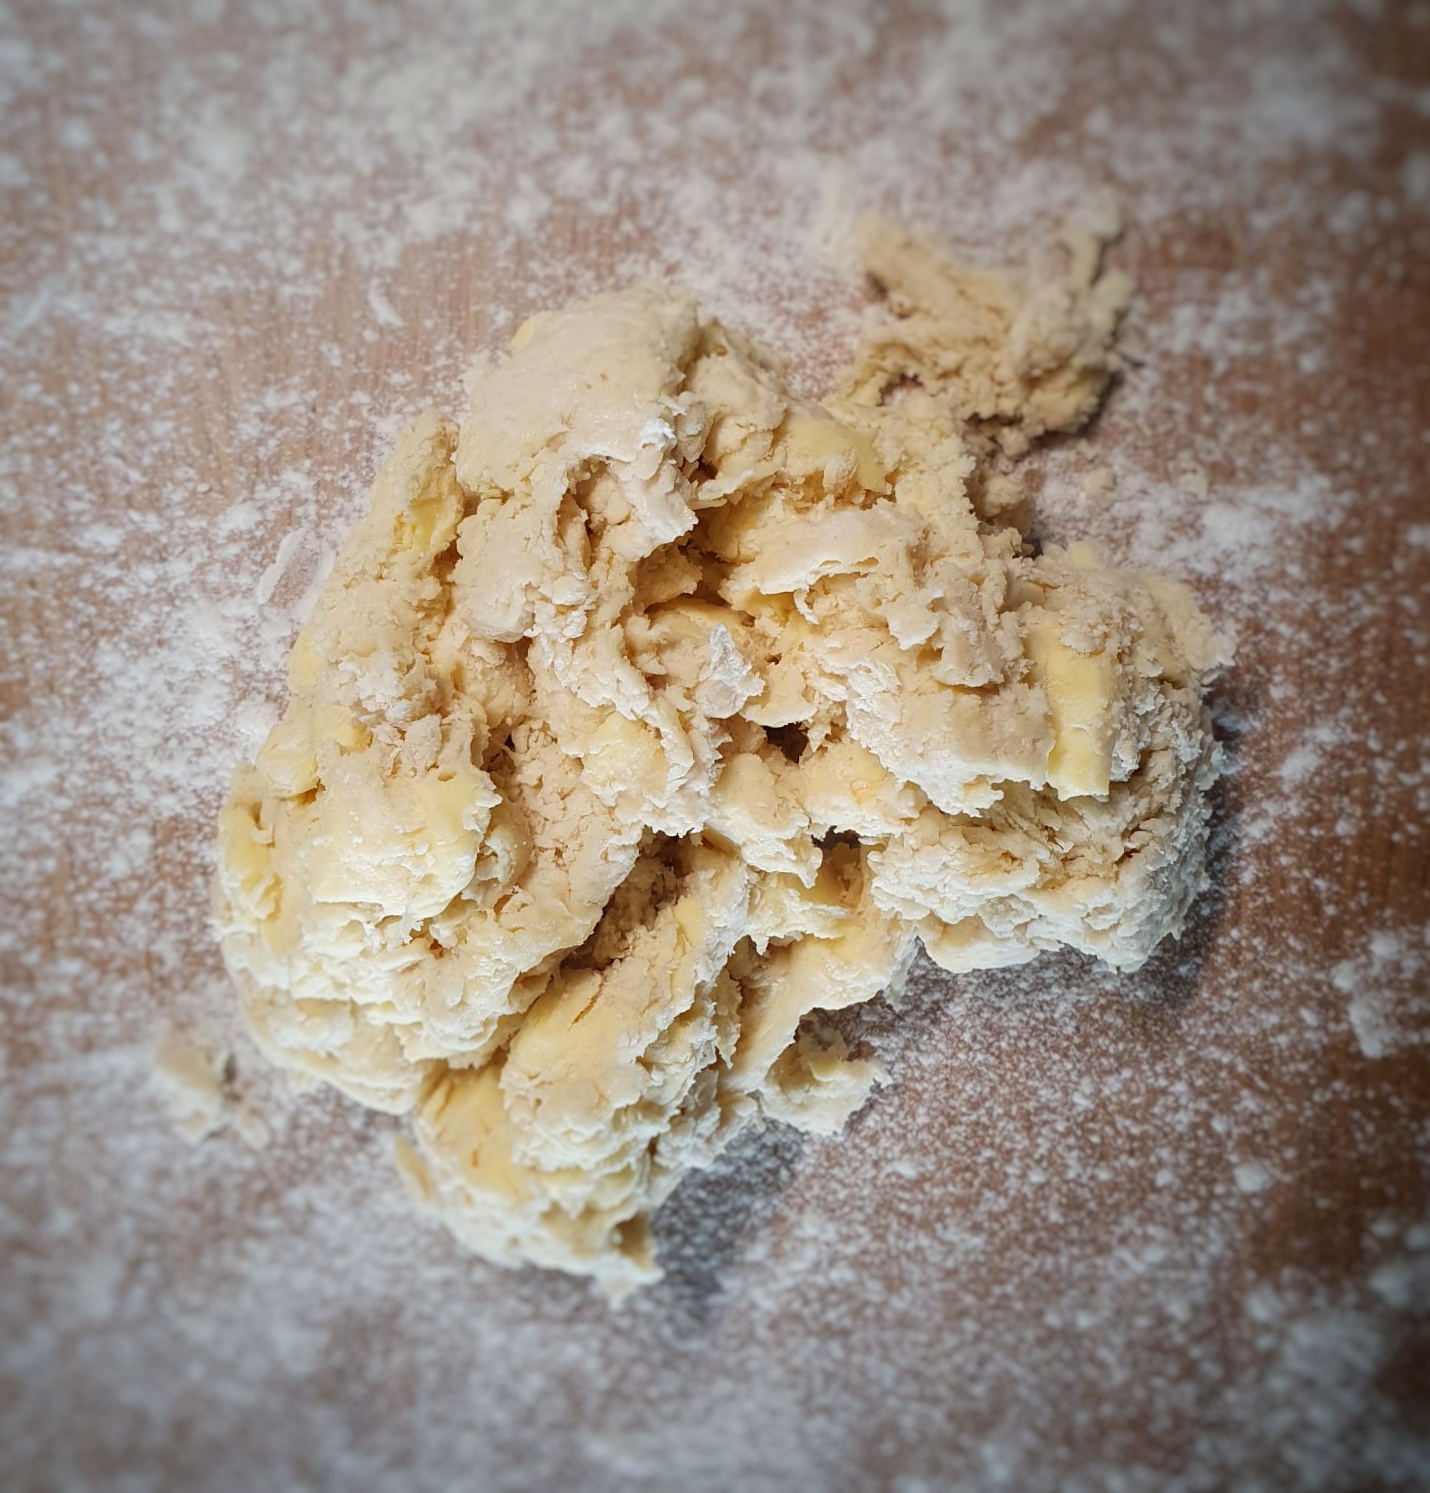
Stir in most of the liquid to form a ball of dough, using the remainder to pour on any dry-looking patches of flour.
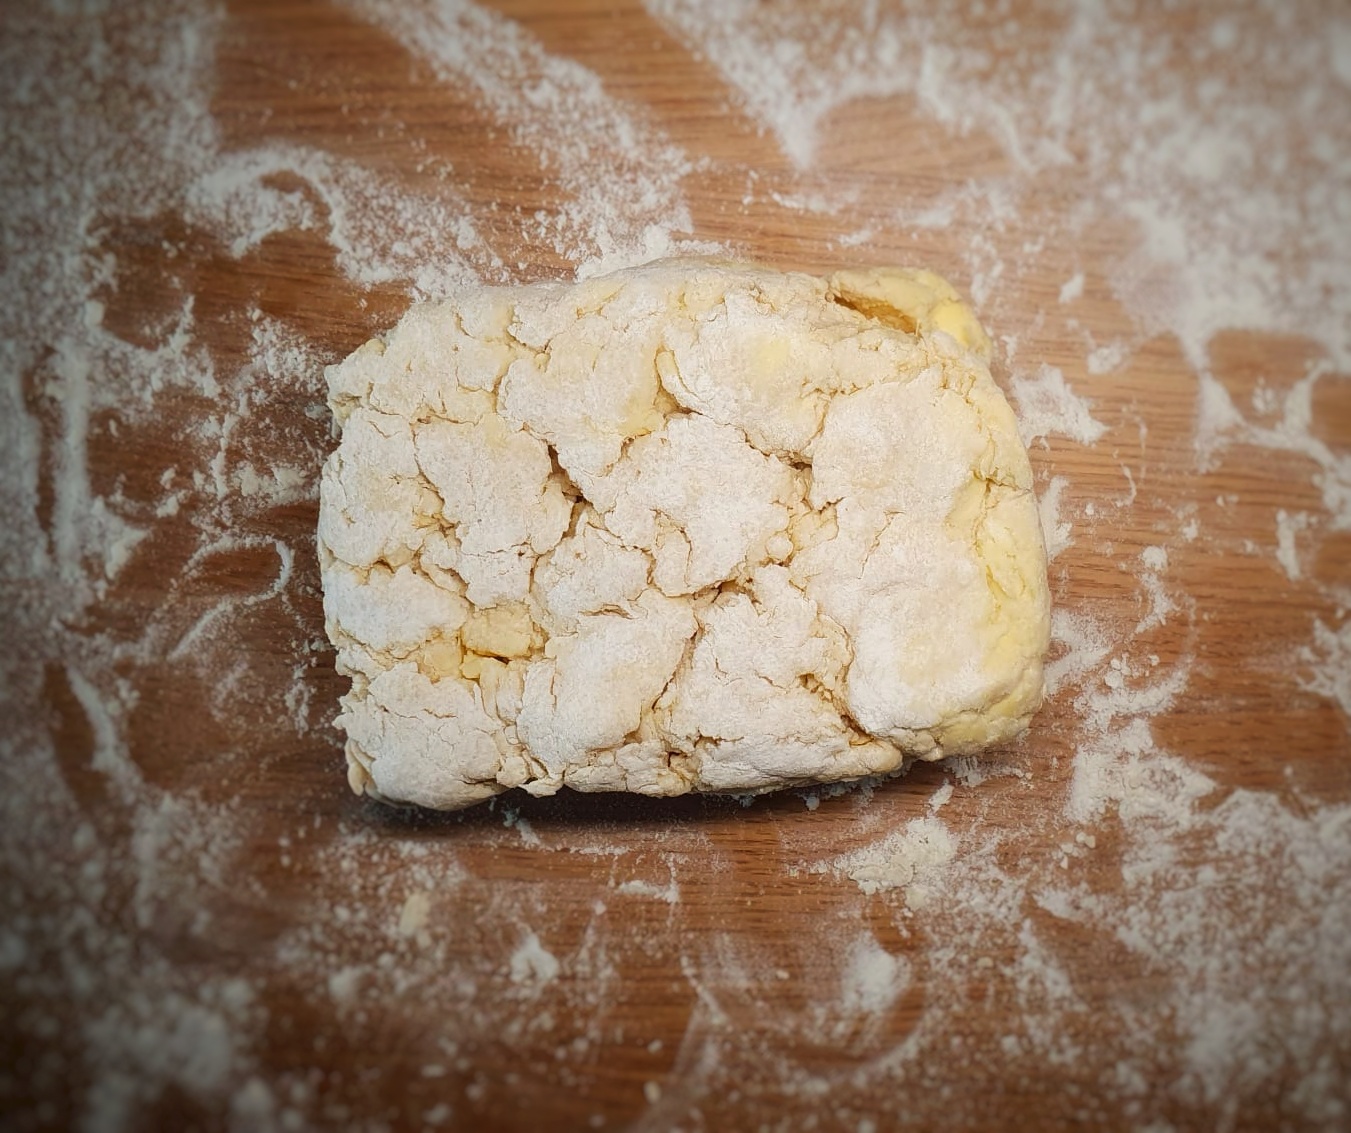
Bring the dough together into a single mass and place on a well-floured worktop. It will look a right mess, but do not worry, it will neaten up in the rolling and folding stage.
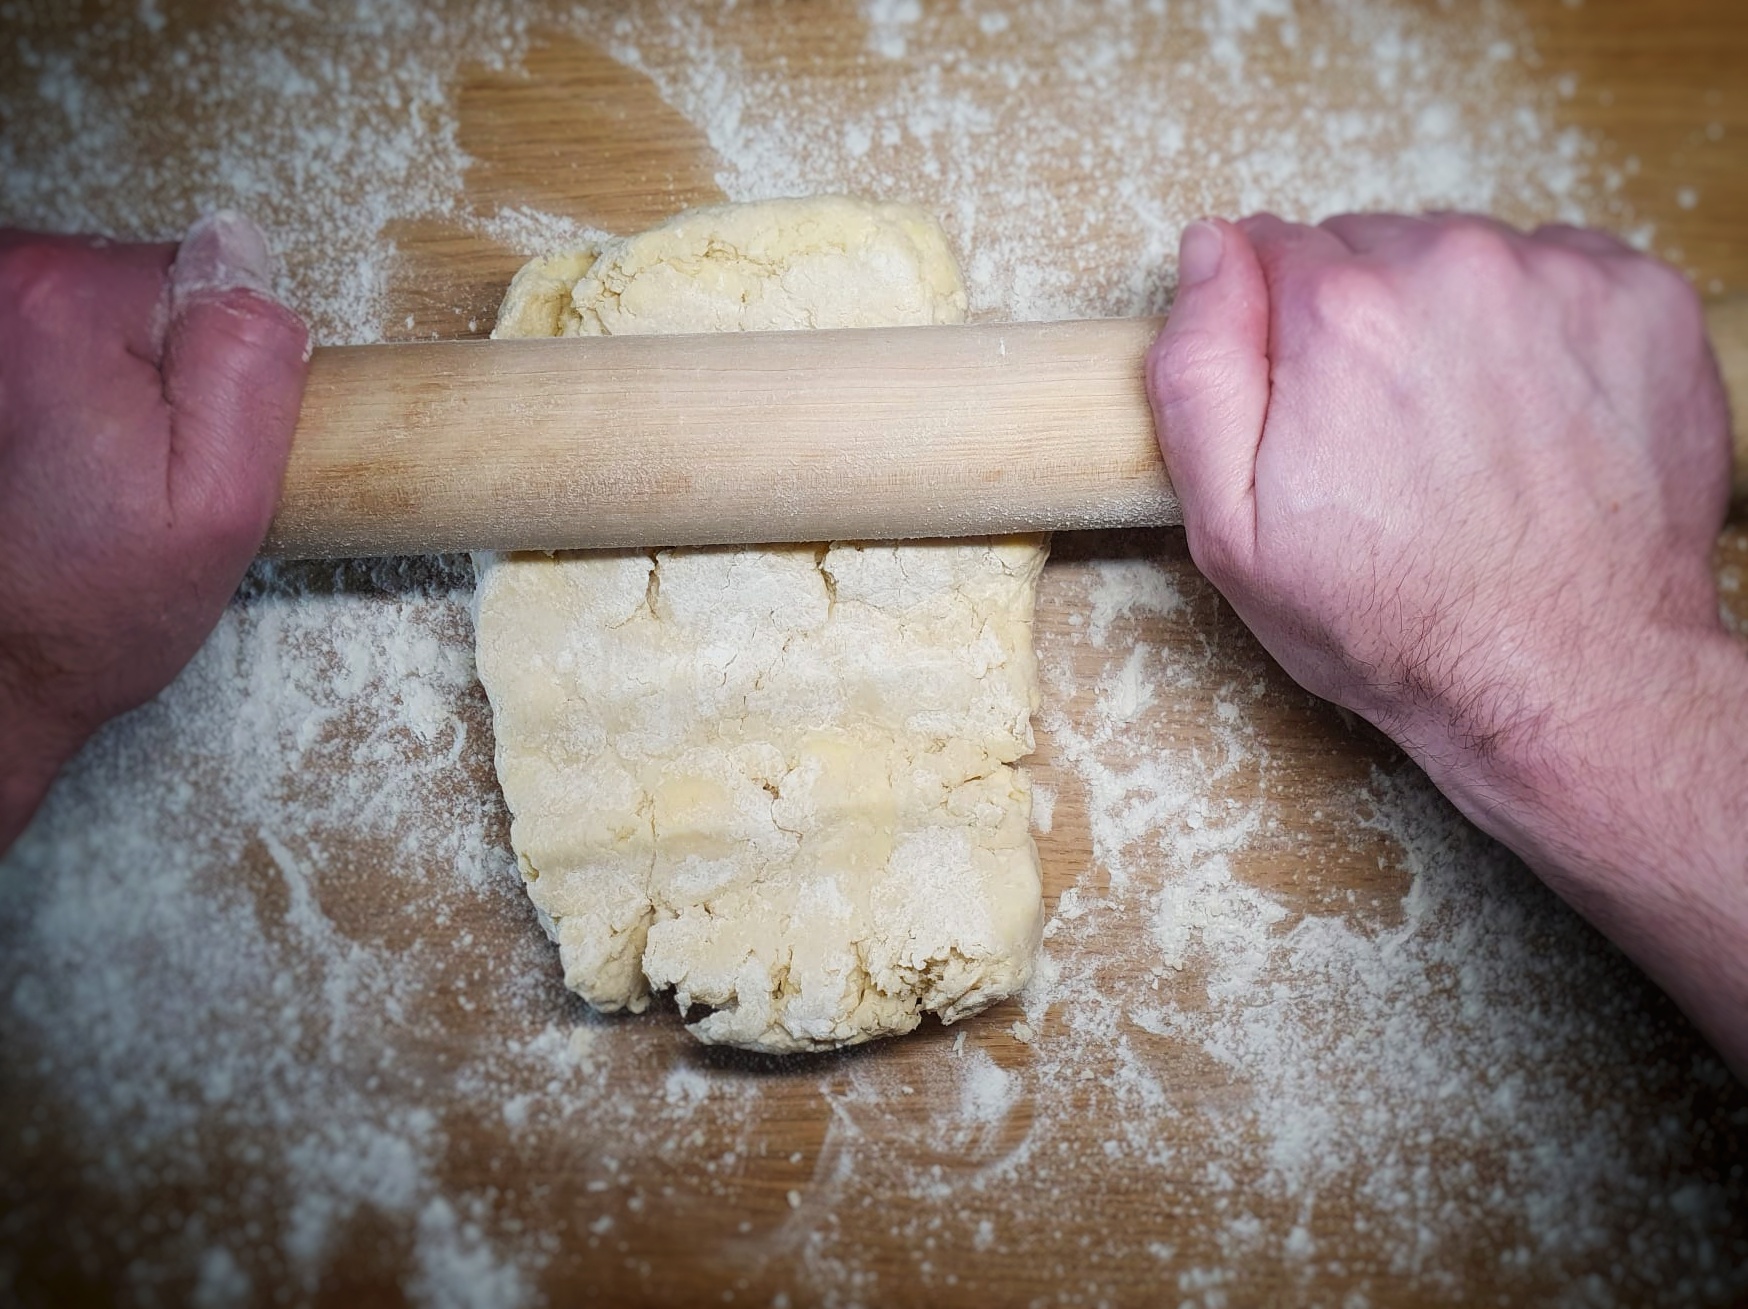
Shape it into an approximate rectangle, then use a rolling pin to roll it into a large rectangle around 30 cm wide and 20 cm deep. Ensure you keep your work surface well-floured because the dough is quite sticky at first.
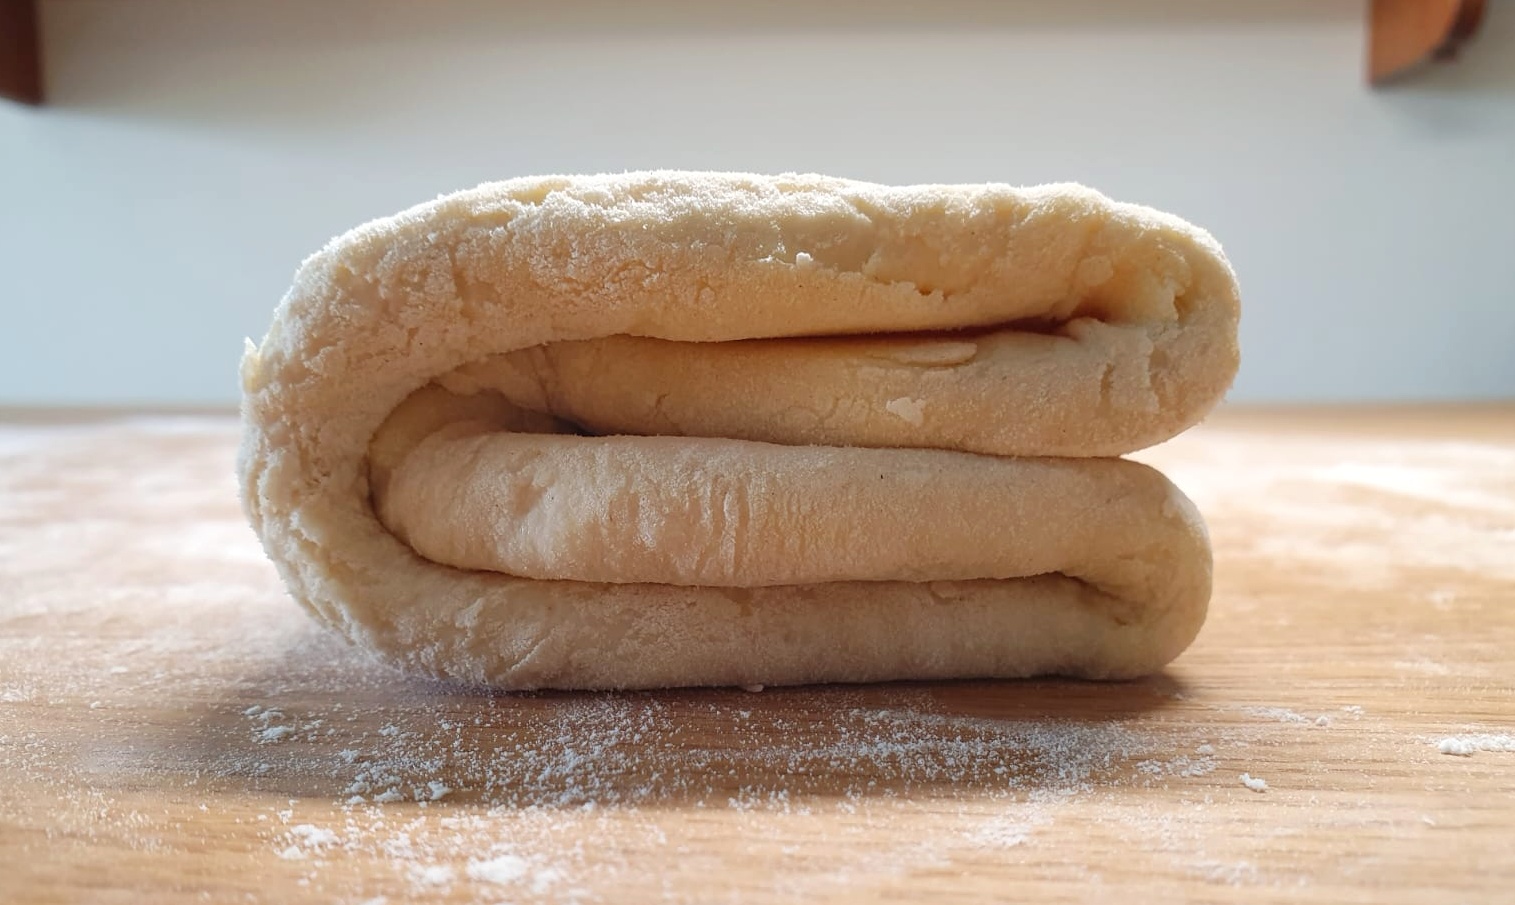
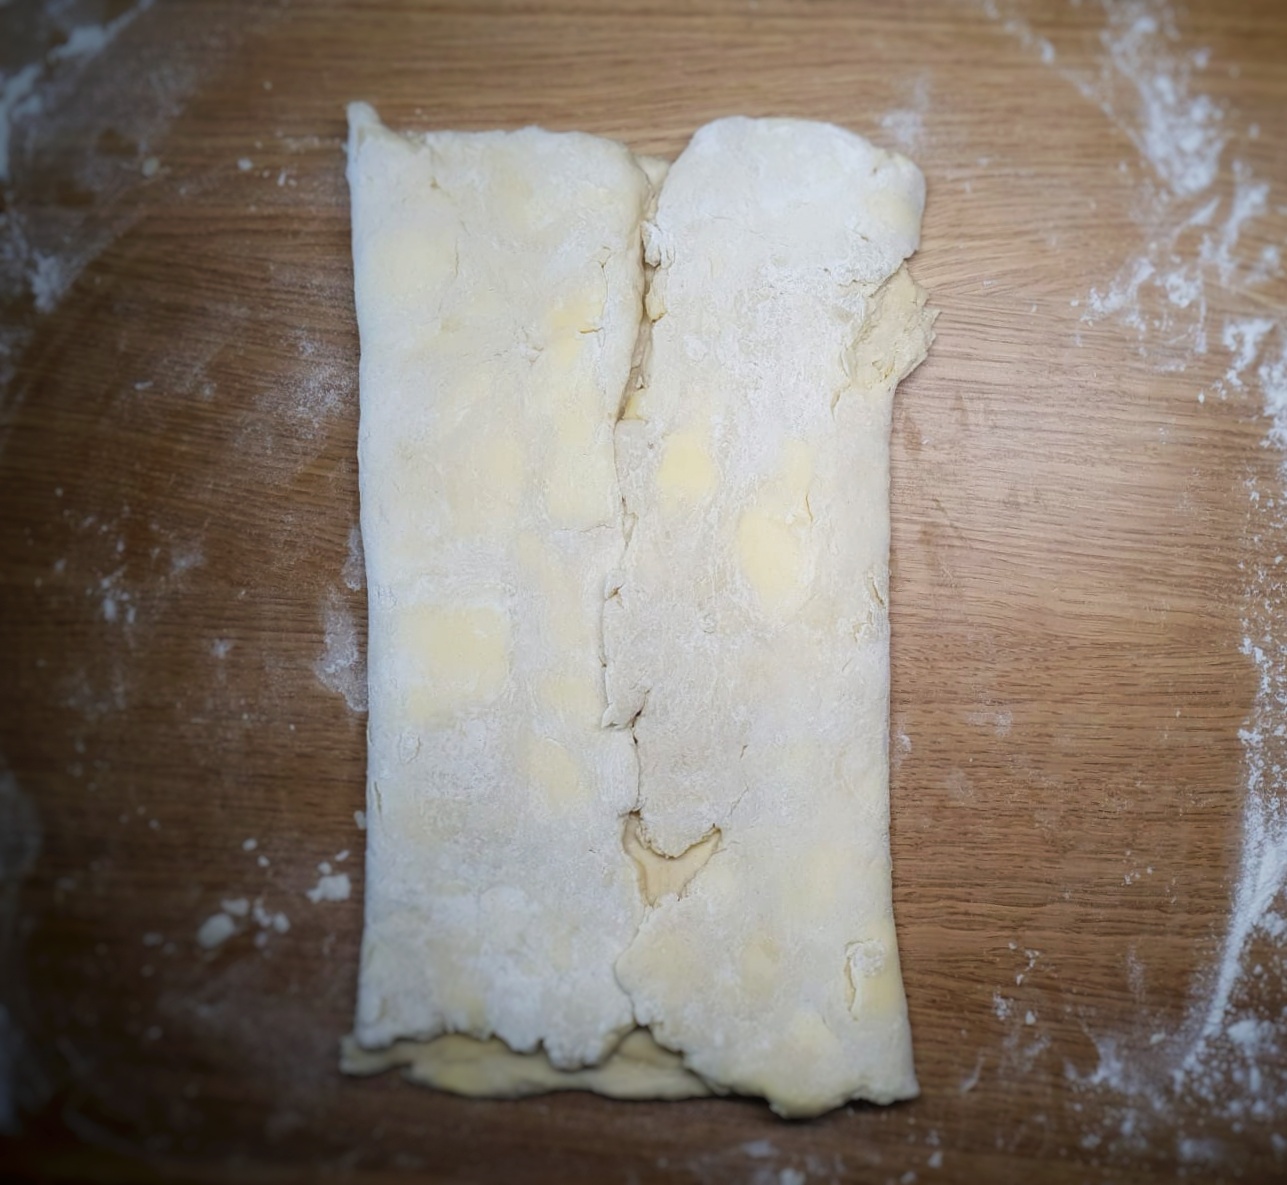
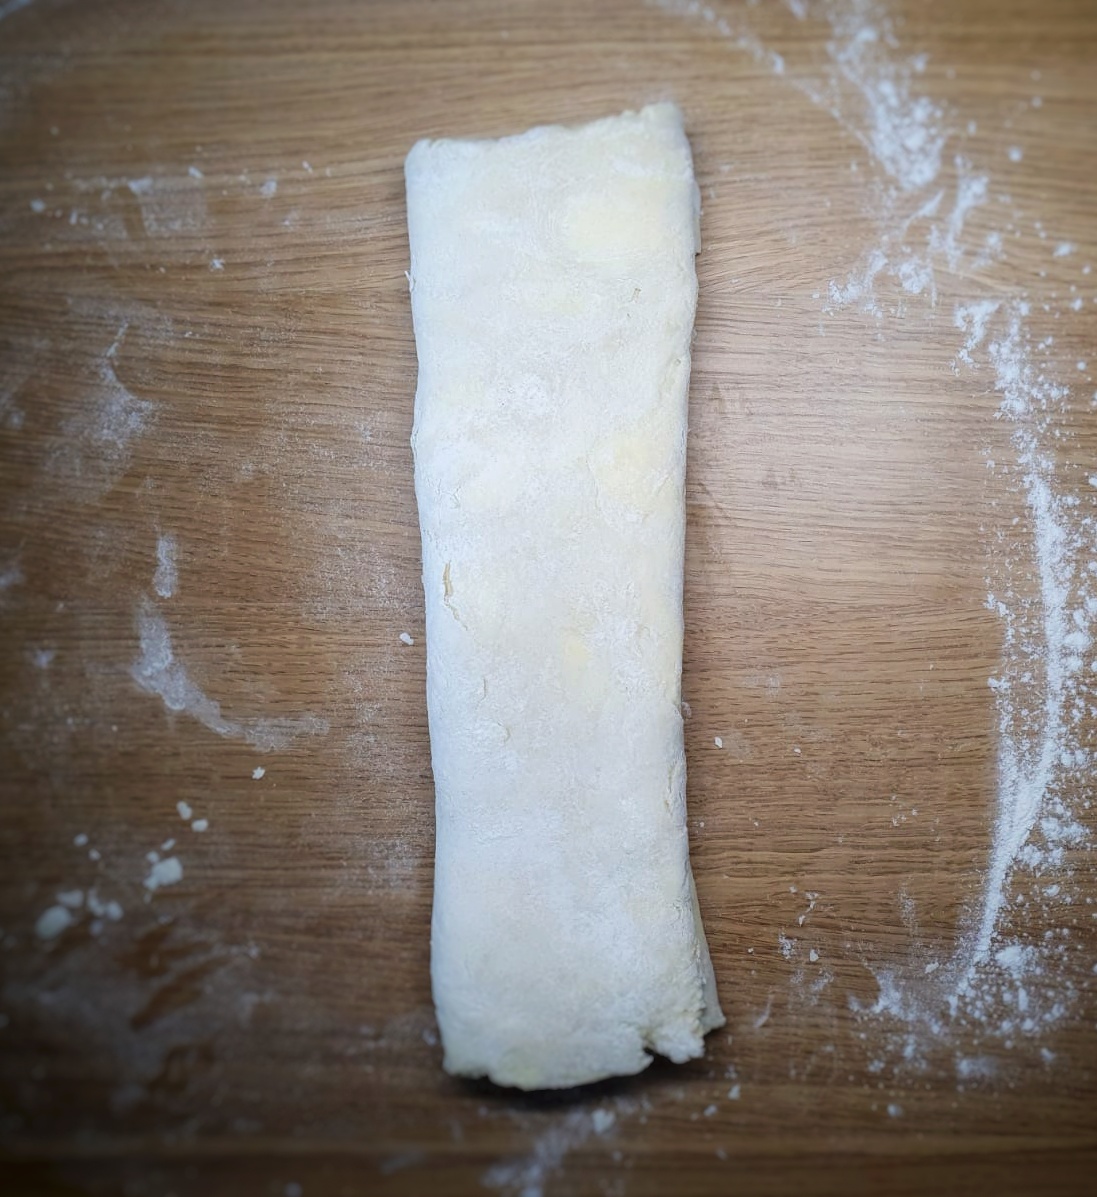
Now fold the sides into the centre of the rectangle and then fold it in half, so it looks a little like a book. Allow it to rest for 2 minutes.
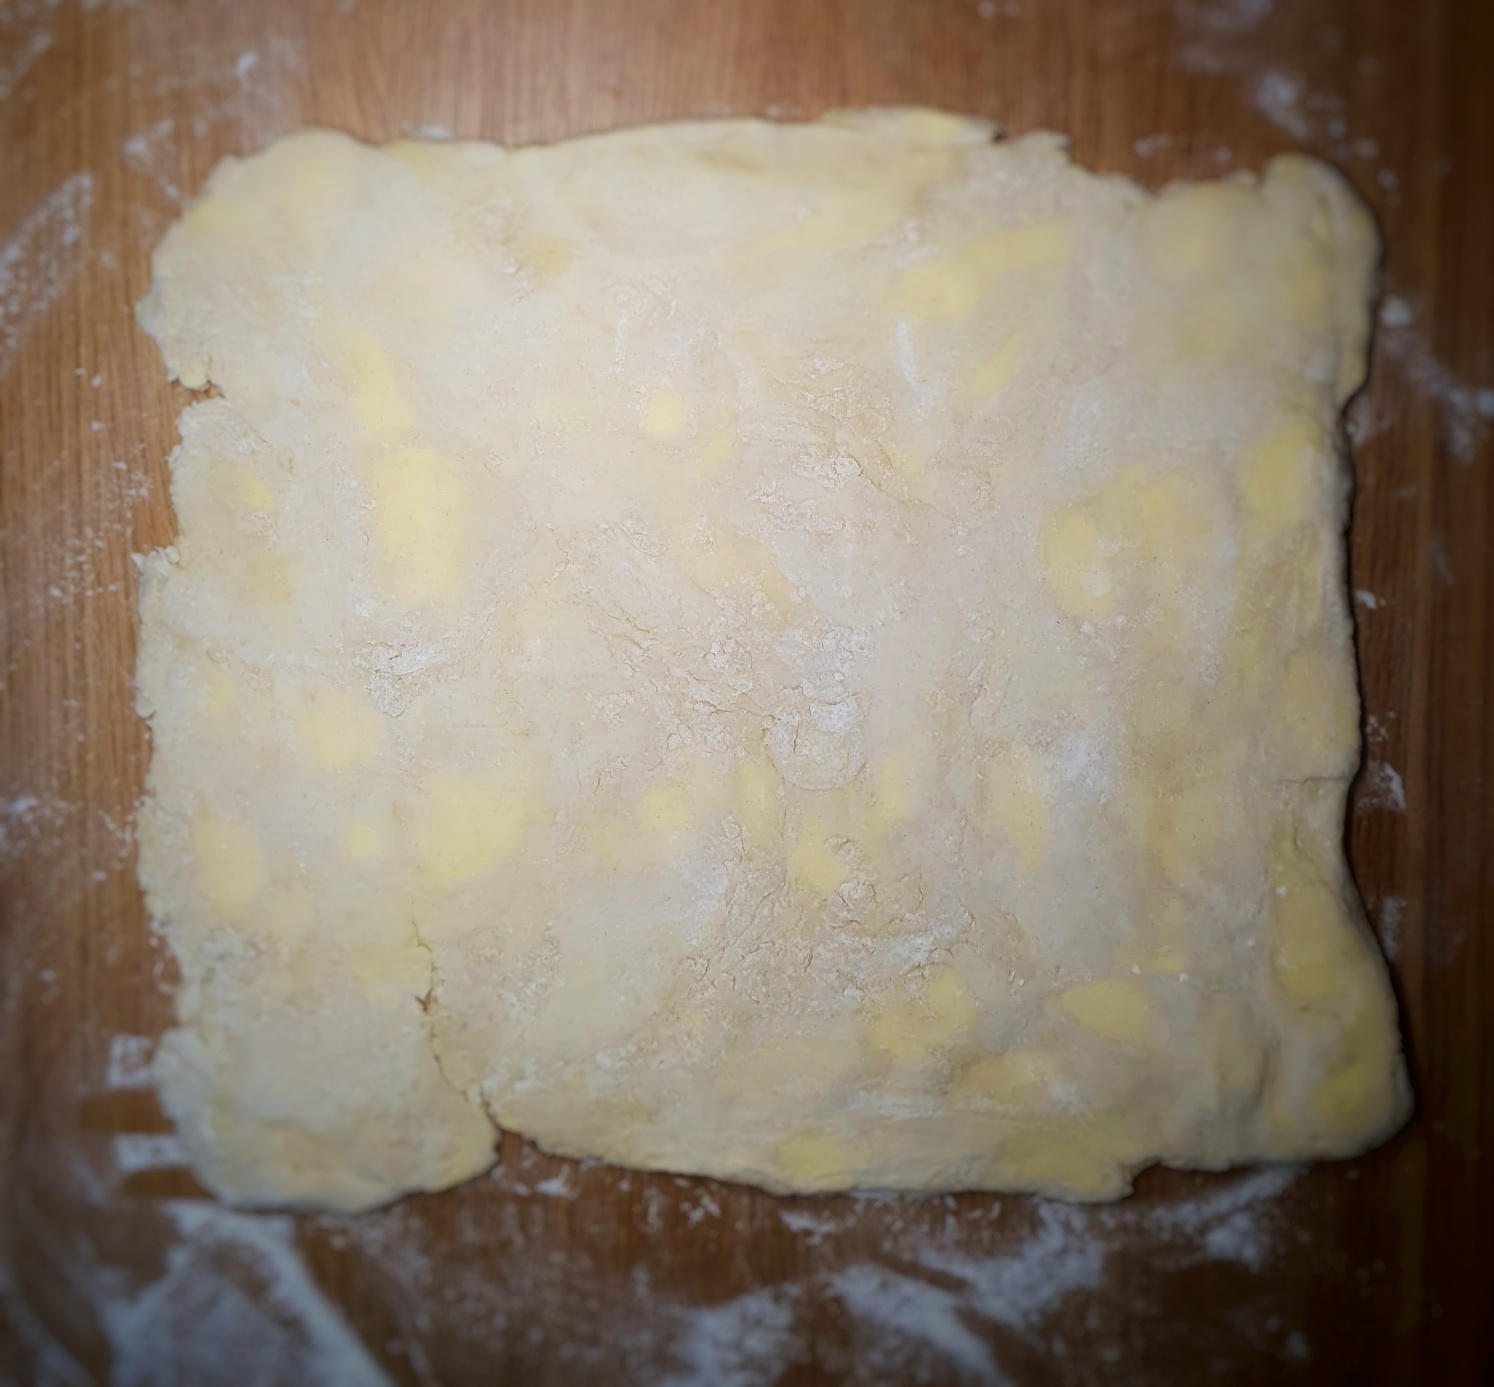
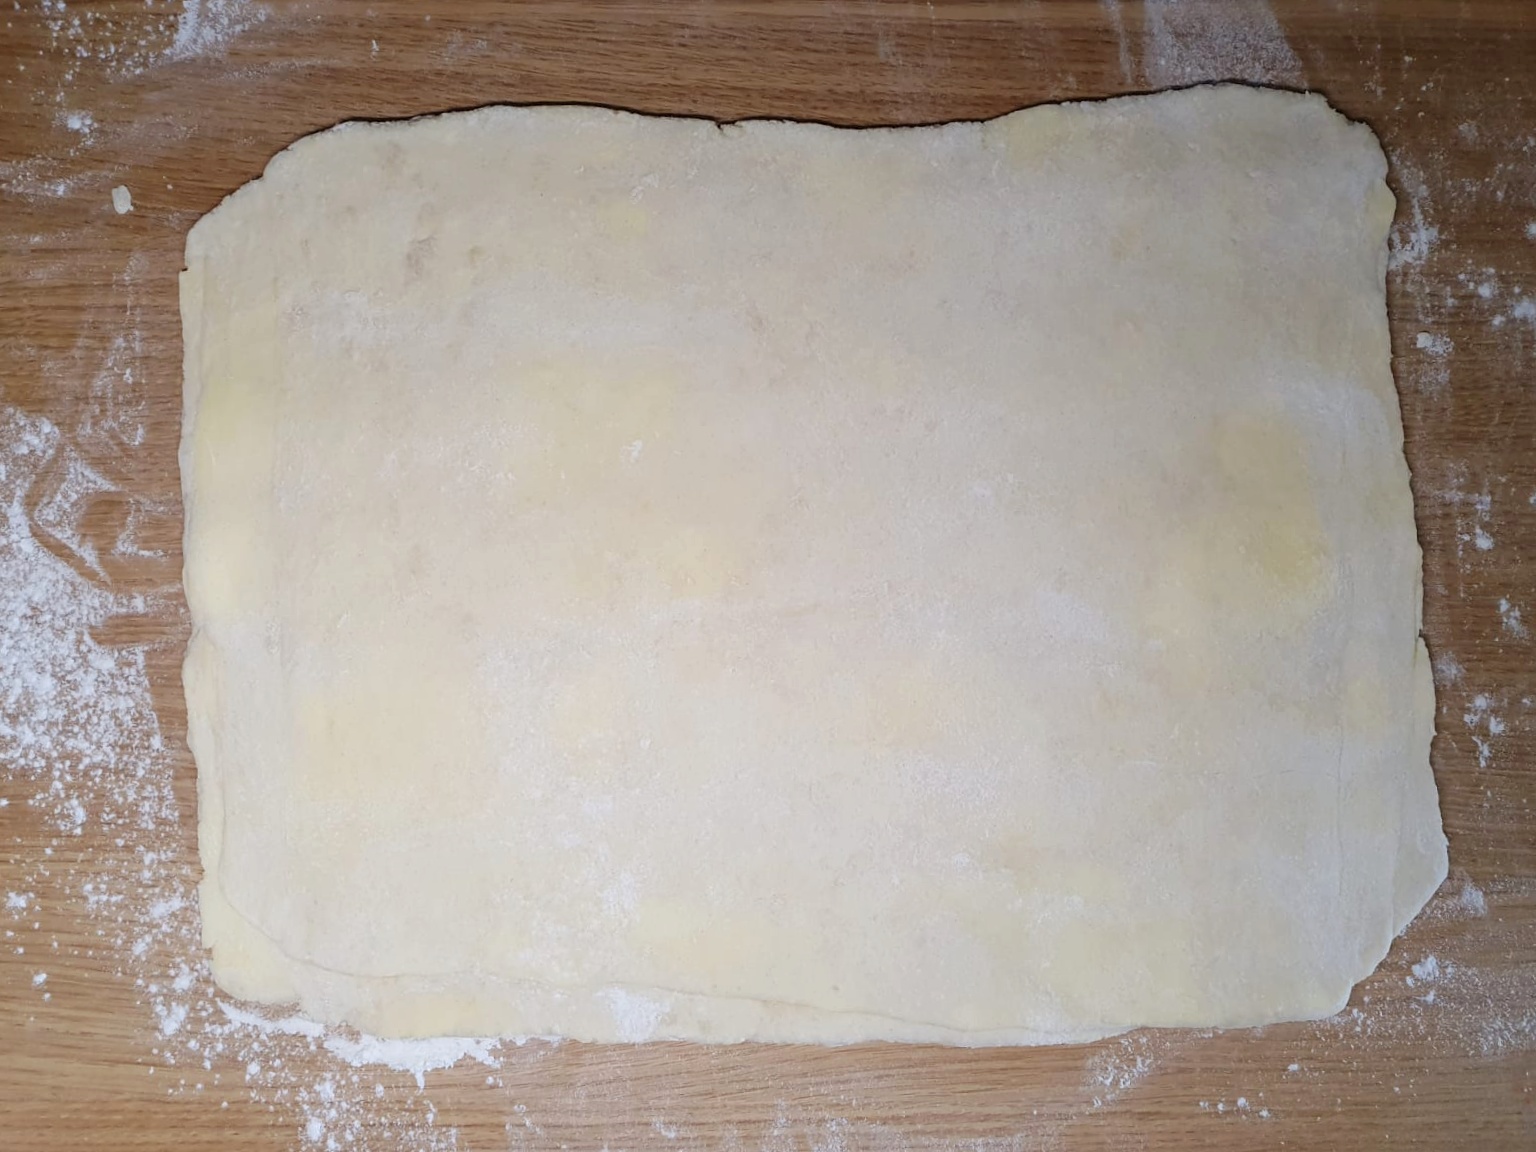
Turn it 90 degrees clockwise and then roll it out again, roll it out thin enough to flatten the cubes of butter.
Fold up and roll out one more time, before wrapping in cling film and allowing it to rest in the fridge for 30 minutes, and roll out as required.
After the first turn the pastry looks a little untidyThe pads of flattened butter are obvious on the second rolling-outThe pastry is much neater and smoother after the second turn
Notes:
[1] i.e., Harrison, S. (1751) The House-keeper’s Pocket-book And Compleat Family Cook. 5th edn. R. Ware; Raffald, E. (1769) The Experienced English Housekeeper. First Edit. J. Harrop; Acton, E. (1845) Modern Cookery For Private Families. Quadrille.
[2] This is the third edition: Grigson, J. (1992) English Food. Third Edit. Penguin.
This post complements the 2023 Christmas special of The British Food History Podcast called ‘Mince Pies’:
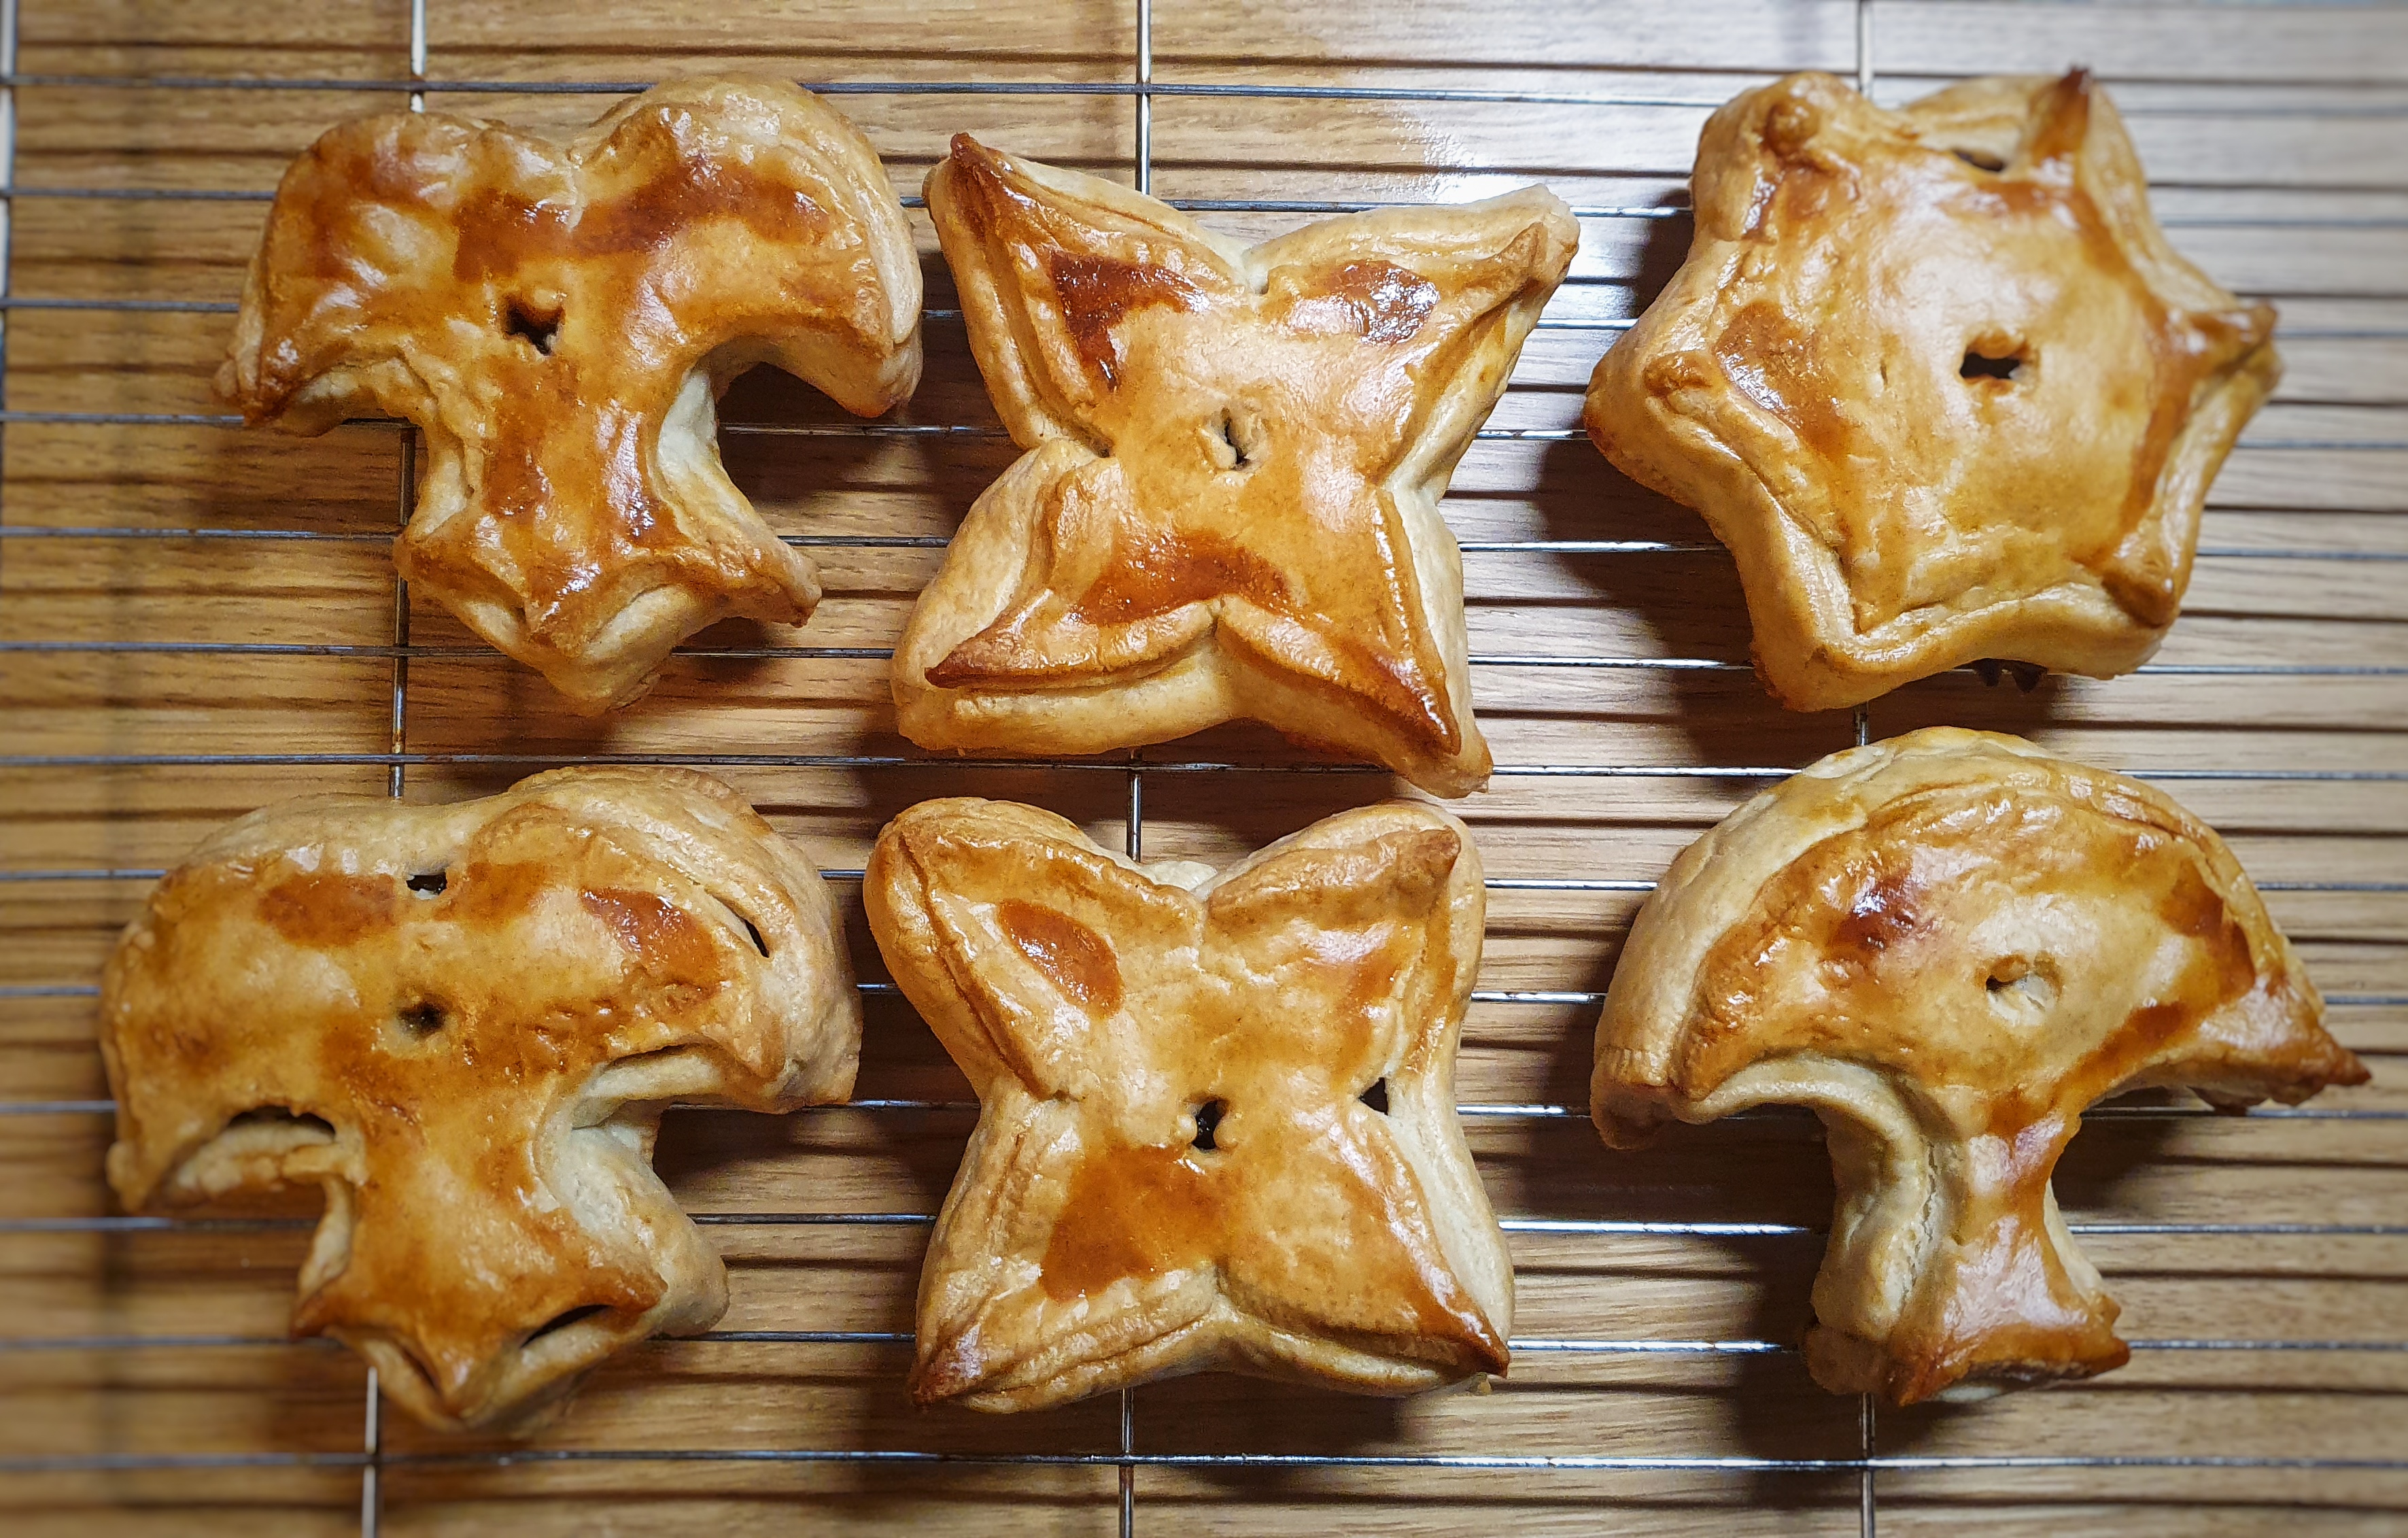
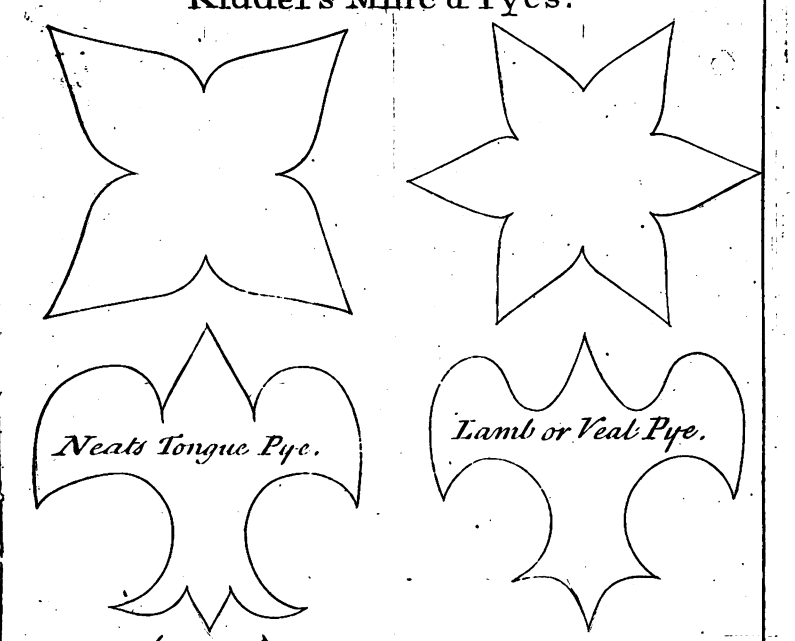
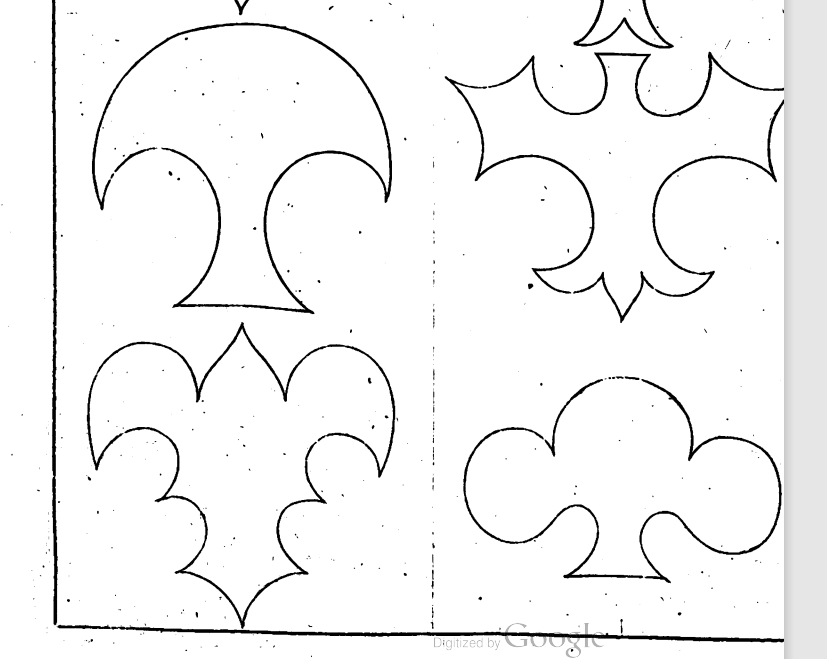
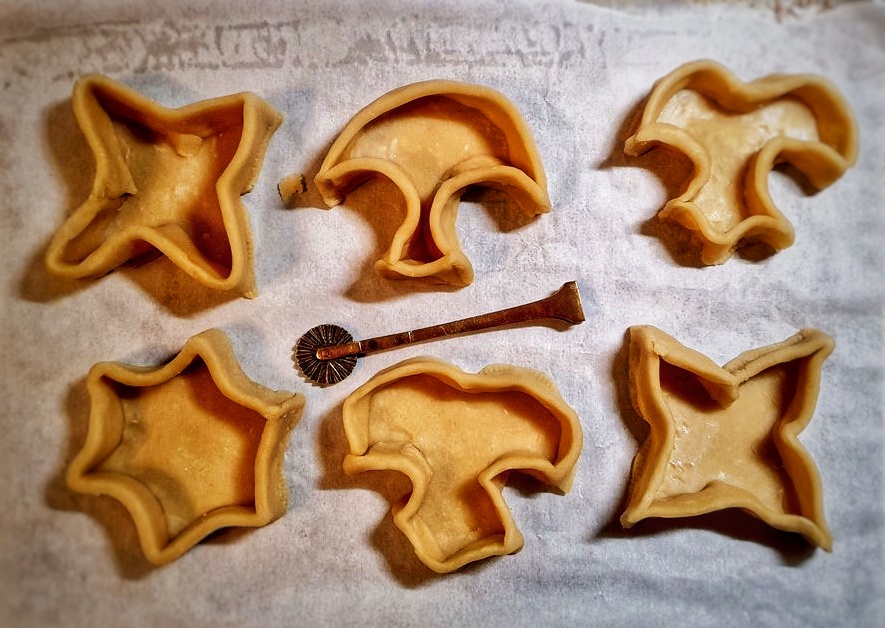
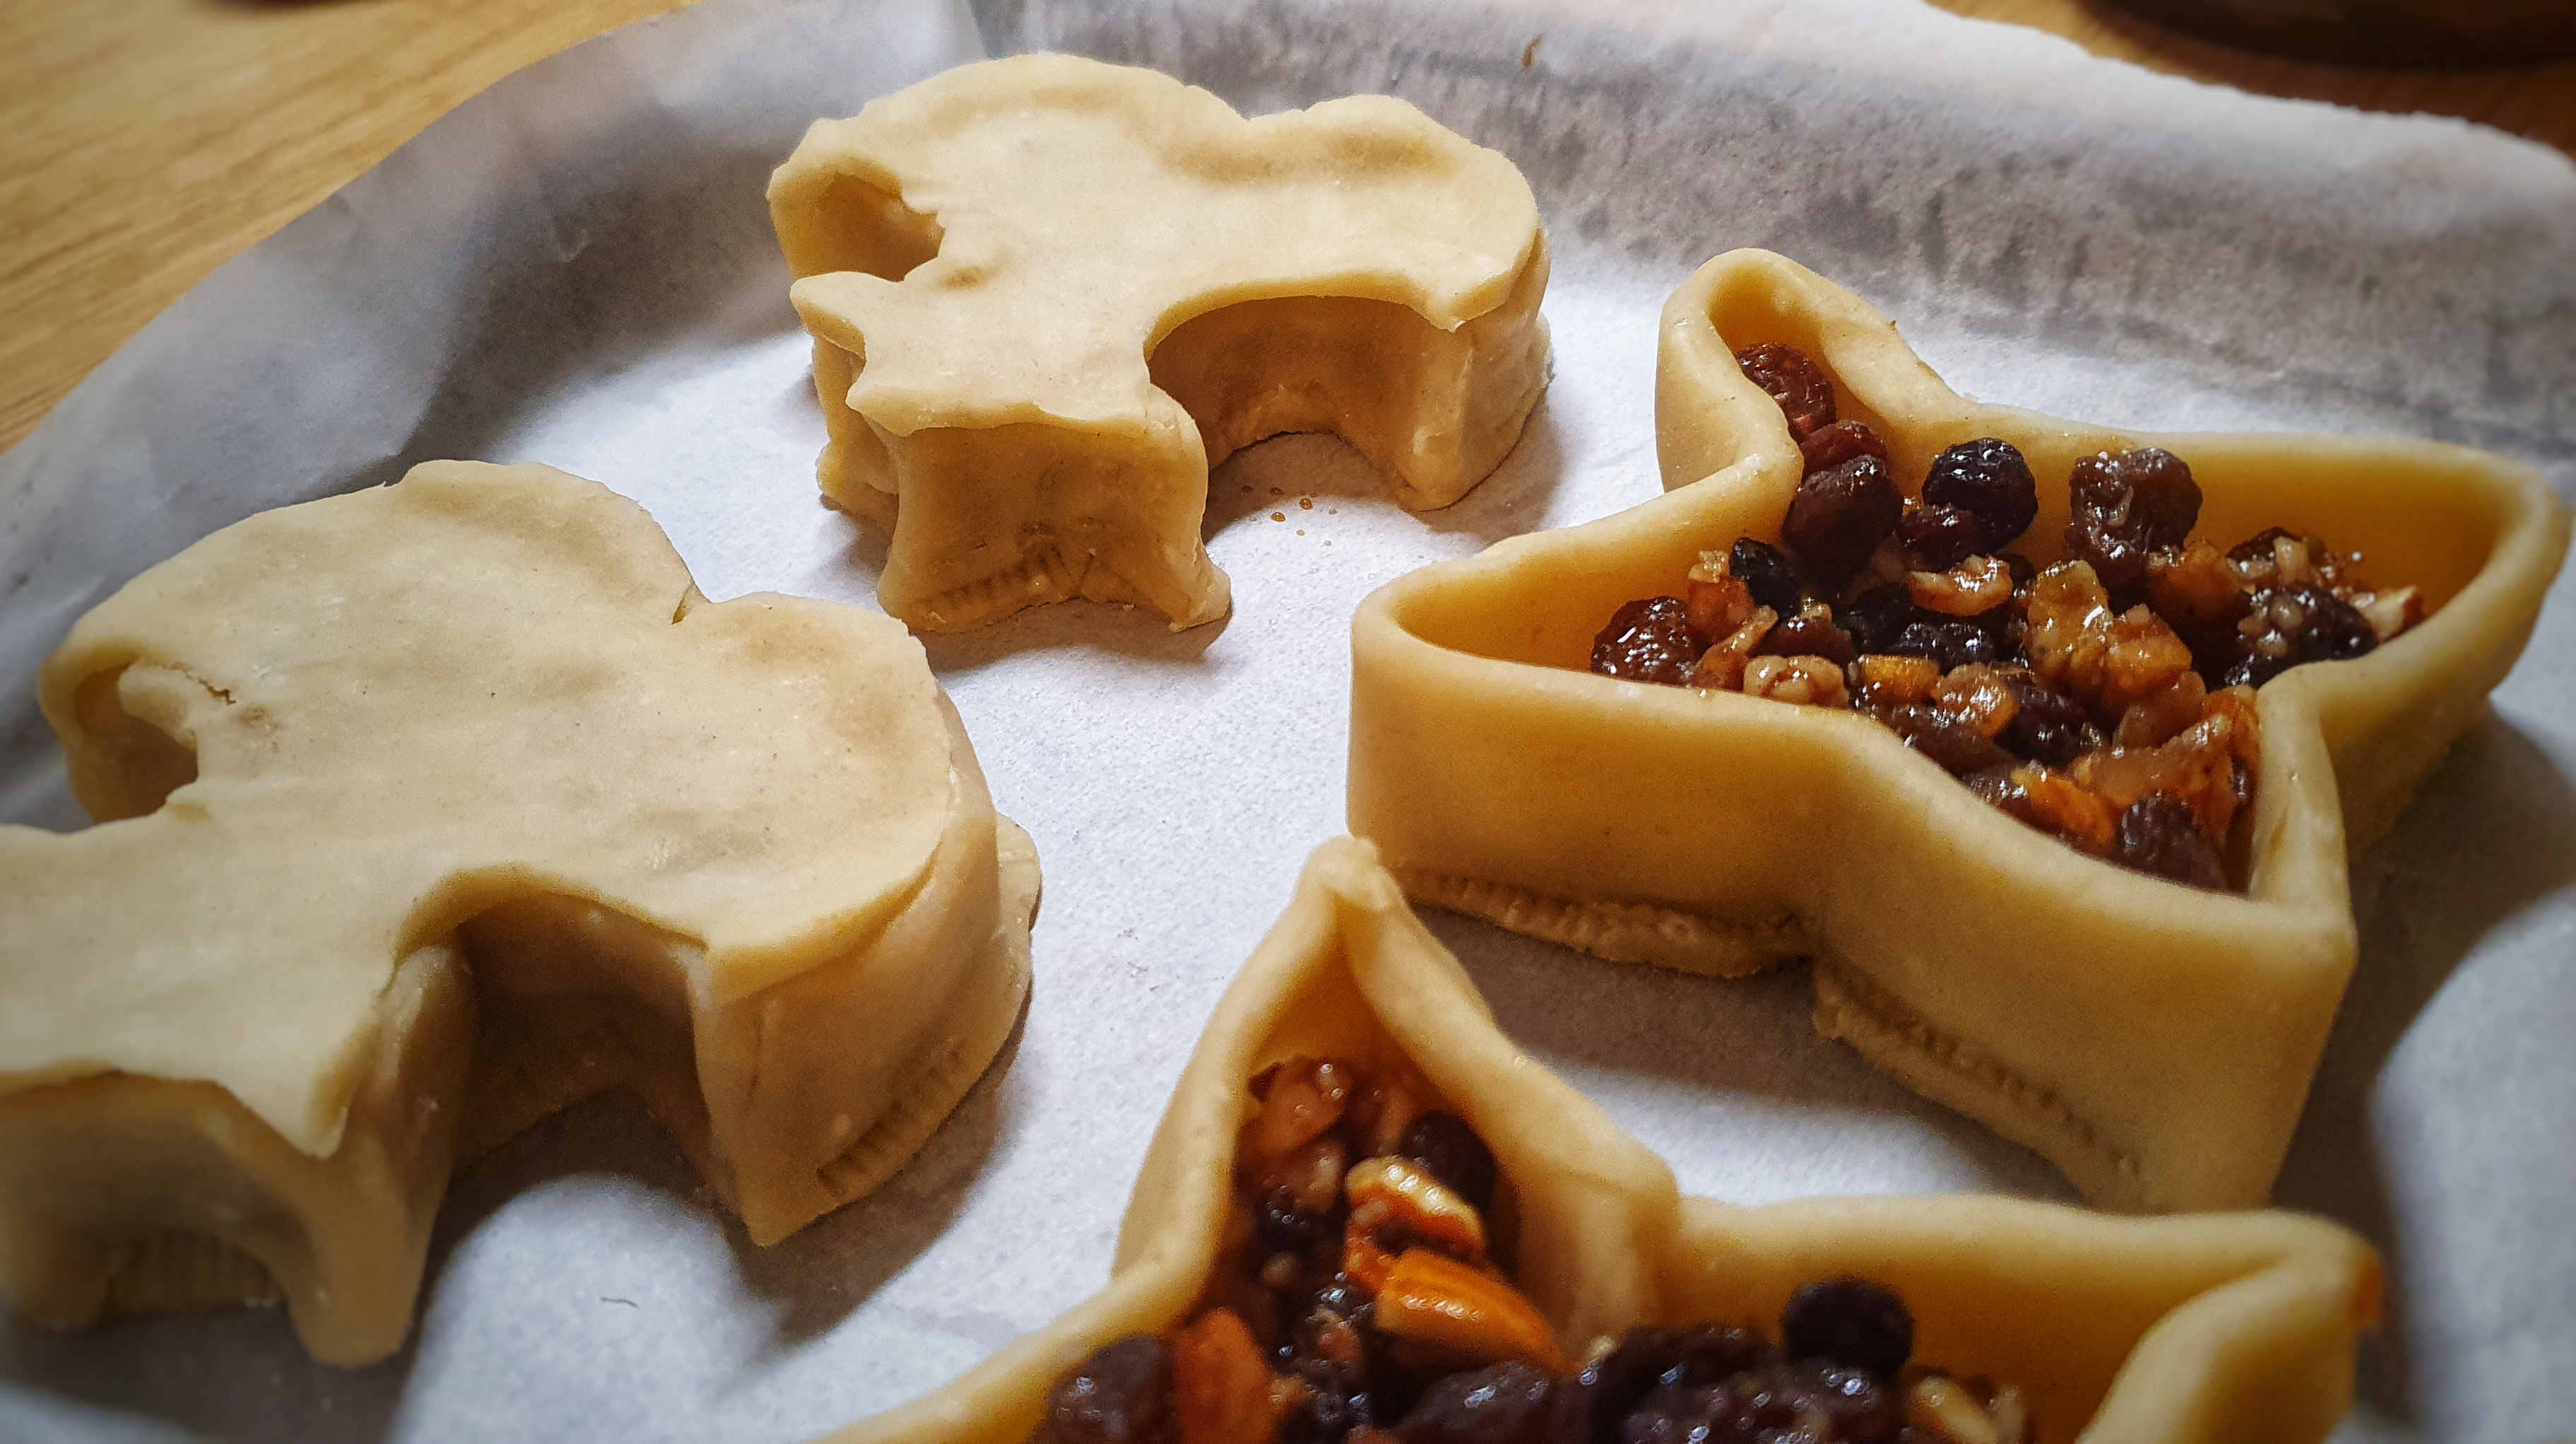
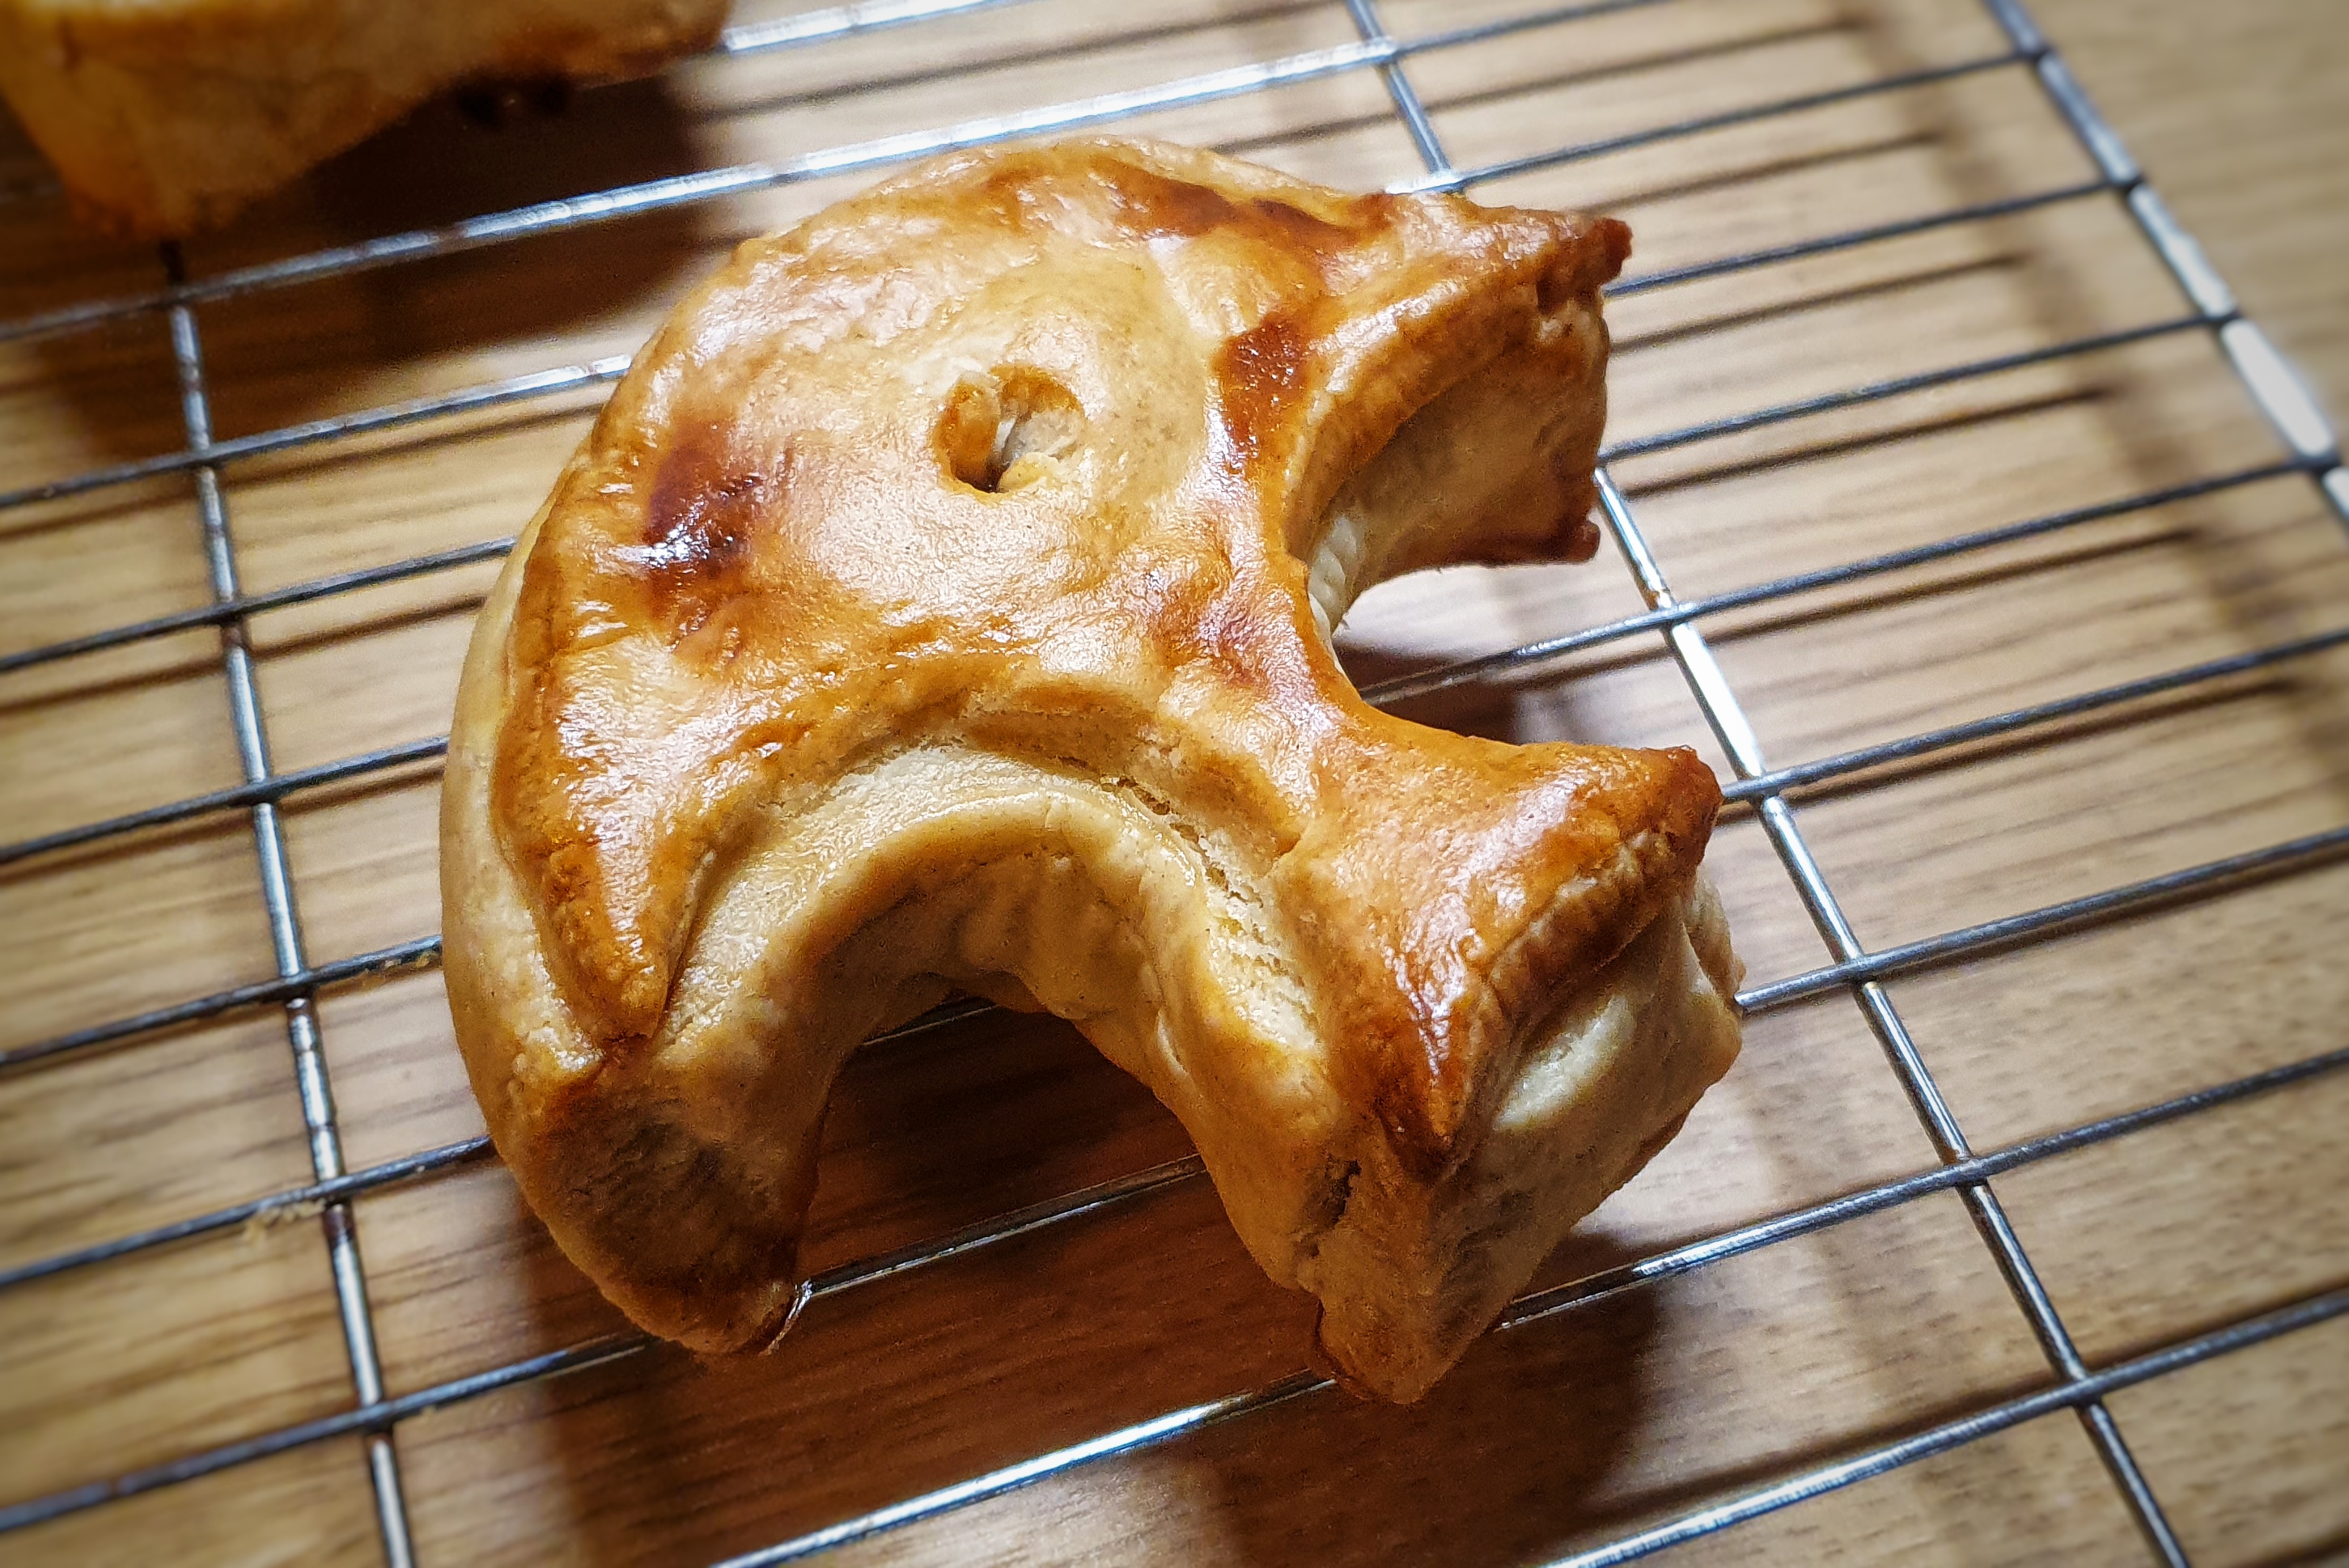
As promised on this year’s Christmas episode of the podcast, all about mince pies, here is my pastry recipe and method for making the shaped-mince pies in E. Kidder’s Receipts of Pastry and Cookery. It was originally published in 1721, but I used the 1740 edition of the book (here’s a link to the document). If you go to the end of the book, you will see lots of different minced pie templates, just like the ones below. The idea was that you rolled out your pastry and cut a shape out, then made pastry walls, filled them with mincemeat, placed on lid on top and baked it. Really beautiful, but fiddly-looking shapes, I’m sure you’ll agree.
I felt a little nervous making them, so let me at this point, say a massive thank you to Ivan Day for the advice he gave me on shaping these pies. Ivan has an excellent blog with a fascinating article about mince pies (click this link to read it).
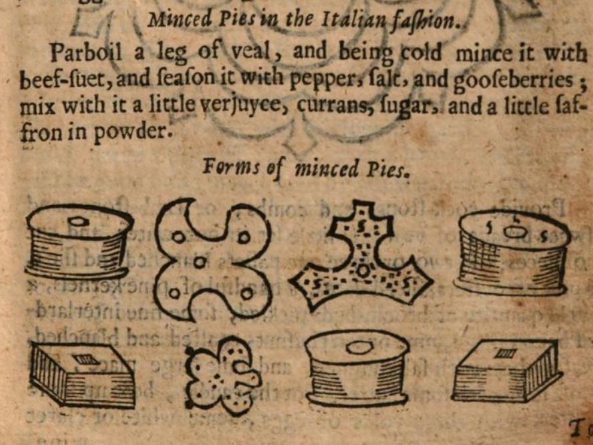
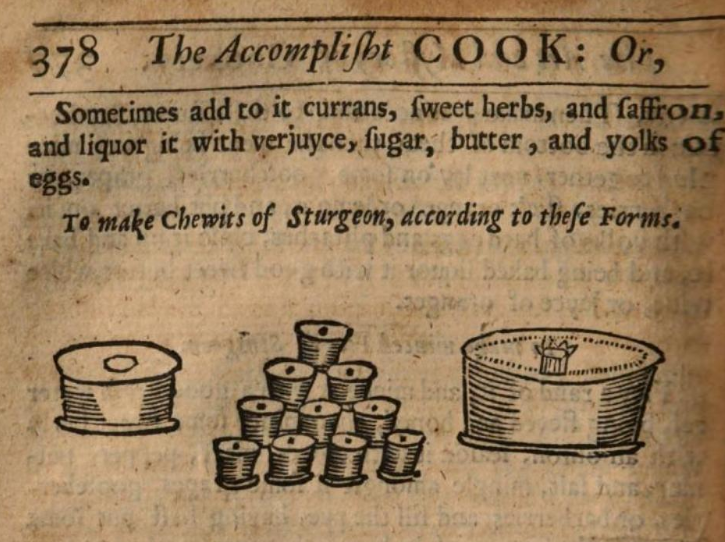
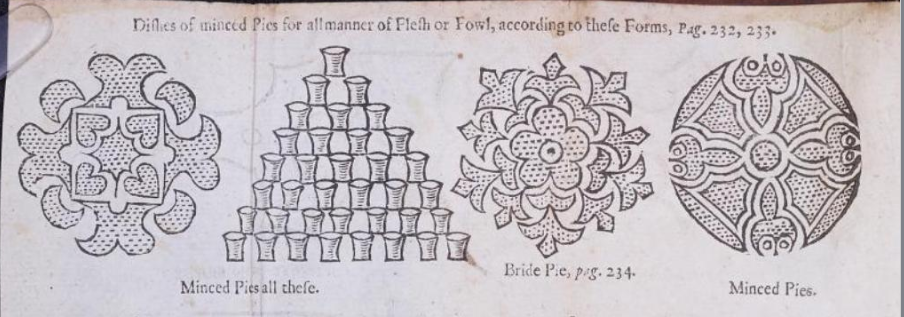
In the Christmas episode, I considered making some of the pie designs in Robert May’s The Accomplisht Cook (first published in 1660), but I found Edward’s designs much easier to extrapolate into three-dimensional pies! However, here are a few from May’s book to give you an idea of the sorts of minced pies he was making:
The Materials
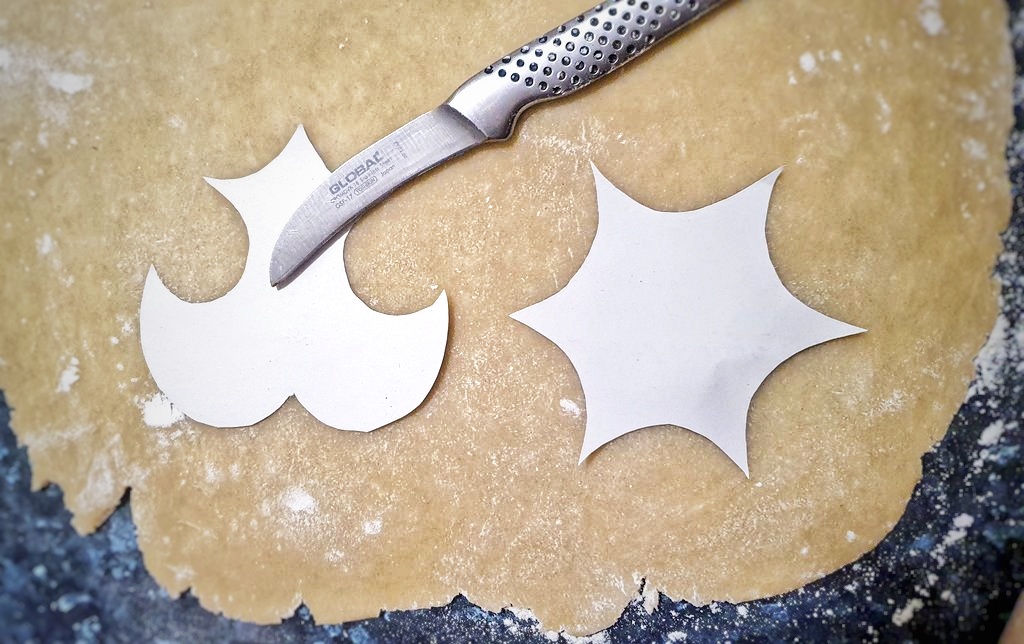
The first thing you need to do is get organised with your templates. I simply took screenshots of the book, printed them out and cut them out. You can make them any size you like. My shapes were around 10cm wide, and I went for the ones that looked the easiest!
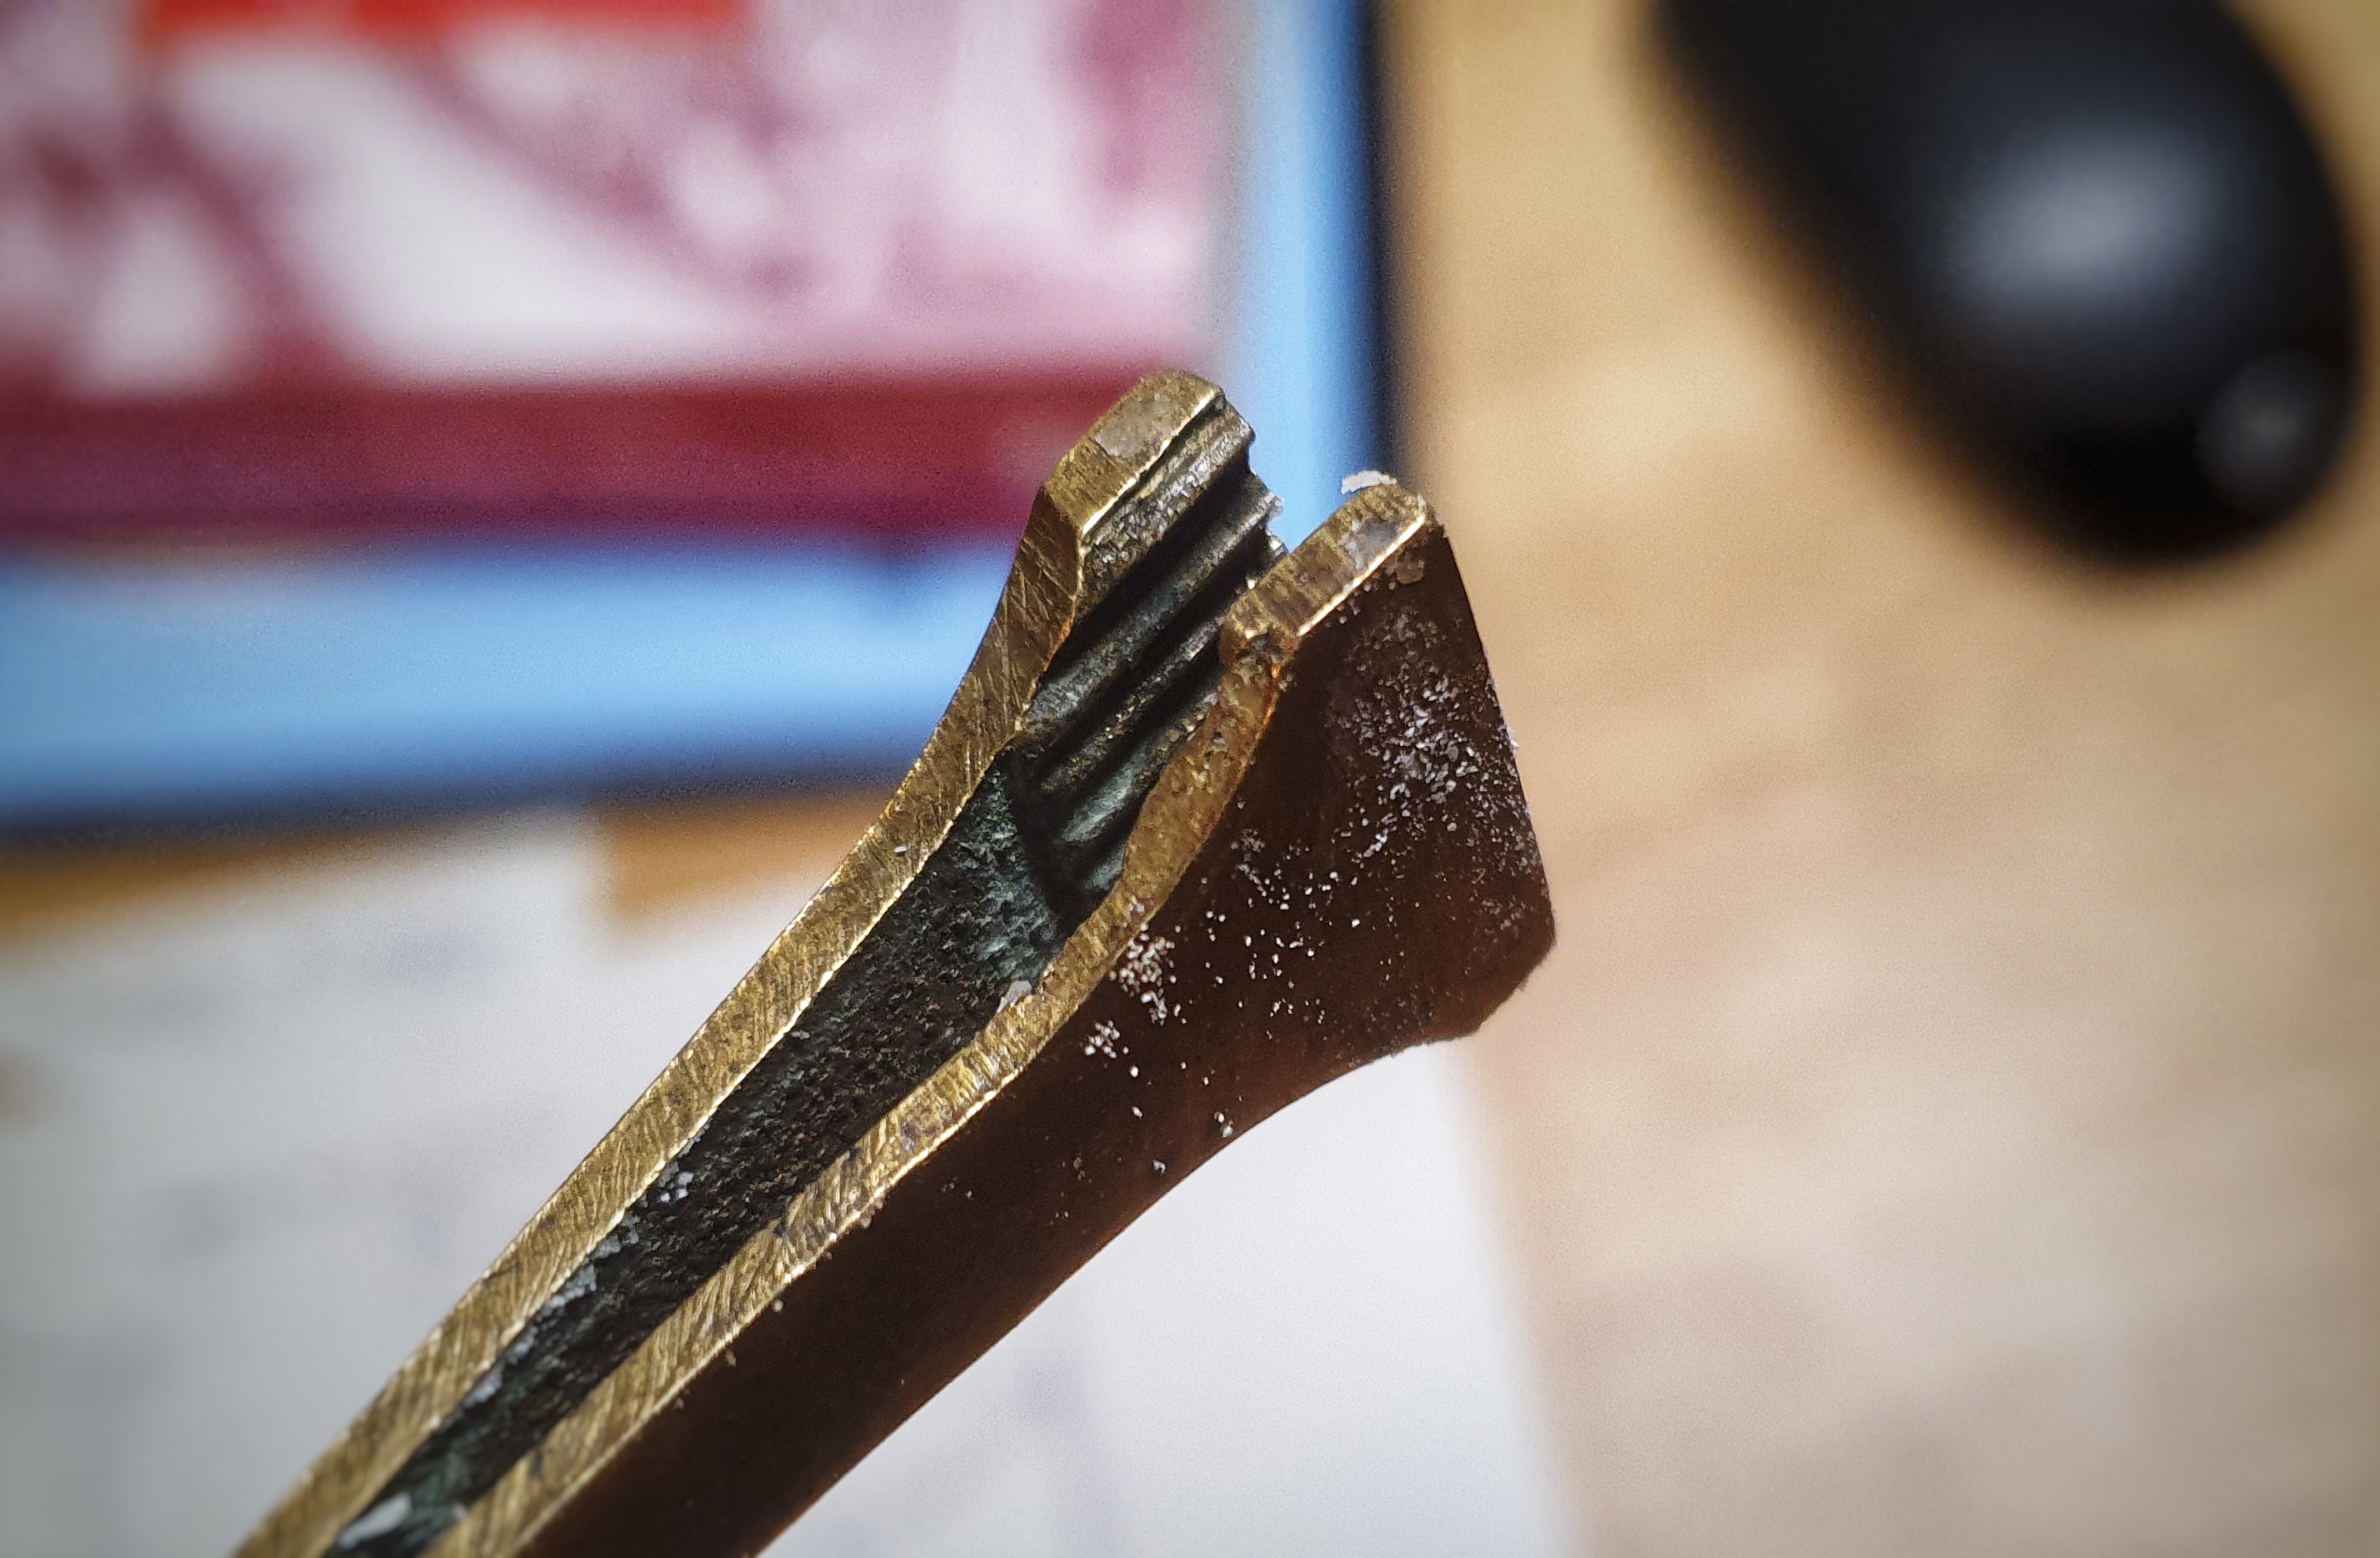
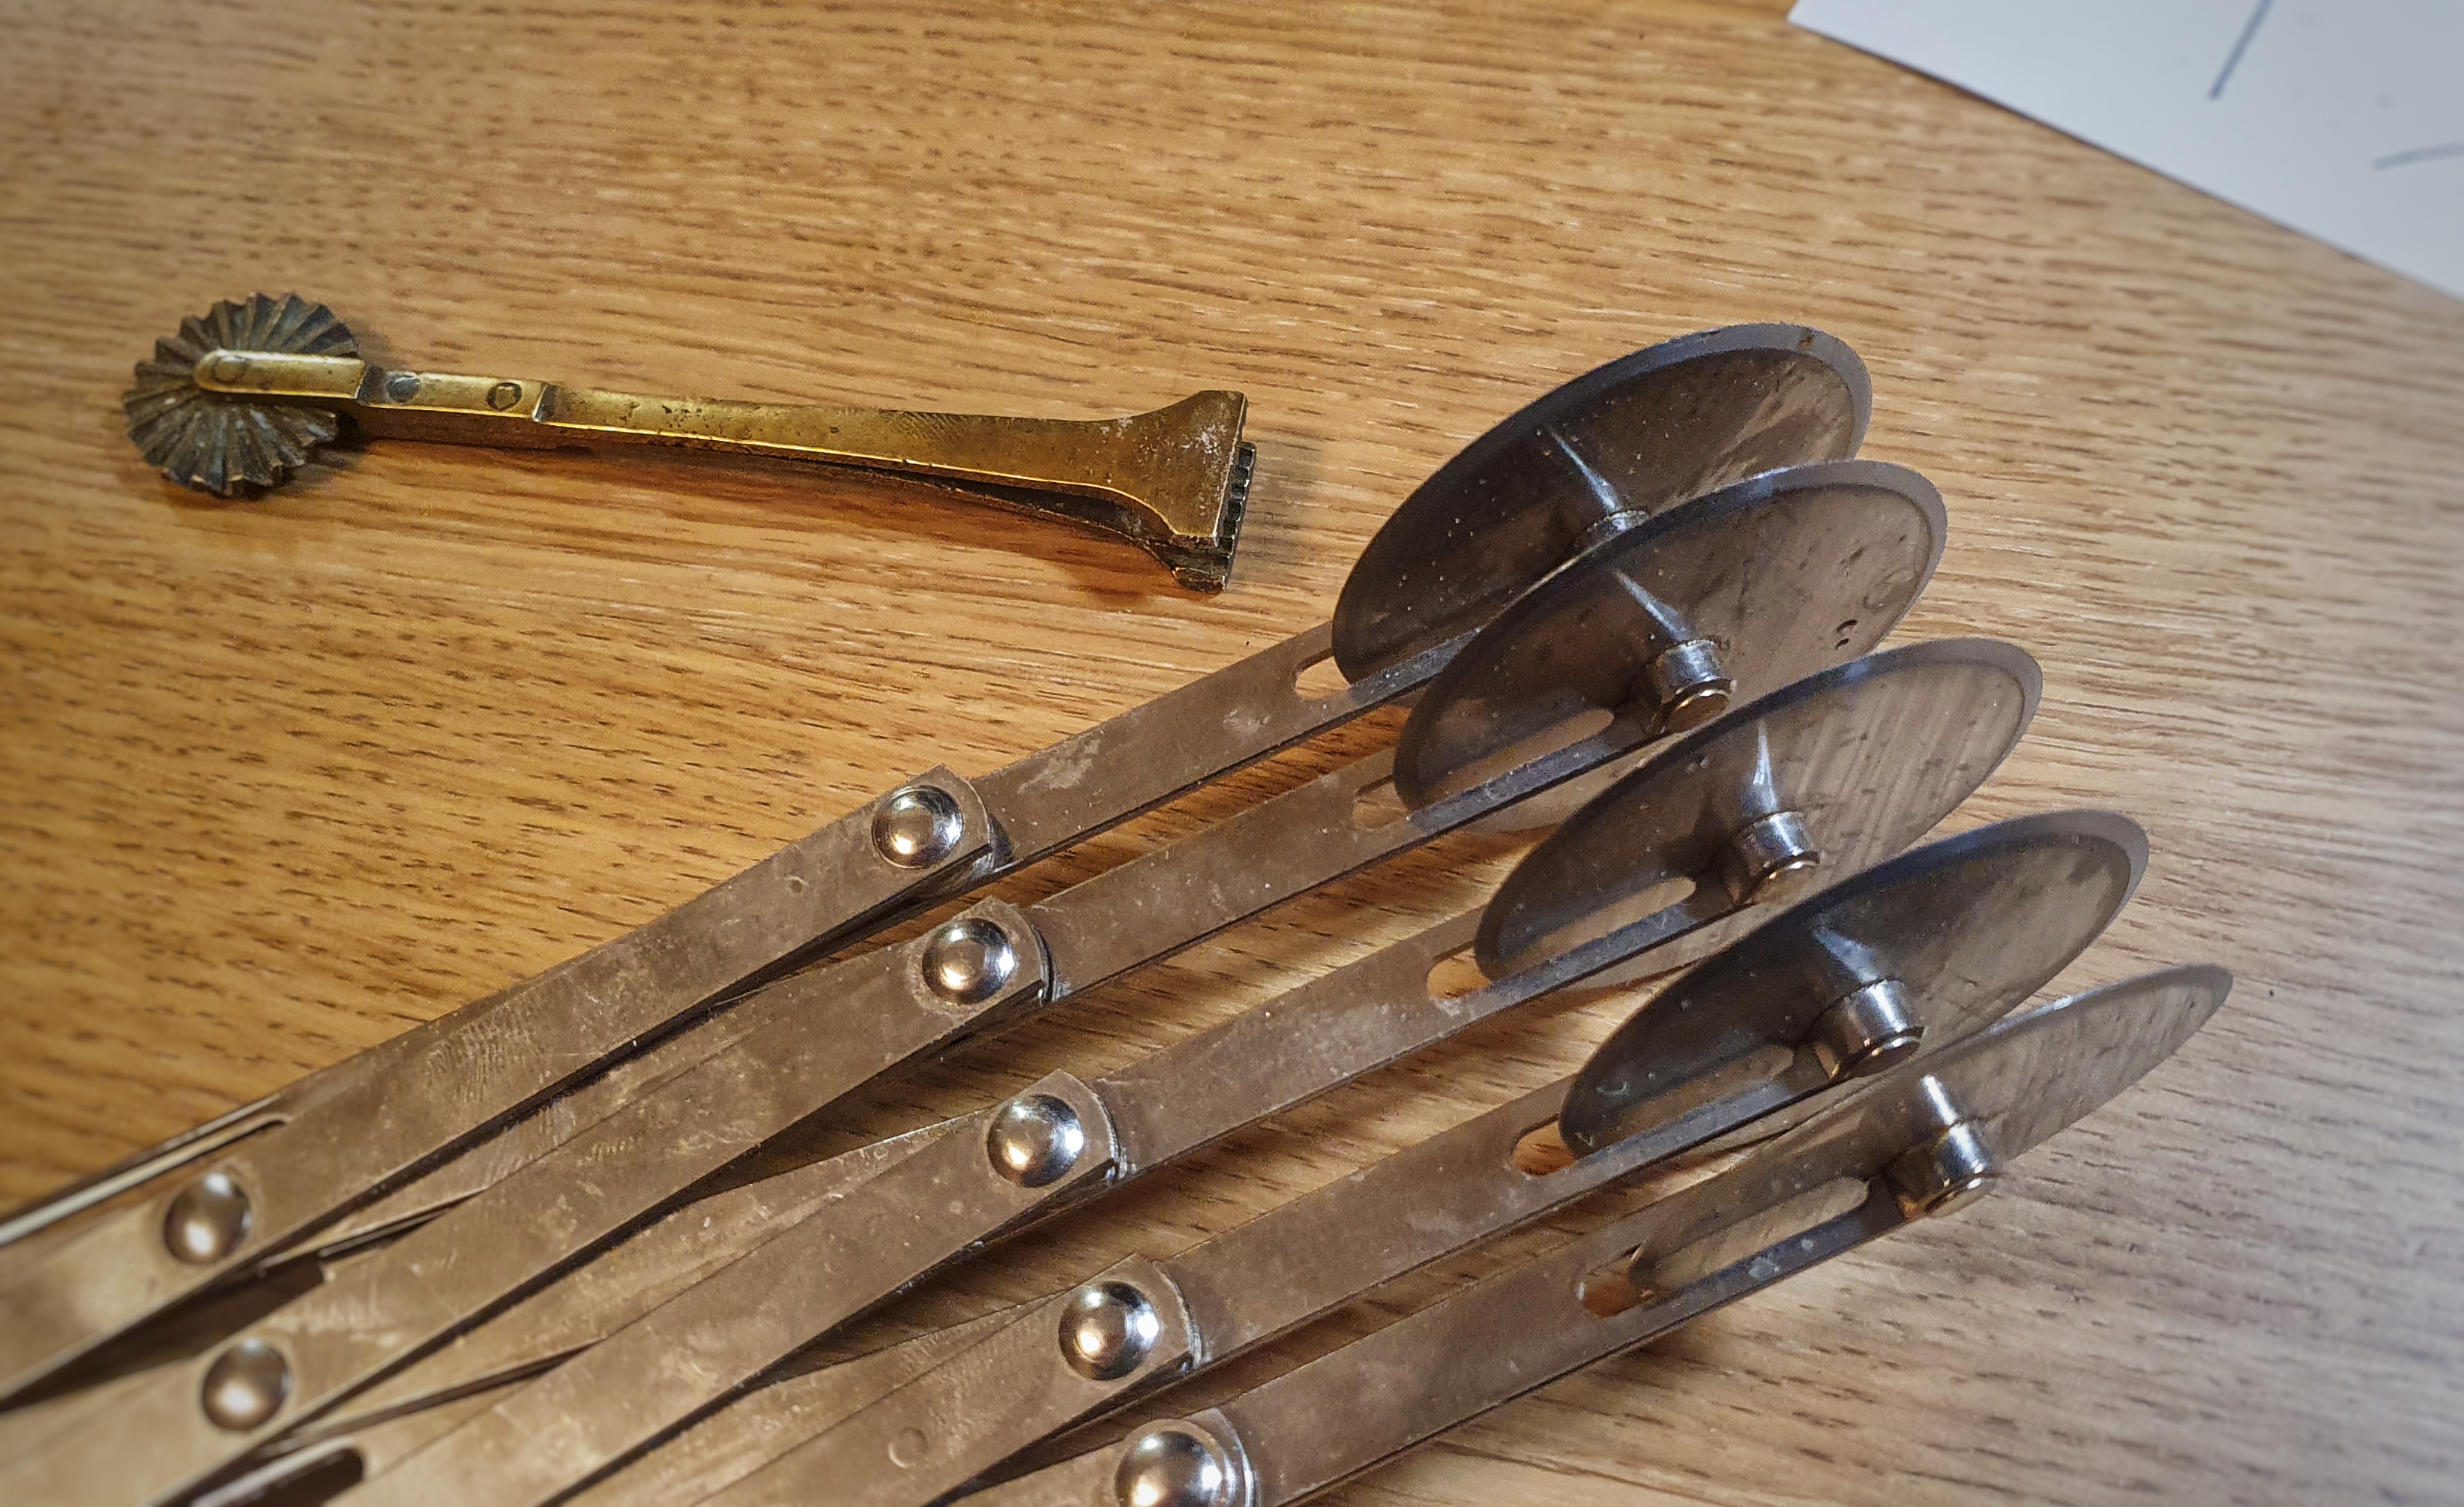
Then you need the correct tools for the job. I have collected over the years various pastry tools, both antique and modern. The wheels are called jiggers, which are used for cutting pastry. The antique ones usually come with a crimping tool attached, and these are used to fuse two pieces of pastry. The one I own with what looks like a flat pair of tweezers was particularly helpful for the pies I made here. I used a paring knife to cut out the shapes – the jiggers weren’t appropriate for these smaller pies.
Jiggers do come in handy for cutting out the pastry walls – essentially strips of pastry – I have a tool that’s made up of 5 jiggers on one expandable frame so you can cut several strips of the same thickness in one go.
That’s the tools of the trade, but now let’s look at our ingredients: we need mincemeat (I used the lamb mincemeat, recipe here) but you can use any you like.[1] Then we need some pastry that is mouldable (we don’t want the walls collapsing in the oven!) yet edible.
If you like the blogs and podcast I produce and would to start a £3 monthly subscription, or would like to treat me to virtual coffee or pint: follow this link for more information.Thank you.
Mouldable Hot Water Pastry
I came up with the following recipe, based on one given by Jane Grigson in English Food.[2] It’s very good for moulding, but not particularly delicious, I made a few changes and I think it’s pretty good. It is simple to make, and this was enough for 8 to 10 pies, depending upon how large your templates are (you could, of course, make one large one!)
500 g plain flour
125 g salted butter, diced
125 g lard, diced
75 ml hot water
2 tbs icing sugar
First, rub the butter into the flour until it resembles breadcrumbs. Put the lard in a saucepan and pour the hot water over it. Heat gently, but be careful – you don’t want it to boil and splutter. Stir in the icing sugar and when it is dissolved, make a well in the centre of the flour-butter mixture and pour into it three-quarters of the hot liquid. Cut the liquid in with a knife, then pour the remaining hot liquid to pour over any dry patches that remain. Once all of the water has been added, give the pastry a knead (leave it to cool a little if you need to). It should be smooth, pliable and waxy. Cover with cling film and allow to cool completely, but do not refrigerate.
Constructing the Pies
Now you can roll out a third of the pastry thinly – aim for the thickness of a pound coin, 2 to 3 millimetres – and cut out your bases. Now roll out another third into a long strip, long enough to go around the perimeter of your shapes. To do this, use a piece of string to trace around the shape. When the appropriate length, use a ruler to cut your strips at your desired thickness. I went for 2 cm, but I could have gone thicker than that, I think.
Now the fiddly bit: brush the edges of the bases with plain water and glue the sides on. Use your finger and thumb to pinch them together, and then crimp them with a crimper tool if you have one. Repeat with all of your shapes and place in the fridge for a few hours to firm up. When firm, roll out the final third of the pastry and cut out your lids.
Fill your pies with your chosen mincemeat, brush the rims of your pies with water and fix on the lids in the same way as you did the bases. Make a steam hole and place back in the fridge for 30 minutes to firm up again. Meanwhile, preheat your oven to 200°C.
If you like, brush your pies with an egg wash before you bake them for 25 minutes, or until a good golden-brown colour. If you are making large pies, turn the heat down to 175°C and cook longer: you should see or hear the filling bubbling, telling you it is ready!
Hello! I’m back after two-month hiatus. Did you miss me?
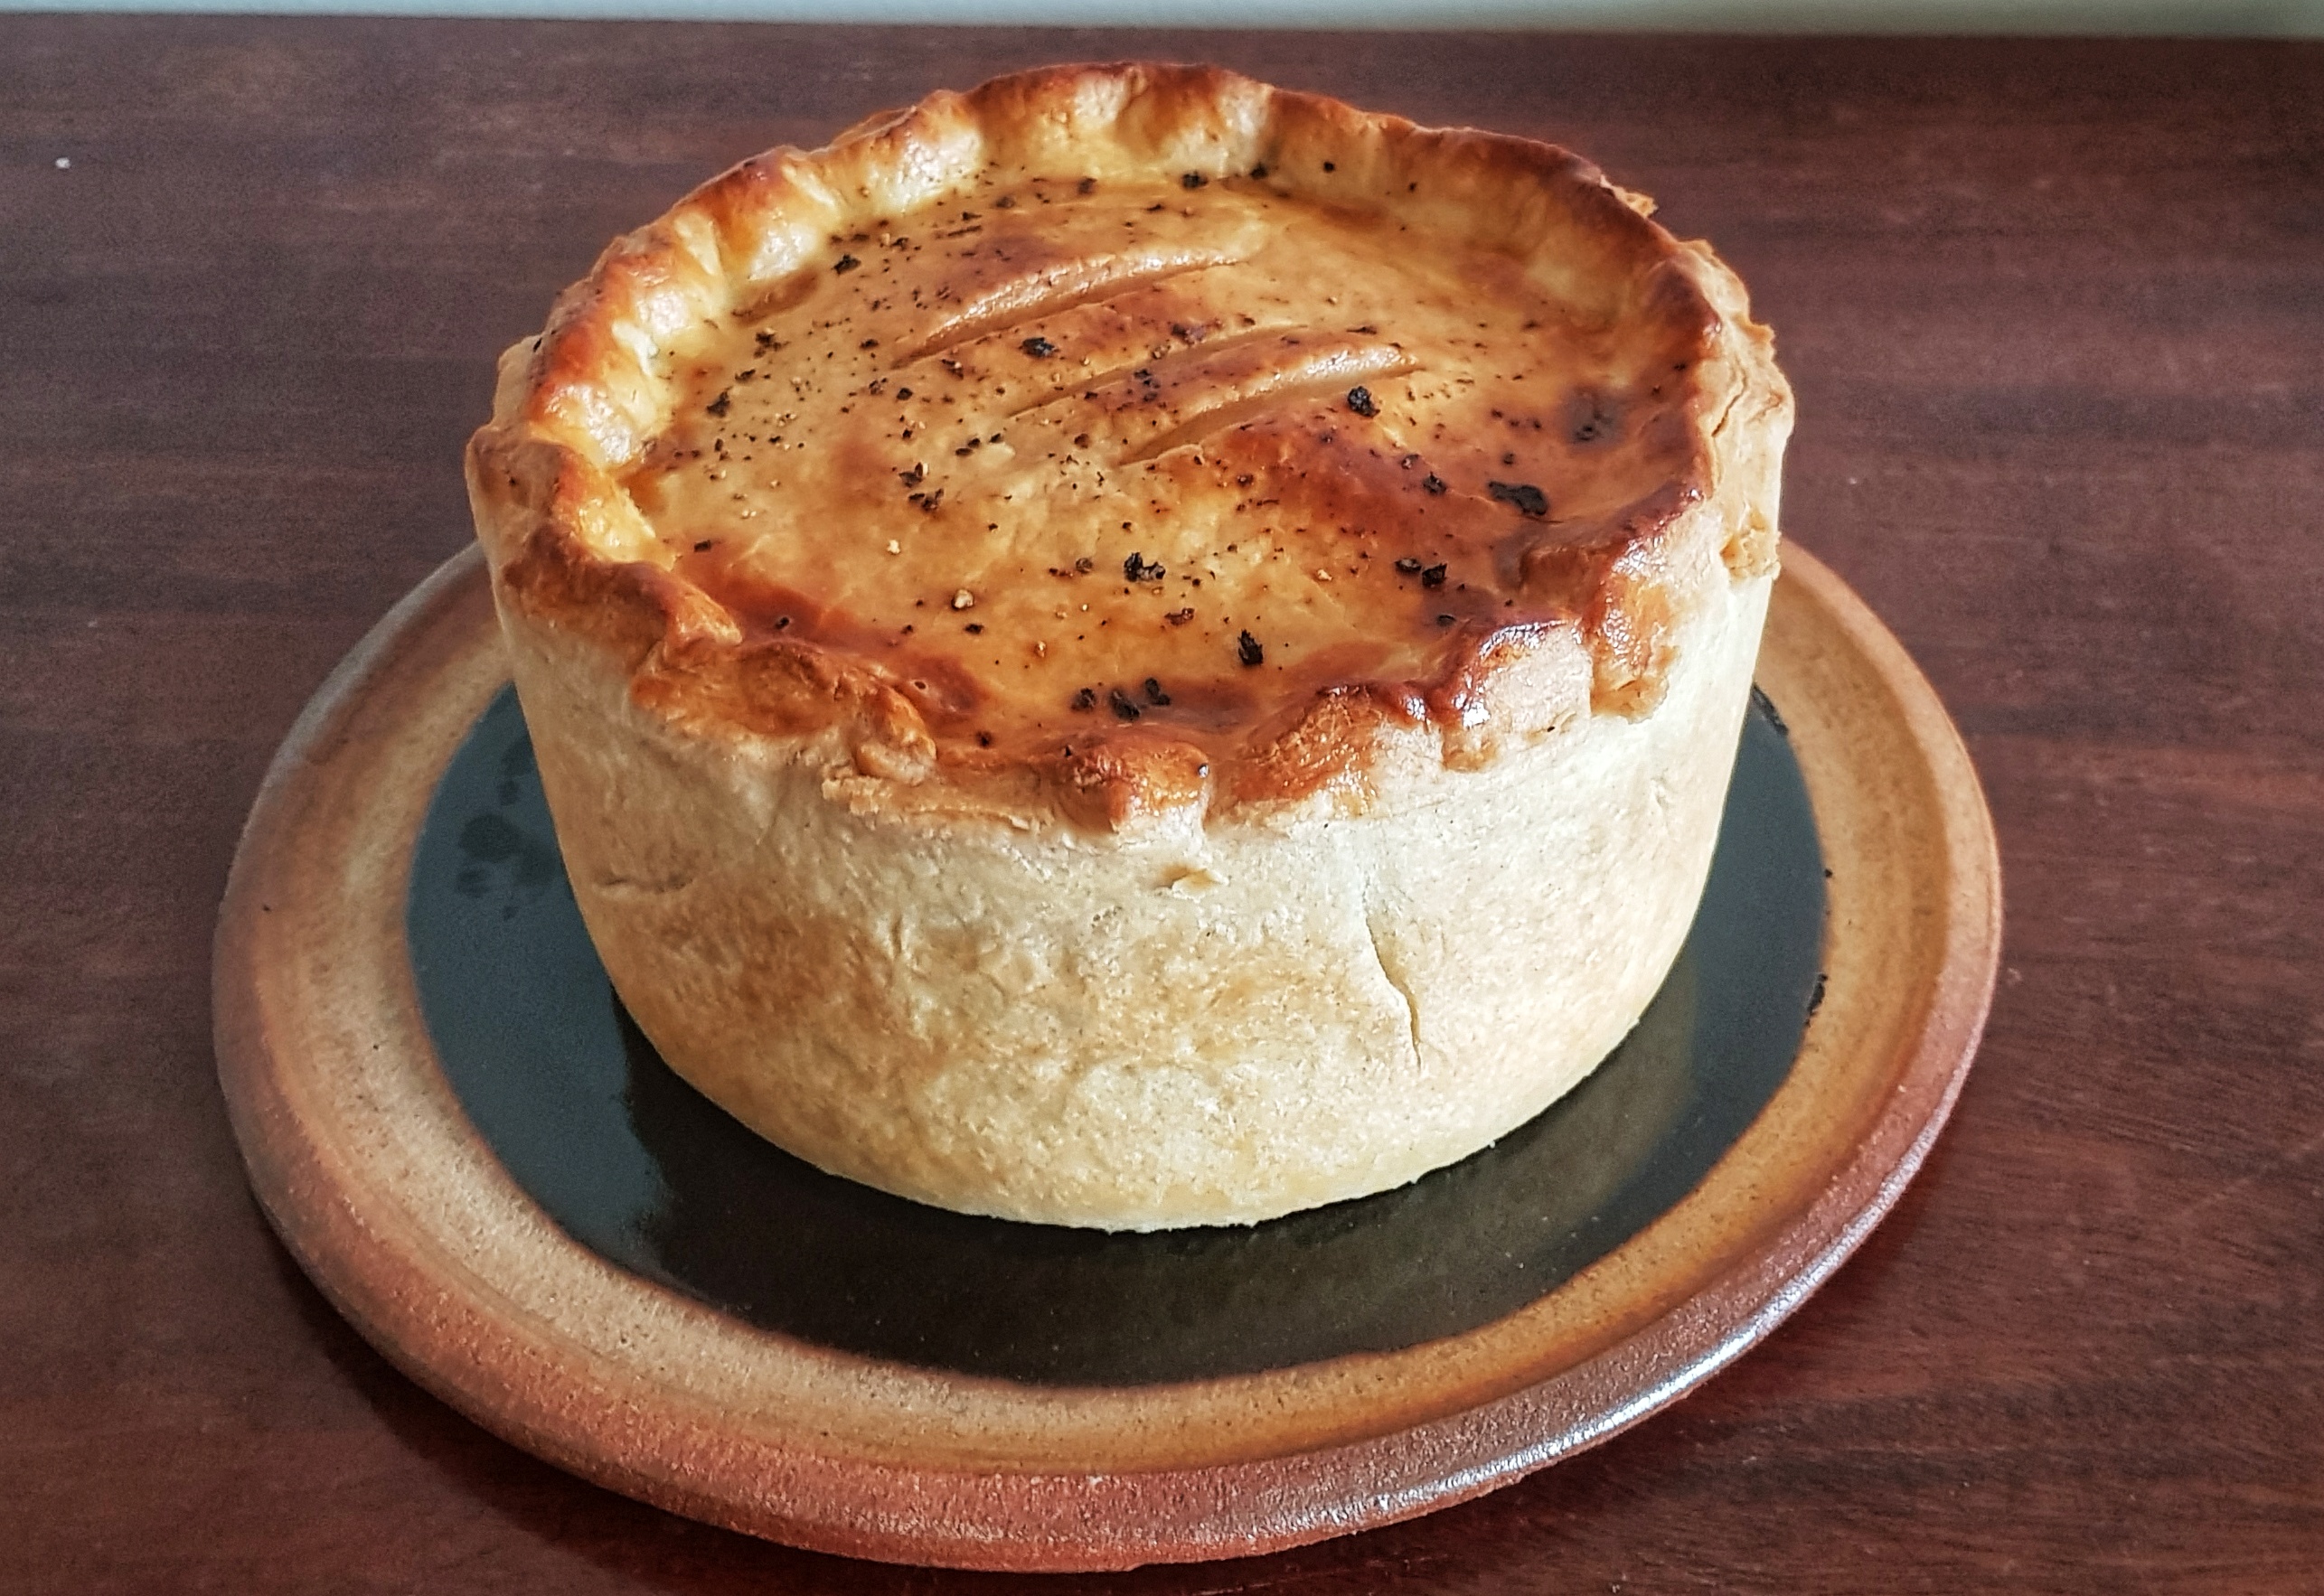
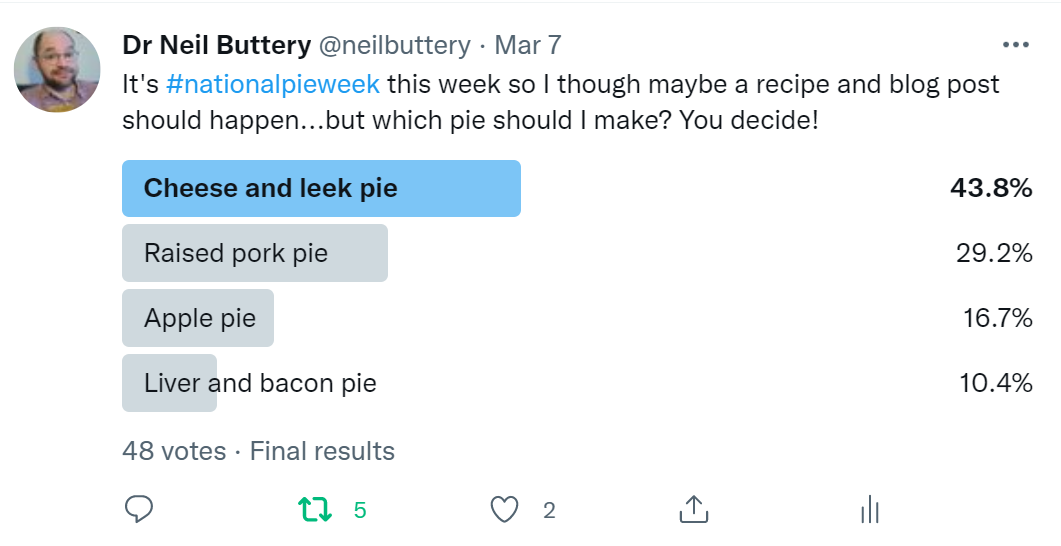
It’s British Pie Week this week so I thought I’d post a recipe for a favourite of mine. The trouble is, I have many favourites, so I came up with a list of four and let Twitter decide. I was very glad to see my favourite won.
Later, I saw the cheese and leek/onion pie was tenth in the top ten favourite UK pies, receiving just 1% of the vote!* Shocking. I think there may be a north-south divide effect at work there; back in the days of my market stall and restaurant, cheese and leek pie was by far the favourite.
The cheese and onion pie or pasty used to be a very important food for the working classes of Northern England, especially Yorkshire and Lancashire: it’s easy to make and the ingredients are cheap compared to meaty fillings. It’s the pie equivalent of the Welsh Rabbit/Rarebit.
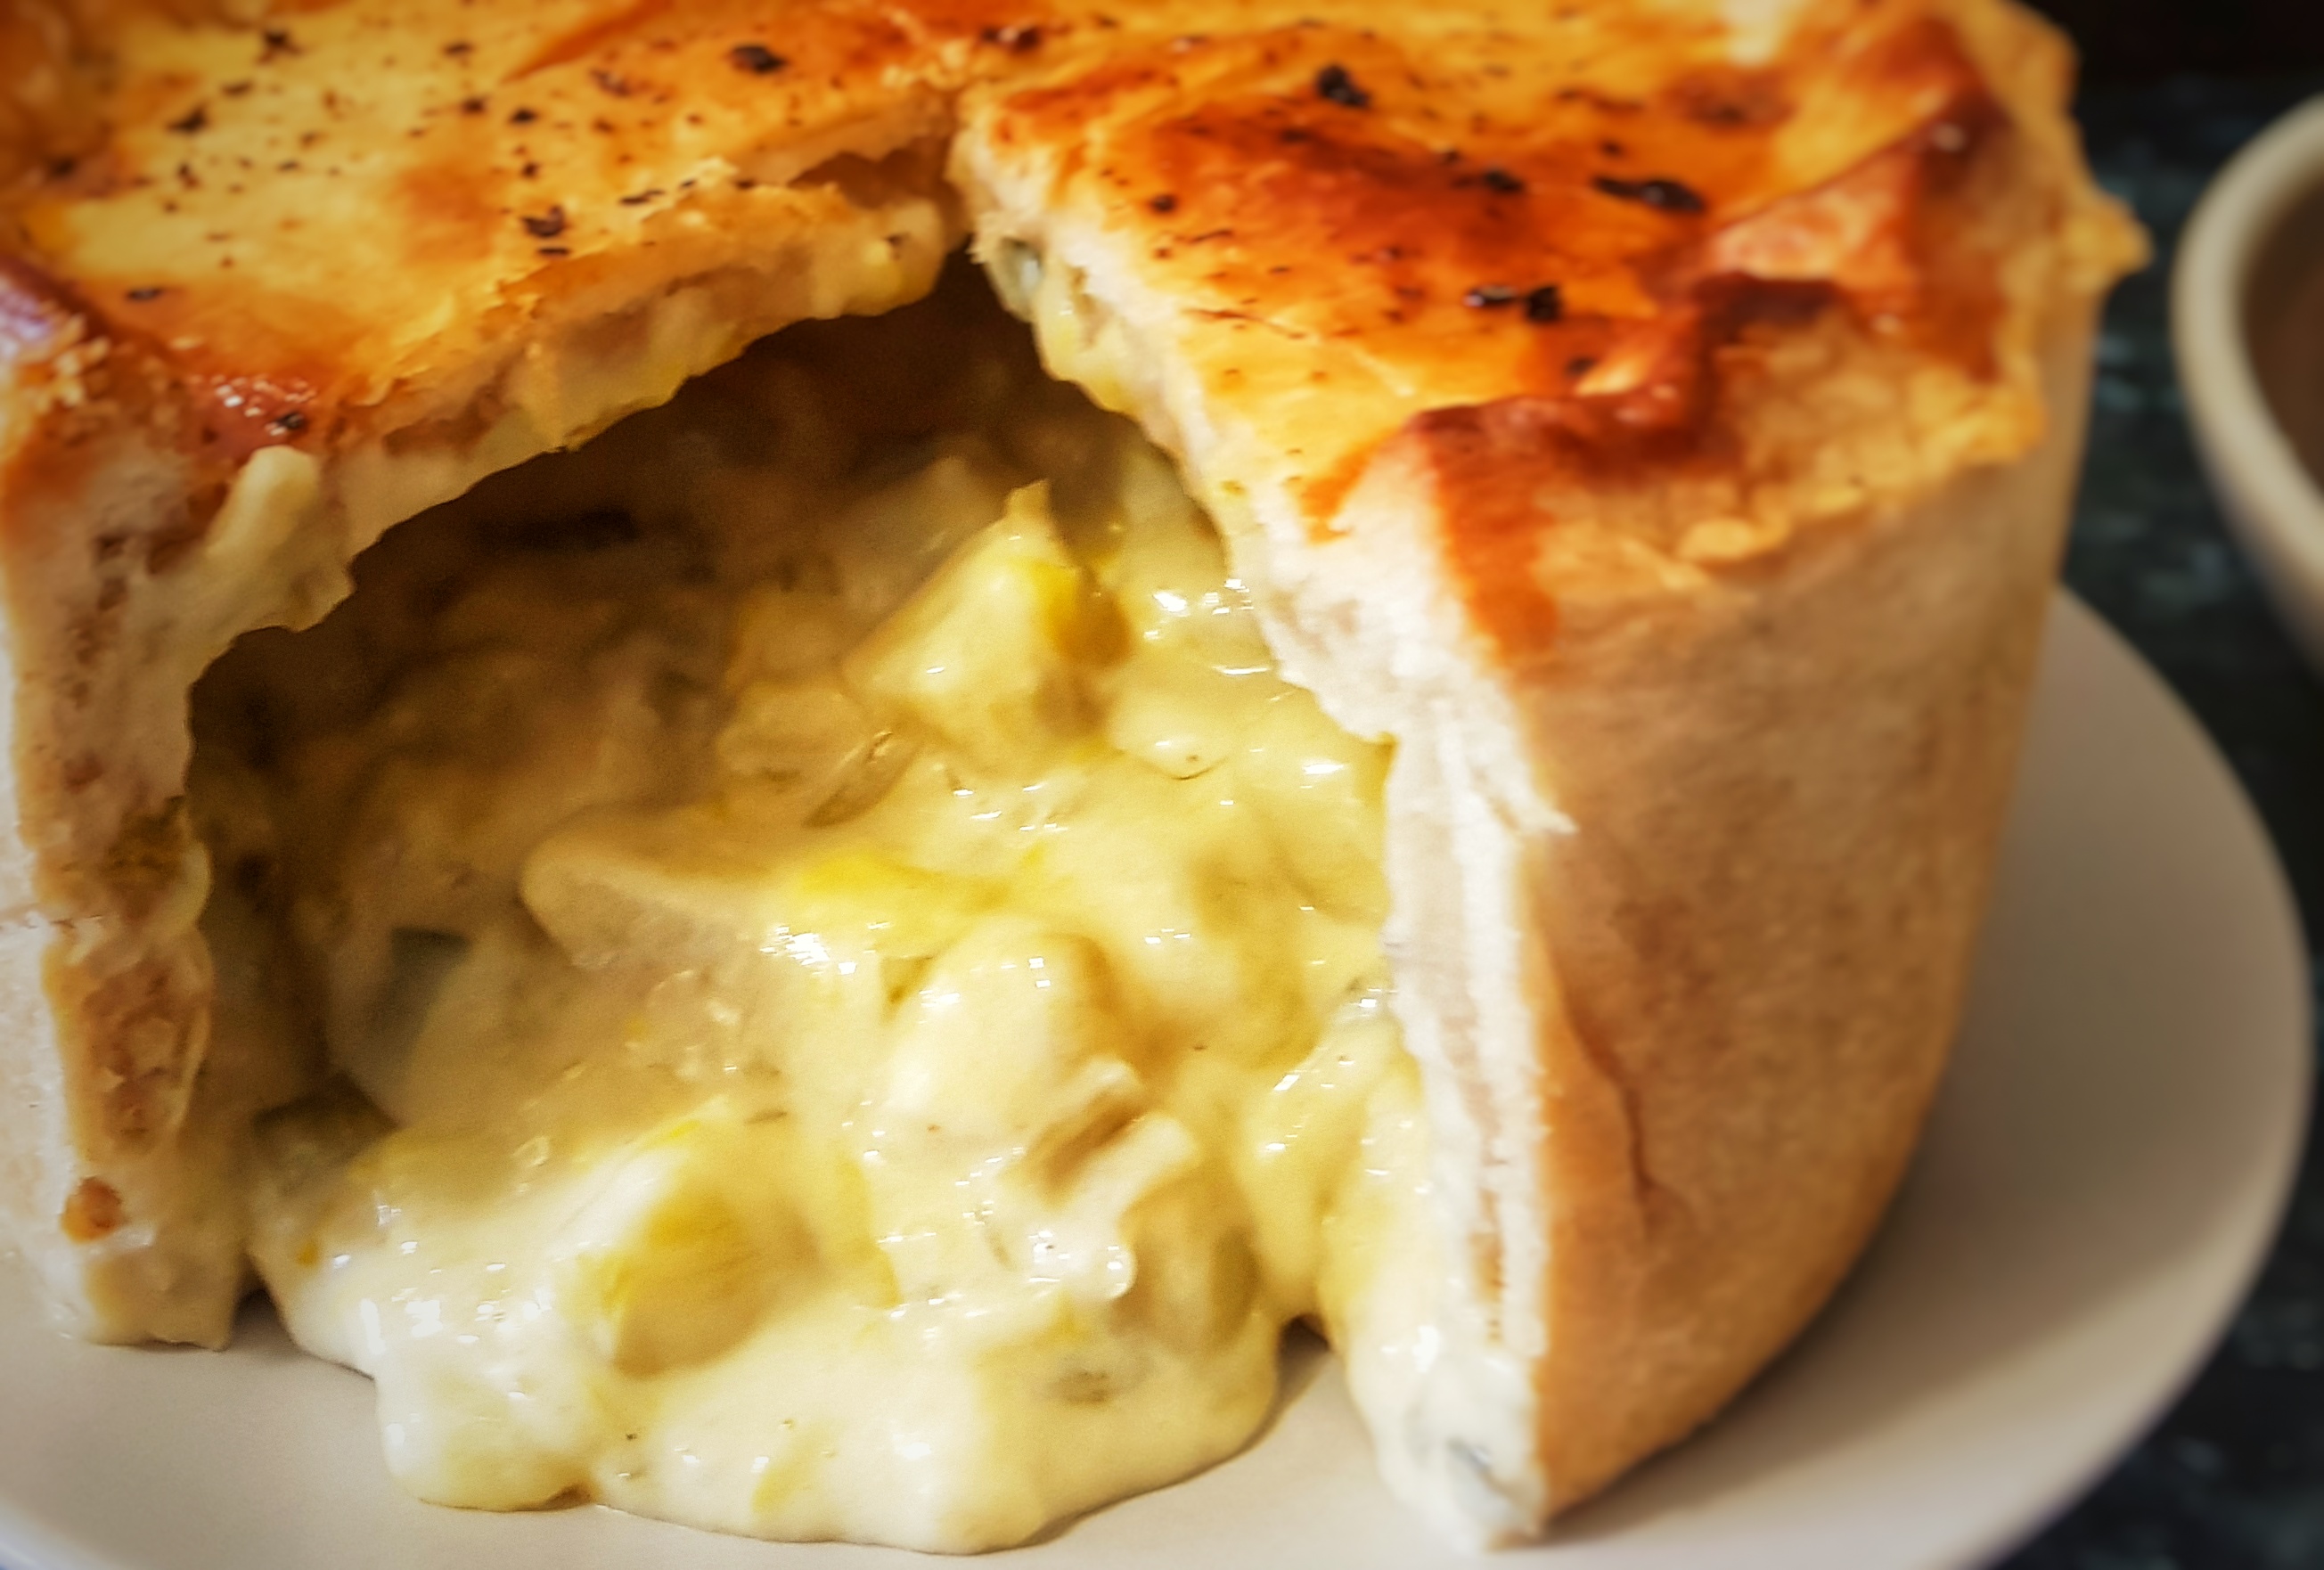
The simplest of fillings were made of cooked onion, thinly-sliced raw potato, or cold mashed potato, and grated cheese. On the fancier side, a thick white sauce is used instead of mash. For my recipe I am going somewhere in between to hopefully enjoy the best of both worlds. I use onion and leek interchangeably because either (or both) can be used: I make leek pies as I’m intolerant to onion.
As for the cheese, use a mature kind that melts easily: Cheddar, Lancashire, Double Gloucester etc. The pastry should be a simple shortcrust made with half butter, half lard, but all butter is good too.
Serve the pie with mashed potatoes or chips, with peas and gravy as is traditional, but this pie eats very well just warm with a dressed green salad and some good old salad cream.
If you like the blogs and podcast I produce, please consider treating me to a virtual coffee or pint, or even a £3 monthly subscription: follow this link for more information.
Makes one large pie to serve 6 people (or 4 greedy ones who always have seconds)
For the filling:
50 g butter
1 leek, trimmed and sliced, but with the green left on; or 2 medium onions, peeled and sliced
350 g (approx.) potatoes, peeled and diced (about 2 medium-sized ones)
Salt and pepper
1 tbs plain flour
1 tsp English mustard powder
275 ml hot milk
150 g grated cheese
Pinch Cayenne pepper (optional)
2 tbs double cream
For the pastry:
400 g plain flour
200g salted butter, or 100 g each butter and lard (or shortening)
120 ml water or milk
Egg wash
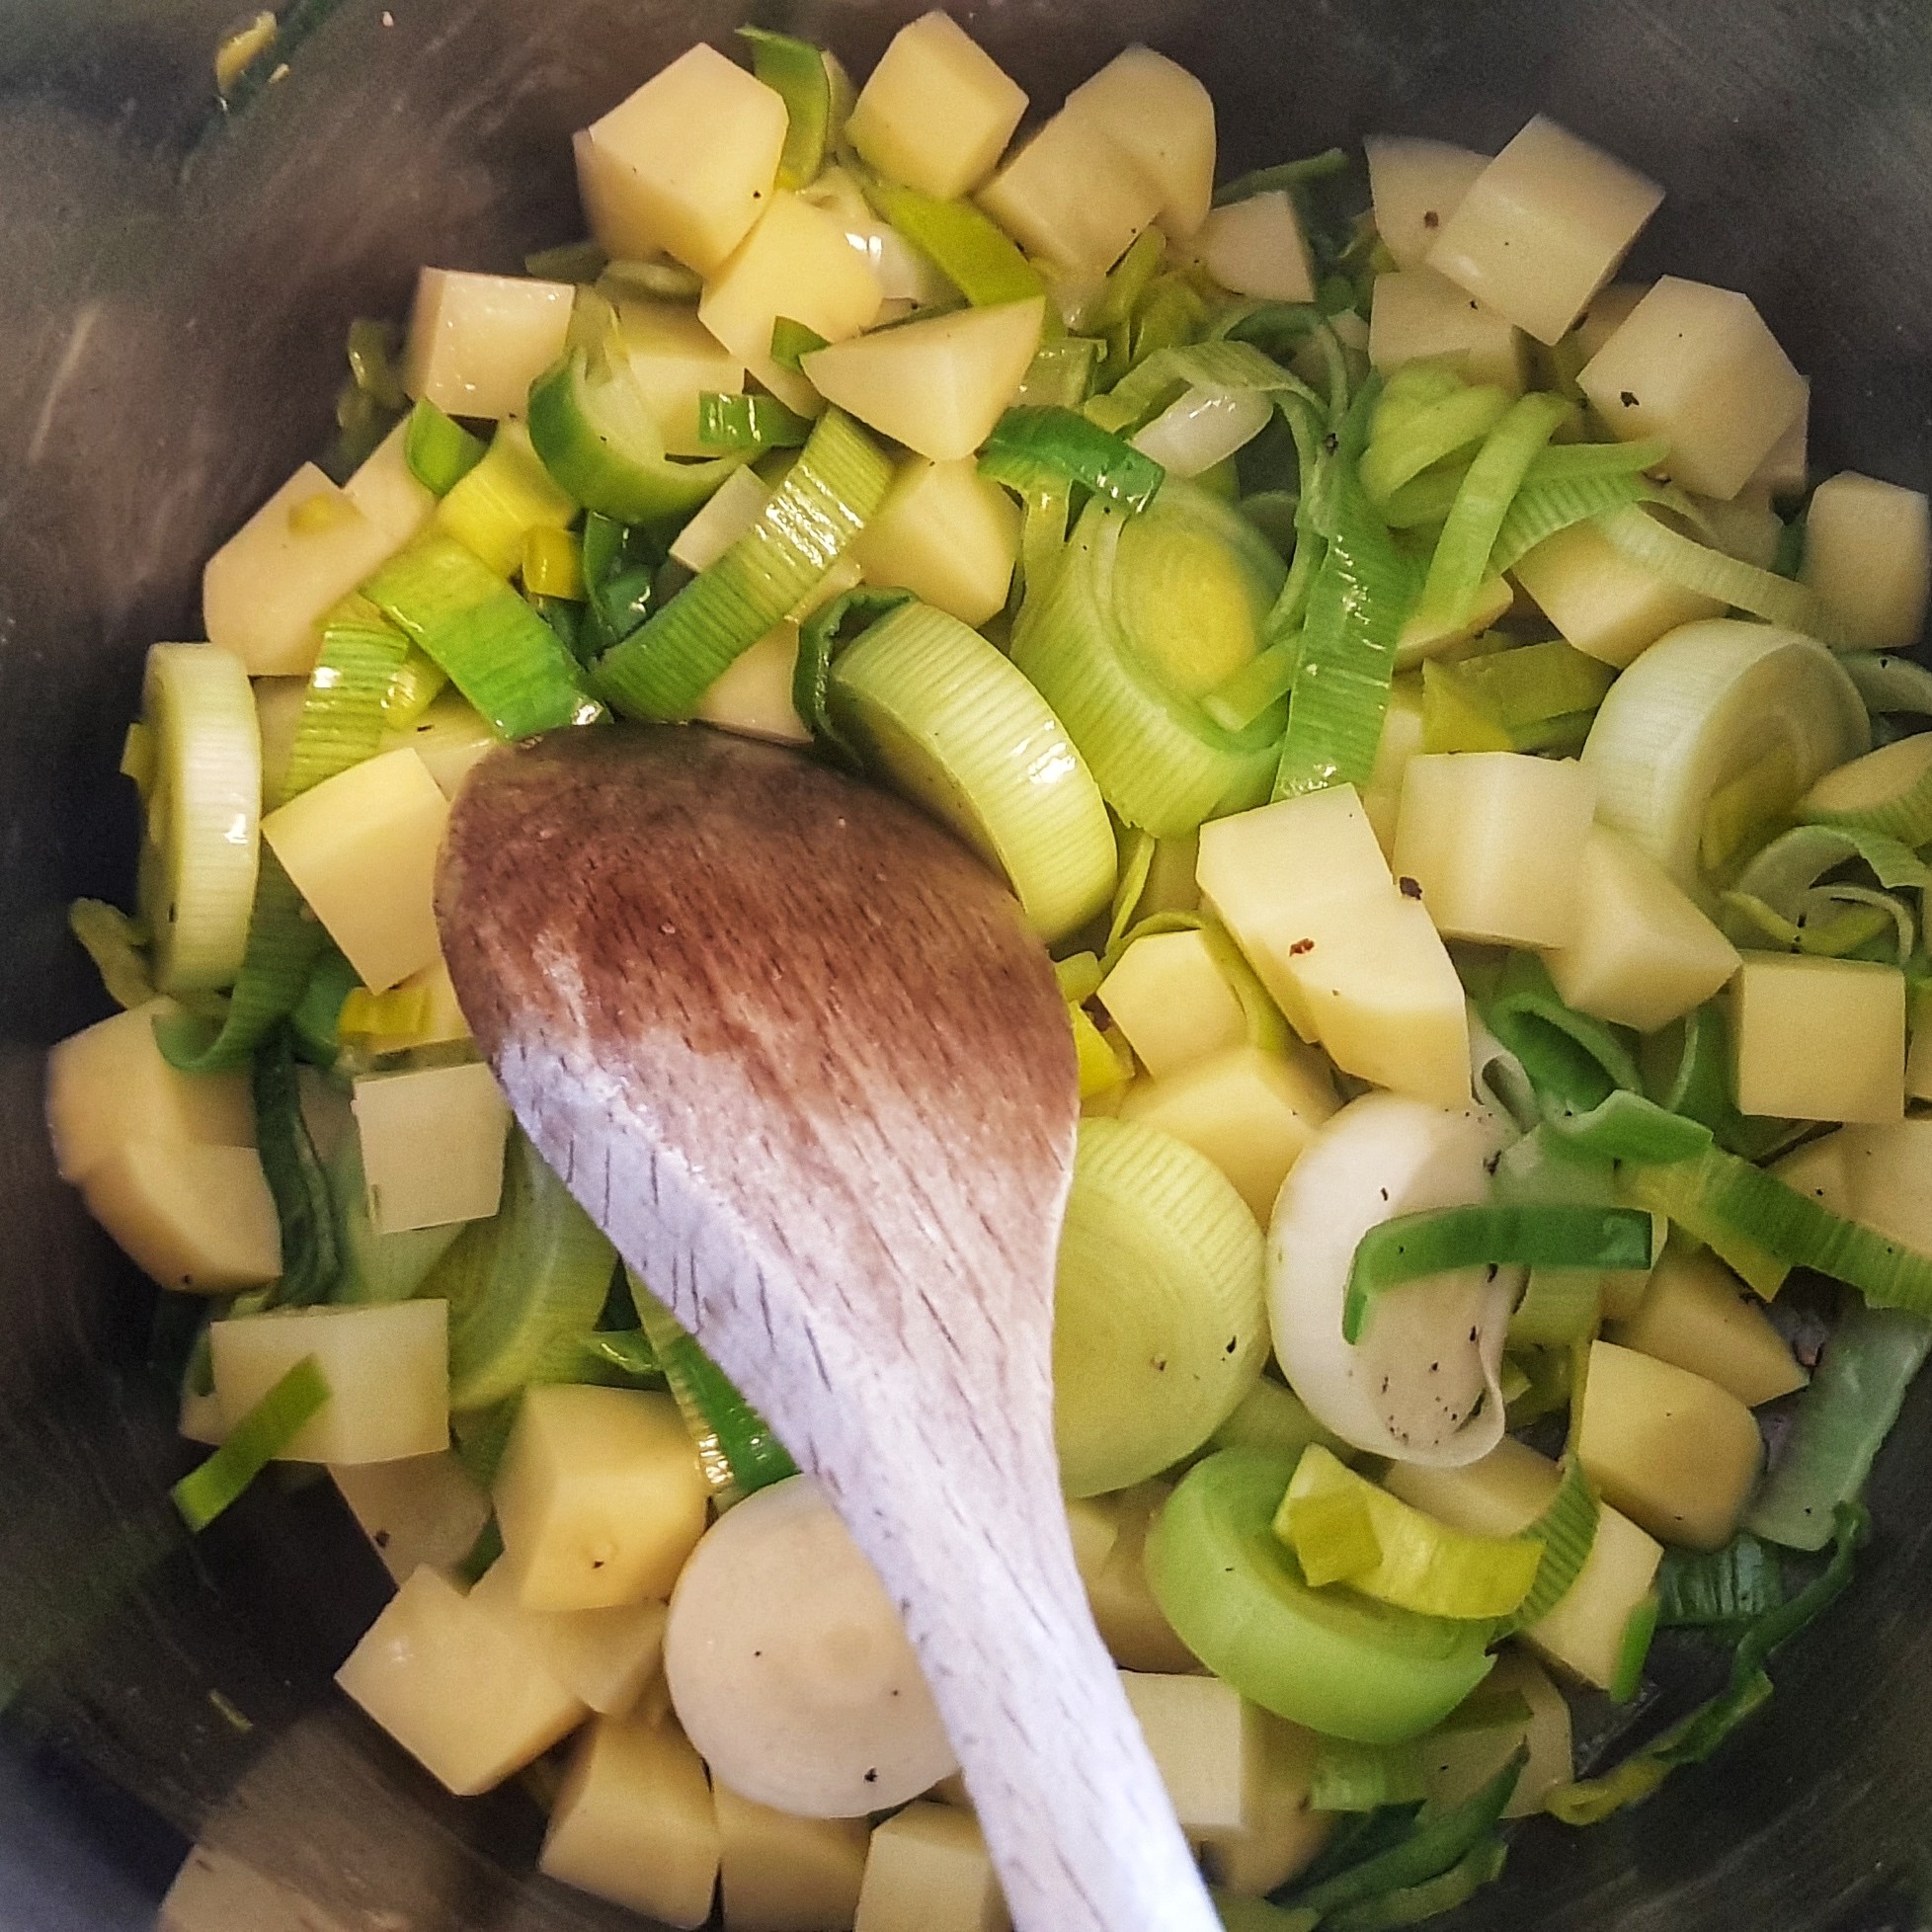
Start with the filling. Melt the butter in a saucepan and add the leek or onion and potatoes, season with half a teaspoon of salt and a good grind of pepper. Cook over a medium heat until the leek or onion melts right down. Do this slowly, turning down the heat if necessary – you don’t want to fry them, though a pale golden brown colour is fine.
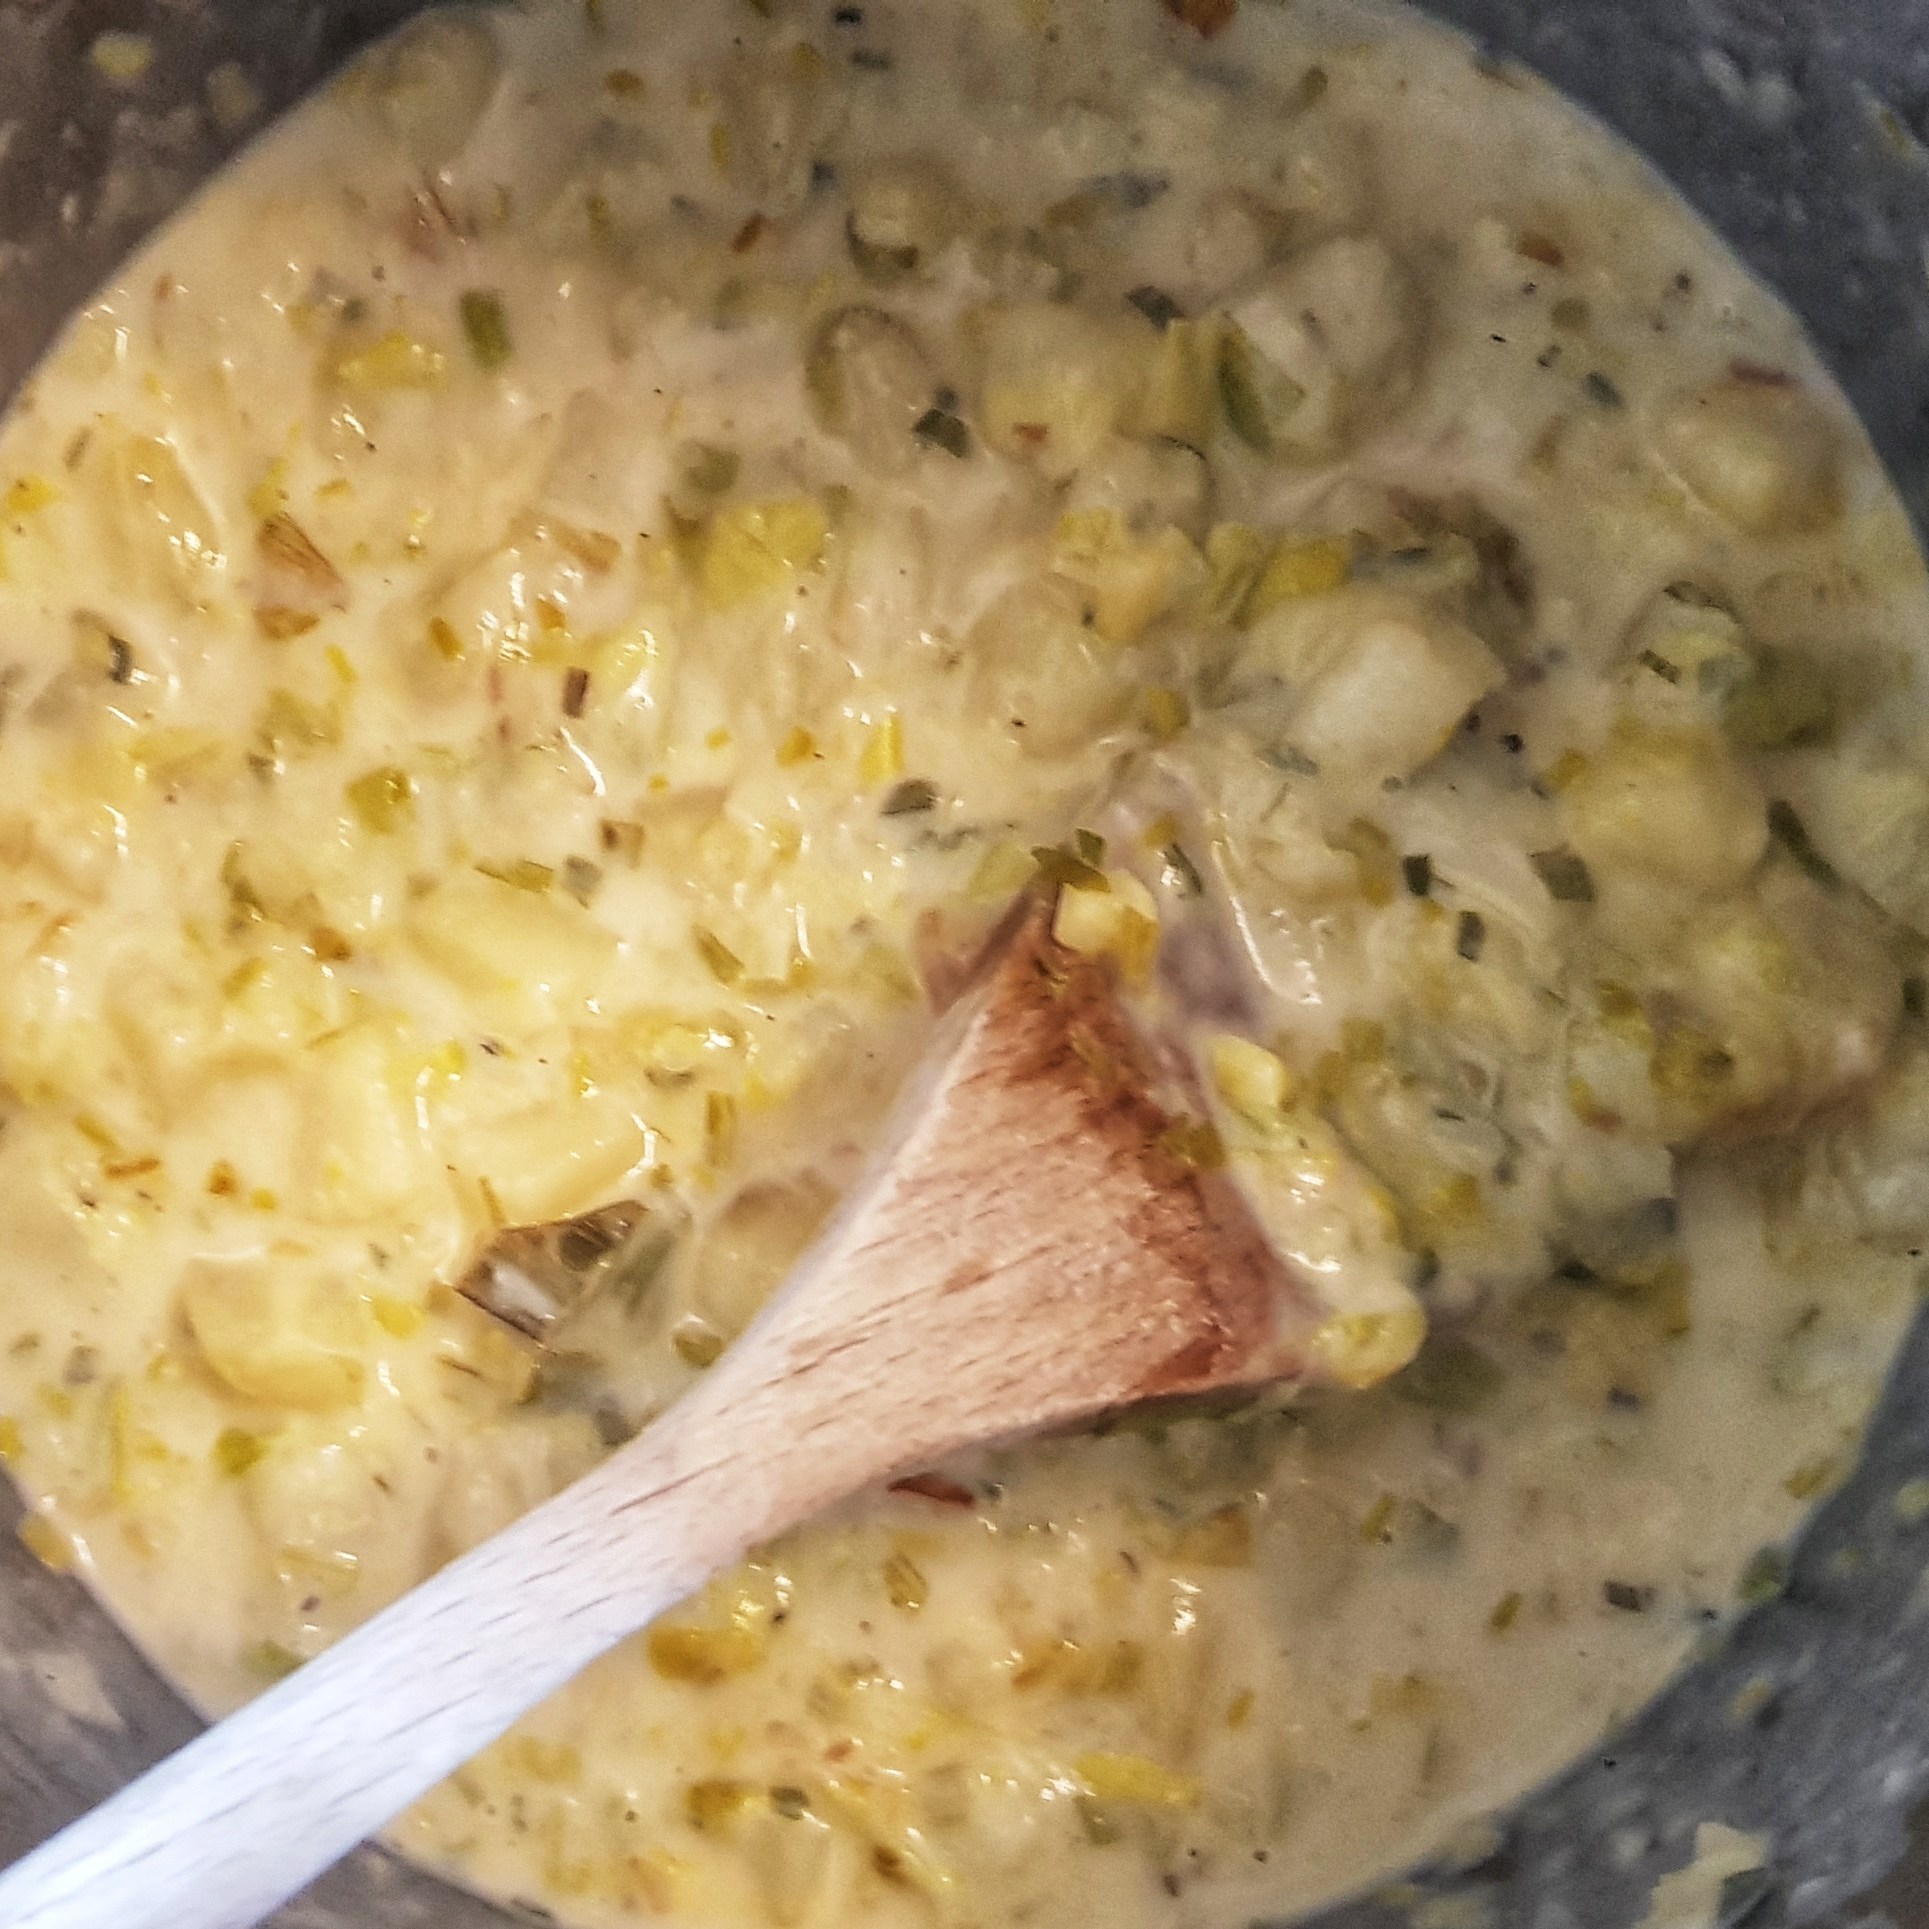
Stir in the flour and mustard and cook for a minute before mixing half of the milk. When the milk combines with the flour to make a smooth sauce, add the remainder of the milk and combine again.
Simmer gently for 10 minutes, stirring occasionally. Then remove from the heat and stir in the cheese. Mix in the Cayenne pepper. Check the seasoning and add more salt and pepper. It’s a good idea to slightly over season the filling to make up for the comparatively bland shortcrust pastry. Finally stir in the cream and allow to cool completely. I usually make my cooked fillings a day or two ahead of time.
Now make the pastry. Rub the fat(s) into the flour. If you are using unsalted butter, add half a teaspoon of salt. If you are making pastry by hand, unless you have forearms like Popeye, use fats that are at room temperature. If using a mixer, use the flat beater and use cold fats straight from the fridge. Either way, once it resembles breadcrumbs add the water a couple of tablespoons at a time until you have a soft but not sticky dough. Knead very briefly, wrap in cling film and leave it rest in the fridge for 30 minutes.
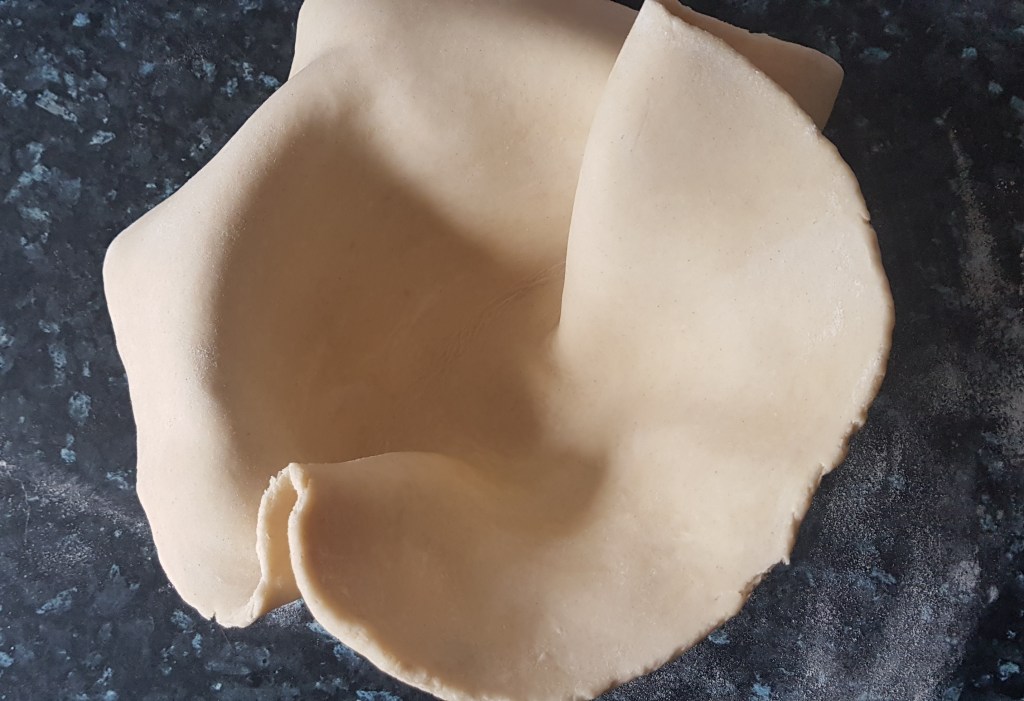
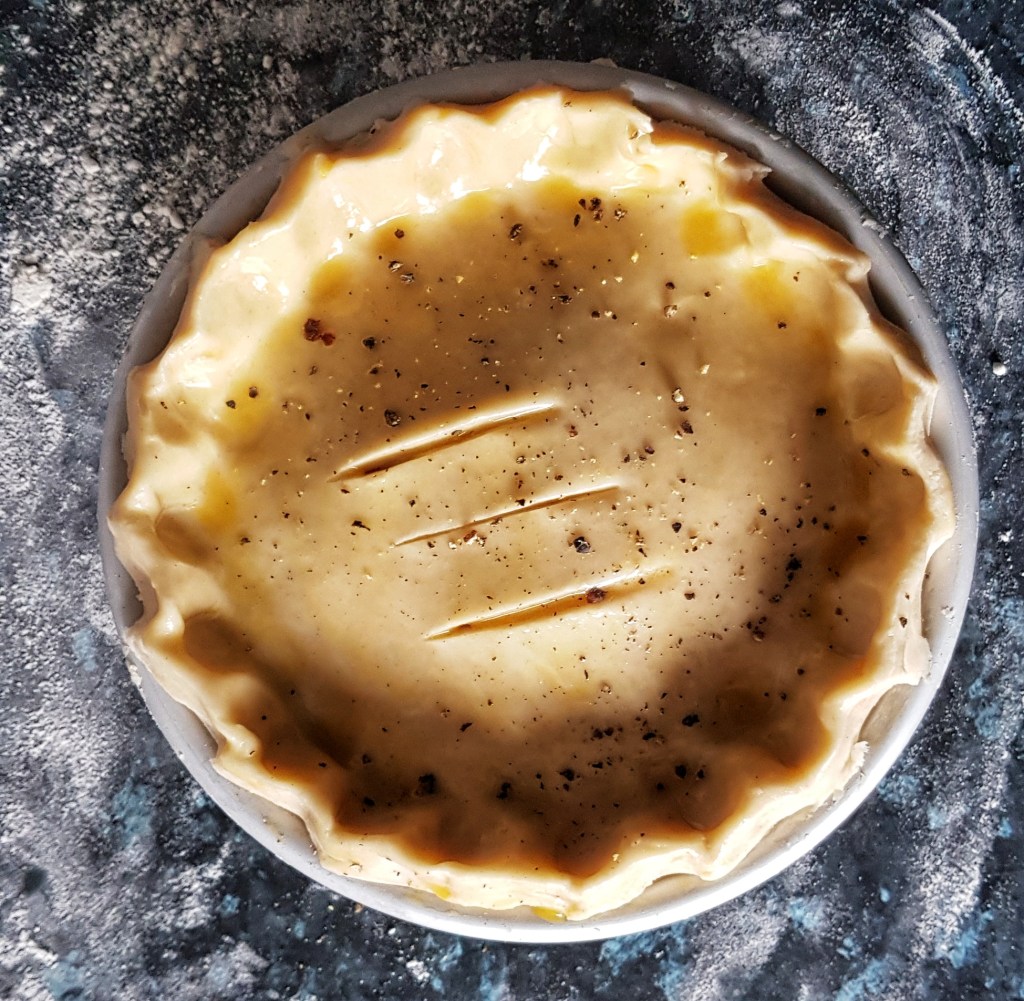
After resting, take around a third of the dough and roll out on a lightly floured worktop. I used an 18 cm cake tin because I like deep-filled pies, but a shallow pie dish or flan ring of around 25 cm would work too. Roll out a third of the pastry into a circle. Leave the pastry to rest again for a minute or so before laying it in the tin. Be careful to press the pastry into the corners without stretching it: lift it in carefully. If using a deep dish as I have it’s helpful to fold the pastry into quarters, placing it in the dish or tin and then unfolding it.
Roll out the remainder of the pastry to make a lid. Cut a steam hole in the centre and set aside.
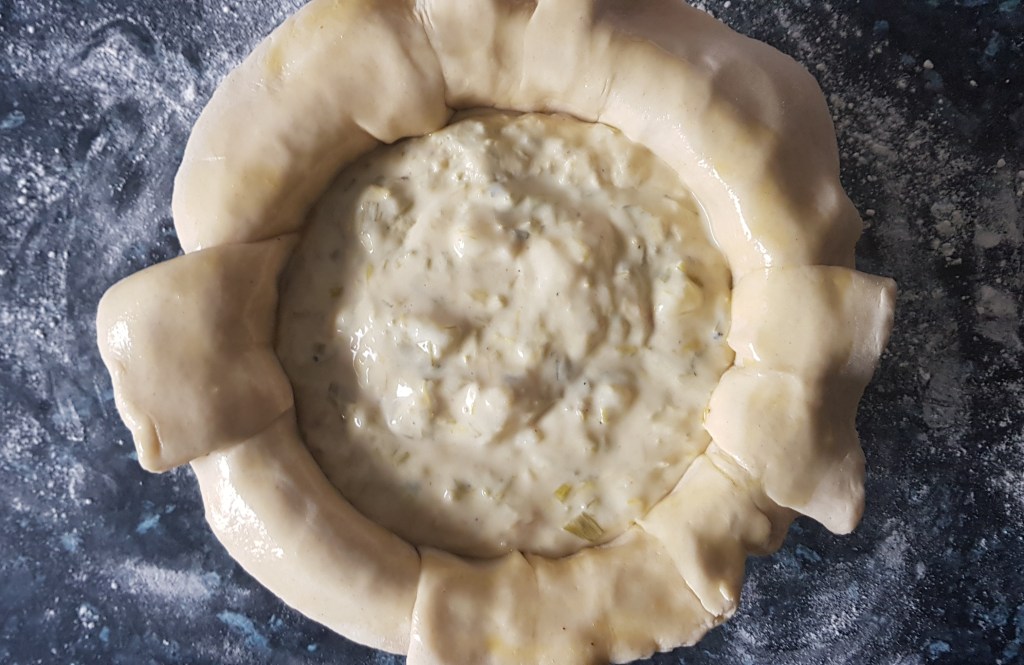
Spoon in the pie filling, but don’t fill it too much – it does expand as it cooks. Now brush the edges with egg wash (I use an egg, or egg yolk, beaten with half a teaspoon of salt). Glue the lid in place, pressing the lid down well.
Trim the excess pastry with a sharp knife and then crimp the edges or use a fork to seal the lid. Paint with more egg wash, and if you like add a bit more black pepper. Place in the fridge to set the pastry.
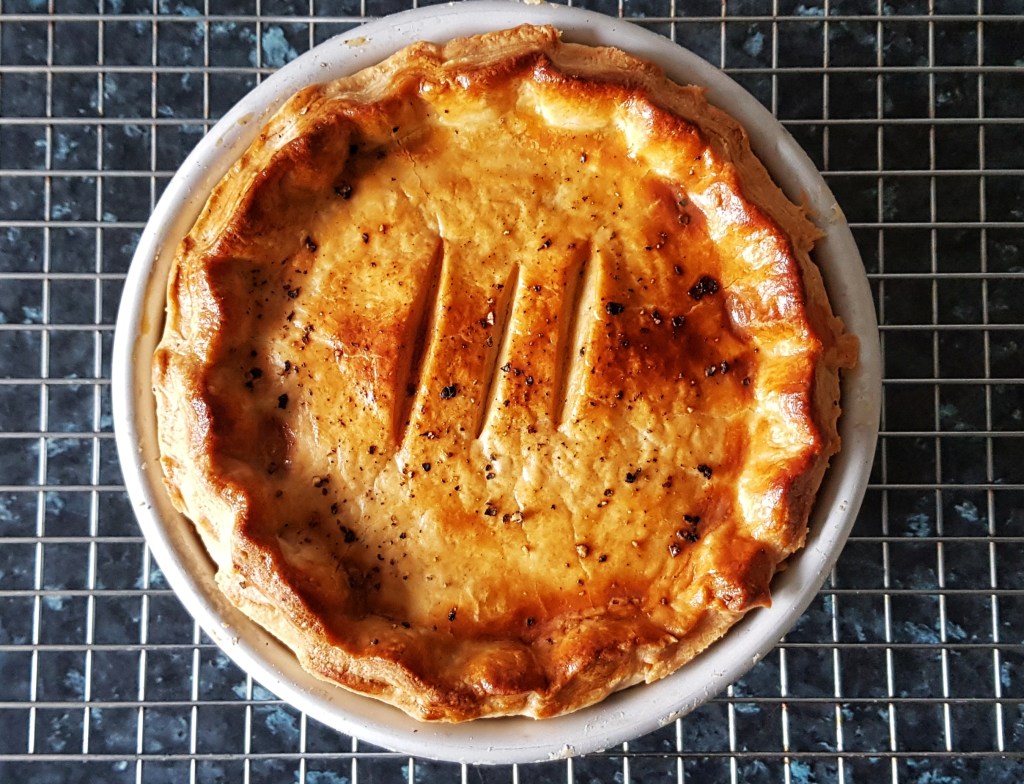
Preheat your oven to 220°C and pop a baking tray on the centre shelf.
(If you have any left-over pastry and filling, make a pasty with it (see here for my Cornish pasty recipe) and bake it with the pie, or freeze it. Both pastry and filling freeze well separately.)
Take the pie out of the fridge and place in the oven on the hot baking tray (this prevents a soggy bottom from developing) and bake for 45 minutes, turning down the heat to 180°C when the pastry is a nice golden brown.