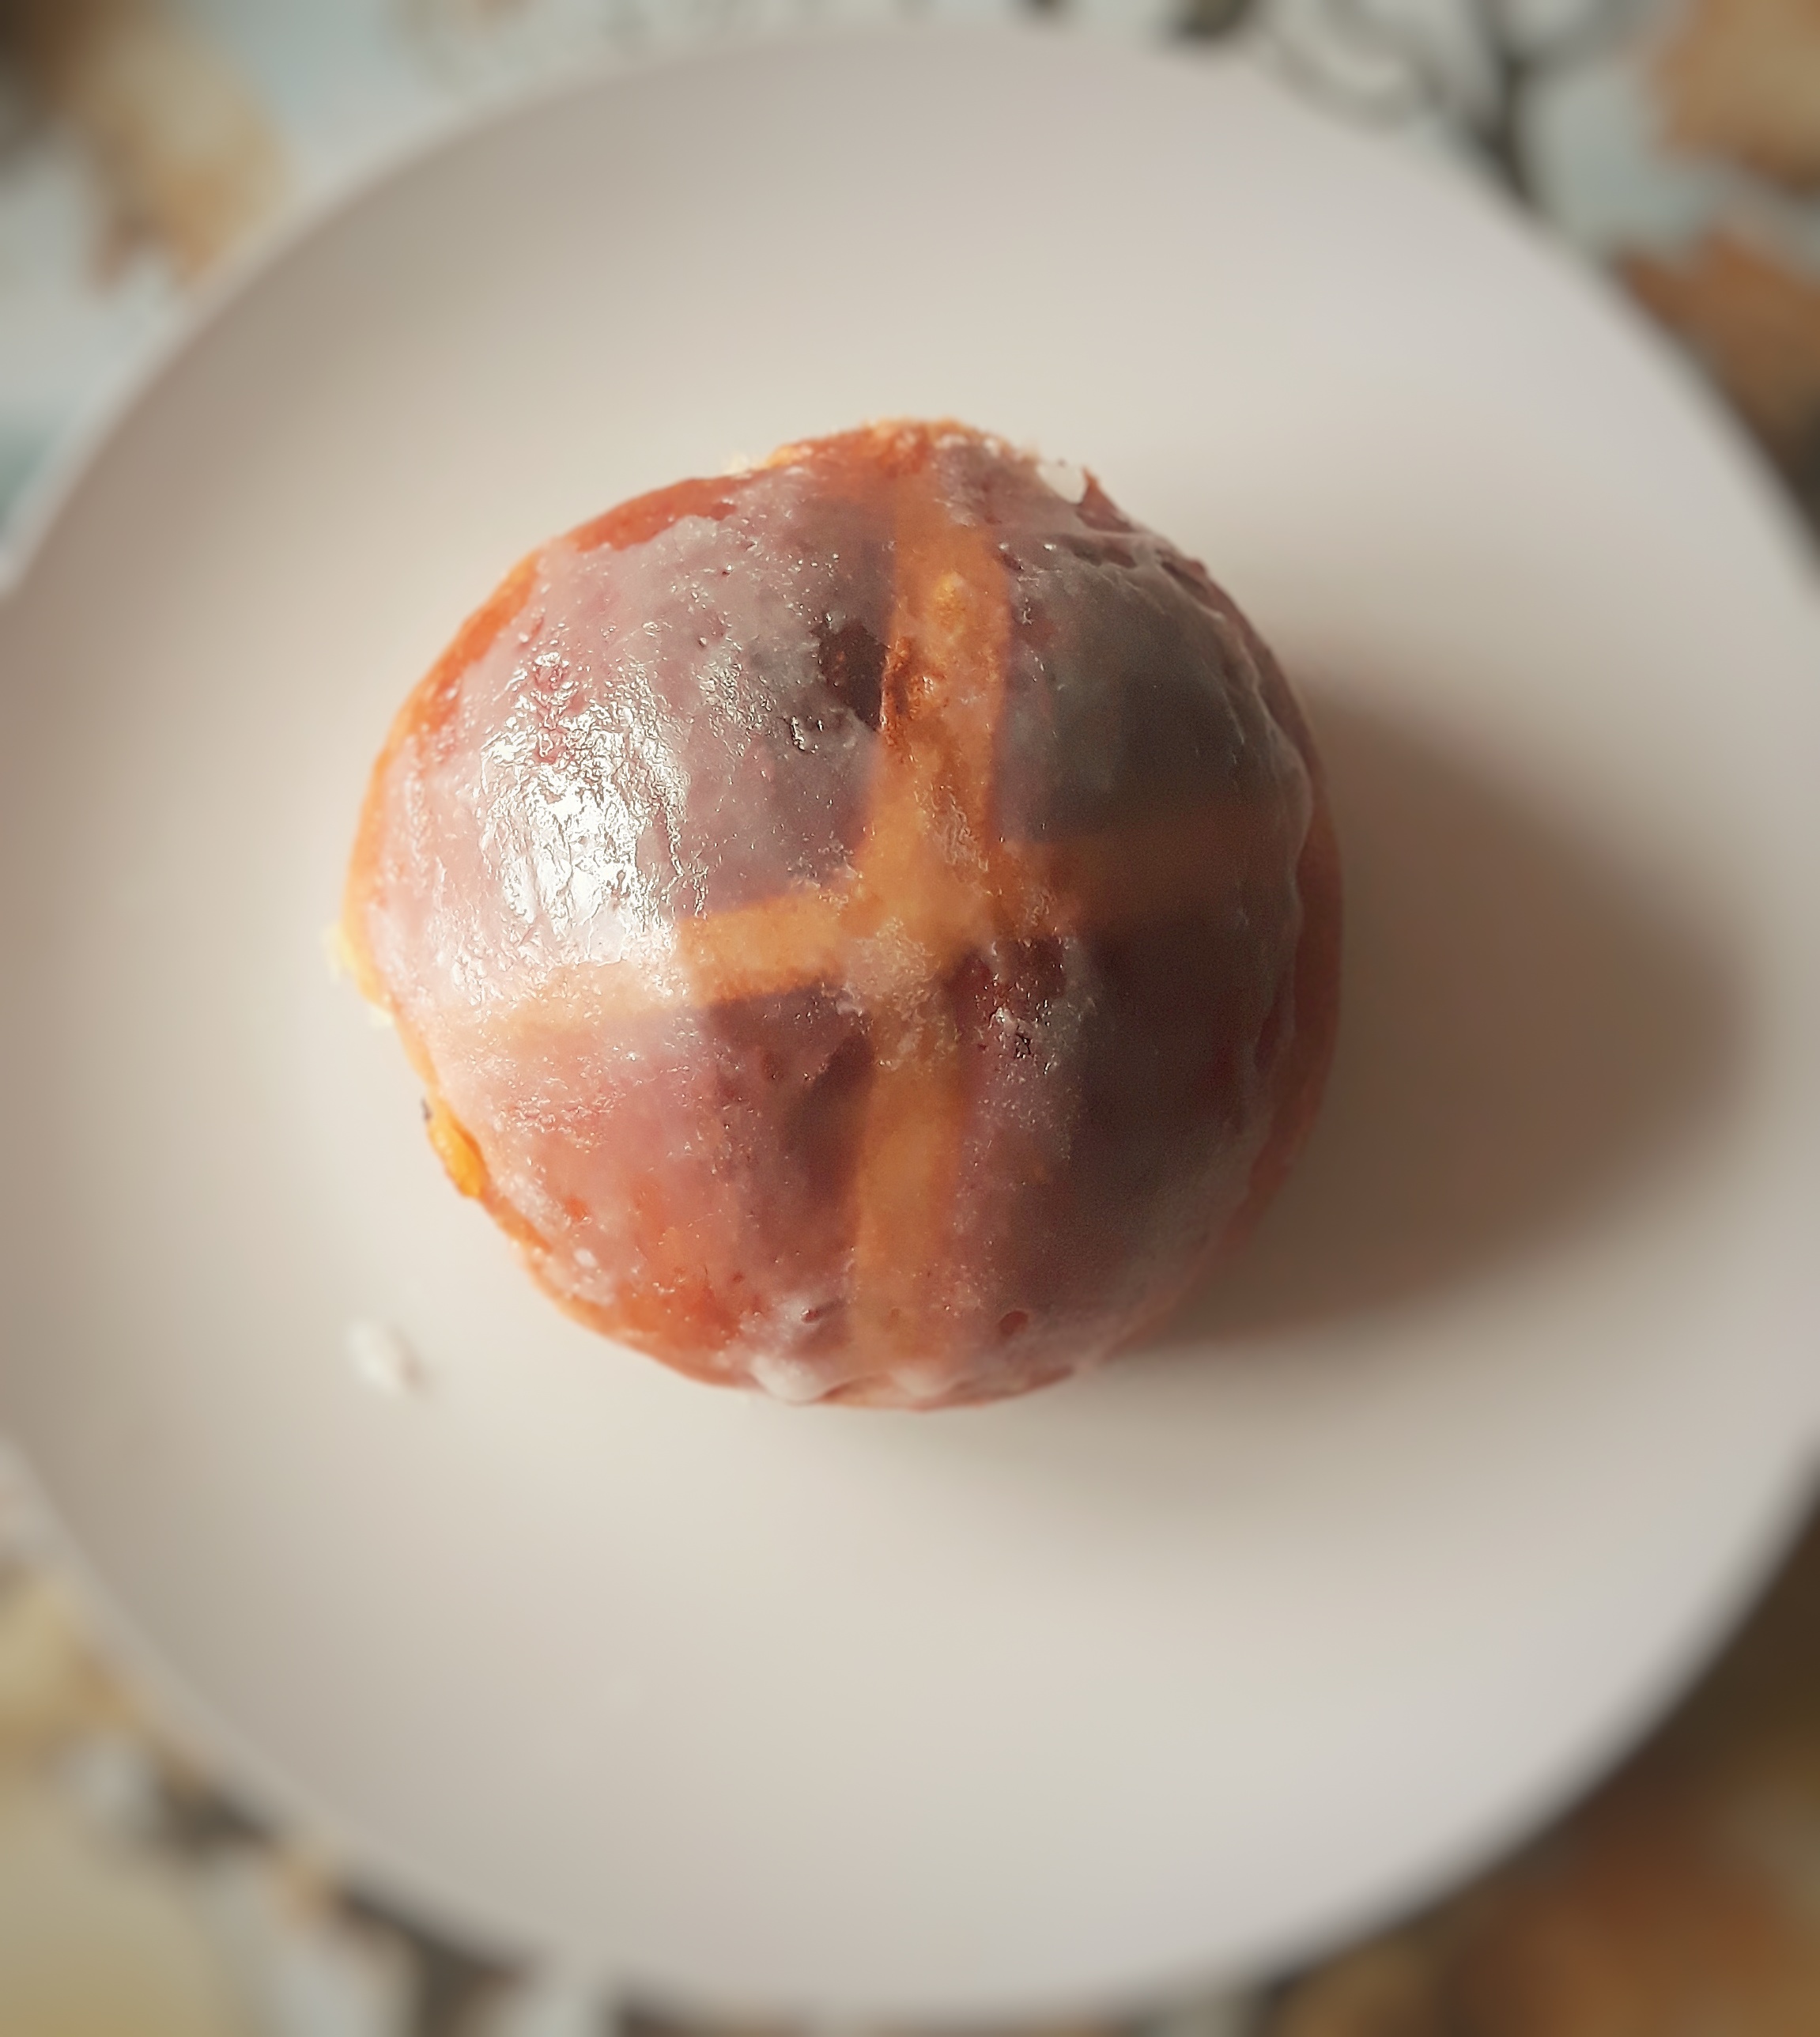
Tag Archives: recipe

Hot Cross Buns

Tomorrow is Good Friday and in England it is traditional to eat hot cross buns, or rather it was;  supermarkets and bakeries bring them out as soon as Christmas is over these days. And why not? They are delicious after all. The reason that Good Friday is the day these buns are traditionally baked goes back to Tudor times, when the sale of spiced buns was illegal, except on Good Friday, at Christmas and at funerals.

The cross, people assume, is to denote the cross upon which Jesus was crucified. This is in fact nonsense; spiced buns with crosses were being produced throughout much of pagan Europe. Spiced buns have always been symbolic in worship and ones adorned with crosses were made for the goddess Eostre (where Easter get its name).

The Pagan goddess, Eostra

So that is the cross taken care of, but what about the hot? We don’t actually eat them hot that often. They were simply called cross buns, until that famous nursery rhyme was written sometime in the eighteenth century:

Hot cross buns, hot cross buns!

One ha’penny, two ha’penny, hot cross buns!

If you have no daughters, give them to your sons,

One ha’penny, two ha’penny, hot cross buns!

What if you have neither sons nor daughters? I suppose you eat them all to yourself like the miserable old spinster you are…

Ever since I started baking my own bread, I have sworn never to buy it again as it is just so delicious. Bought buns – like bread – are just shadow of their former selves, says Jane Grigson: ‘Until you make spiced hot cross buns yourself…it is difficult to understand why they should have become popular. Bought, they taste so dull. Modern commerce has taken them over, and, in the interests of cheapness, reduced the delicious ingredients to a minimum – no butter, little egg, too much yellow colouring, not enough spice, too few currants and bits of peel, a stodgy texture instead of a rich, light softness. In other words, buns are now a doughy filler for children.’

The recipe below asks for mixed spice, you buy a proprietary blend of course or make your own. I decided to make my own – simply because I didn’t have any. The good thing about making your own is that you can remove spices you don’t like, and enhance the ones you do. Typical spices are the warm ones: cinnamon, mace, allspice (pimento), nutmeg, cloves and ginger. I also think a little black pepper is good.

Here’s my recipe. It makes between 8 and 12 buns, depending upon how large you want to make them. The piped pastry cross is optional – cutting crosses with a serrated knife is fine, and closer to the original. I used to think the same as Elizabeth David, in that they ‘involve unnecessary fiddly work’, but that’s because I couldn’t get them right, I reckon to have worked it out now.


If you like the blogs and podcast I produce, please consider treating me to a virtual coffee or pint, or even a £3 monthly subscription: follow this link for more information.


Ingredients

500 g strong bread flour

5 g dried, fast-action yeast

10 g salt

60 g caster or soft dark brown sugar

1 tsp mixed spice

50 g softened butter

250 ml warm milk, or half-and-half water and milk

1 egg

100 g dried fruit (currants, raisins, sultanas, etc.)

25 g candied peel

For the crosses:

50g strong white flour

70-80 ml water

For the glaze:

60g sugar

70 ml water

Mix together the flour, yeast, salt, sugar and mixed spice in a bowl, then make a well in the centre. Beat an egg into the milk, and pour it into the well, adding the butter too. If you have an electric mixer, use the dough-hook attachment and mix slowly until everything is incorporated, then turn the speed up a couple of notches and knead for around 6 minutes. The dough should be tacky, glossy, smooth and stretchy. If you don’t have one, get stuck in with your hands and knead by hand on a lightly-floured worktop. It’s a very sticky dough at first, so it’s a messy job, but it will come together.

Grease a bowl, tighten the dough into a ball, pop it in and cover the bowl with cling film or a damp tea towel. Leave to prove until doubled in size – this can take anywhere between 1 and 3 hours, depending upon ambient temperature.

Knock back the dough to remove any air and mix in the dried and candied fruits – again, either by using your hands or your dough hook. Divide the dough into 8, 10 or 12 equally sized pieces and roll up into very tight balls on a very lightly-floured board. This is done by cupping your hand over a ball of dough and rolling it in tight circles, takes a little practise, but is an easy technique to learn.

Line a baking tray with greaseproof paper and arrange the buns on it, leaving a good couple of centimetres distance between each one. Cover with a large plastic bag and allow to prove again until they have doubled in size.

Meanwhile, make the cross dough. Simply beat the water into the flour to make a loose, but still pipeable batter. Put the batter in a piping bag (or freezer bag, with a corner cut away) and make your crosses. If you like, just cut crosses in the tops.

Put the tray in a cold oven, and set it to 200⁰C and bake for 20 to 25 minutes (you get a better rise if they go into a cold/just warm oven, if you have to put them into a hot over, knock 5 minutes from the cooking time).

When they are almost ready, make the glaze: boil the sugar and water to a syrup and when the buns come out of the oven, brush them with the glaze twice.

Eat, warm or cold with butter. To reheat them, bake in the oven for 10 minutes at 150⁰C.

22 Comments

Filed under baking, bread, Britain, Easter, Festivals, food, General, history, Recipes, Teatime

The Oriental Club’s Mid-19th Century “Mutton Curry”

The Duke of Wellington, the first (and only) President of the Oriental Club

In the mid-19th century, the British obsession with Indian curries and culture really started to take off (see this post for a brief history of Britain’s love of spice and India). It wasn’t just the spiciness, but the romance of the place. Queen Victoria loved the country and even had an Indian wing in the palace. Although she was the Empress of India, she never actually visited the country, leaving all that excitement to her sons.

Hanover Square in the 18th Century

Authentic – or very close approximations to authentic – curries were being made in one particular London gentleman’s club called the Oriental Club which could be found in Hanover Square. The club catered for high society – the Duke of Wellington was the President and all the chairmen seem to have been Sirs, Lords, Major-Generals or Vice-Admirals.  The Club was obviously a popular one; it opened in 1825 and in 1961 it moved from Hanover Square to Stratford House on Stratford Square, where it remains to this day. If you are a Londoner (and a man), you can still join, though it does cost between £240 and £850 per year to become a member.

Stretford House, the current home of the Oriental Club

In its hey-day, Chef Richard Terry was at the helm in the kitchen, who took full advantage of the first Asian grocery warehouses; Payne’s Oriental Warehouse on Regent Street and the Oriental Depot on Leicester Square. His recipes were ‘not only from [his] own knowledge of cookery, but from Native Cooks’ too. He published a book called Indian Cookery in 1861, where the recipe below is adapted from. The job of adaptation was not done by me, but Madhur Jaffrey, though I would like to get my hands on a copy.

To make the curry, you need to make a blend of curry powder and curry paste first.

Richard Terry’s 19th Century British Curry Powder

This makes 7 tablespoons of curry powder – enough for more than three curries using the recipe below. You can of course use it in any recipe that asks for ‘curry powder’ in its list of ingredients. All the spices required are ground, but don’t buy ground coriander, pepper, cumin, cardamom and cloves if you can avoid it. Instead, roast whole spices over a medium-high heat in a dry frying pan then grind using a coffee grinder after cooling. All you need to do is mix together the following:

2 tbs ground turmeric

5 tsp ground coriander seed

2 tsp ground ginger

2 tsp Cayenne pepper

1 ½ tsp ground black pepper

½ tsp ground cumin

½ tsp cardamom seeds

½ tsp ground cloves

Store in a cool, dry, dark place.


If you like the blogs and podcast I produce, please consider treating me to a virtual coffee or pint, or even a £3 monthly subscription: follow this link for more information.


Sir Ranald Martin’s British Curry Paste

Many old (and new!) recipes ask for curry paste, but don’t always give receipts for the paste itself.  This recipe from Ranald Martin, a Victorian doctor and foodie who lived in India during the 1840s provides us with this one below. He was told it was an old Madras concoction. According to Madhur Jaffrey, the ingredients are very common in Madras, but the combination is ‘totally alien’. Aside from being used in curries, it was also used in sandwiches. The recipe below makes around 12 fluid ounces of paste.

4 tbs whole coriander seeds

2 tbs lentils such as yellow split peas or chana dal

1 tbs whole black peppercorns

1 ½ tsp whole cumin seeds

1 tbs whole brown mustard seeds

1 tbs ground turmeric

1 tbs Cayenne pepper

1 ½ tsp ground ginger

2 tsp salt

2 tsp sugar

3 cloves of garlic, minced

4 fl oz cider vinegar

6 tbs flavourless cooking oil such as sunflower or peanut oil

Dry-roast the whole spices and lentils in a frying pan until they turn a shade darker and emanate a delicious roasted aroma.

Remove from the heat, cool and grind in a spice or coffee grinder. Add the remaining ingredients except for the oil and stir well. Heat the oil in a frying pan and when hot, add the spice mixture and fry for around five minutes until the paste turns darker. Cool and empty into a jar. Store in the refrigerator.

The Oriental Club’s 19th Century Mutton Curry

Okay, you have made the paste and blended your spices, now you can get on with the curry. You can use either lamb or mutton, but bear in mind, the mutton – although more flavourful – will take longer to cook. If lamb is tricky to get hold of, goat or kid could be used as an alternative. The curry is pretty pungent, but good, dark and rich; I added a couple of peeled, chopped potatoes to add much needed-blandness. This curry serves 4 people and goes very well with plain rice, yoghurt and mango chutney. Would you believe, I forgot to take a photograph!?

4 tbs flavourless cooking oil

1 medium-sized onion, thinly sliced

2 tbs 19th Century British Curry Powder

1 tbs 19th Century British Curry Paste

1 ½ lb cubed lamb meat, shoulder is a good cut for this

8 – 12 oz (i.e. a couple of medium-sized) potatoes, peeled and cut into large chunks

¾ – 1 tsp salt

Heat the oil in one of those wide, deep frying pans that come with a lid. Add the onions and fry until the onions have browned and become crisp. Add the paste and powder, stirring well for a few seconds. Now add the meat and half of the salt, stir, cover and turn the heat right down. Gently fry for around 10 minutes, stirring occasionally. Add a pint of water (that’s a British pint – 20 fluid ounces) and the potatoes, turn up the heat and when the curry comes to a boil, turn the heat back down, cover and simmer very gently until the meat is tender, around 60 to 90 minutes if using lamb, longer if using mutton. Taste and add more salt if needed.

9 Comments

Filed under food, history, Indian food, Meat, Nineteenth Century, Recipes, The Royals, The Victorians, Uncategorized

Pea Soupers

London, Parliament: Sun Through the Fog by Claude Monet 1903

London in the mid-to-late nineteenth century must have been an amazing place. There’s nothing I like more than walking around London Bridge and its environs; it is just like walking around a Dickens novel, with the romantic remains of the Marshalsea prison and roads named after his characters such as Clennam and Copperfield Street. There was however, one rather unromantic aspect to London life and that was the intense and deadly pollution created from the huge amount of coal being burnt at the time.

We talk of the smog that lie over the big cities of the modern world, Houston certainly had one, but they all pale in comparison to London smog; it had a very strong sulphurous smell and a green-brown colour to it. The Sun didn’t burn it off, but actually intensified it. Hung-out washing would be visibly dirtier once it had dried. Thousands died from heart and lung problems – it was said that a 30 second walk was the equivalent of smoking 20 cigarettes – and rickets was widespread due the lack of sunlight. A miserable place indeed:

The fog was so thick that the shops in Bond Street had lights at noon. I could not see people in the street from my windows. I am tempted to ask, how the English became great with so little daylight? It seems not to come fully out until nine in the morning, and immediately after four it is gone…On the 22nd of the month, accidents occurred all over London, from a remarkable fog. Carriages ran against each other, and persons were knocked down by them at the crossings. The whole gang of thieves seemed to be let loose. After perpetrating their deeds, they eluded detection by darting into the fog. It was of an opake, dingy yellow. Torches were used as guides to carriages at mid-day, but gave scarcely any light through the fog. I went out for a few minutes. It was dismal.

Richard Rush, 1883

On several occasions, people fell in the Thames and drowned because they could not see the river right in front of them.

Victorian link boys guide people home

through the London smog

And so, for obvious reasons, the thick London smog became known as a ‘pea souper’. Dried pea based soups and puddings were very popular at this time, especially in the winter when there were no few fresh vegetables around. The soup became known as London particular because of a line from Charles Dickens’ novel Bleak House: “This is a London particular…A fog, miss”, said the young gentleman.

The phrase London particular had actually been around for at least a century – it was used to describe food and drink particular to London, for example London Particular Madeira.


If you like the blogs and podcast I produce, please consider treating me to a virtual coffee or pint, or even a £3 monthly subscription: follow this link for more information.


London Particular

This soup is really more of a potage and is very simple and cheap to make. The best thing about it is the wonderful stock made from the addition of a nice ham hock. You can use smoked or unsmoked, or you could go for a couple of pig’s trotters. Either way, it shouldn’t cost you more than 50 pence at the butcher. He might even give you them for free if you bat your eye-lashes at him. The recipe also asks for two tablespoons of Worcestershire sauce, this might seem like a lot, but it really can take it.

Ingredients

1 lb dried split peas

2 oz butter

3 rashers of smoky bacon, chopped

1 onion, sliced

1 ham knuckle, ham hock or 2 pig’s trotters

pepper

salt

2 tbs Worcestershire sauce

Have a look at the packet of peas; see if they need soaking overnight. If they are non-soak but are particularly old, you might want to soak them.

Melt the butter in a stockpot or large saucepan, add the bacon and fry on a medium heat for five minutes. Add the onion and fry until softened. Drain the peas and stir them in, making sure they get a good covering of bacon fat and butter. In amongst the peas, place the hock, knuckle or trotters and cover with water. Add some pepper, but do not add salt at this stage. Bring to a boil and skim off any grey scum, then cover and simmer gently until the peas are all mushy; around 1 ½ to 2 hours. Give the potage a stir every now and then as the peas do tend to stick, particularly towards the end of cooking.

Take out the meat joint and place to one side. Liquidise or mill the soup and return it to the pan. Pick any meat from the joints and add to the soup. Season with salt (if needed), pepper and the Worcestershire sauce.

6 Comments

Filed under food, history, Nineteenth Century, Recipes, Soups, The Victorians, Uncategorized

The Rhubarb Triangle

It is just about the end of the short British forced rhubarb season, and it is always a treat to see it nestled, glowing pink in a crate at the marketstalls, and it is always sad to see it disappear, as I think it is one of the most wonderful vegetables.

In Britain, the long thin bright pink stalks are grown in an area called the Rhubarb Triangle, also known as the Wakefield triangle, a nine mile square area of land contained by Leeds, Morley and Wakefield in the West Riding of Yorkshire. Here, the rhubarb is grown in large, heated, low-ceilinged sheds in complete darkness. Because the plants want sunlight, they are forced stretch and grow long and thin in the vain hope of catching some of the Sun’s rays. Hence it is called forced rhubarb. It is also called Champagne rhubarb by some. The rhubarb never gets to attain the green colour like normal field or garden rhubarb has; I think the biological term is chlorosed. It also never gets the chance to develop the very astringent sourness too, but it does still has the wonderful rhubarb flavour. The plants grow so quickly in their desperation to find light that you can actually hear them pop and crack as they stretch and grow. I imagine that it is pretty scary in those dark, dank sheds harvesting the rhubarb by candlelight.

So what is special about West Yorkshire when it comes to growing rhubarb? Apparently, it is the unique mix of soil and climate. I know that that might sound rather trite, but I think in this case it might actually be true; Wakefield is the only place in the UK where one can successfully grow liquorice and the reason for that is because of its soil. Yorkshire-produced Forced Rhubarb has been given Protected Designation of Origin (PDO) status by the European Commission’s Protected Food Name scheme, just like Stilton Cheese, and famously not like Cornish pasties. That said the forced rhubarb I got was from Mexico.

It wasn’t until the discovery that rhubarb could be forced in the 1840s that the vegetable caught on as a ‘fruit’ in crumbles, pies &c. (it isn’t a true fruit as there are no seeds). Before then, like many plants, it was grown for medicinal purposes. It was such a revered drug for treating gut, lung and liver disorders that it was worth thrice the price of opium! It was first introduced into Europe by Marco Polo from Asia during the thirteenth century, and was first grown in Britain in the mid-seventeenth century.

Okay, that’s enough waffle, it is recipe time. Rhubarb is great for desserts and jams, and it is also great with fish, particularly oily fish. There are many recipes that I could add to the post, but the best has to be…


If you like the blogs and podcast I produce, please consider treating me to a virtual coffee or pint, or even a £3 monthly subscription: follow this link for more information.


Rhubarb Crumble

This is my favourite way of eating rhubarb: tart fruit, sweet crunchy topping and loads of proper custard (link here for a recipe for that). I like to include some ginger in my crumble, they are a classic combination. Here I use it twice, ground ginger in the topping, and preserved ginger in with the gently stewed fruit. Orange zest and juice also work well as an alternative.

Ingredients

10 sticks of rhubarb, forced if possible

2 knobs of preserved ginger, chopped, plus one tbs of the syrup

4 tbs caster sugar

4 oz butter

4 oz Demerara sugar, or half caster sugar and half soft dark brown sugar

6 oz plain flour

2 oz oats

1 tsp ground ginger

Slice the rhubarb sticks into one inch lengths. If buying forced rhubarb, there should be no need for peeling, but older, field grown sticks might need it. Place the rhubarb and caster sugar in a saucepan with the ginger and syrup, plus a couple of tablespoons of water. Cover, and simmer gently until the rhubarb is tender, about 10 minutes. Try not to stir the rhubarb too much, as it easily breaks up. If there is a lot of liquid, take the lid off and let it simmer away a little. Add more sugar if necessary; field-grown rhubarb may need more. Cool.

Meanwhile, make the crumble topping by rubbing the butter into the flour, using fingers, mixer or processor. Stir in the flour, oats and ginger.

Pour the rhubarb into a pie dish, or baking dish and pile on the crumble topping. I like loads of topping, but if there is too much for you, freeze the remainder for future crumbles.

Bake at 160⁰C for 45 minutes. Serve with custard, cream or vanilla (or even better, ginger) ice cream.

14 Comments

Filed under baking, food, Fruit, history, Puddings, Recipes, Uncategorized

Angels and Devils on Horseback

A Victorian hors d’œuvre that has died a death in recent decades; an angel on horseback is simply an oyster wrapped in bacon and grilled; a devil is a tea-soaked prune treated the same way. The main reason for this is that oysters were then poor man’s food and now they are a delicacy; it is odd to think of the working-class tucking into these at dinner rather than the upper middle classes. Of course, the tables were turned by the time we hit the 20th Century. If you have never tried oysters before, this is a good way to introduce yourself to them, I reckon. They should have a comeback as they are delicious, and if you can’t afford – or stomach – oysters, then at least have a go at making the devils, though they are best made together.

The best oysters for the angels are the large Pacific ones – especially if you can get them pre-shucked. The best prunes are the squidgy ‘giant’ ones; if you can’t find them, just substitute two normal prunes for each giant one. There are many elaborate recipes, especially for the angels; the oysters in one are  breaded and fried, in another they are chopped up to make a stuffing. These things are best kept simple – the raw ingredients should speak for themselves.

You can make these delightful and delicious bite-size nibbles as some decadent finger-food on rounds of bread fried in butter or alongside some roast poultry instead of pigs in blankets.


If you like the blogs and podcast I produce, please consider treating me to a virtual coffee or pint, or even a £3 monthly subscription: follow this link for more information.


Angels on Horseback

12 large shucked oysters

Cayenne pepper or Tabasco sauce (optional)

6 rashers of smoked streaky bacon cut in half

First, soak 12 wooden toothpicks in some water and get your grill nice and hot. Season your oysters with a little Cayenne or Tabasco sauce if using and roll each in a piece of bacon, securing it with a toothpick. Place them on a baking sheet and grill until the bacon is crisp and the oysters are plump. Serve immediately.

Devils on Horseback

12 large prunes or 24 small ones

Freshly brewed, strong tea

12 roasted, salted almonds

6 rashers of smoked streaky bacon cut in half

Soak your prunes in the hot tea until plump – this will take 30 minutes if no-soak prunes, or overnight if they require soaking.* Remove the stones if the prunes are pitted then fills the gap it has left with a roasted almond. If you are using small prunes, sandwich an almond between two of them. Spear with a cocktail stick and grill as described above.

*Don’t throw away the tea for it tastes delicious!

5 Comments

Filed under food, history, Nineteenth Century, Recipes, The Victorians, Uncategorized

What is a Pudding?: Addendum

Quite a while ago, I wrote a post called ‘What is a Pudding?‘ and it seems I made a few little errors within. I don’t like to be wrong, so thought I would put it right. The subject was a little essay on the origins of puddings – the boiled and steamed kind, which I argued was the proper definition of a pudding. I still don’t think I am wrong on that count, but I did accuse some puddings of being mock puddings:

So, a pudding is any dessert, or the name for the dessert course. Aside from the proper puddings…there are some that go under a false name: bread and butter pudding [and] sticky toffee pudding…are examples of this. Why are these puddings and, say, an apple pie not called an apple pie pudding?

Well it seems that I can answer my own question, at least in part. I was flicking through The English Huswife, Containing the Inward and Outward Virtues Which Ought to Be in a Complete Woman by Gervase Markham which dates from 1615 (for context King James I of England and VI of Scotland was reigning) and it seems that some of the puddings that are baked today have their roots in the simmering pot. In fact a pair of my favourites – the rice pudding and previously accused bread and butter pudding are specifically mentioned. Their forerunners were cooked in natural intestinal casings – farmes – just like black puddings:

Rice puddings

Take half a pound of rice, and steep it in new milk a whole night, and in the morning drain it, and let the milk drop away; then take a quart of the best, sweetest and thickest cream, and put the rice into it, and boil it a little; then set it to cool an hour or two, and after put in the yolks of half a dozen eggs, a little pepper, cloves, mace, currants,dates, sugar and salt; and having mixed them well together, put in a great store of beef suet well beaten and small shred, and so put it into the farmes…and serve them after a day old.

To make bread puddings

Take the yolks and whites of a dozen or fourteen eggs, and, having beat them very well, put to them the fine powder of cloves, mace, nutmegs, sugar, cinnamon, saffron, and salt; then take the quantity of two loaves of white grated bread, dates (very small shred) and great store of currants, with good plenty either of sheep’s, hog’s or beef suet beaten and cut small; then when all is mixed and stirred well together, and hath stood a while to settle, then fill it into farmes…and in like manner boil them, cook them, and serve them to the table.

I was corrected on the sticky toffee pudding in that post… I wonder how many other puddings that are not boiled today once were? I shall go through the books with a fine-toothed comb and report back. More interestingly, I need to get my hands on some farmes and make these bad boys myself and see how they compare to their modern counterparts…


If you like the blogs and podcast I produce, please consider treating me to a virtual coffee or pint, or even a £3 monthly subscription: follow this link for more information.


20 Comments

Filed under bread, food, history, Puddings, Recipes, Seventeenth Century, Uncategorized

Proper Custard

By proper custard I mean the pourable kind that goes on your pie, crumble or steam pudding. It also assumes the name cream custard and, of course, crème anglaise; you see it given that name in restaurants that trying to look all ‘high-end’, I suppose in many people’s minds, custard comes out of a packet or tin whilst crème anglaise is the real deal.

Custard in Britain has become somewhat of a travesty over the last few decades and I wonder how many people have actually ever eaten the proper stuff, whatever name you like to call it. I think it appears extravagant, fattening or difficult to make. Well it might be guilty on the first two counts against it because of the egg yolks and cream that are used, but it’s not really that difficult. All it needs is a watchful eye and a little stirring. There ways of making it easier to conjure up, as well as reducing its calorie count and cost, and there is no need to always resort going to the packet or tin.

Now, before you label me a custard snob, I need to point something out: I actually love custard made with custard powder and there’s really nothing wrong with it per se, but until you make the real stuff you won’t see they are almost incomparable. That said, there has been many an evening when I have a made a whole pint of Bird’s custard and eaten the whole lot to myself, but if there are people coming round for food, I always get the vanilla and egg yolks out.

Bird’s custard was my first contact so it will always have a special place in both my heart and stomach. However, technically, Bird’s custard isn’t custard at all, for it contains no egg (see the main post on custard). The powder was invented by Alfred Bird in 1837 because his wife, though she liked custard, was terribly allergic to eggs. Bird’s custard powder is simply cornflour with some vanilla flavouring and colouring. The famous three birds logo wasn’t introduced until the 1920s, surprisingly.

Tinned custard is pretty good too and, up until the last five or so years, it was the form I bought custard in if I wanted proper custard. My tinned custard of choice? Ambrosia Devon Custard of course – nothing else would do – and, like the Bird’s, I still love it. Again, however, Ambrosia custard does not contain eggs or egg products so is not proper custard.

Now you can go off and buy the proper stuff in the refrigerator section of your local supermarket, always called crème anglaise of course, but you may as well make your own if you’re going to do that. Next time you make a trifle or a nice warm pudding, why not try making the real thing – England’s only sauce as the French call it – proper custard.


If you like the blogs and podcast I produce, please consider treating me to a virtual coffee or pint, or even a £3 monthly subscription: follow this post for more information.


It’s a recipe that goes far, far back and I gave an early recipe a few posts ago (see here). I hope to try some old recipes in the near future. These days vanilla is the typical flavouring, whether it be in the form of a pod, an extract or as vanilla sugar, but it is optional. Some like no spice or some go for an alternative like nutmeg or cinnamon. For me, vanilla is the only way. It is sweetened with sugar and the amount you add depends on your own taste, but as a rule I like sweet custard, especially when it’s with a tart fruit pie or crumble or with a stodgy suet pudding. I add less sugar if the dessert is very sweet, like treacle tart or sticky toffee pudding.

When it comes to thickening the custard, you need to be careful not to over-cook it as it results in curdling. If you are new to custard making, the best thing to do is to replace two yolks with two teaspoons of cornflour; it works as a thickener like the yolks, but it also stabilises everything, so you’re less likely to make an error. The recipe below uses six egg yolks, but if you want thicker custard add another, or another teaspoon of cornflour.

Ingredients

1 pint of milk, or a mixture of milk and cream

1 vanilla pod or ¼ teaspoon of vanilla extract

6 egg yolks or 4 egg yolks and 2 tsp cornflour

1 to 2 tbs sugar

Split the vanilla pod, if using, and scrape out the seeds and add to a saucepan along with the milk and cream. Bring slowly to almost boiling point. Meanwhile beat the egg yolks, cornflour and sugar together in a bowl.

making custard

When the milk and cream are scalding hot and about to boil, pour it quickly onto the egg mixture whilst vigorously beating with a whisk. Tip the custard back into the saucepan and stir over a very low heat for a few minutes until it thickens and coats the back of your wooden spoon. On no account, let the custard boil, otherwise you will get scrambled egg. The temperature you are looking to achieve is 81⁰C (178⁰F). So if you are worried that it will curdle, either make sure you include the cornflour and/or put the custard in a bowl over a pan of simmering water. Don’t worry if there is a little curdling; simply pass it through a sieve and everyone will be none the wiser.

home made custard

18 Comments

Filed under food, General, history, Puddings, Recipes, Uncategorized

To Make a Coburg (or Cob) Loaf

Here’s another recipe to add to the series of posts on bread and bread-making (see main post here).

Coburg loaves are a common sight in traditional bakeries, but are rarely spotted outside of them these days. A Coburg is a round loaf that is not baked in a tin like your basic loaf (see recipe here), but as a round plump crusty loaf on a tray. On the top there are cuts in a cross shape that open up when it bakes. It can be made with pretty much any flour you like – white, whole-wheat, rye, oat, or whatever takes your fancy. I class it as one of the basic loaves because it contains just flour, yeast, salt and water.

Technically, a Coburg is a kind of cob, the only difference being that a cob does not get cut before going in the oven, though these days, there is no real distinction really. There are variations on the Coburg cuts though; sometimes several cuts are made in a chess board fashion which expands to make a porcupine loaf, which is also known as a college loaf or a Manchester loaf. Alternatively, the top of the dough gets quickly stabbed with a piece of wood spiked with lots of nails. A bit hardcore that one.

The Coburg loaf became popular in the Victorian era, and I assumed the loaf was named after Queen Victoria’s hubby Prince Albert Saxe-Coburg-Gotha, as many things were in those days. The British public were fascinated by the royal couple, and really took to many German traditions (especially a Christmastime). However, it may not be the case. There was such a thing as Coburg material; cheap and coarse and used for making mourning clothes that predated Albert so the word is older. The most likely explanation is that a German baker living in London, as many did, gave it his family name, though no baker actually knows who this was. The loaves themselves were certainly around before the Victorian era, centuries earlier in fact. They were made from courser grains than today and went by the name of a Brunswick loaf. So it seems all that occurred was a name change.

The good thing about baking these loaves is that you need no tin and consequently you achieve a good crust all over the surface. The recipe below is based on one from Elizabeth David and I haven’t provided massive detail on the making of the dough as I have already done that in the recipe for baking a basic loaf, so if you are new to bread-making, it might be worth having a little of that post first (you’ll find it here).

Also, this method asks you to put the loaf in a cold oven and then timing the bake from the time it gets to temperature, this way you get an extra-fluffy loaf. There is a little oil or butter to add if you like too; fat helps the bread keep fresh an extra day.


If you like the blogs and podcast I produce, please consider treating me to a virtual coffee or pint, or even a £3 monthly subscription: follow this post for more information.


Ingredients

up to 15 g fresh yeast or 8 g easy-bake yeast (see method)

400 g strong white flour (or a mix of up to 50% other flour(s) if you like)

10 g salt

25 g softened butter or olive oil (optional)

250 g blood-heat water

If using fresh yeast, cream it in a little of the warm water, adding a pinch of sugar and leave about 10 or 15 minutes until it is alive and foaming. Put the flour in a bowl, make a well in the centre and tip the yeast in along with the remainder of the water and the oil or butter.

If using dried yeast, make a well in the flour adding the salt to one side of the bowl and the yeast on the other side. Pour the warm water into the well along with the butter or oil.

Mix together with a wooden spoon and then bring the dough together with your hands. Alternatively, you can use the dough hook on a mixer to bring it together. Knead well until the dough becomes tight and springy, around 5 minutes in a mixer, or 10 or so minutes if kneading by hand. It will be sticky, but persevere, sprinkle a little flour or a smear a little olive oil on your work surface if you like. Bundle the dough into a tight ball and place in an oiled bowl and cover to allow it to double in volume in a warm place.

Knock the dough back lightly and give it a brief knead. If you want, give it another rising.

The super-stretchy dough after its first proof

On a lightly-floured work surface, make the cob shape by forming a ball with the dough by tucking your hands under it, tightening the dough. If you twist the ball of dough slightly as you do this, it will be extra tight.

Place the dough on a floured baking tray and cover with a large plastic bag or large bowl or pot.

Slash the top of the loaf with a sharp serrated knife to make a cross shape and place in a cold oven. Set the oven to 220°C and once the oven has got up to temperature, bake for 15 minutes. Turn the temperature down to 200°C and bake for a further 15 – 20 minutes, until brown and crusty. Check the loaf is cooked by knocking its underside and listening for a hollow sound. Cool on a rack and listen carefully for the sound of the crusts cracking!

A close-up of the cracking crust

29 Comments

Filed under baking, bread, food, history, Nineteenth Century, Recipes, Teatime, The Victorians, Uncategorized

How to Make an Everyday Loaf

All that bread wants is time and warmth.”

After writing a post on bread a while ago, I thought I should follow it up with some bread recipes. I was going to go in a chronological order and find the earliest recipe for bread I could, but then I thought against that idea; a recipe for a delicious, but basic loaf is what we need to start with.

I try to bake all my own bread these days, but admittedly, I don’t eat a large amount of it, making a loaf every couple of weeks. However, I do believe that baking your own bread several times a week is possible and not the huge pain the arse you might expect. For many years, I tried to bake bread and it always had good flavour, but it was always a little tough or stodgy. I was rather disappointed thinking one had to practise, ptractise, practise to get the knack. It turns out that I was doing everything correctly, the only ingredient I was missing out was time

…and this is the problem with today’s factory-made bread; it is mass produced to the extreme, hurredly leavened, containing additives that preserve, emulsify and rise. The slices are always far too light and fluffy – “flabby” is the word I think Jane Grigson used. Of course, these days there are bakery sections in our supermarkets, but Elizabeth David was very suspect of them even in 1977.

Now don’t be thinking me a big old snob: I actually like some factory bread, and much instore bakery bread is very nice and crusty, but having realised I can make bread that is better tasting and so much cheaper, I can’t go back. Admittedly, it doesn’t last as long in the bread bin, but then bread shouldn’t!

Here is the recipe I use for a basic loaf – it requires little elbow grease, unless you have a food mixer with a dough hook. The best thing is that it should be made the evening before you actually want to eat it, so there’s no getting up at the crack of dawn. It contains only four ingredients too: flour, water, salt and yeast. There is the option of adding a little fat to keep it fresh and soft an extra day. You can enrich the bread by swapping some or all of the water for milk, but I think there’s no need. There are so many variations on the theme and as I discover them and try to perfect them, I shall add them to the blog.

It is very important to use the appropriate amount of water. A cob loaf which just sits on a baking tray needs 60% water per volume, in other words 600 g of water for every 1000 g of flour, any more and you risk it spreading out as it proves and bakes. This loaf is going to be baked in a tin, so we can add a little more water – 62.5% for white bread flour. If you are using a mixture of wholegrain strong and white strong, you will need a little more water, around 65% water.


If you like the blogs and podcast I produce, please consider treating me to a virtual coffee or pint, or even a £3 monthly subscription: follow this link for more information.


You will also need a 2 pound, or 900 g loaf tin.

Ingredients:

400 g strong white bread flour, or a mixture of at least half white, and a wholegrain bread flour

8 g salt

4 to 5 g grams of dried instant yeast

250 – 260 g warm water

25 g oil or very soft butter

Mix the flour(s), salt and yeast in a bowl, make a well and add the oil or fat if using, then pour on the water. Mix together using your hand or a wooden spoon. If you have a mixer with a dough hook, just mix on a slow speed until it comes together to form a dough.

Important note no. 1: try to make the dough more on the wet side, rather than the dry; just keep your hands well-floured so you can handle the dough. Work it for a few minutes whilst in the bowl. Of course, if you have a mixer with a dough hook, you can simply use that on a slow to moderate speed to mix and briefly knead it.

You’ll have a sticky dough that is hard to work with, but don’t worry. It is now time to knead the bread. You can sprinkle a little flour or spread a little oil on the work surface to help if you like, but really you don’t need anything. Use whichever you might prefer. I tend to go for a light sprinkle at the beginning of the kneading process.

To knead by hand, push out the dough with the heel of your hand, and then roll it up, give it a quarter turn and repeat. The dough will quickly start to become more stretchy and smooth, and soon you’ll find you don’t need any oil or flour to knead it.

Before rising…
….after!

After around 10 minutes, you’ll feel the dough suddenly get more difficult to knead; it’s a bit like when you chew gum too long and it suddenly becomes more effort to chew it. 

Using a dough hook, turn up the speed a couple of notches and mix around 6 minutes. Keep guard though, your mixer may tend to go for a dance or walk over your worktop and off the edge!

Form the dough into a tight ball by tucking it under itself. Pop it into a grease bowl, cover with a plastic bag or damp tea towel and leave it to rise in a warm place.

Important note no. 2: Do not leave it near a radiator or anything like that – unequal heat will not do the job – you need ambient warmth. I let my dough rise in my airing cupboard. If you don’t have a warm place, do not worry for the quickly-metabolising yeast will begin to generate its own heat.

The stretchy dough after its first prove

When it has doubled in size, knock it back, i.e. press the air out with your fingertips – a very satisfying thing to do. It should be squidgy and much more elastic. Make a ball with the dough by pushing the edges into the centre. Once it is round, stretch the circle into an oval shape, long side toward you.

Now roll the dough towards you from the far end, tucking in everything tight all around, like tucking in your bed. This ensures that the seam is at the bottom of the bread and so that the top is nice and tight.

Cover with a plastic bag and allow to prove again, until doubled in size – it should have risen above the rim of the tin and should spring back when pushed by your finger.

Sprinkle with flour and make some cuts on the crust so that it can unfurl as it bakes – I go for diagonal slashes. It’s important to do it quite quickly and in one direction. A sharp serrated knife like a bread knife is best for this.

There are many methods for baking your bread, and some require a lot of messing around with trays of hot water and crazily-high temperatures. I do something much less dramatic: I put the bread in a cold oven and then turn it on – you get some extra rise without faffing about altering temperatures and giving yourself steam burns. If you have to use a hot oven, spray the dough with water to stop it forming a crust too early.

Set the oven to 220-230⁰C and bake for 40 minutes. When ready, the loaf will sound hollow when knocked with a knuckle.

The seam you made can still be seen on the underside of the loaf

Important note no. 3: do not eat the bread when hot – try to resist! The still-hot steam can make it stodgy.

There it is – sorry it’s rather long, but hopefully it is a good guide to baking proper bread. If anyone has any extra tips, let me know…

16 Comments

Filed under baking, bread, food, Recipes, Teatime

To make mince pies…

A few posts ago I gave the recipe for Mrs Beeton’s mincemeat, so I thought it only right to give a little instruction in making mince pies. I have to tell you that it is really worth the trouble of making your own mincemeat and mince pies – any bought ones are incomparable and always too sweet. The secret to an excellent mince pie is two-fold: you need homemade mincemeat and you need shortcrust pastry that is made with half butter and half lard. many people recoil in horror these days at thought of using lard, but it isn’t that bad really, at least not in small doses.

A recipe by Roger Twysden from the times of Charles I (c. 1640) says that larger Christmas pies were also made using a mixture made of meat, sugar, dried fruit and spices. He then says: “put them in coffins or pyes, and bake them”. The word coffin was used to describe the pastry-shell of pies. The reason they were called coffins is because, in earlier times, the pastry simply served as a casing intowhich the meat could be cooked; the pastry itself actually being inedible. They weren’t actually coffin-shaped, except for the Christmas Pie as Charles Dickens, writing in 1877, tells us: ‘ The coffin shape…is not now familiar to us. There is good reason to believe that, in old times, the form was symbolic of the manger at Bethlehem; and that Christmas Pie, whether mince or not, had religious as well as a gastronomic association with this particular season.’

For more typical mince pies, they are based upon Jane Grigson’s instructions from English Food, and they are excellent.

Roll out your pastry and use cutters to line…tart tins [I actually use muffin tins, cutting a large circle for the base, and a smaller one for the top]. Add…[a dessertspoon] of the mincemeat – not too much though the suet and sugar expands quite alot. Use some beaten egg to glue on lids of pastry, pinching as you go. Lastly brush the top with more egg, make a little cross in the top of the pie so steam can escape and sprinkle with a little sugar.

Bake at 220⁰C (425⁰F) for 15 to 20 minutes. Eat warm or cold. If you are feeling extra-Christmassy and if your stomach can take it, add a blob of brand or rum butter. Personally I go for a blob of lightly whipped cream or even some custard if any is to hand [and I concur!].


If you like the blogs and podcast I produce, please consider treating me to a virtual coffee or pint, or even a £3 monthly subscription: follow this link for more information.


12 Comments

Filed under Christmas, food, history, Nineteenth Century, Puddings, Recipes, Teatime, The Victorians