Quite a while ago, I wrote a post called ‘What is a Pudding?‘ and it seems I made a few little errors within. I don’t like to be wrong, so thought I would put it right. The subject was a little essay on the origins of puddings – the boiled and steamed kind, which I argued was the proper definition of a pudding. I still don’t think I am wrong on that count, but I did accuse some puddings of being mock puddings:
So, a pudding is any dessert, or the name for the dessert course. Aside from the proper puddings…there are some that go under a false name: bread and butter pudding [and] sticky toffee pudding…are examples of this. Why are these puddings and, say, an apple pie not called an apple pie pudding?
Well it seems that I can answer my own question, at least in part. I was flicking through The English Huswife, Containing the Inward and Outward Virtues Which Ought to Be in a Complete Woman by Gervase Markham which dates from 1615 (for context King James I of England and VI of Scotland was reigning) and it seems that some of the puddings that are baked today have their roots in the simmering pot. In fact a pair of my favourites – the rice pudding and previously accused bread and butter pudding are specifically mentioned. Their forerunners were cooked in natural intestinal casings – farmes – just like black puddings:
Rice puddings
Take half a pound of rice, and steep it in new milk a whole night, and in the morning drain it, and let the milk drop away; then take a quart of the best, sweetest and thickest cream, and put the rice into it, and boil it a little; then set it to cool an hour or two, and after put in the yolks of half a dozen eggs, a little pepper, cloves, mace, currants,dates, sugar and salt; and having mixed them well together, put in a great store of beef suet well beaten and small shred, and so put it into the farmes…and serve them after a day old.
To make bread puddings
Take the yolks and whites of a dozen or fourteen eggs, and, having beat them very well, put to them the fine powder of cloves, mace, nutmegs, sugar, cinnamon, saffron, and salt; then take the quantity of two loaves of white grated bread, dates (very small shred) and great store of currants, with good plenty either of sheep’s, hog’s or beef suet beaten and cut small; then when all is mixed and stirred well together, and hath stood a while to settle, then fill it into farmes…and in like manner boil them, cook them, and serve them to the table.
I was corrected on the sticky toffee pudding in that post… I wonder how many other puddings that are not boiled today once were? I shall go through the books with a fine-toothed comb and report back. More interestingly, I need to get my hands on some farmes and make these bad boys myself and see how they compare to their modern counterparts…
If you like the blogs and podcast I produce, please consider treating me to a virtual coffee or pint, or even a £3 monthly subscription: follow this link for more information.
By proper custard I mean the pourable kind that goes on your pie, crumble or steam pudding. It also assumes the name cream custard and, of course, crème anglaise; you see it given that name in restaurants that trying to look all ‘high-end’, I suppose in many people’s minds, custard comes out of a packet or tin whilst crème anglaise is the real deal.
Custard in Britain has become somewhat of a travesty over the last few decades and I wonder how many people have actually ever eaten the proper stuff, whatever name you like to call it. I think it appears extravagant, fattening or difficult to make. Well it might be guilty on the first two counts against it because of the egg yolks and cream that are used, but it’s not really that difficult. All it needs is a watchful eye and a little stirring. There ways of making it easier to conjure up, as well as reducing its calorie count and cost, and there is no need to always resort going to the packet or tin.
Now, before you label me a custard snob, I need to point something out: I actually love custard made with custard powder and there’s really nothing wrong with it per se, but until you make the real stuff you won’t see they are almost incomparable. That said, there has been many an evening when I have a made a whole pint of Bird’s custard and eaten the whole lot to myself, but if there are people coming round for food, I always get the vanilla and egg yolks out.
Bird’s custard was my first contact so it will always have a special place in both my heart and stomach. However, technically, Bird’s custard isn’t custard at all, for it contains no egg (see the main post on custard). The powder was invented by Alfred Bird in 1837 because his wife, though she liked custard, was terribly allergic to eggs. Bird’s custard powder is simply cornflour with some vanilla flavouring and colouring. The famous three birds logo wasn’t introduced until the 1920s, surprisingly.
Tinned custard is pretty good too and, up until the last five or so years, it was the form I bought custard in if I wanted proper custard. My tinned custard of choice? Ambrosia Devon Custard of course – nothing else would do – and, like the Bird’s, I still love it. Again, however, Ambrosia custard does not contain eggs or egg products so is not proper custard.
Now you can go off and buy the proper stuff in the refrigerator section of your local supermarket, always called crème anglaise of course, but you may as well make your own if you’re going to do that. Next time you make a trifle or a nice warm pudding, why not try making the real thing – England’s only sauce as the French call it – proper custard.
If you like the blogs and podcast I produce, please consider treating me to a virtual coffee or pint, or even a £3 monthly subscription: follow this post for more information.
It’s a recipe that goes far, far back and I gave an early recipe a few posts ago (see here). I hope to try some old recipes in the near future. These days vanilla is the typical flavouring, whether it be in the form of a pod, an extract or as vanilla sugar, but it is optional. Some like no spice or some go for an alternative like nutmeg or cinnamon. For me, vanilla is the only way. It is sweetened with sugar and the amount you add depends on your own taste, but as a rule I like sweet custard, especially when it’s with a tart fruit pie or crumble or with a stodgy suet pudding. I add less sugar if the dessert is very sweet, like treacle tart or sticky toffee pudding.
When it comes to thickening the custard, you need to be careful not to over-cook it as it results in curdling. If you are new to custard making, the best thing to do is to replace two yolks with two teaspoons of cornflour; it works as a thickener like the yolks, but it also stabilises everything, so you’re less likely to make an error. The recipe below uses six egg yolks, but if you want thicker custard add another, or another teaspoon of cornflour.
Ingredients
1 pint of milk, or a mixture of milk and cream
1 vanilla pod or ¼ teaspoon of vanilla extract
6 egg yolks or 4 egg yolks and 2 tsp cornflour
1 to 2 tbs sugar
Split the vanilla pod, if using, and scrape out the seeds and add to a saucepan along with the milk and cream. Bring slowly to almost boiling point. Meanwhile beat the egg yolks, cornflour and sugar together in a bowl.
When the milk and cream are scalding hot and about to boil, pour it quickly onto the egg mixture whilst vigorously beating with a whisk. Tip the custard back into the saucepan and stir over a very low heat for a few minutes until it thickens and coats the back of your wooden spoon. On no account, let the custard boil, otherwise you will get scrambled egg. The temperature you are looking to achieve is 81⁰C (178⁰F). So if you are worried that it will curdle, either make sure you include the cornflour and/or put the custard in a bowl over a pan of simmering water. Don’t worry if there is a little curdling; simply pass it through a sieve and everyone will be none the wiser.
Here’s another recipe to add to the series of posts on bread and bread-making (see main post here).
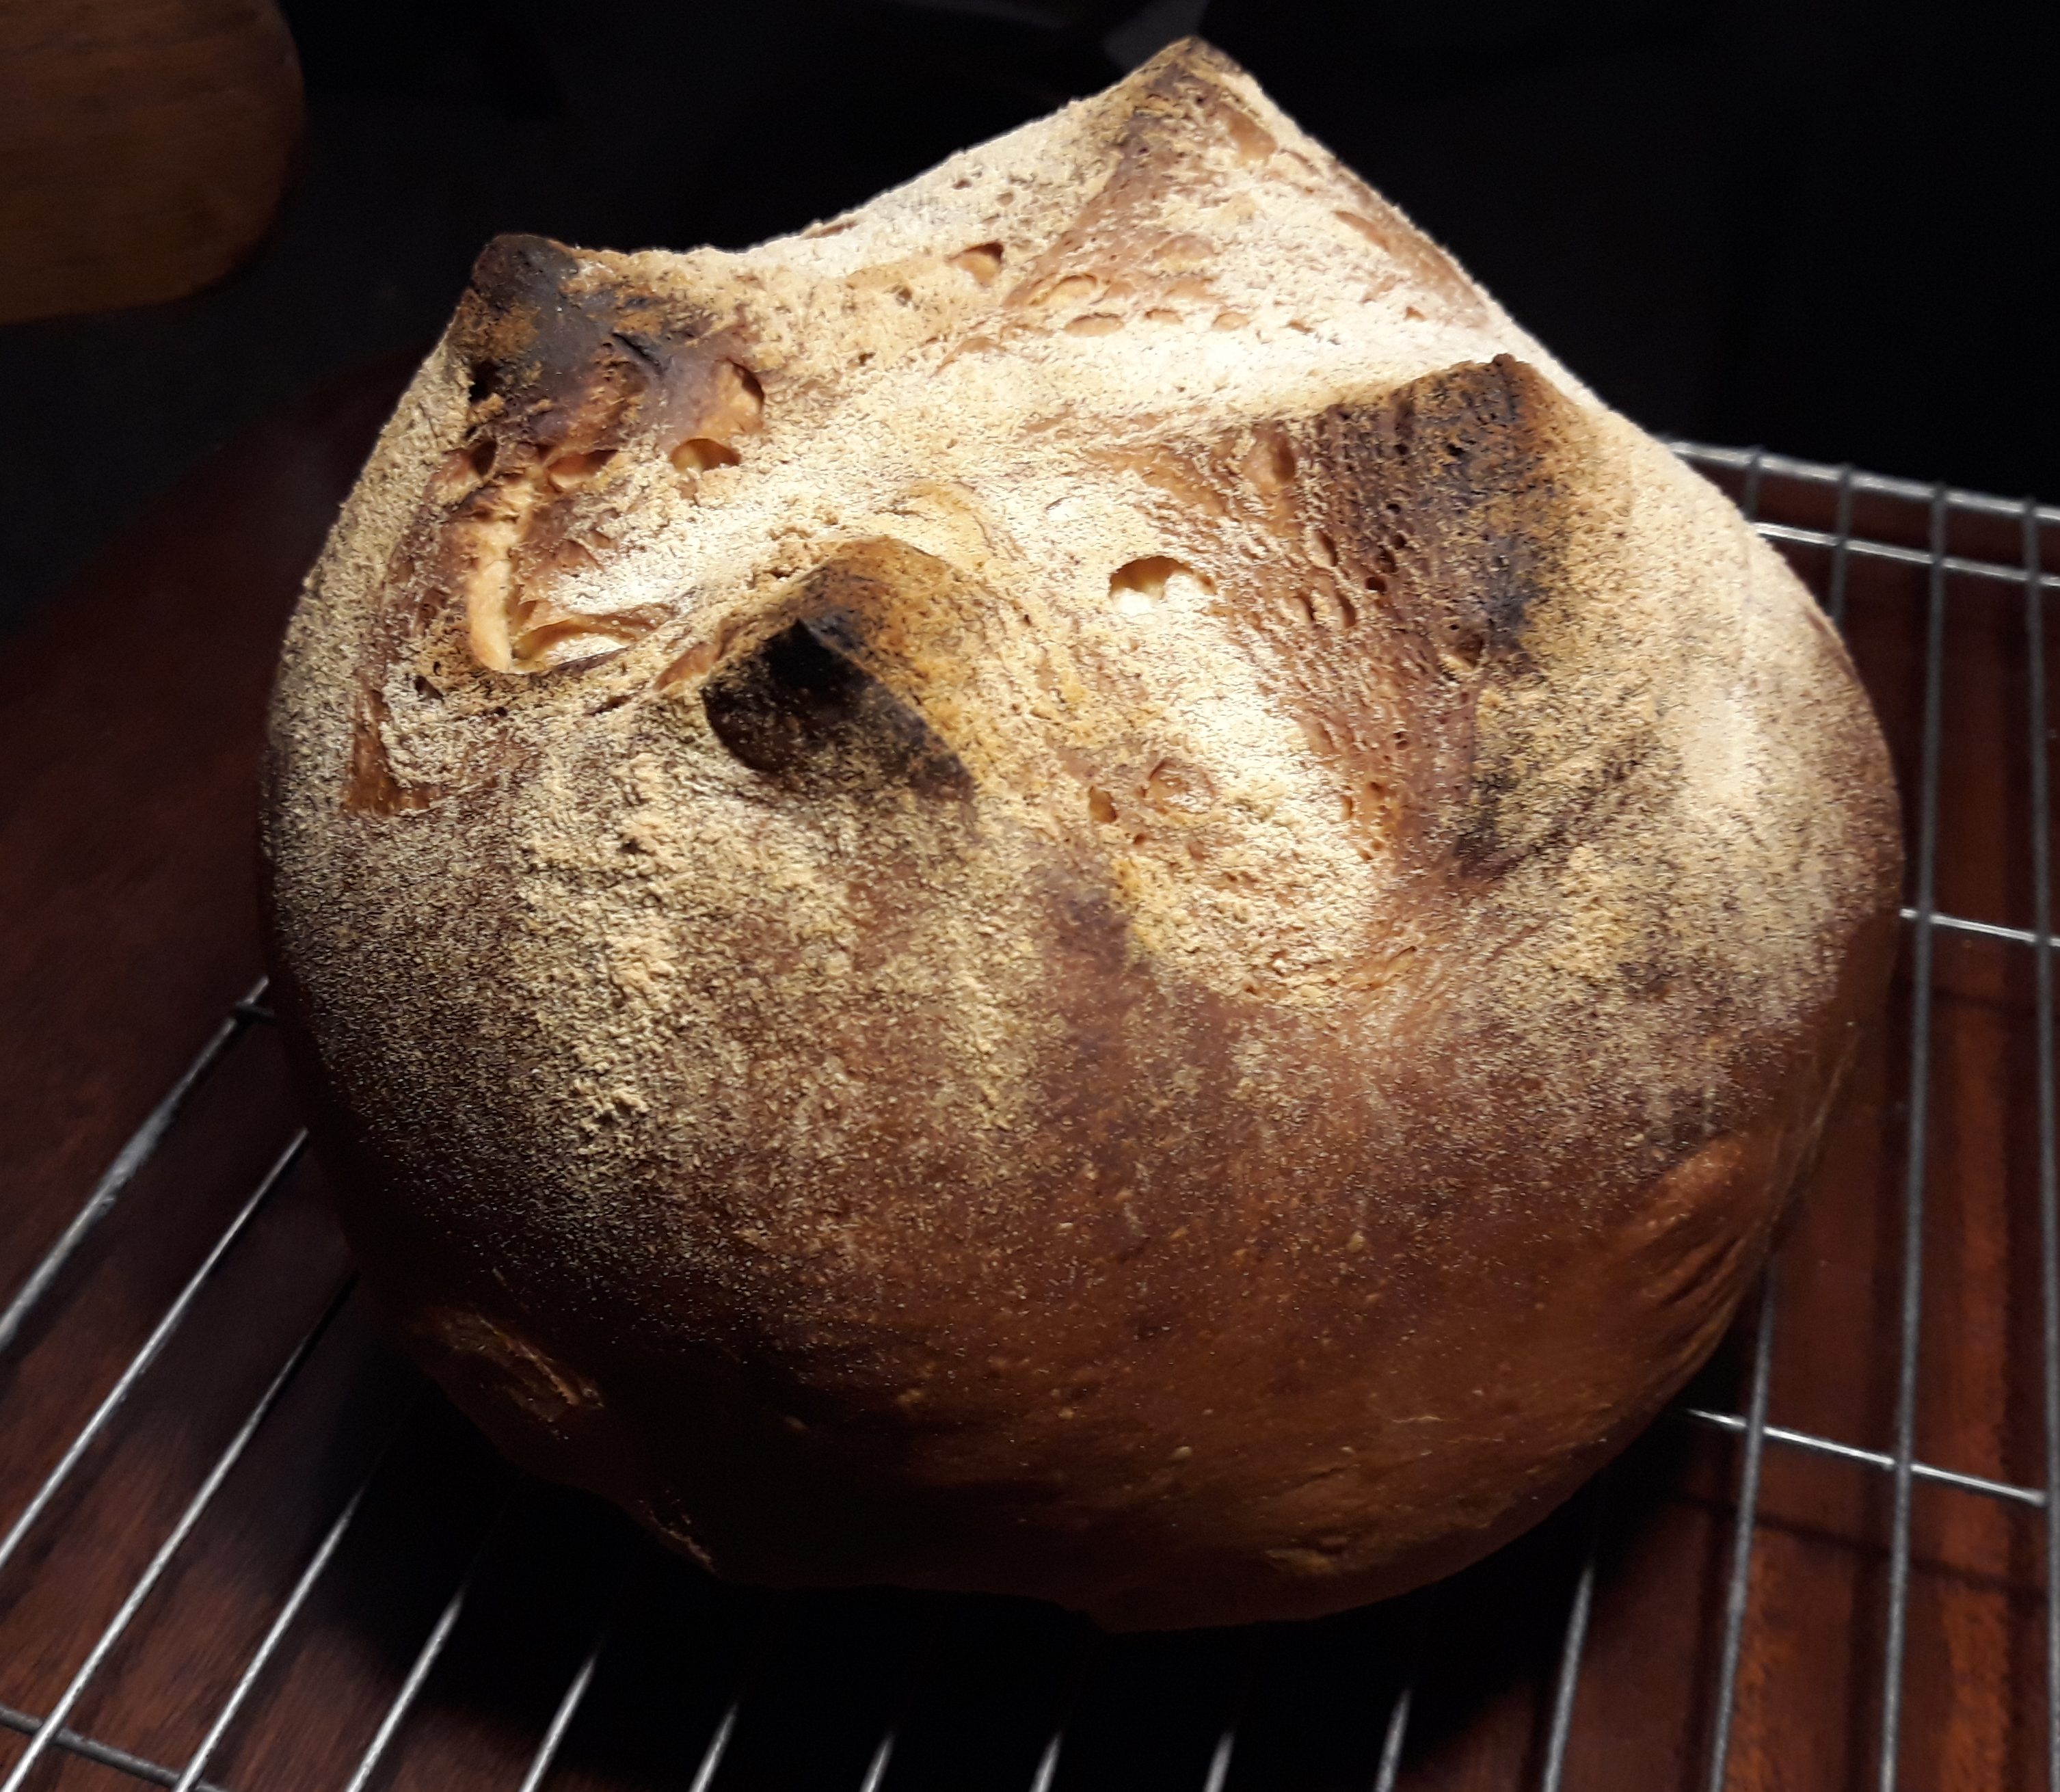
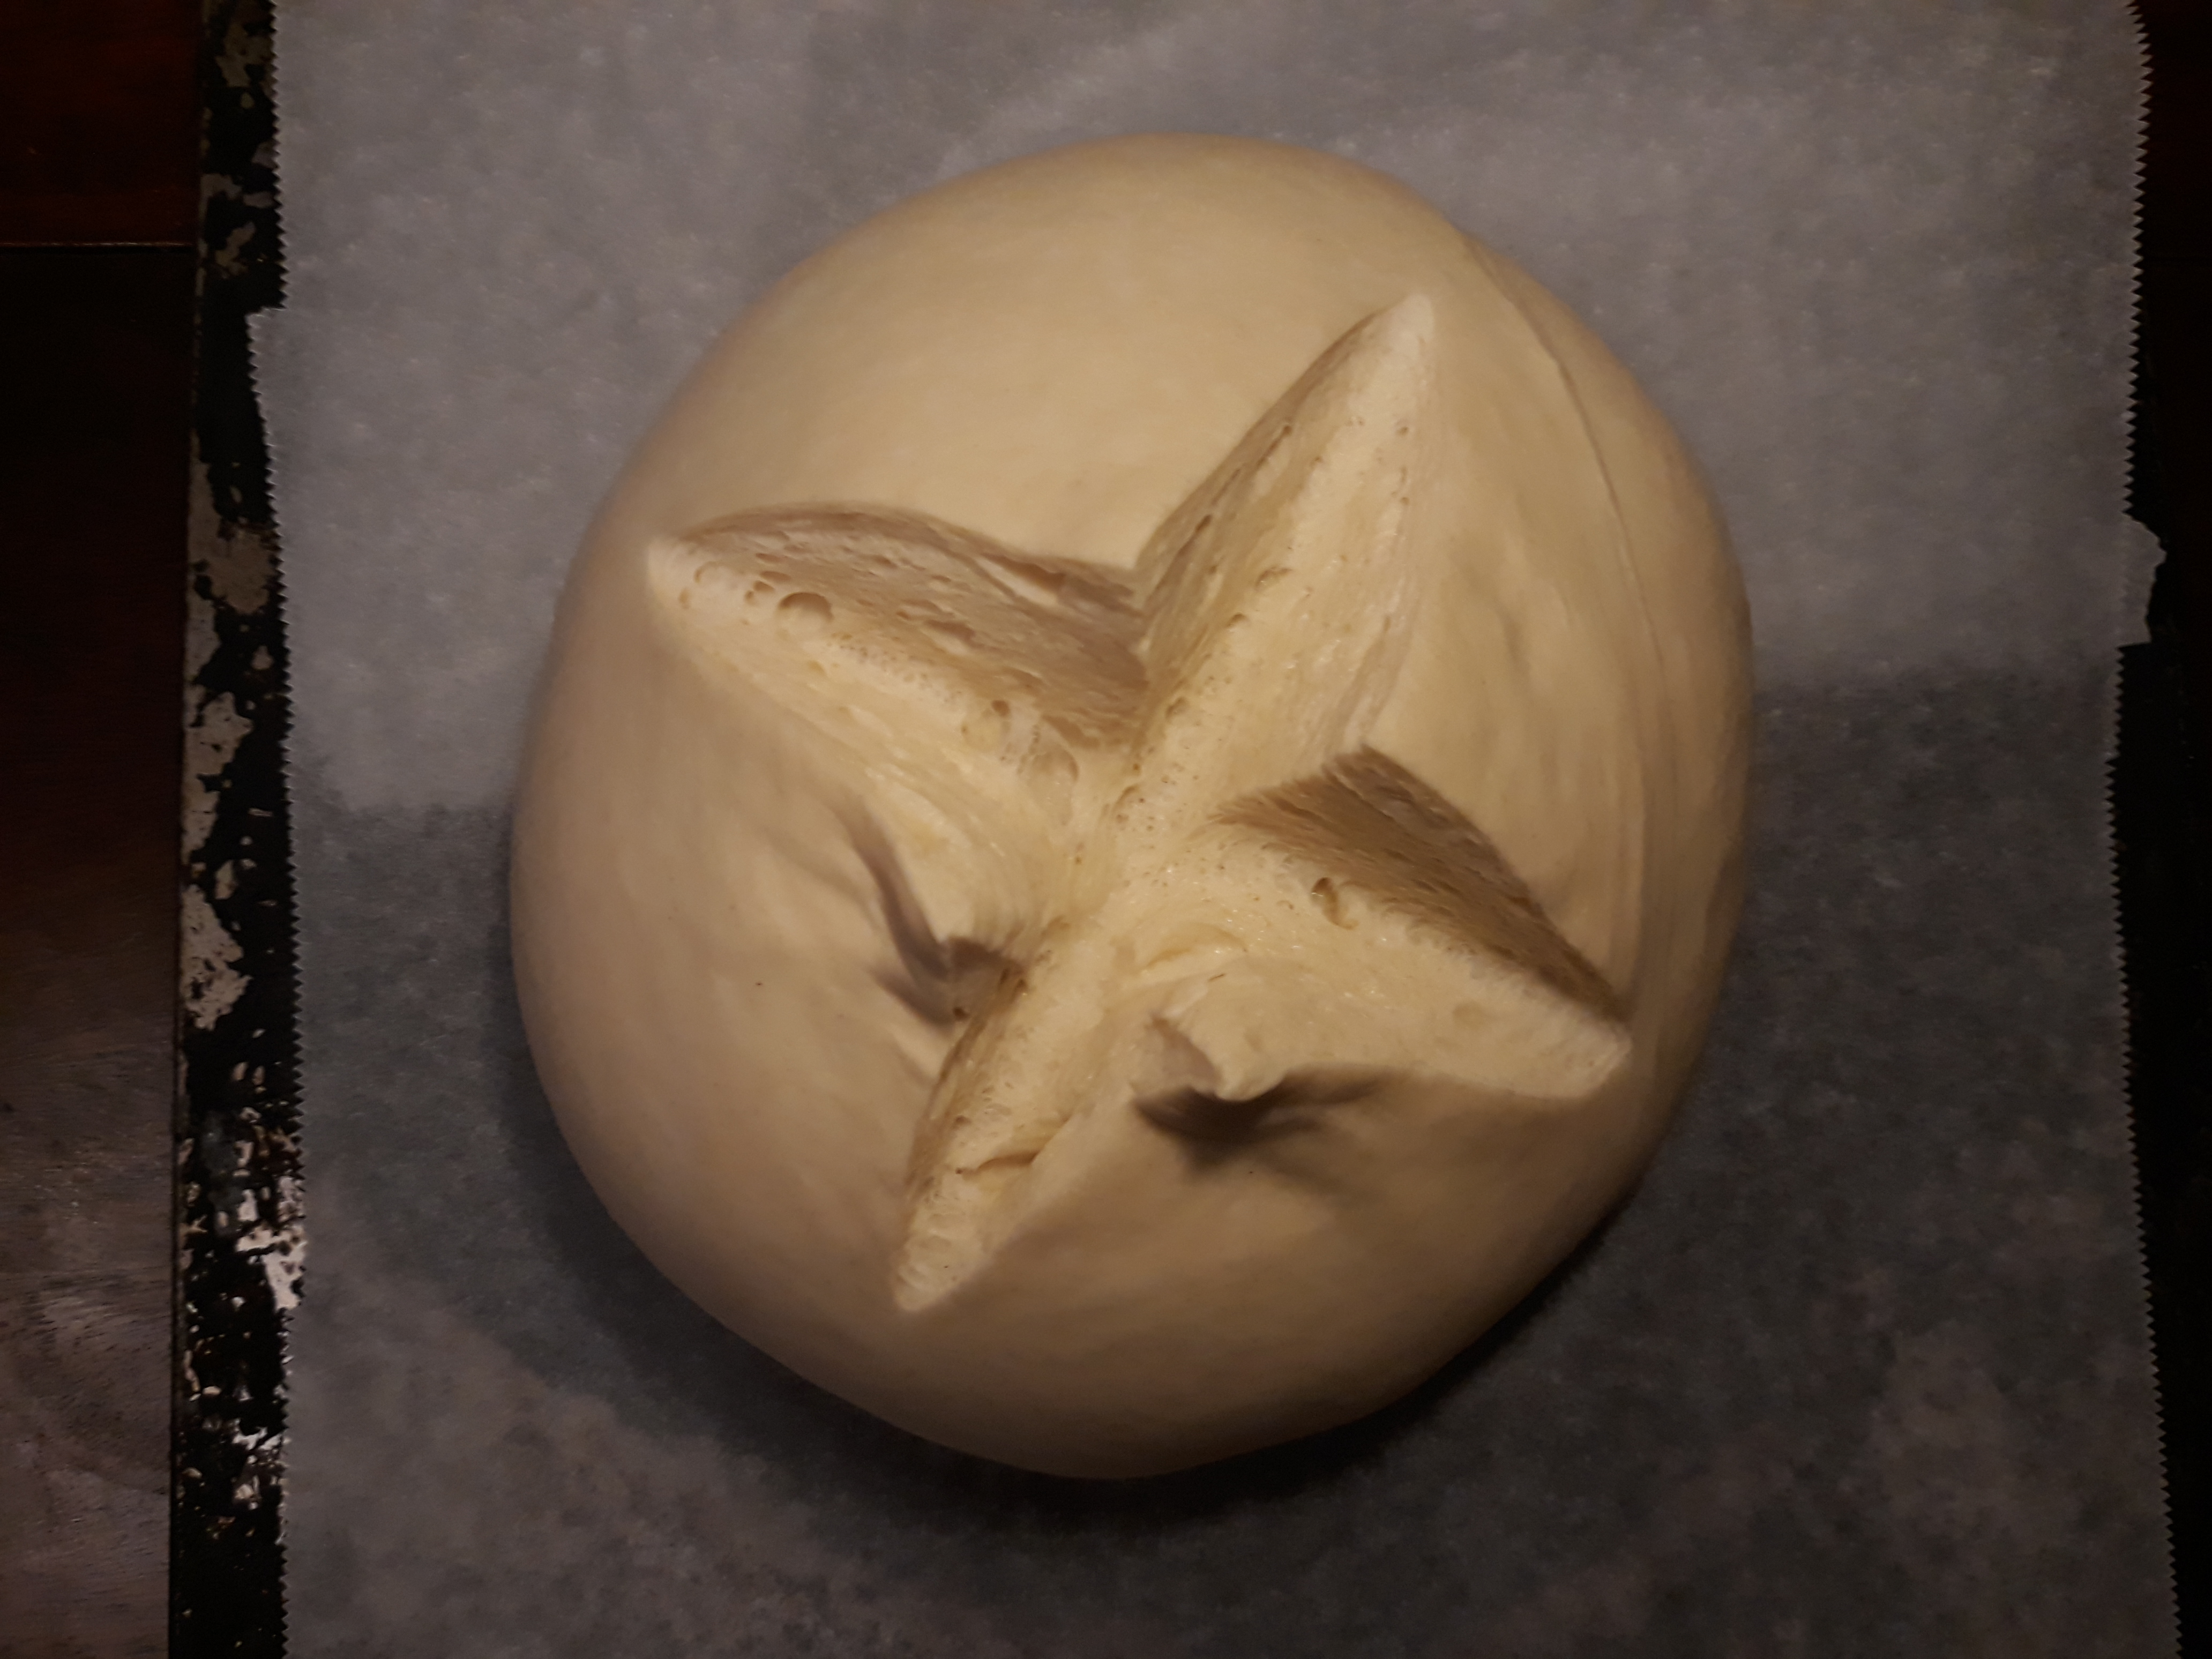
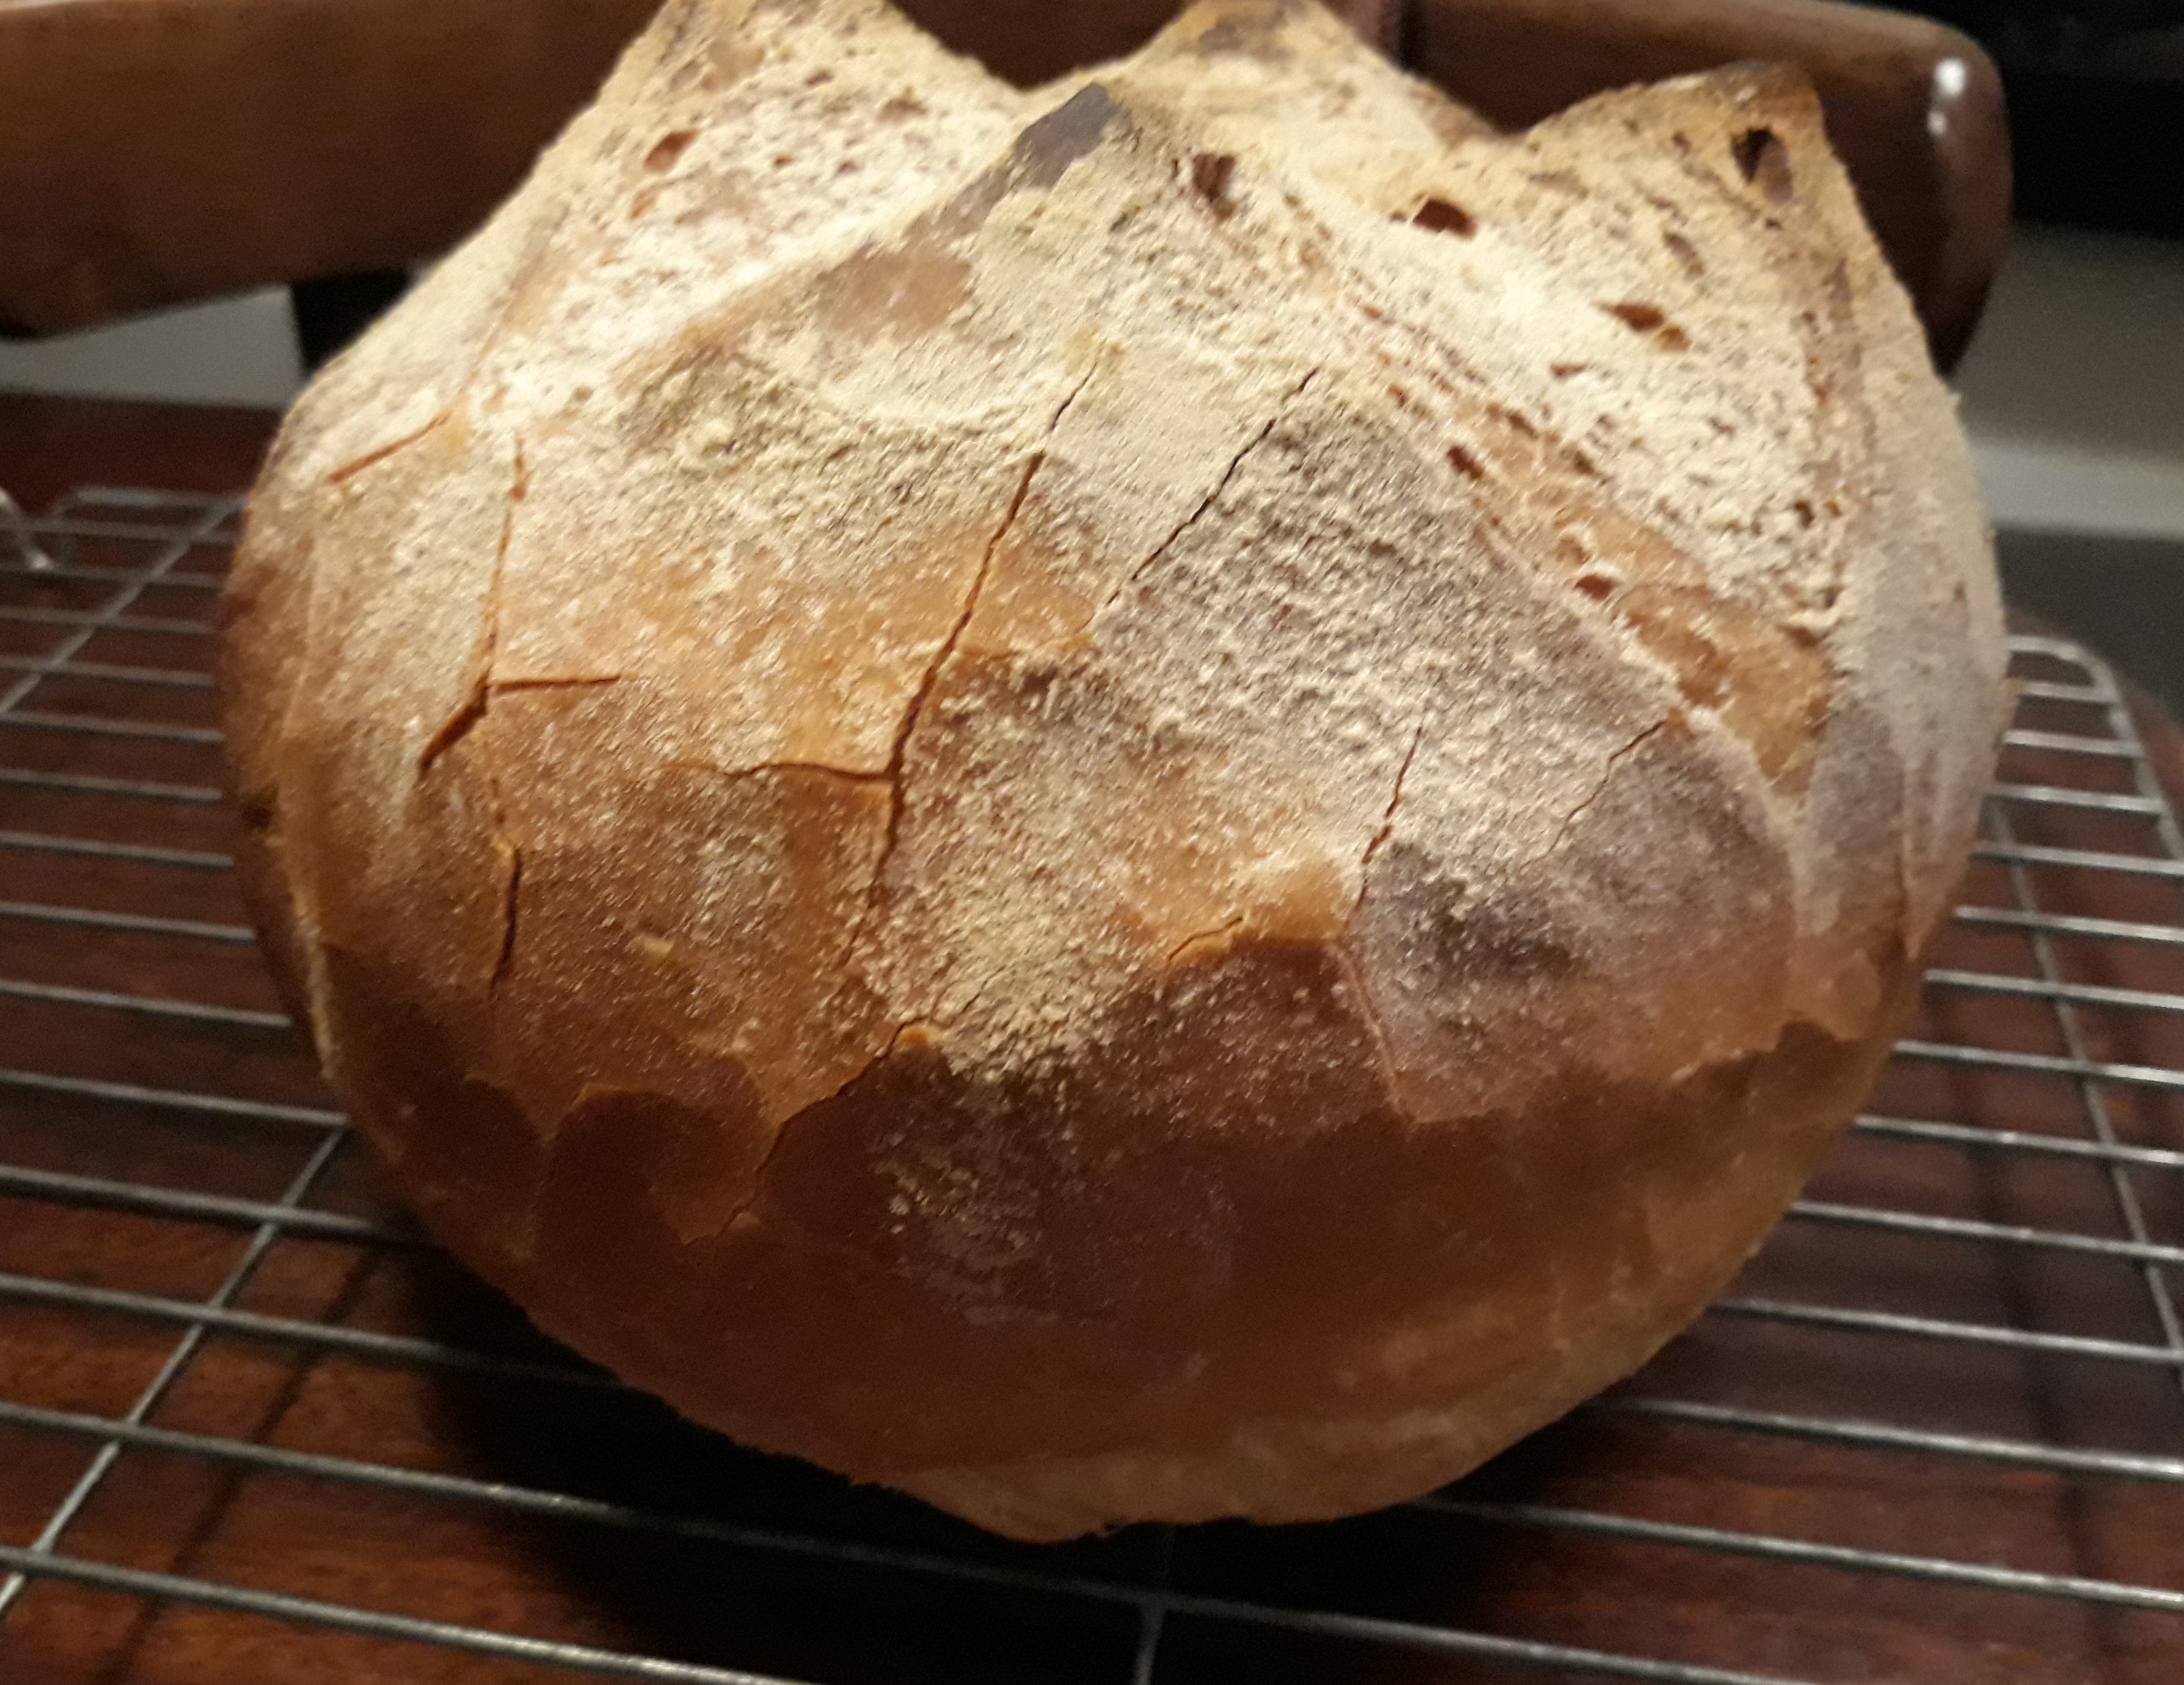
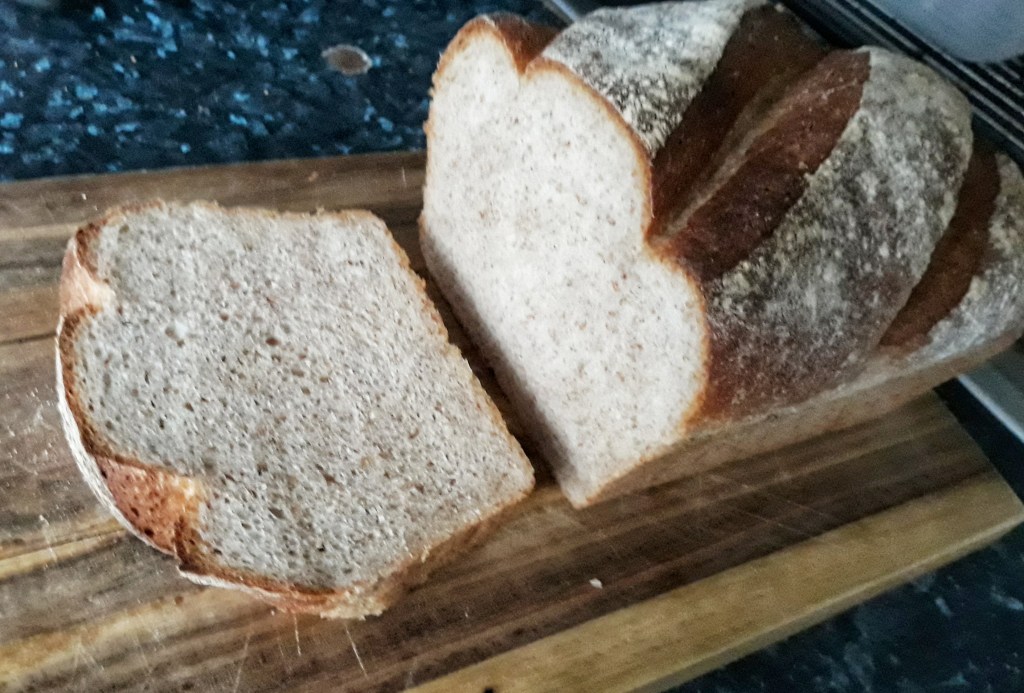
Coburg loaves are a common sight in traditional bakeries, but are rarely spotted outside of them these days. A Coburg is a round loaf that is not baked in a tin like your basic loaf (see recipe here), but as a round plump crusty loaf on a tray. On the top there are cuts in a cross shape that open up when it bakes. It can be made with pretty much any flour you like – white, whole-wheat, rye, oat, or whatever takes your fancy. I class it as one of the basic loaves because it contains just flour, yeast, salt and water.
Technically, a Coburg is a kind of cob, the only difference being that a cob does not get cut before going in the oven, though these days, there is no real distinction really. There are variations on the Coburg cuts though; sometimes several cuts are made in a chess board fashion which expands to make a porcupine loaf, which is also known as a college loaf or a Manchester loaf. Alternatively, the top of the dough gets quickly stabbed with a piece of wood spiked with lots of nails. A bit hardcore that one.
The Coburg loaf became popular in the Victorian era, and I assumed the loaf was named after Queen Victoria’s hubby Prince Albert Saxe-Coburg-Gotha, as many things were in those days. The British public were fascinated by the royal couple, and really took to many German traditions (especially a Christmastime). However, it may not be the case. There was such a thing as Coburg material; cheap and coarse and used for making mourning clothes that predated Albert so the word is older. The most likely explanation is that a German baker living in London, as many did, gave it his family name, though no baker actually knows who this was. The loaves themselves were certainly around before the Victorian era, centuries earlier in fact. They were made from courser grains than today and went by the name of a Brunswick loaf. So it seems all that occurred was a name change.
The good thing about baking these loaves is that you need no tin and consequently you achieve a good crust all over the surface. The recipe below is based on one from Elizabeth David and I haven’t provided massive detail on the making of the dough as I have already done that in the recipe for baking a basic loaf, so if you are new to bread-making, it might be worth having a little of that post first (you’ll find it here).
Also, this method asks you to put the loaf in a cold oven and then timing the bake from the time it gets to temperature, this way you get an extra-fluffy loaf. There is a little oil or butter to add if you like too; fat helps the bread keep fresh an extra day.
If you like the blogs and podcast I produce, please consider treating me to a virtual coffee or pint, or even a £3 monthly subscription: follow this post for more information.
Ingredients
up to 15 g fresh yeast or 8 g easy-bake yeast (see method)
400 g strong white flour (or a mix of up to 50% other flour(s) if you like)
10 g salt
25 g softened butter or olive oil (optional)
250 g blood-heat water
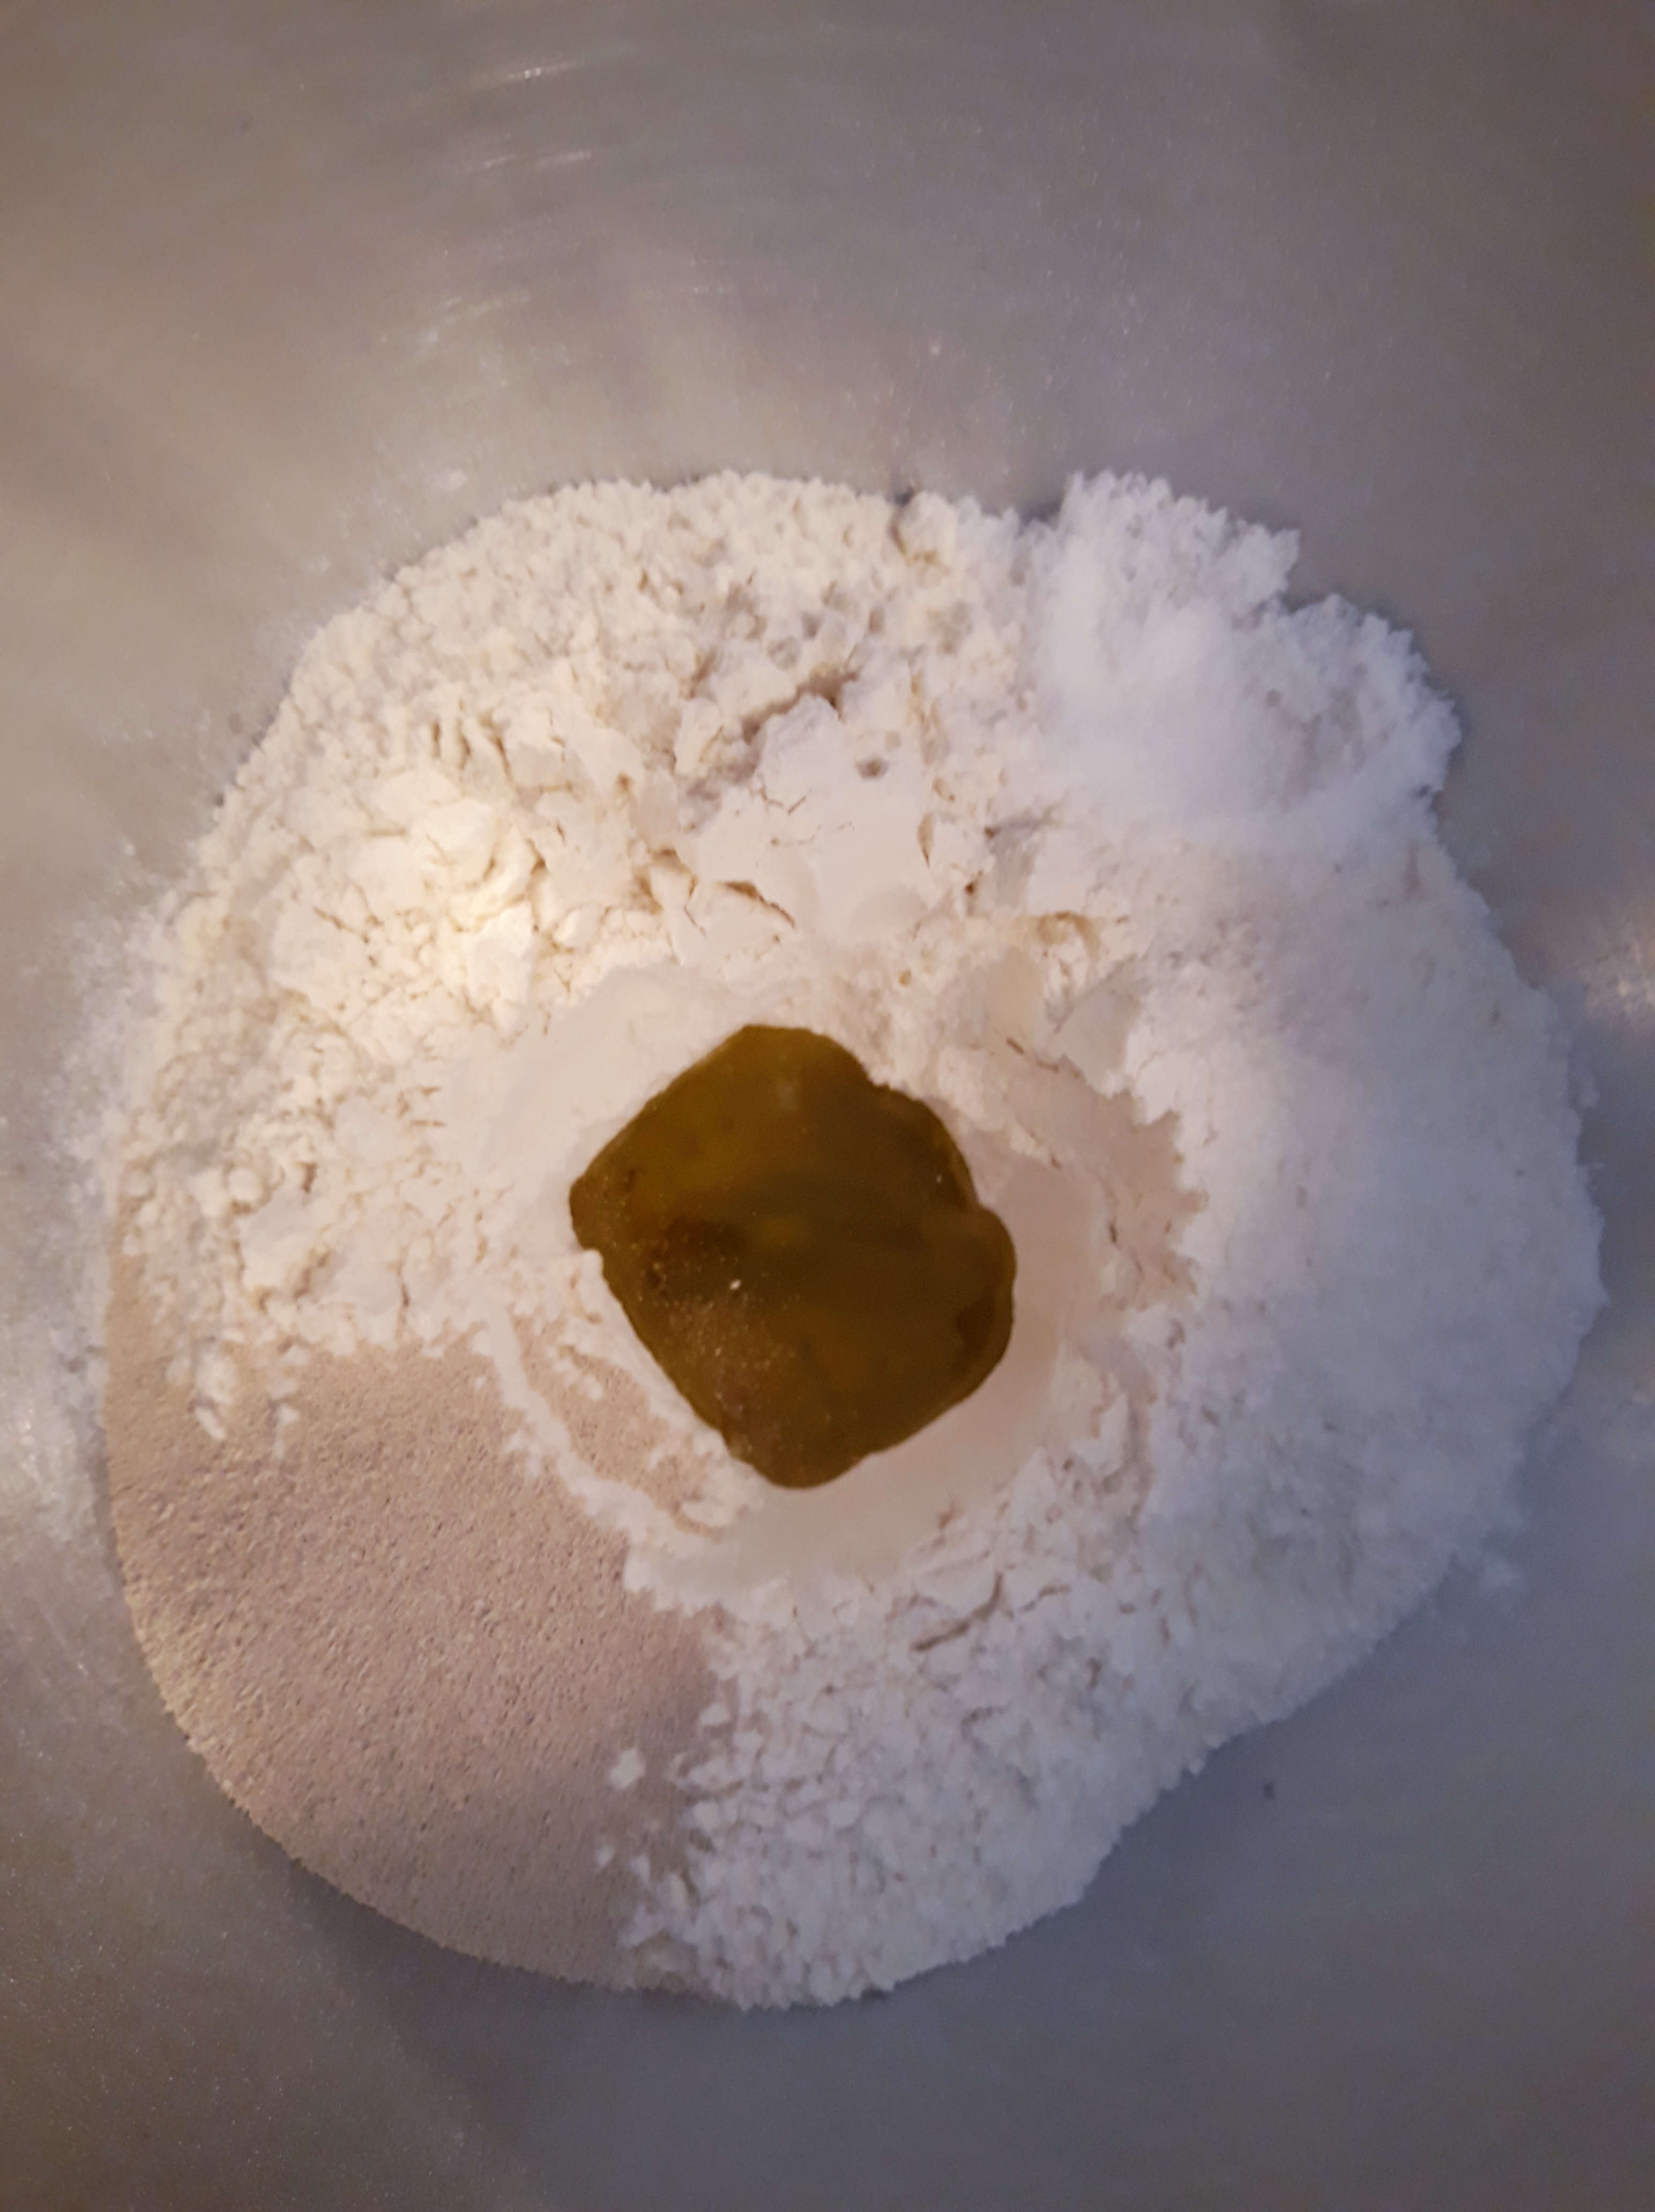
If using fresh yeast, cream it in a little of the warm water, adding a pinch of sugar and leave about 10 or 15 minutes until it is alive and foaming. Put the flour in a bowl, make a well in the centre and tip the yeast in along with the remainder of the water and the oil or butter.
If using dried yeast, make a well in the flour adding the salt to one side of the bowl and the yeast on the other side. Pour the warm water into the well along with the butter or oil.
Mix together with a wooden spoon and then bring the dough together with your hands. Alternatively, you can use the dough hook on a mixer to bring it together. Knead well until the dough becomes tight and springy, around 5 minutes in a mixer, or 10 or so minutes if kneading by hand. It will be sticky, but persevere, sprinkle a little flour or a smear a little olive oil on your work surface if you like. Bundle the dough into a tight ball and place in an oiled bowl and cover to allow it to double in volume in a warm place.
Knock the dough back lightly and give it a brief knead. If you want, give it another rising.
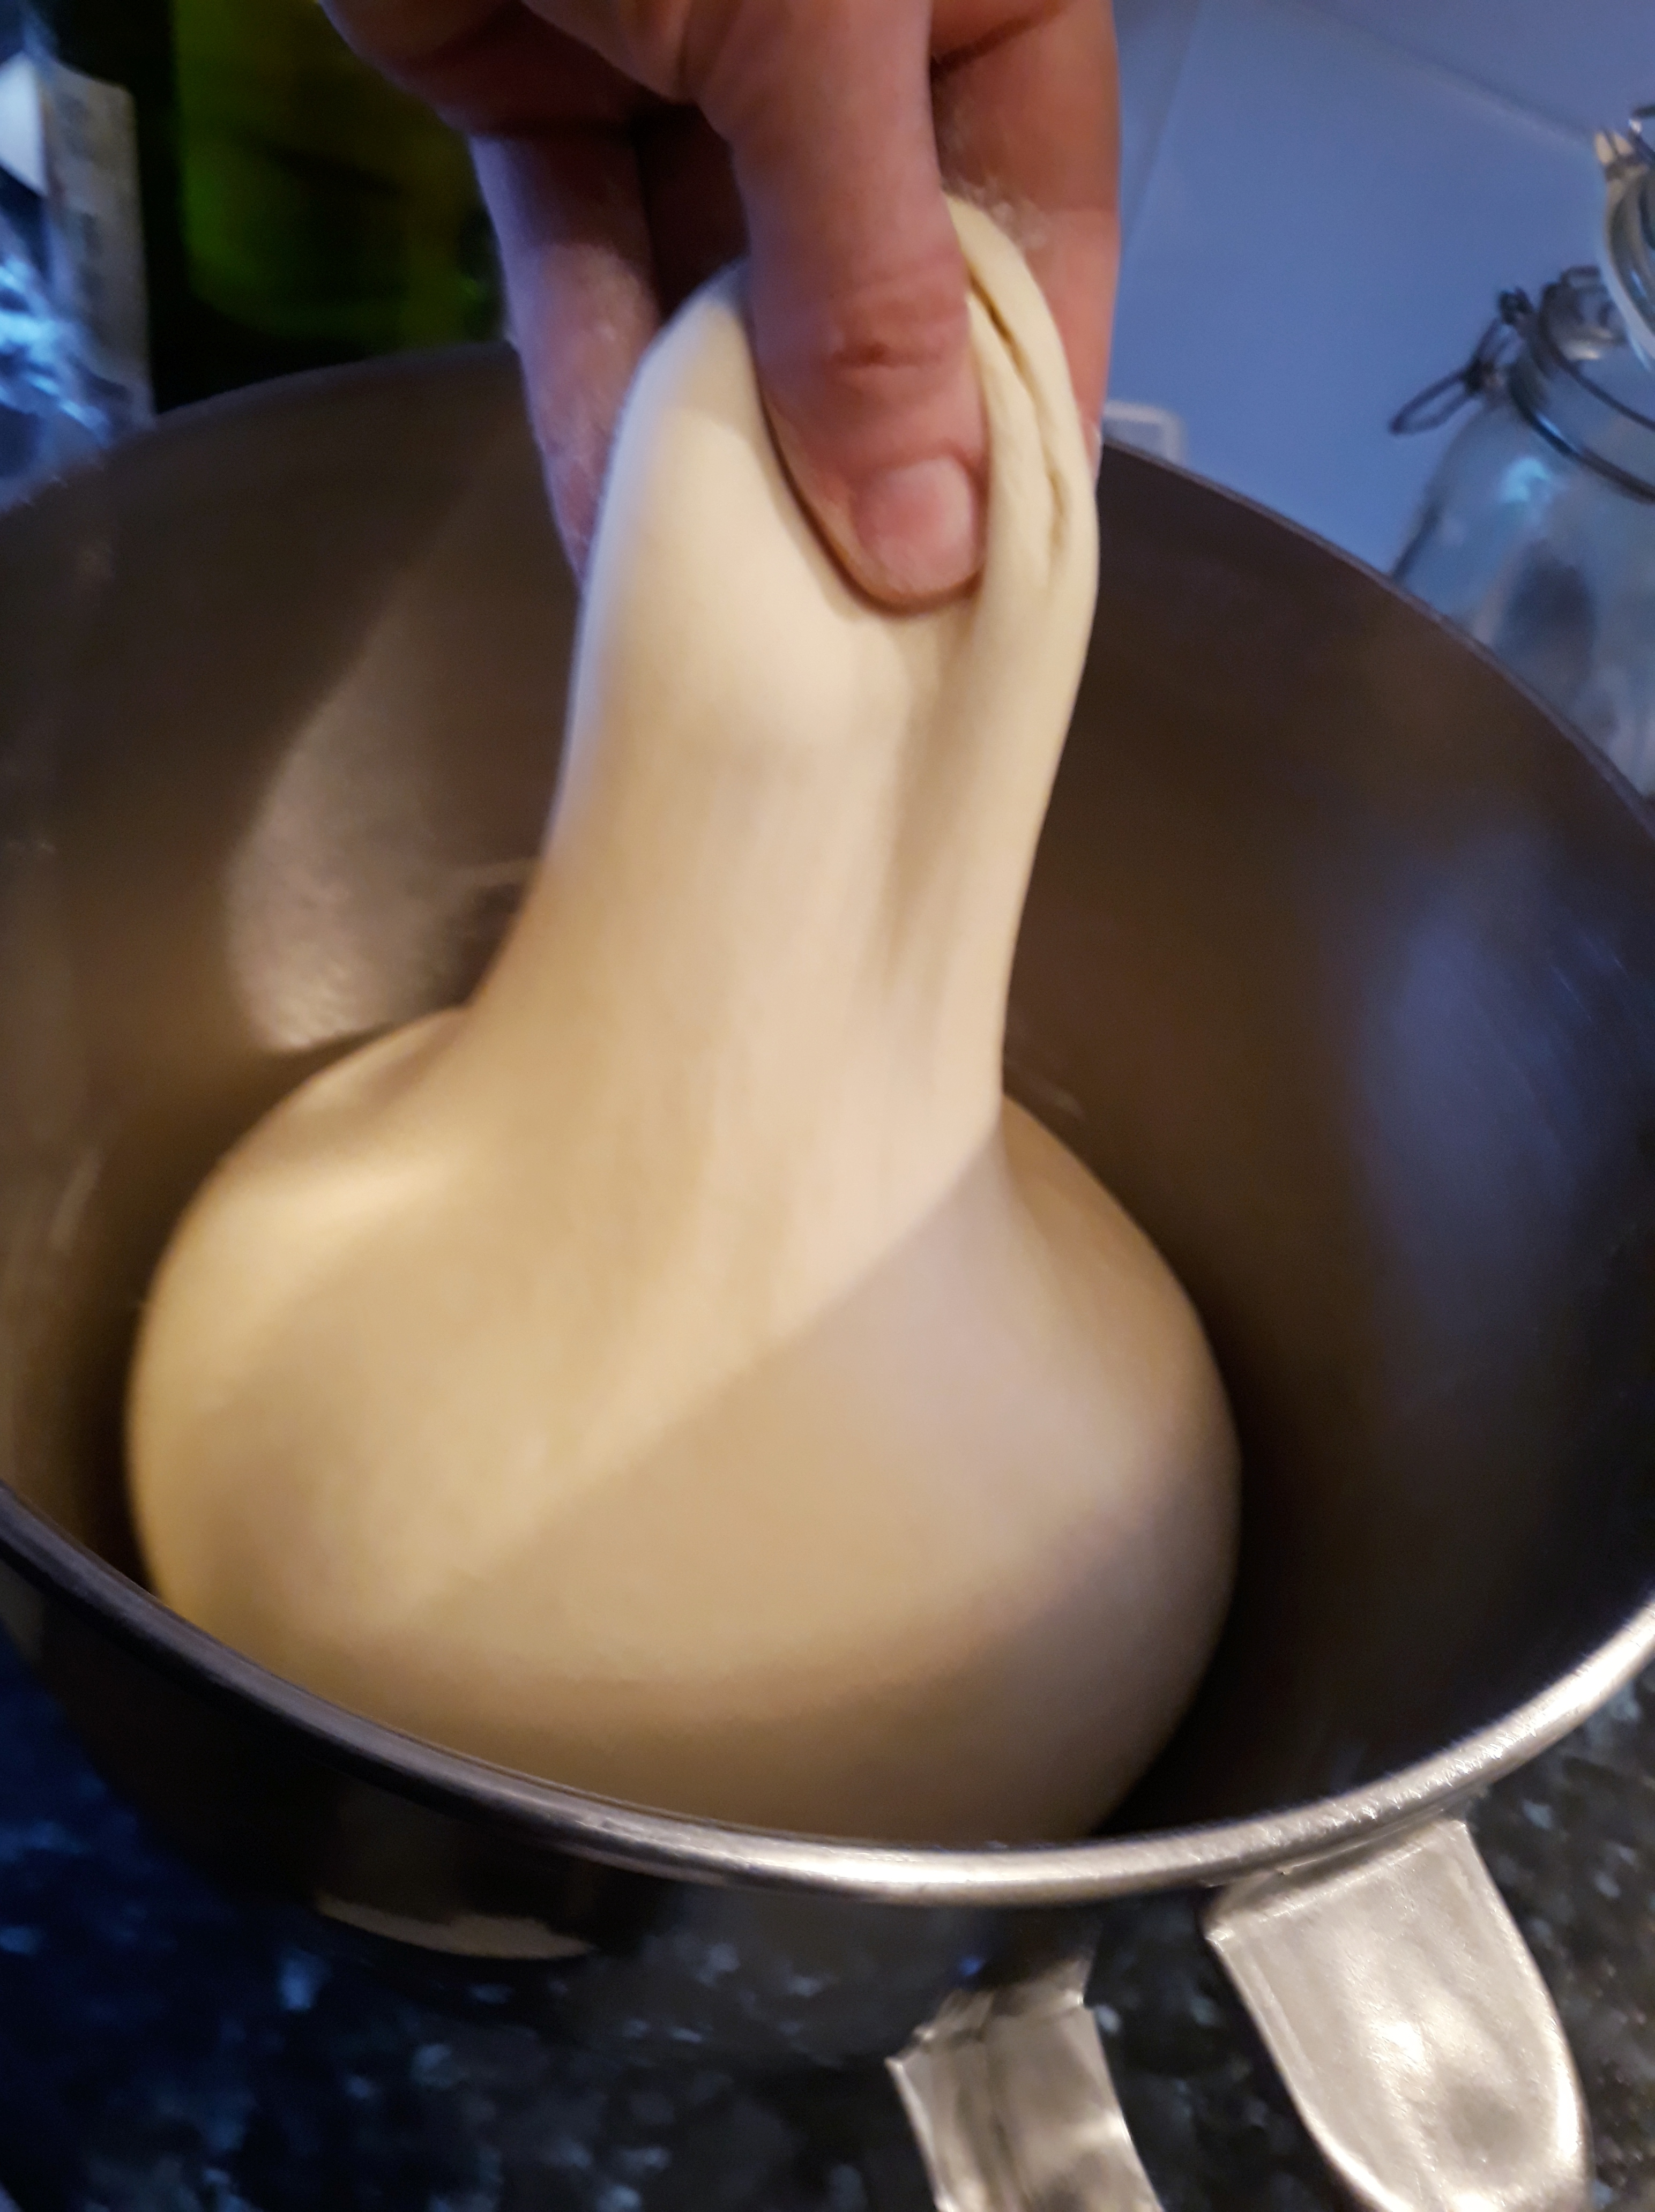
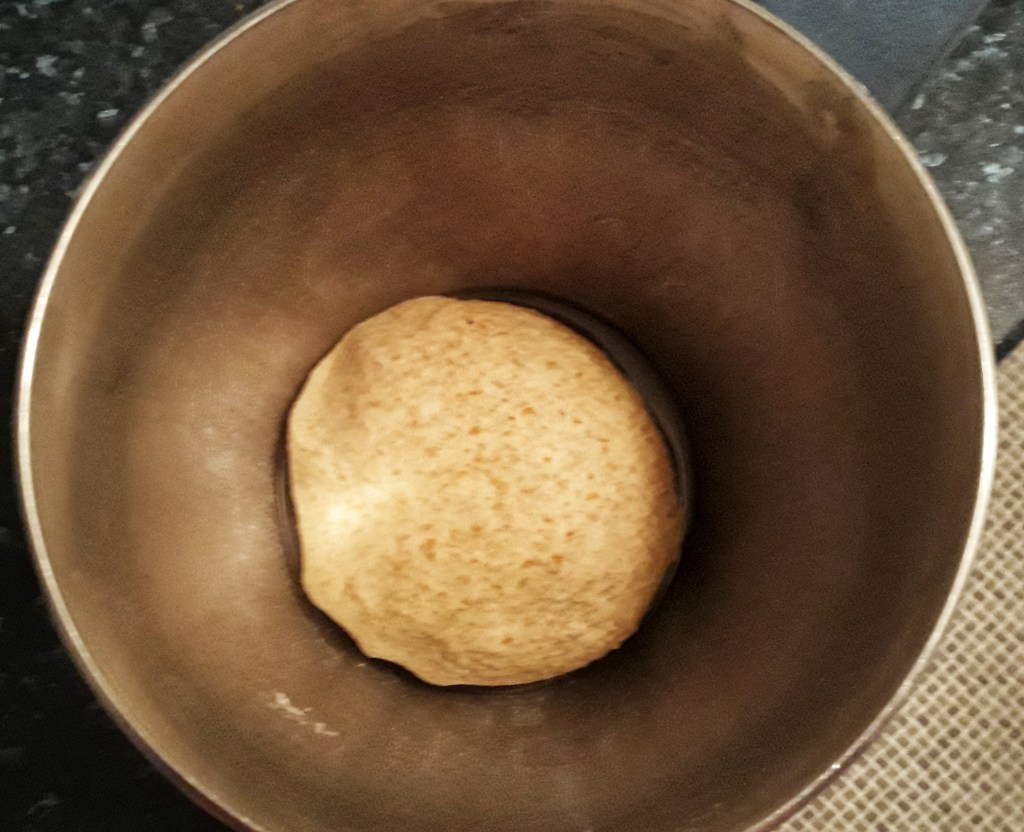
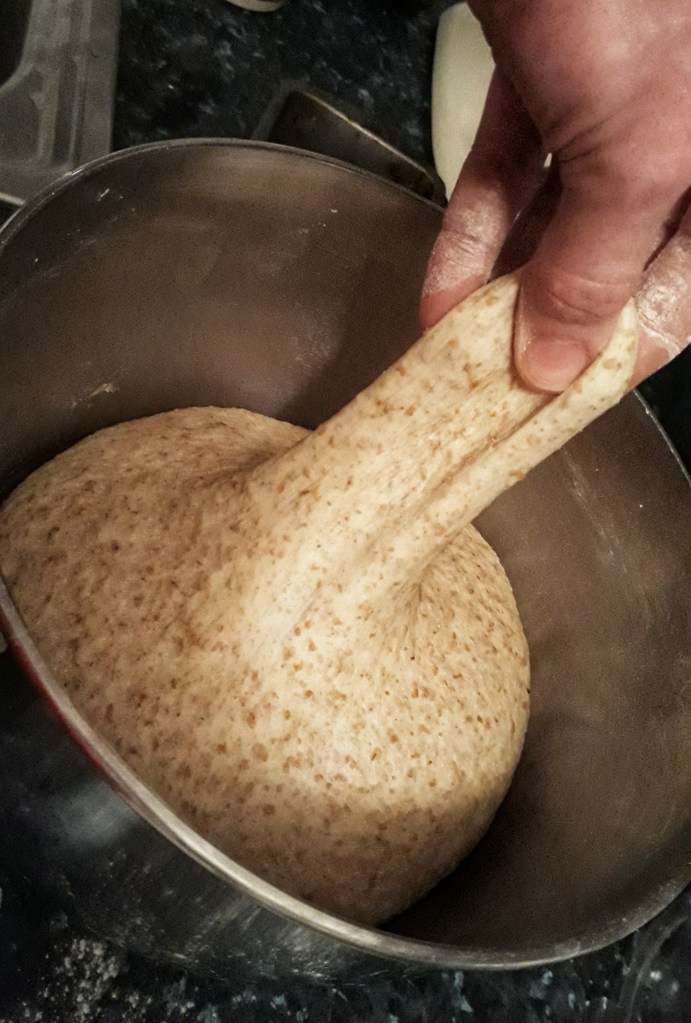
The super-stretchy dough after its first proof
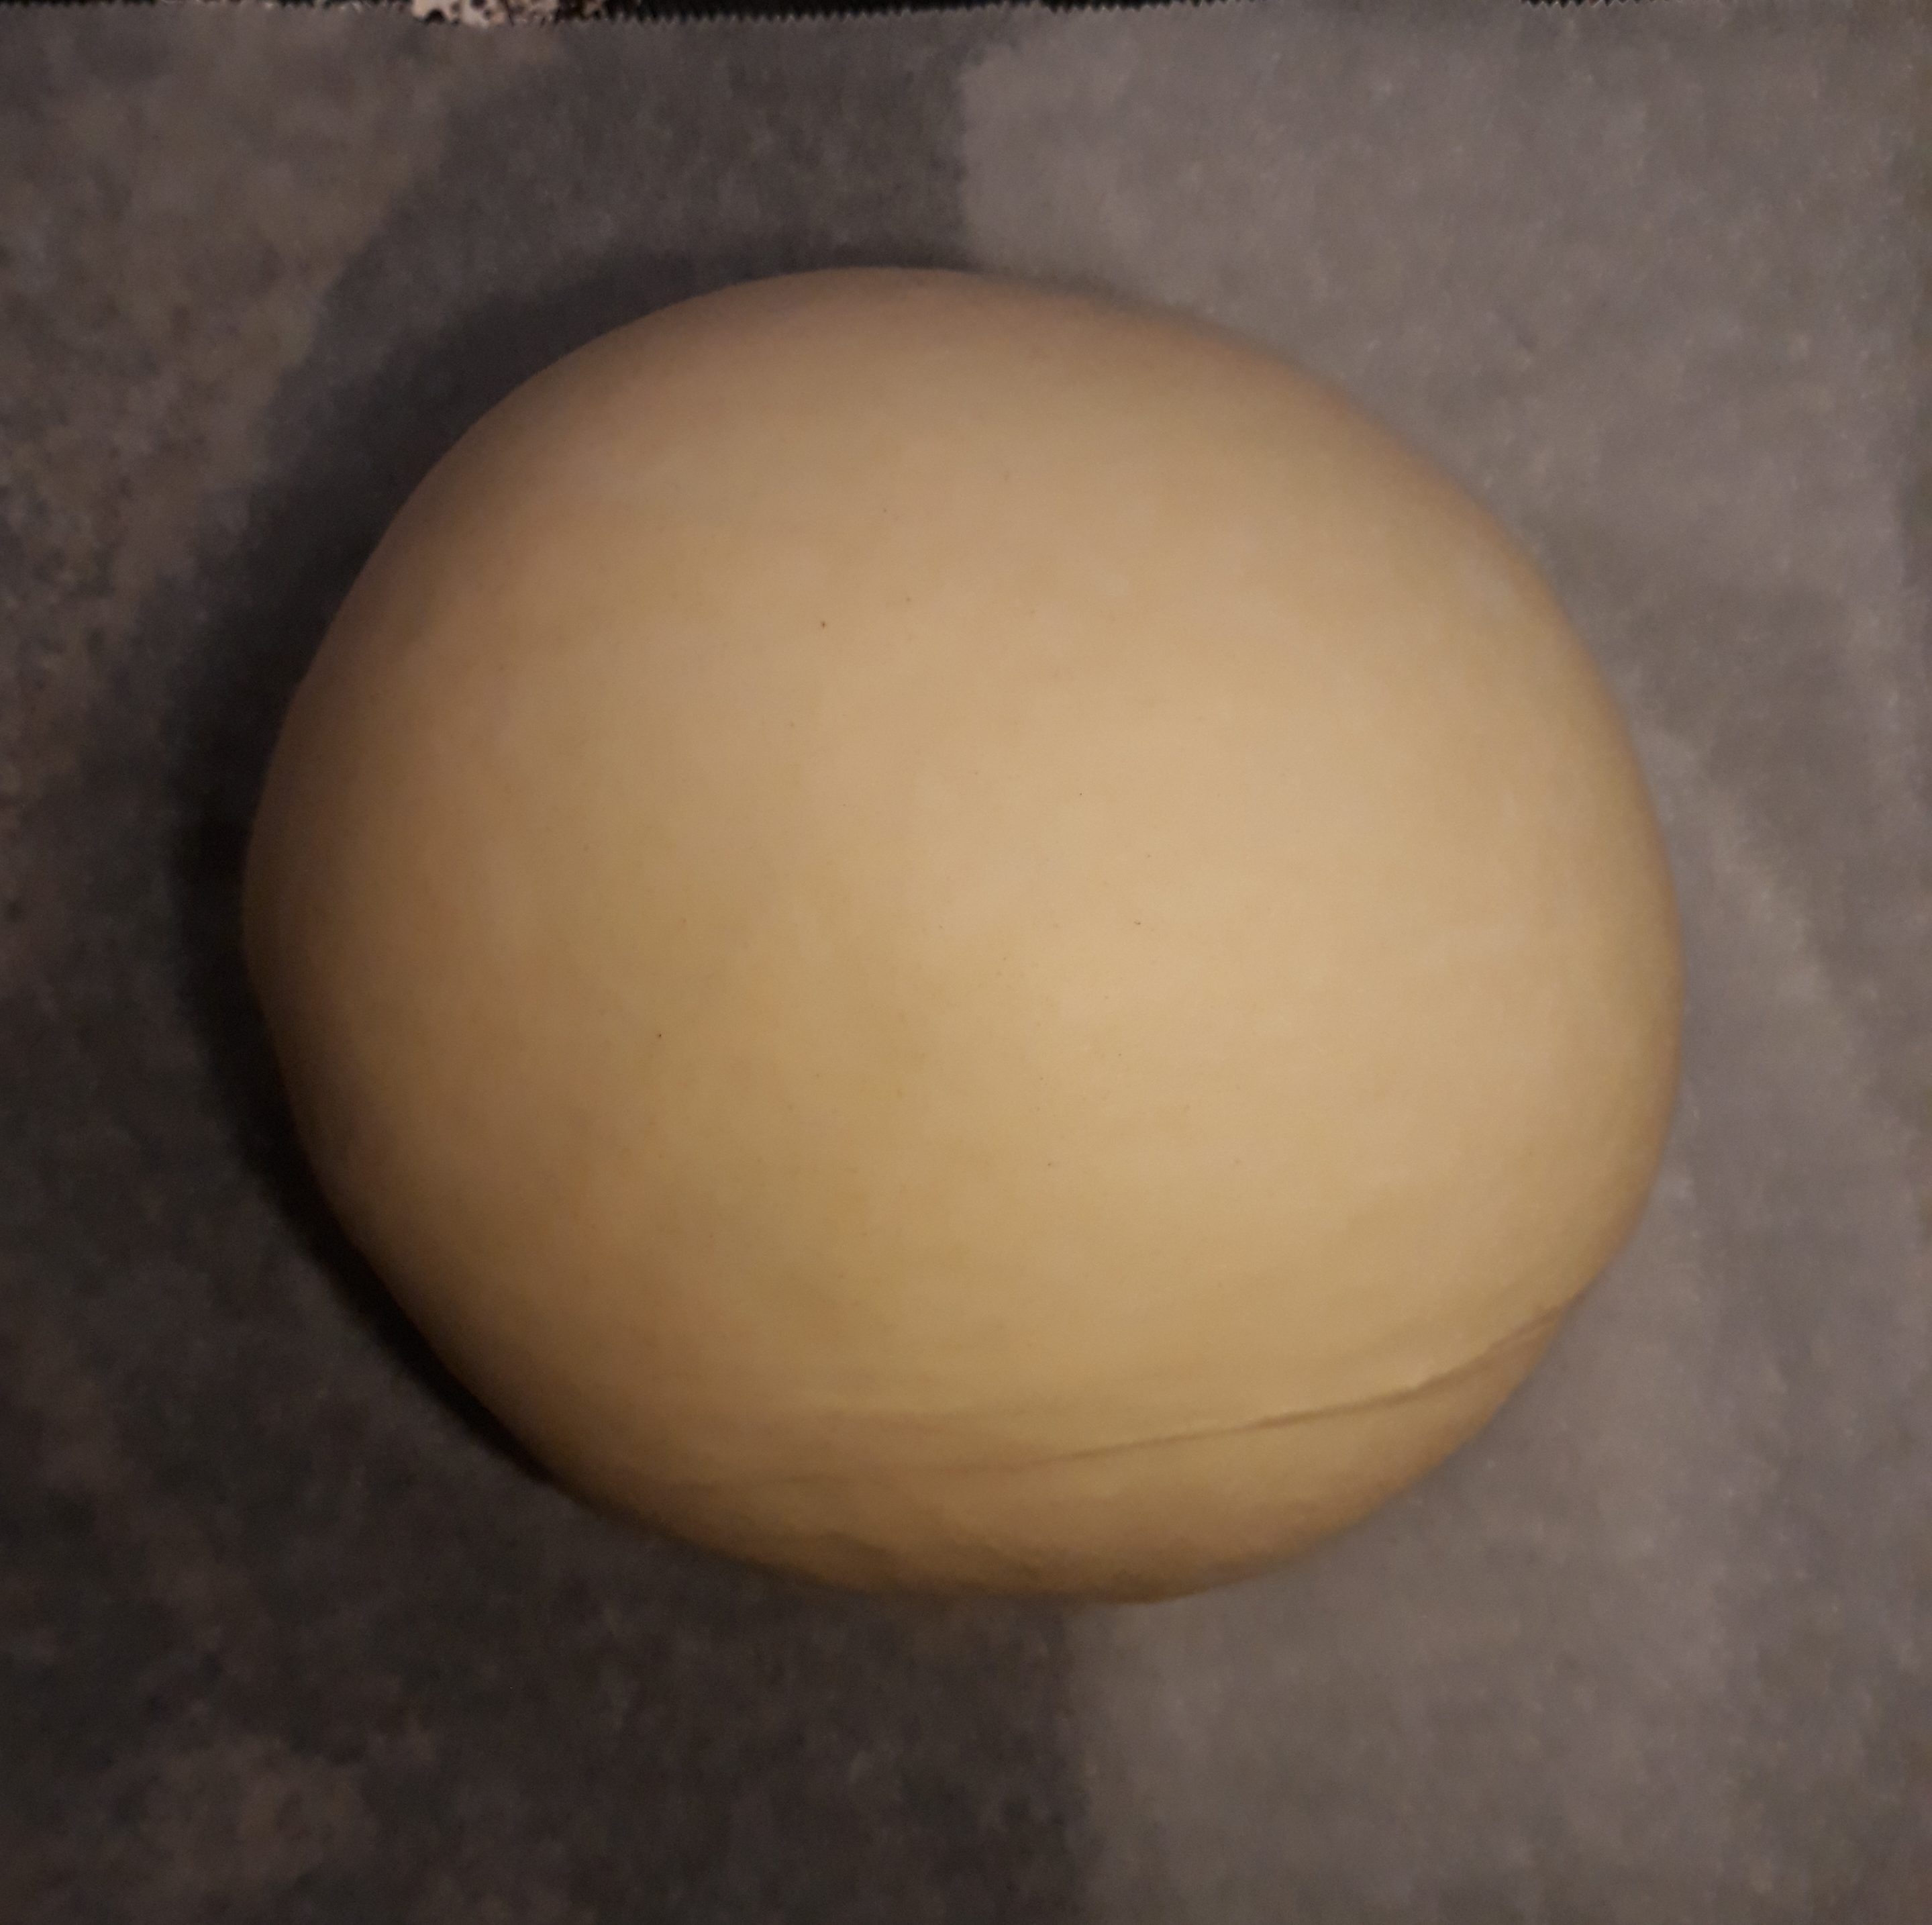
On a lightly-floured work surface, make the cob shape by forming a ball with the dough by tucking your hands under it, tightening the dough. If you twist the ball of dough slightly as you do this, it will be extra tight.
Place the dough on a floured baking tray and cover with a large plastic bag or large bowl or pot.
Slash the top of the loaf with a sharp serrated knife to make a cross shape and place in a cold oven. Set the oven to 220°C and once the oven has got up to temperature, bake for 15 minutes. Turn the temperature down to 200°C and bake for a further 15 – 20 minutes, until brown and crusty. Check the loaf is cooked by knocking its underside and listening for a hollow sound. Cool on a rack and listen carefully for the sound of the crusts cracking!
After writing a post on bread a while ago, I thought I should follow it up with some bread recipes. I was going to go in a chronological order and find the earliest recipe for bread I could, but then I thought against that idea; a recipe for a delicious, but basic loaf is what we need to start with.
I try to bake all my own bread these days, but admittedly, I don’t eat a large amount of it, making a loaf every couple of weeks. However, I do believe that baking your own bread several times a week is possible and not the huge pain the arse you might expect. For many years, I tried to bake bread and it always had good flavour, but it was always a little tough or stodgy. I was rather disappointed thinking one had to practise, ptractise, practise to get the knack. It turns out that I was doing everything correctly, the only ingredient I was missing out was time…
…and this is the problem with today’s factory-made bread; it is mass produced to the extreme, hurredly leavened, containing additives that preserve, emulsify and rise. The slices are always far too light and fluffy – “flabby” is the word I think Jane Grigson used. Of course, these days there are bakery sections in our supermarkets, but Elizabeth David was very suspect of them even in 1977.
Now don’t be thinking me a big old snob: I actually like some factory bread, and much instore bakery bread is very nice and crusty, but having realised I can make bread that is better tasting and so much cheaper, I can’t go back. Admittedly, it doesn’t last as long in the bread bin, but then bread shouldn’t!
Here is the recipe I use for a basic loaf – it requires little elbow grease, unless you have a food mixer with a dough hook. The best thing is that it should be made the evening before you actually want to eat it, so there’s no getting up at the crack of dawn. It contains only four ingredients too: flour, water, salt and yeast. There is the option of adding a little fat to keep it fresh and soft an extra day. You can enrich the bread by swapping some or all of the water for milk, but I think there’s no need. There are so many variations on the theme and as I discover them and try to perfect them, I shall add them to the blog.
It is very important to use the appropriate amount of water. A cob loaf which just sits on a baking tray needs 60% water per volume, in other words 600 g of water for every 1000 g of flour, any more and you risk it spreading out as it proves and bakes. This loaf is going to be baked in a tin, so we can add a little more water – 62.5% for white bread flour. If you are using a mixture of wholegrain strong and white strong, you will need a little more water, around 65% water.
If you like the blogs and podcast I produce, please consider treating me to a virtual coffee or pint, or even a £3 monthly subscription: follow this link for more information.
You will also need a 2 pound, or 900 g loaf tin.
Ingredients:
400 g strong white bread flour, or a mixture of at least half white, and a wholegrain bread flour
8 g salt
4 to 5 g grams of dried instant yeast
250 – 260 g warm water
25 g oil or very soft butter
Mix the flour(s), salt and yeast in a bowl, make a well and add the oil or fat if using, then pour on the water. Mix together using your hand or a wooden spoon. If you have a mixer with a dough hook, just mix on a slow speed until it comes together to form a dough.
Important note no. 1: try to make the dough more on the wet side, rather than the dry; just keep your hands well-floured so you can handle the dough. Work it for a few minutes whilst in the bowl. Of course, if you have a mixer with a dough hook, you can simply use that on a slow to moderate speed to mix and briefly knead it.
You’ll have a sticky dough that is hard to work with, but don’t worry. It is now time to knead the bread. You can sprinkle a little flour or spread a little oil on the work surface to help if you like, but really you don’t need anything. Use whichever you might prefer. I tend to go for a light sprinkle at the beginning of the kneading process.
To knead by hand, push out the dough with the heel of your hand, and then roll it up, give it a quarter turn and repeat. The dough will quickly start to become more stretchy and smooth, and soon you’ll find you don’t need any oil or flour to knead it.
Before rising…
….after!
After around 10 minutes, you’ll feel the dough suddenly get more difficult to knead; it’s a bit like when you chew gum too long and it suddenly becomes more effort to chew it.
Using a dough hook, turn up the speed a couple of notches and mix around 6 minutes. Keep guard though, your mixer may tend to go for a dance or walk over your worktop and off the edge!
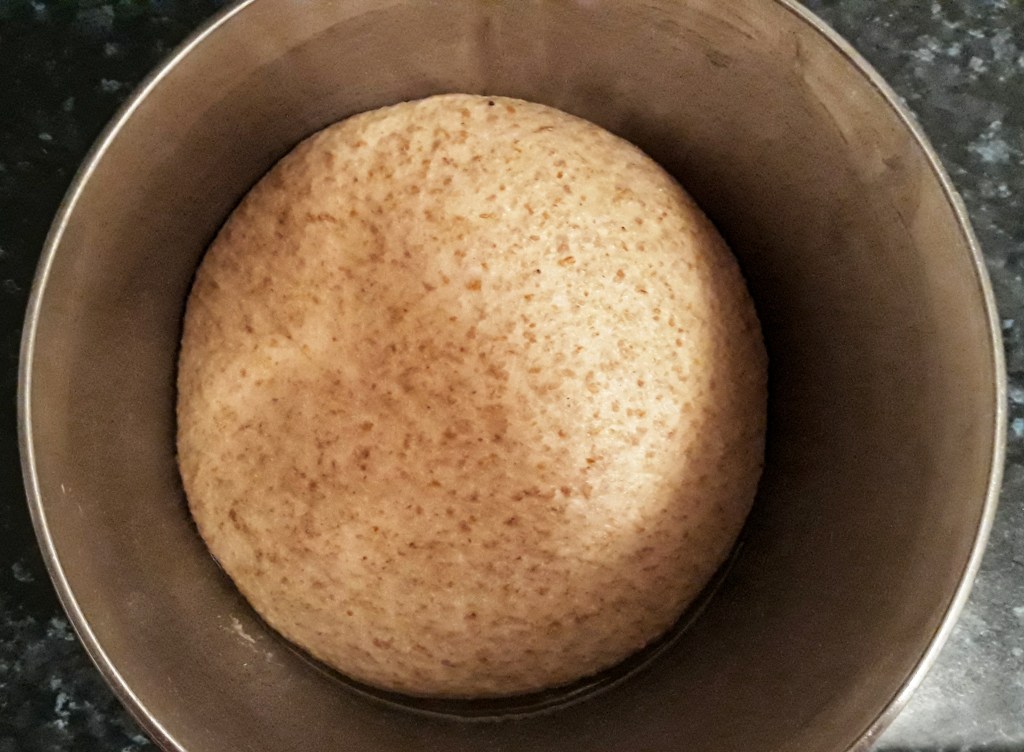
Form the dough into a tight ball by tucking it under itself. Pop it into a grease bowl, cover with a plastic bag or damp tea towel and leave it to rise in a warm place.
Important note no. 2: Do not leave it near a radiator or anything like that – unequal heat will not do the job – you need ambient warmth. I let my dough rise in my airing cupboard. If you don’t have a warm place, do not worry for the quickly-metabolising yeast will begin to generate its own heat.
The stretchy dough after its first prove
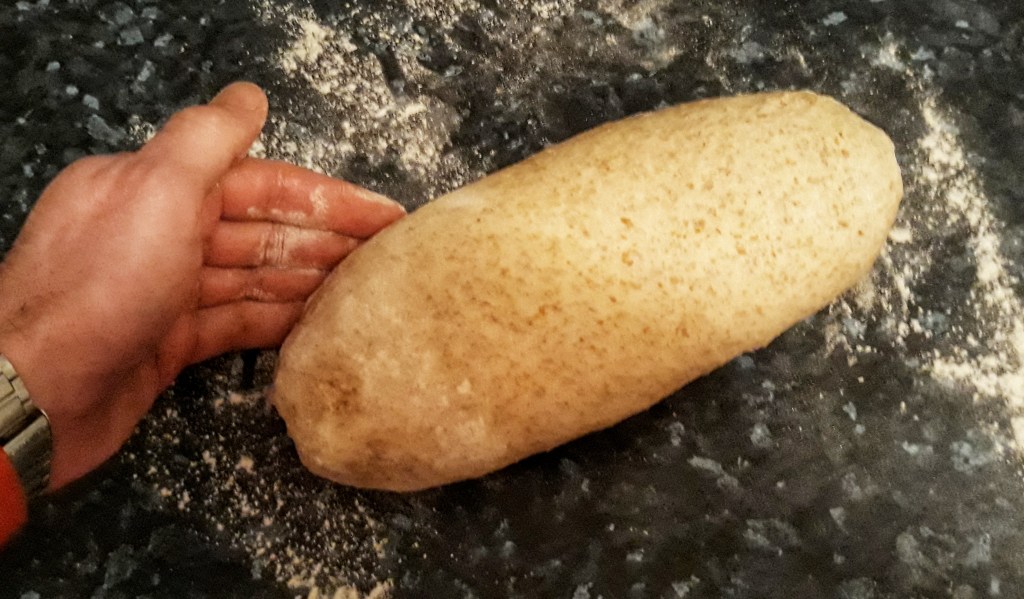
When it has doubled in size, knock it back, i.e. press the air out with your fingertips – a very satisfying thing to do. It should be squidgy and much more elastic. Make a ball with the dough by pushing the edges into the centre. Once it is round, stretch the circle into an oval shape, long side toward you.
Now roll the dough towards you from the far end, tucking in everything tight all around, like tucking in your bed. This ensures that the seam is at the bottom of the bread and so that the top is nice and tight.
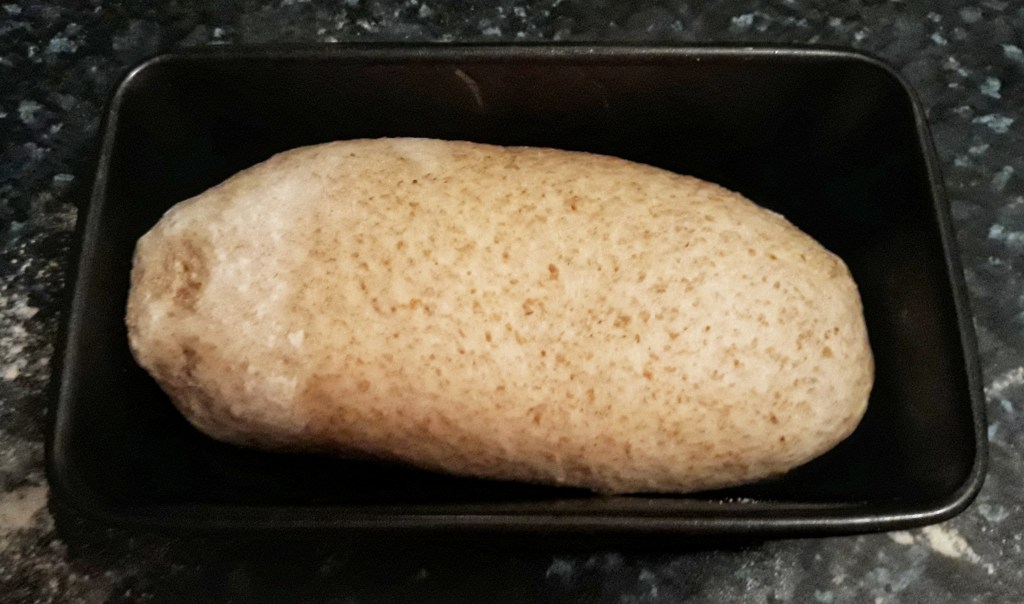
Cover with a plastic bag and allow to prove again, until doubled in size – it should have risen above the rim of the tin and should spring back when pushed by your finger.
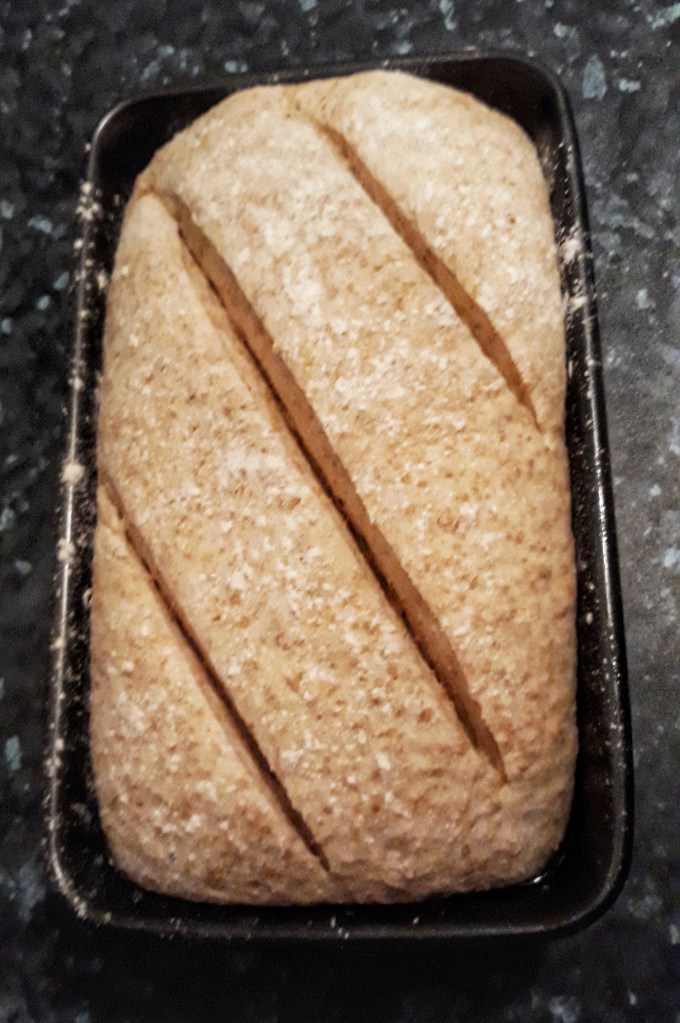
Sprinkle with flour and make some cuts on the crust so that it can unfurl as it bakes – I go for diagonal slashes. It’s important to do it quite quickly and in one direction. A sharp serrated knife like a bread knife is best for this.
There are many methods for baking your bread, and some require a lot of messing around with trays of hot water and crazily-high temperatures. I do something much less dramatic: I put the bread in a cold oven and then turn it on – you get some extra rise without faffing about altering temperatures and giving yourself steam burns. If you have to use a hot oven, spray the dough with water to stop it forming a crust too early.
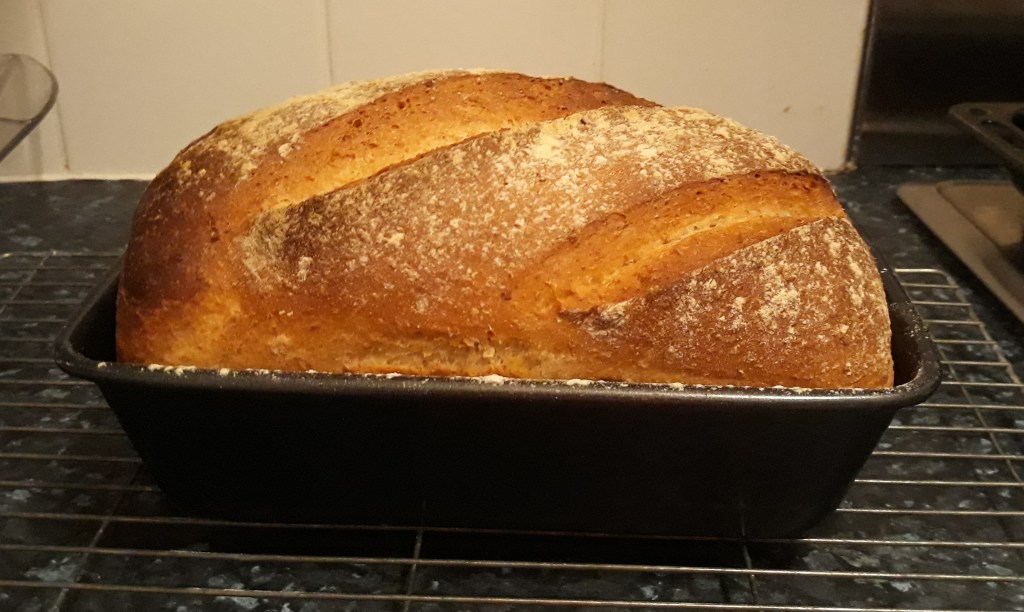
Set the oven to 220-230⁰C and bake for 40 minutes. When ready, the loaf will sound hollow when knocked with a knuckle.
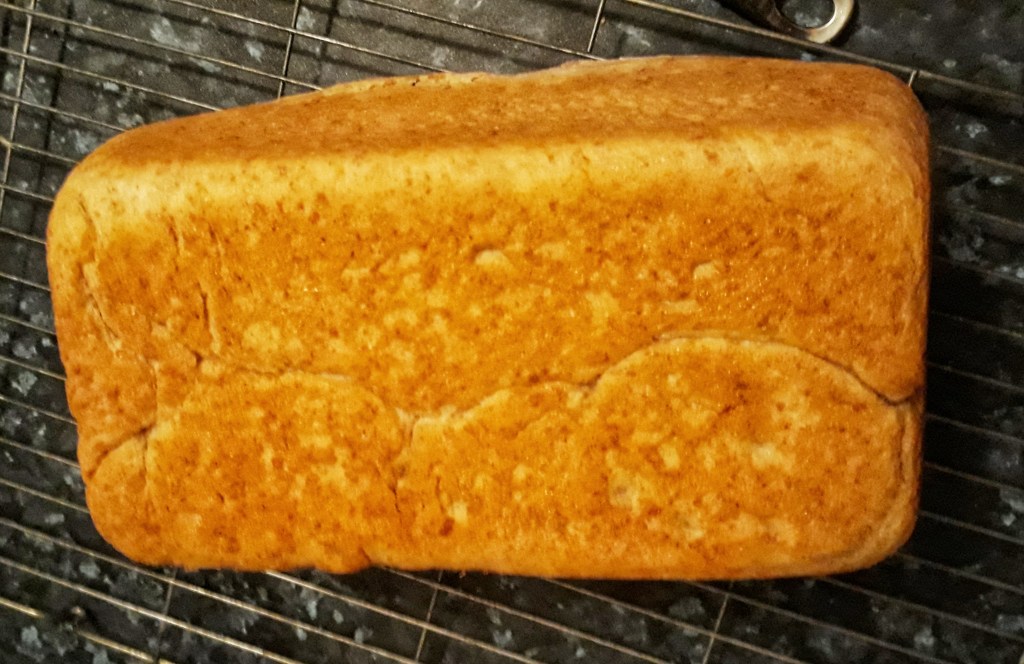
The seam you made can still be seen on the underside of the loaf
Important note no. 3: do not eat the bread when hot – try to resist! The still-hot steam can make it stodgy.
There it is – sorry it’s rather long, but hopefully it is a good guide to baking proper bread. If anyone has any extra tips, let me know…
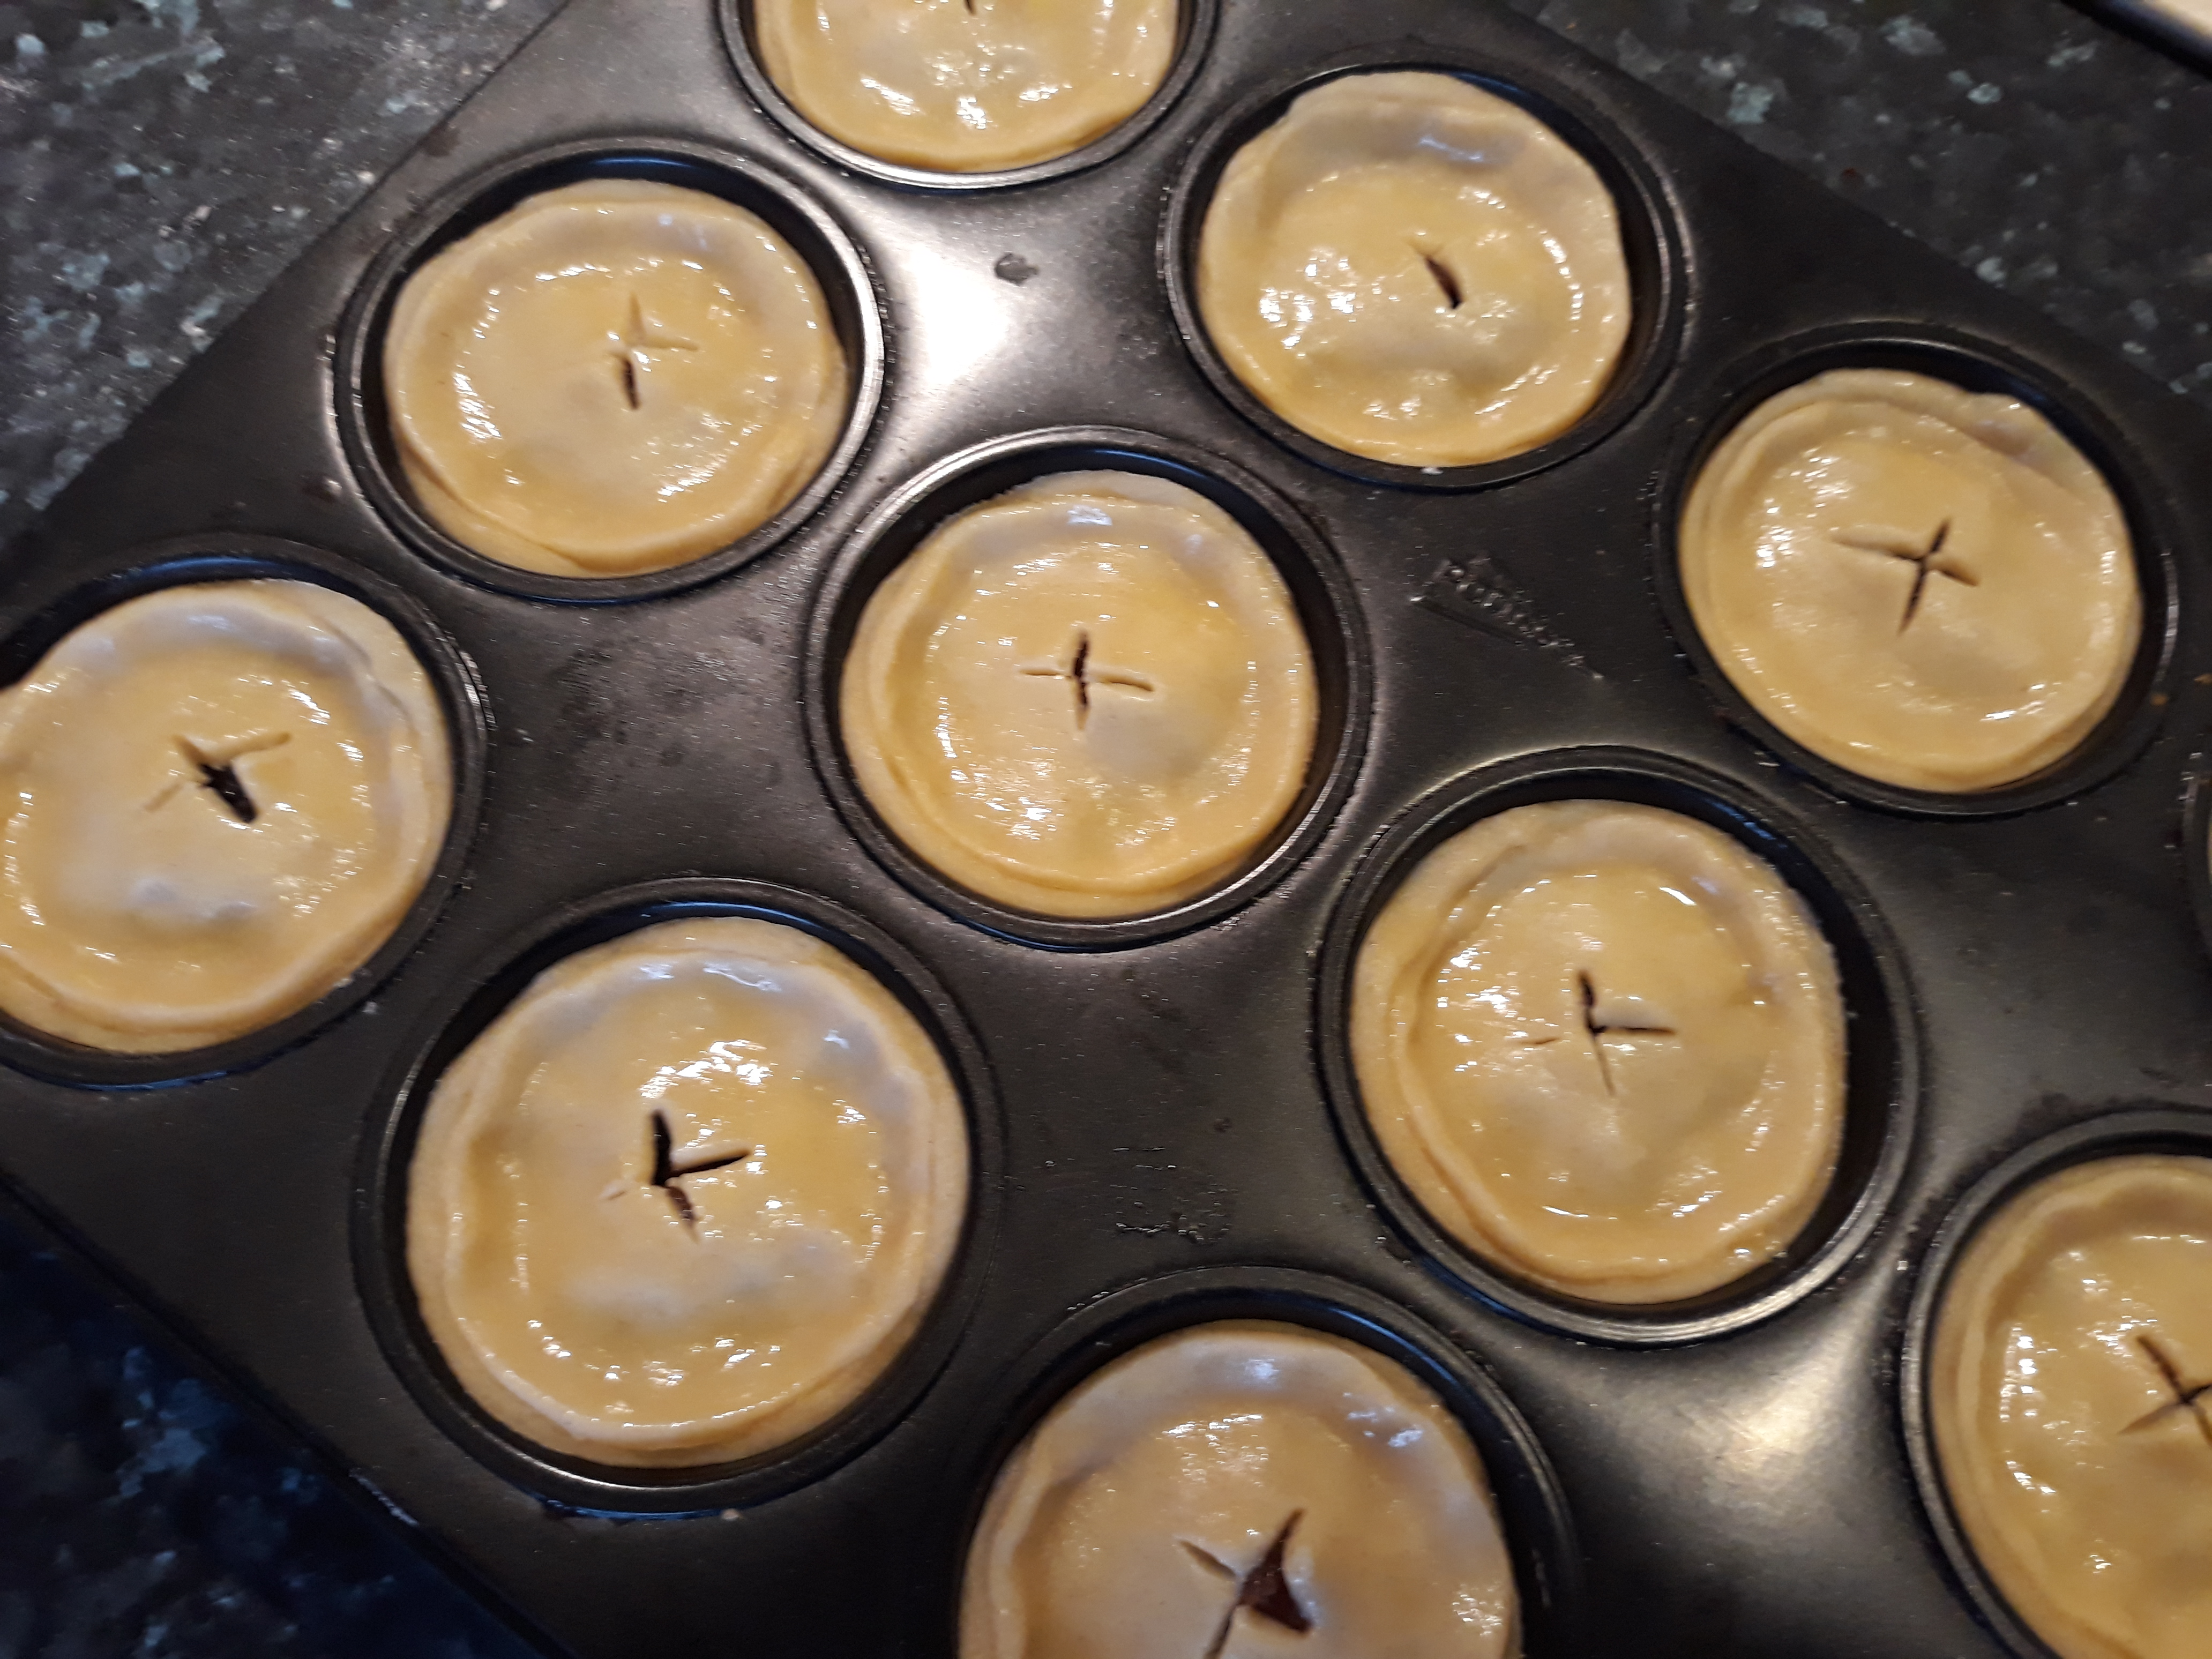
A few posts ago I gave the recipe for Mrs Beeton’s mincemeat, so I thought it only right to give a little instruction in making mince pies. I have to tell you that it is really worth the trouble of making your own mincemeat and mince pies – any bought ones are incomparable and always too sweet. The secret to an excellent mince pie is two-fold: you need homemade mincemeat and you need shortcrust pastry that is made with half butter and half lard. many people recoil in horror these days at thought of using lard, but it isn’t that bad really, at least not in small doses.
A recipe by Roger Twysden from the times of Charles I (c. 1640) says that larger Christmas pies were also made using a mixture made of meat, sugar, dried fruit and spices. He then says: “put them in coffins or pyes, and bake them”. The word coffin was used to describe the pastry-shell of pies. The reason they were called coffins is because, in earlier times, the pastry simply served as a casing intowhich the meat could be cooked; the pastry itself actually being inedible. They weren’t actually coffin-shaped, except for the Christmas Pie as Charles Dickens, writing in 1877, tells us: ‘ The coffin shape…is not now familiar to us. There is good reason to believe that, in old times, the form was symbolic of the manger at Bethlehem; and that Christmas Pie, whether mince or not, had religious as well as a gastronomic association with this particular season.’
For more typical mince pies, they are based upon Jane Grigson’s instructions from English Food, and they are excellent.
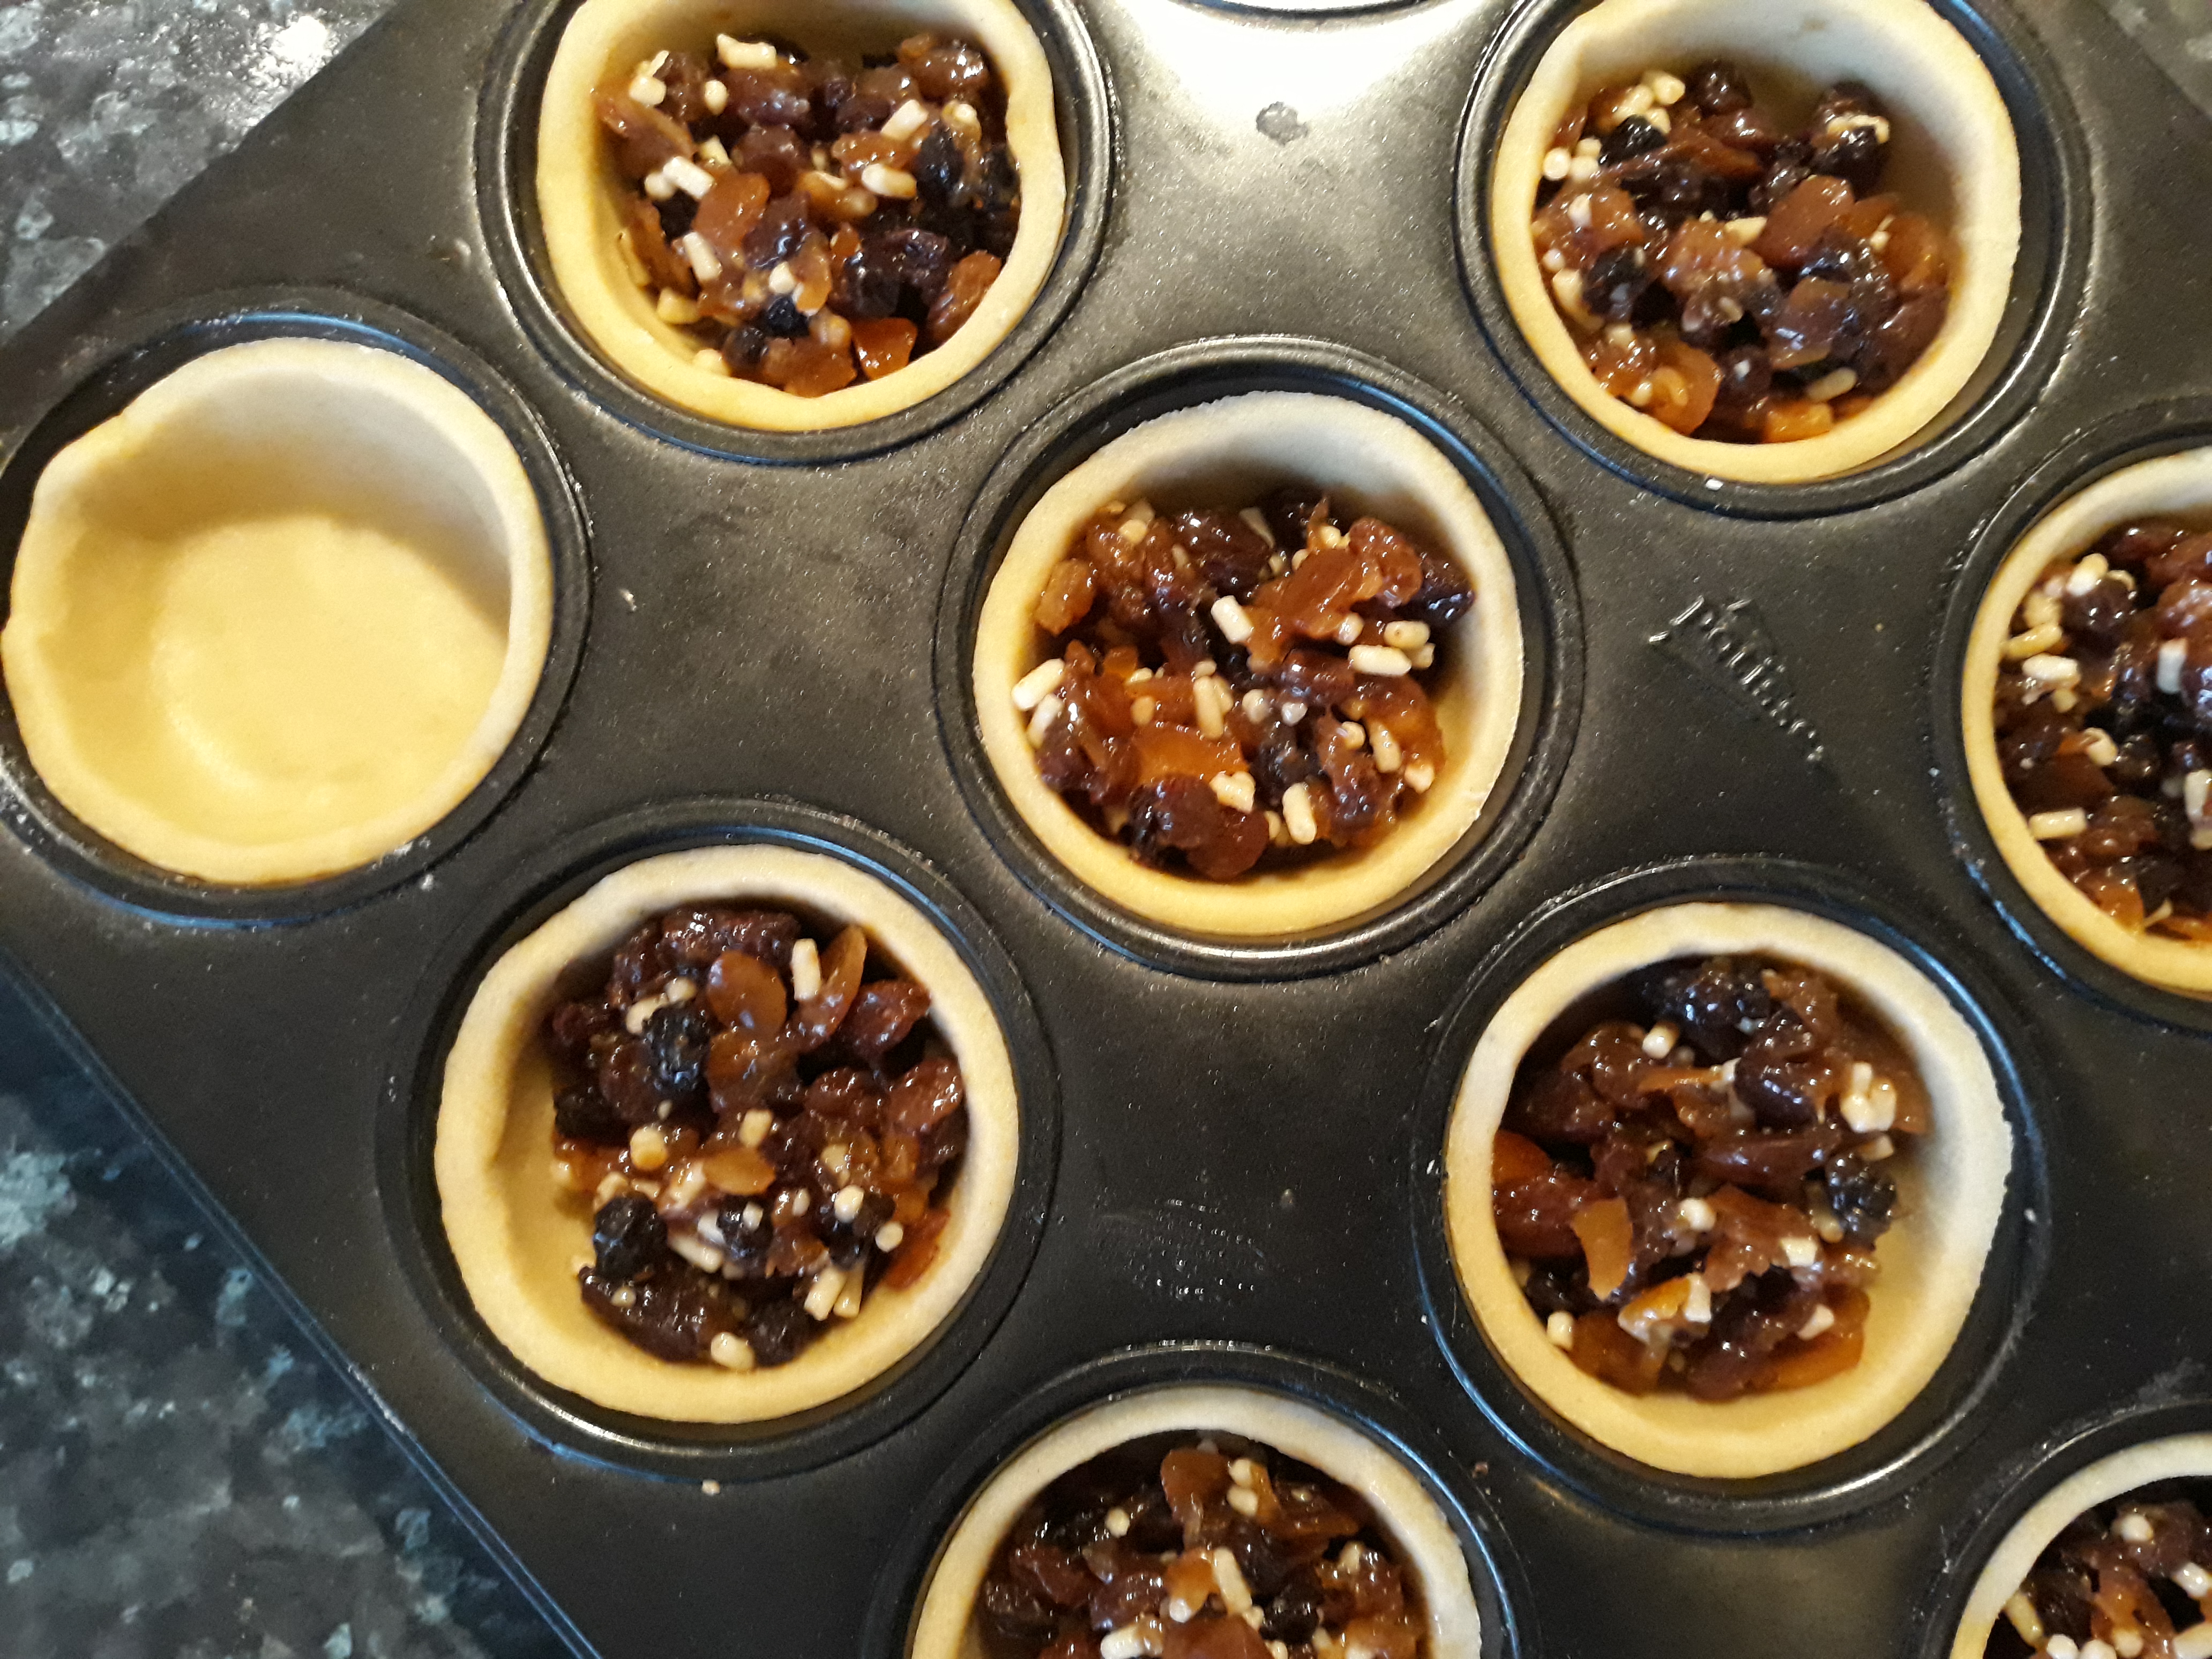
Roll out your pastry and use cutters to line…tarttins [I actually use muffin tins, cutting a large circle for the base, and a smaller one for the top]. Add…[a dessertspoon] of the mincemeat – not too much though the suet and sugar expands quite alot. Use some beaten egg to glue on lids of pastry, pinching as you go. Lastly brush the top with more egg, make a little cross in the top of the pie so steam can escape and sprinkle with a little sugar.
Bake at 220⁰C (425⁰F) for 15 to 20 minutes. Eat warm or cold. If you are feeling extra-Christmassy and if your stomach can take it, add a blob of brand or rum butter. Personally I go for a blob of lightly whipped cream or even some custard if any is tohand [and I concur!].
If you like the blogs and podcast I produce, please consider treating me to a virtual coffee or pint, or even a £3 monthly subscription: follow this link for more information.
Once your Christmas cake is nicely matured and well-fed on brandy, it is time to decorate the bugger. In my opinion it is best to go all-or-nothing; either don’t decorate at all or go crazy. Traditionally, in England at any rate, you need a layer of marzipan and a layer of royal icing. Though I have seen recipes that have a bakeable marzipan and no icing, which I must admit is attractive, but I keep it traditional, even though I am not really bothered about the icing. No, I do it simply for tradition’s sake.
I gave the Christmas cake recipe that I use in the previous post, so if you have made one or have a bought undecorated one that you want to put your own stamp on, I have recipes for marzipan and for royal icing too. Don’t forget to add some festive bits and bobs too.
Marzipan
Marzipan is essentially a paste made of ground almonds and sugar and it found its way in Europe from the Middle East via the Crusades. It was the Italians – specifically the Milanese – that really took to the stuff, refining the techniques to produce a very high quality product that was excellent for making into extravagant sculptures. Leonardo da Vinci was quite despondent after making some amazing and intricate marzipan sculptures for the Milanese court as he ‘observed in pain that [they] gobble up all the sculptures I give them, right down to the last morsel.’
Aside from being used as a sculpture material, marzipan also became a popular sweetmeat used by chocolatiers and bakers. Some of my favourite cakes use marzipan: Battenburg, stollen and simnel cake. The Christmas cake got its layer of marzipan because the Twelfth Night cake – traditionally covered in it – was banned by the Puritan and Lord Protector of England, Oliver Cromwell as too frivolous, so people added the marzipan they loved so much to their Christmas cake instead.
Here’s the recipe I always use these days. What I like specifically about this recipe is that it is not too sweet, which I think the bought stuff always is. Also, when you make your own marzipan, it has a much better texture as well as flavour. You can add extra things to the mixture if you like, such as the grated zest of an orange, or a couple of teaspoons of orange flower water or rose water.
140 g icing sugar
90 g caster sugar
220 g ground almonds
1 beaten egg
1 tbs apricot jam
1 tbs water
Sieve the icing sugar into a large bowl and stir in the caster sugar and almonds. Stir in the beaten egg and lemon juice to form a paste. Knead the marzipan on a surface floured with icing sugar. Easy. Wrap and allow to chill in the fridge for a few hours.
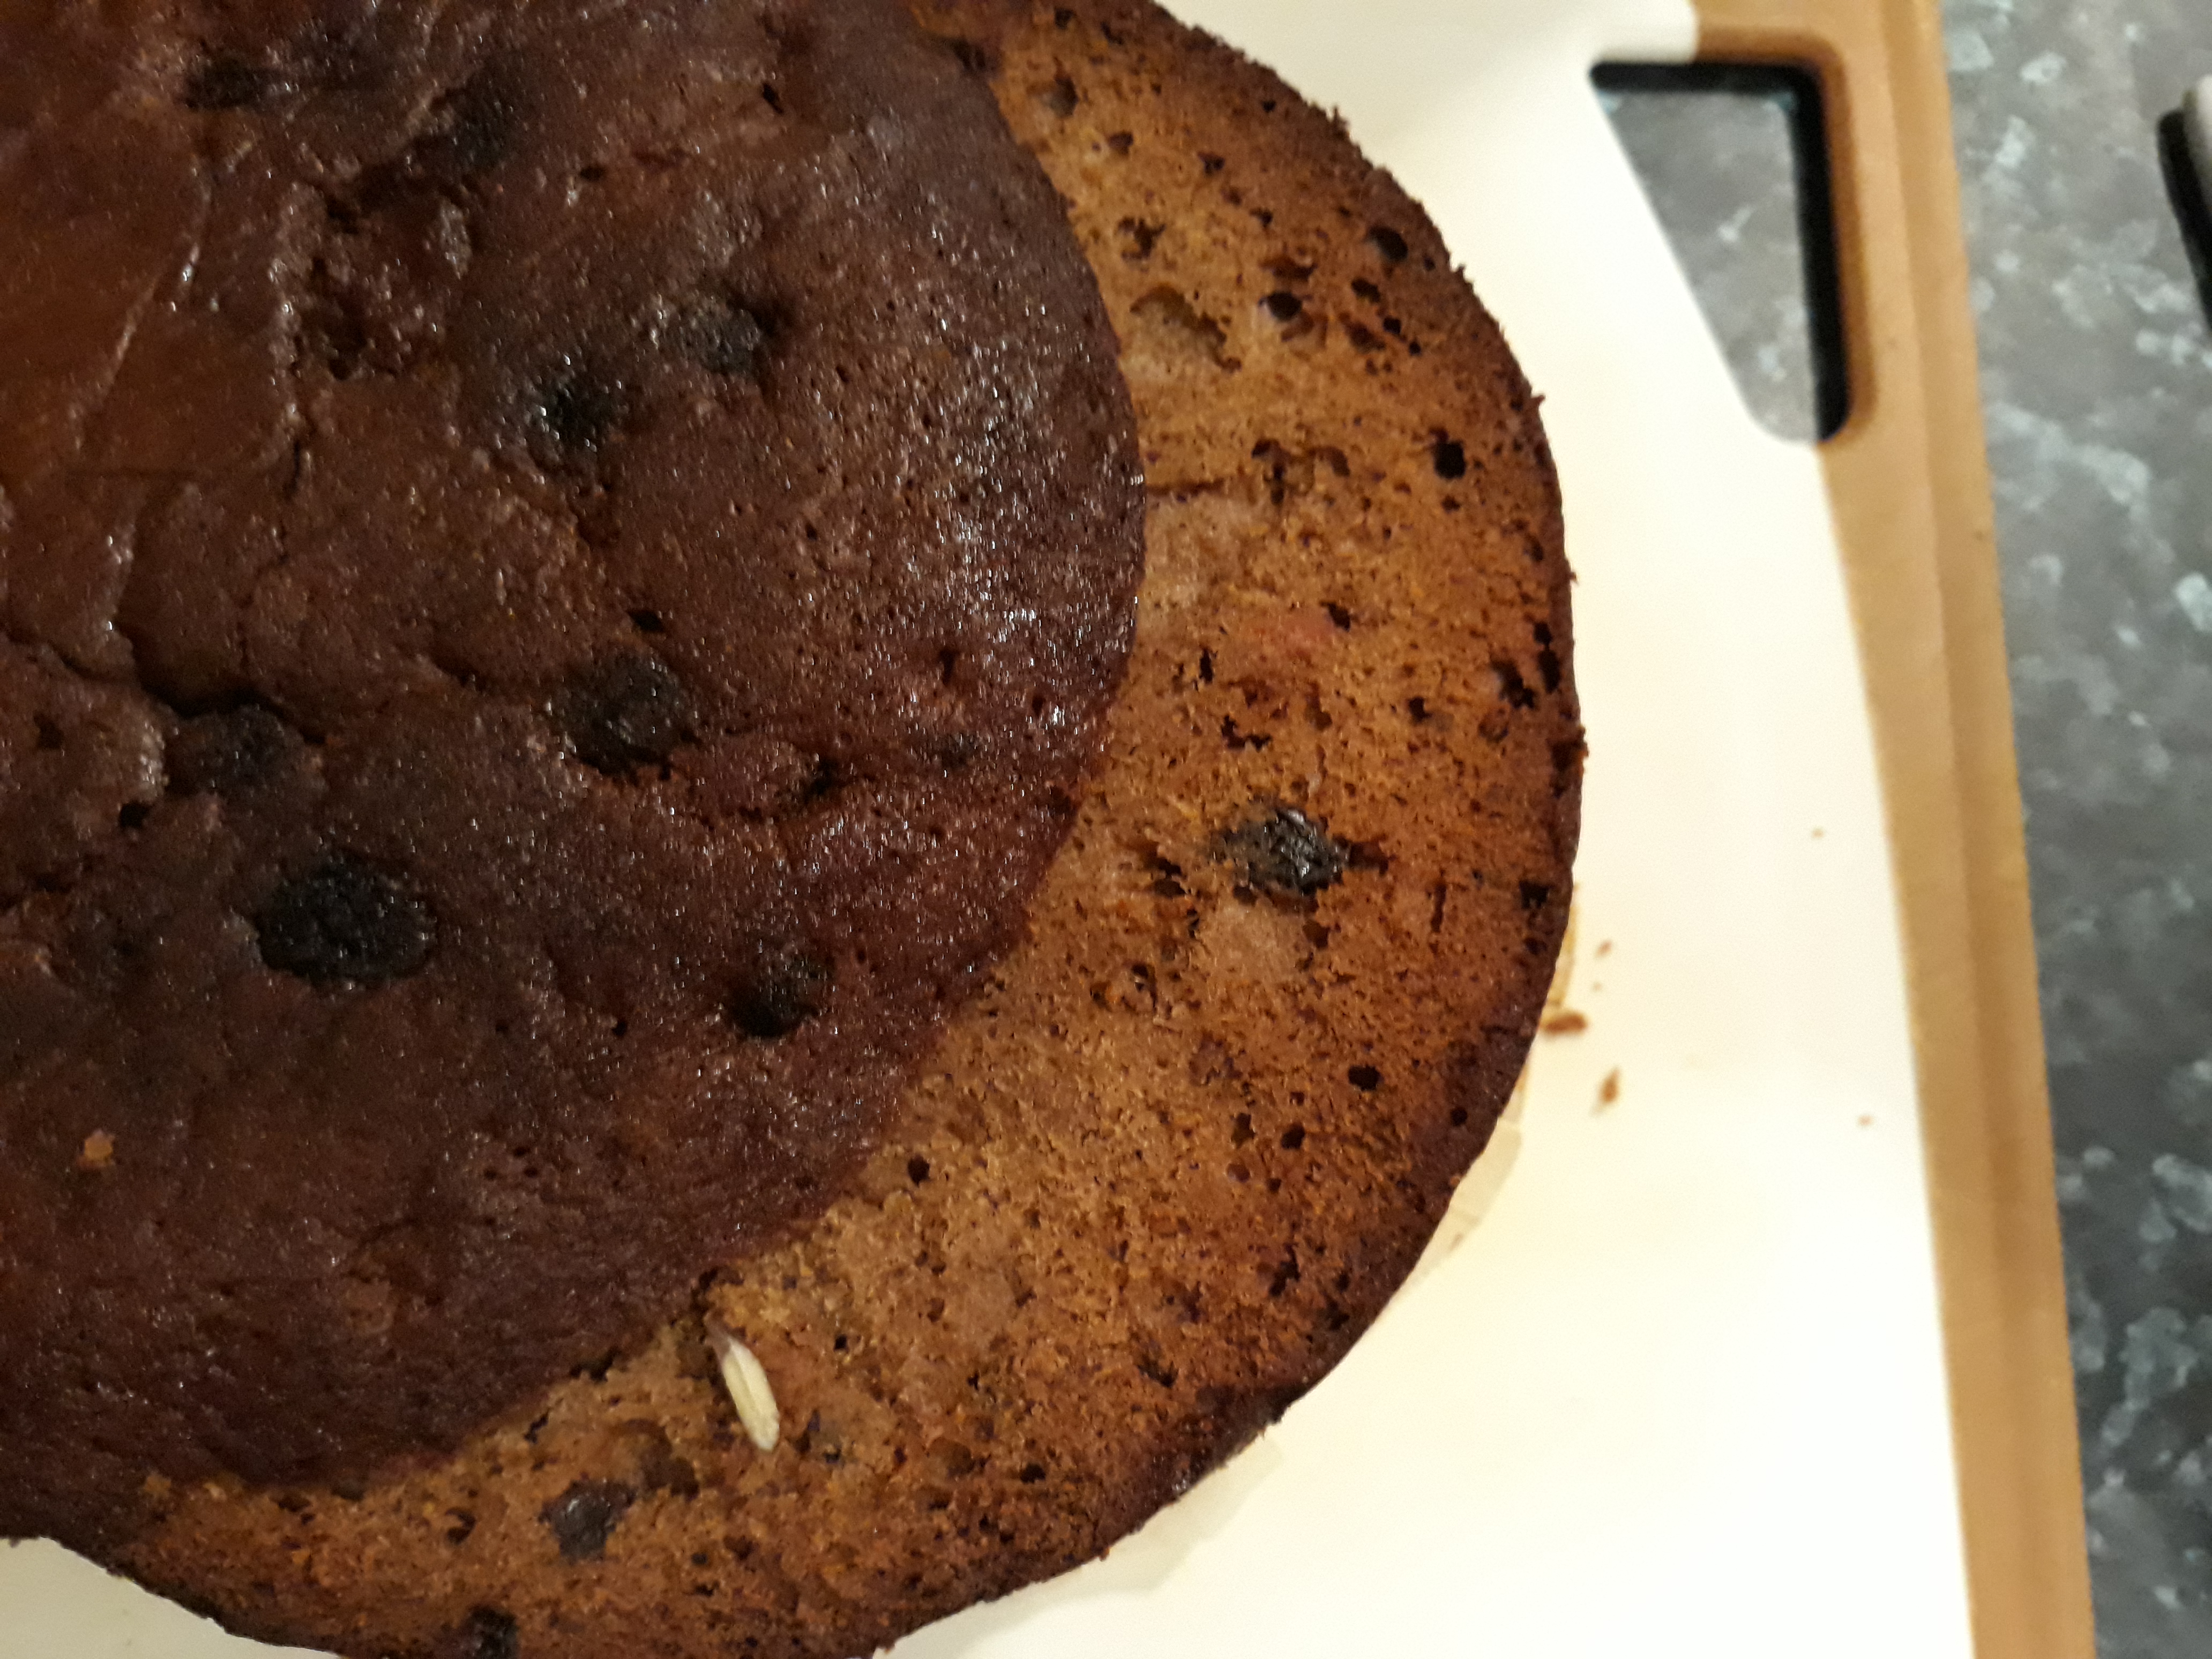
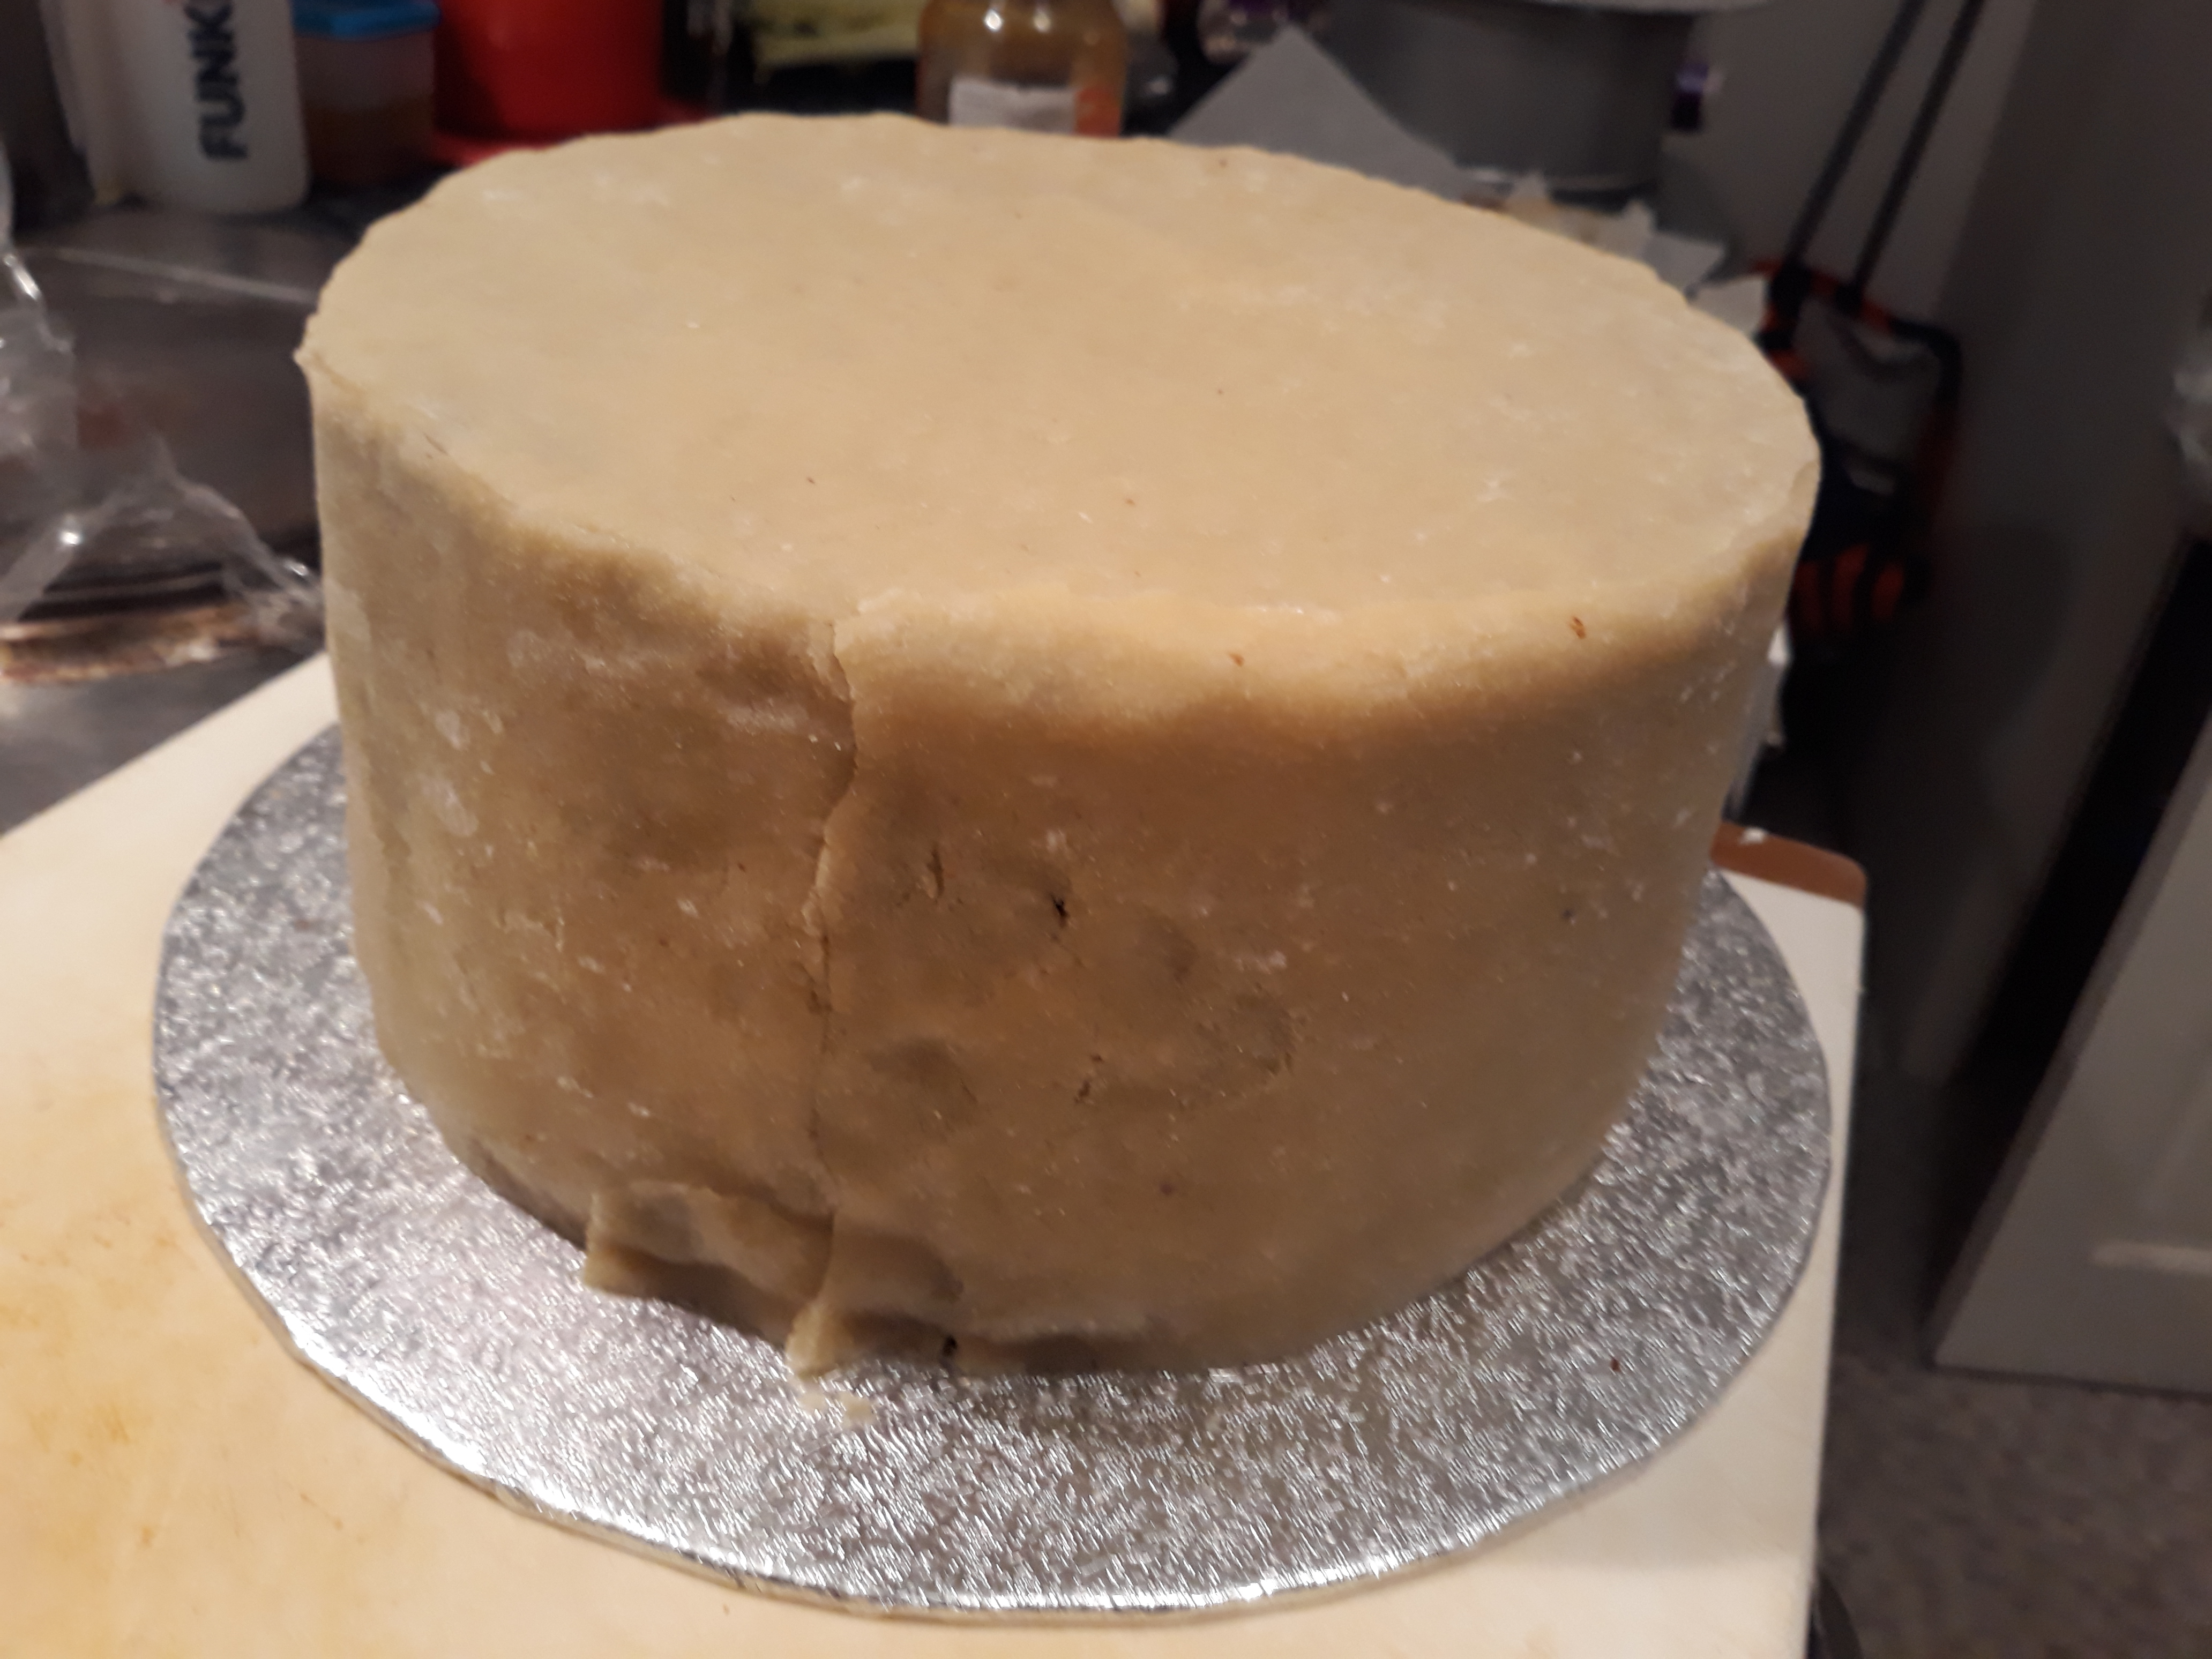
To cover the cake with it, you first need to slice the top of your cake off so that it is a nice, flat surface. I always like that bit because I get to try the cake.
Next, turn it upside down and pop it on a cake base or plate. Warm up the jam and water in a pan and paint the whole cake with the glaze.
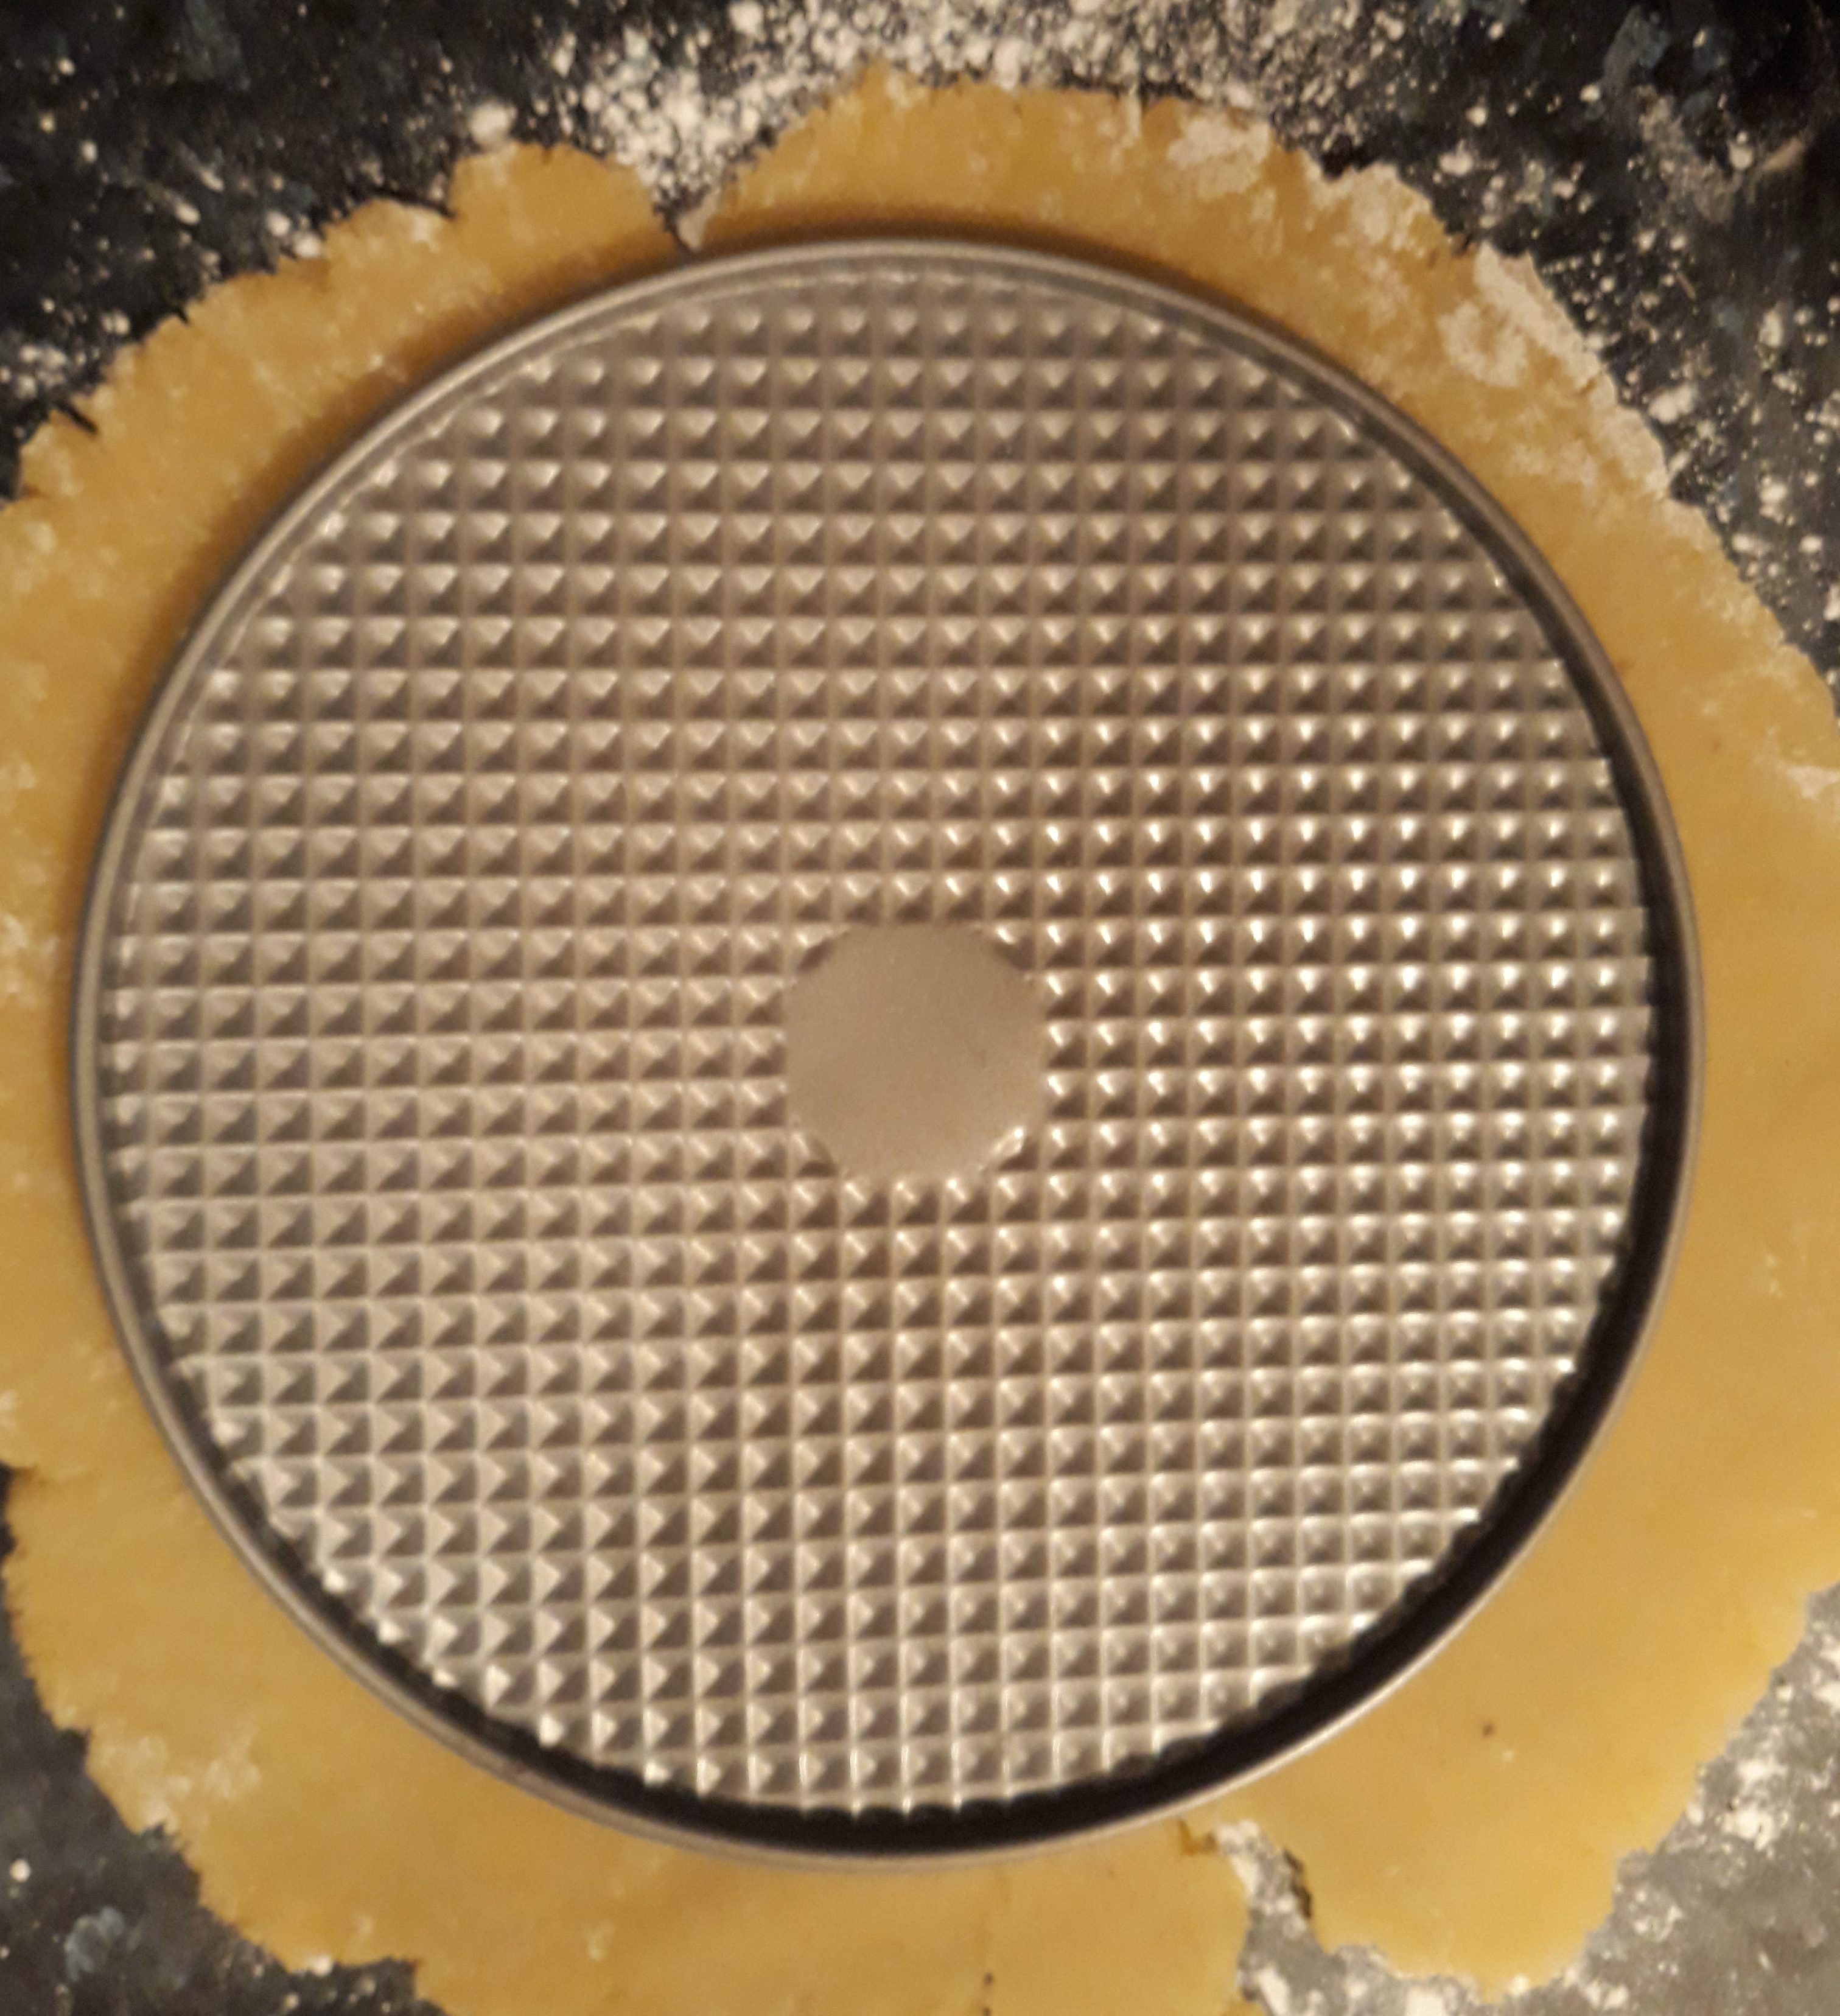
On a sheet of greaseproof paper, roll out a little over half of the marzipan into a round shape that is just a little larger than the cake itself. The greaseproof paper makes it easier to roll out, but you can use an icing sugar dusted worktop instead. Use the cake tin as a template and cut a circle.
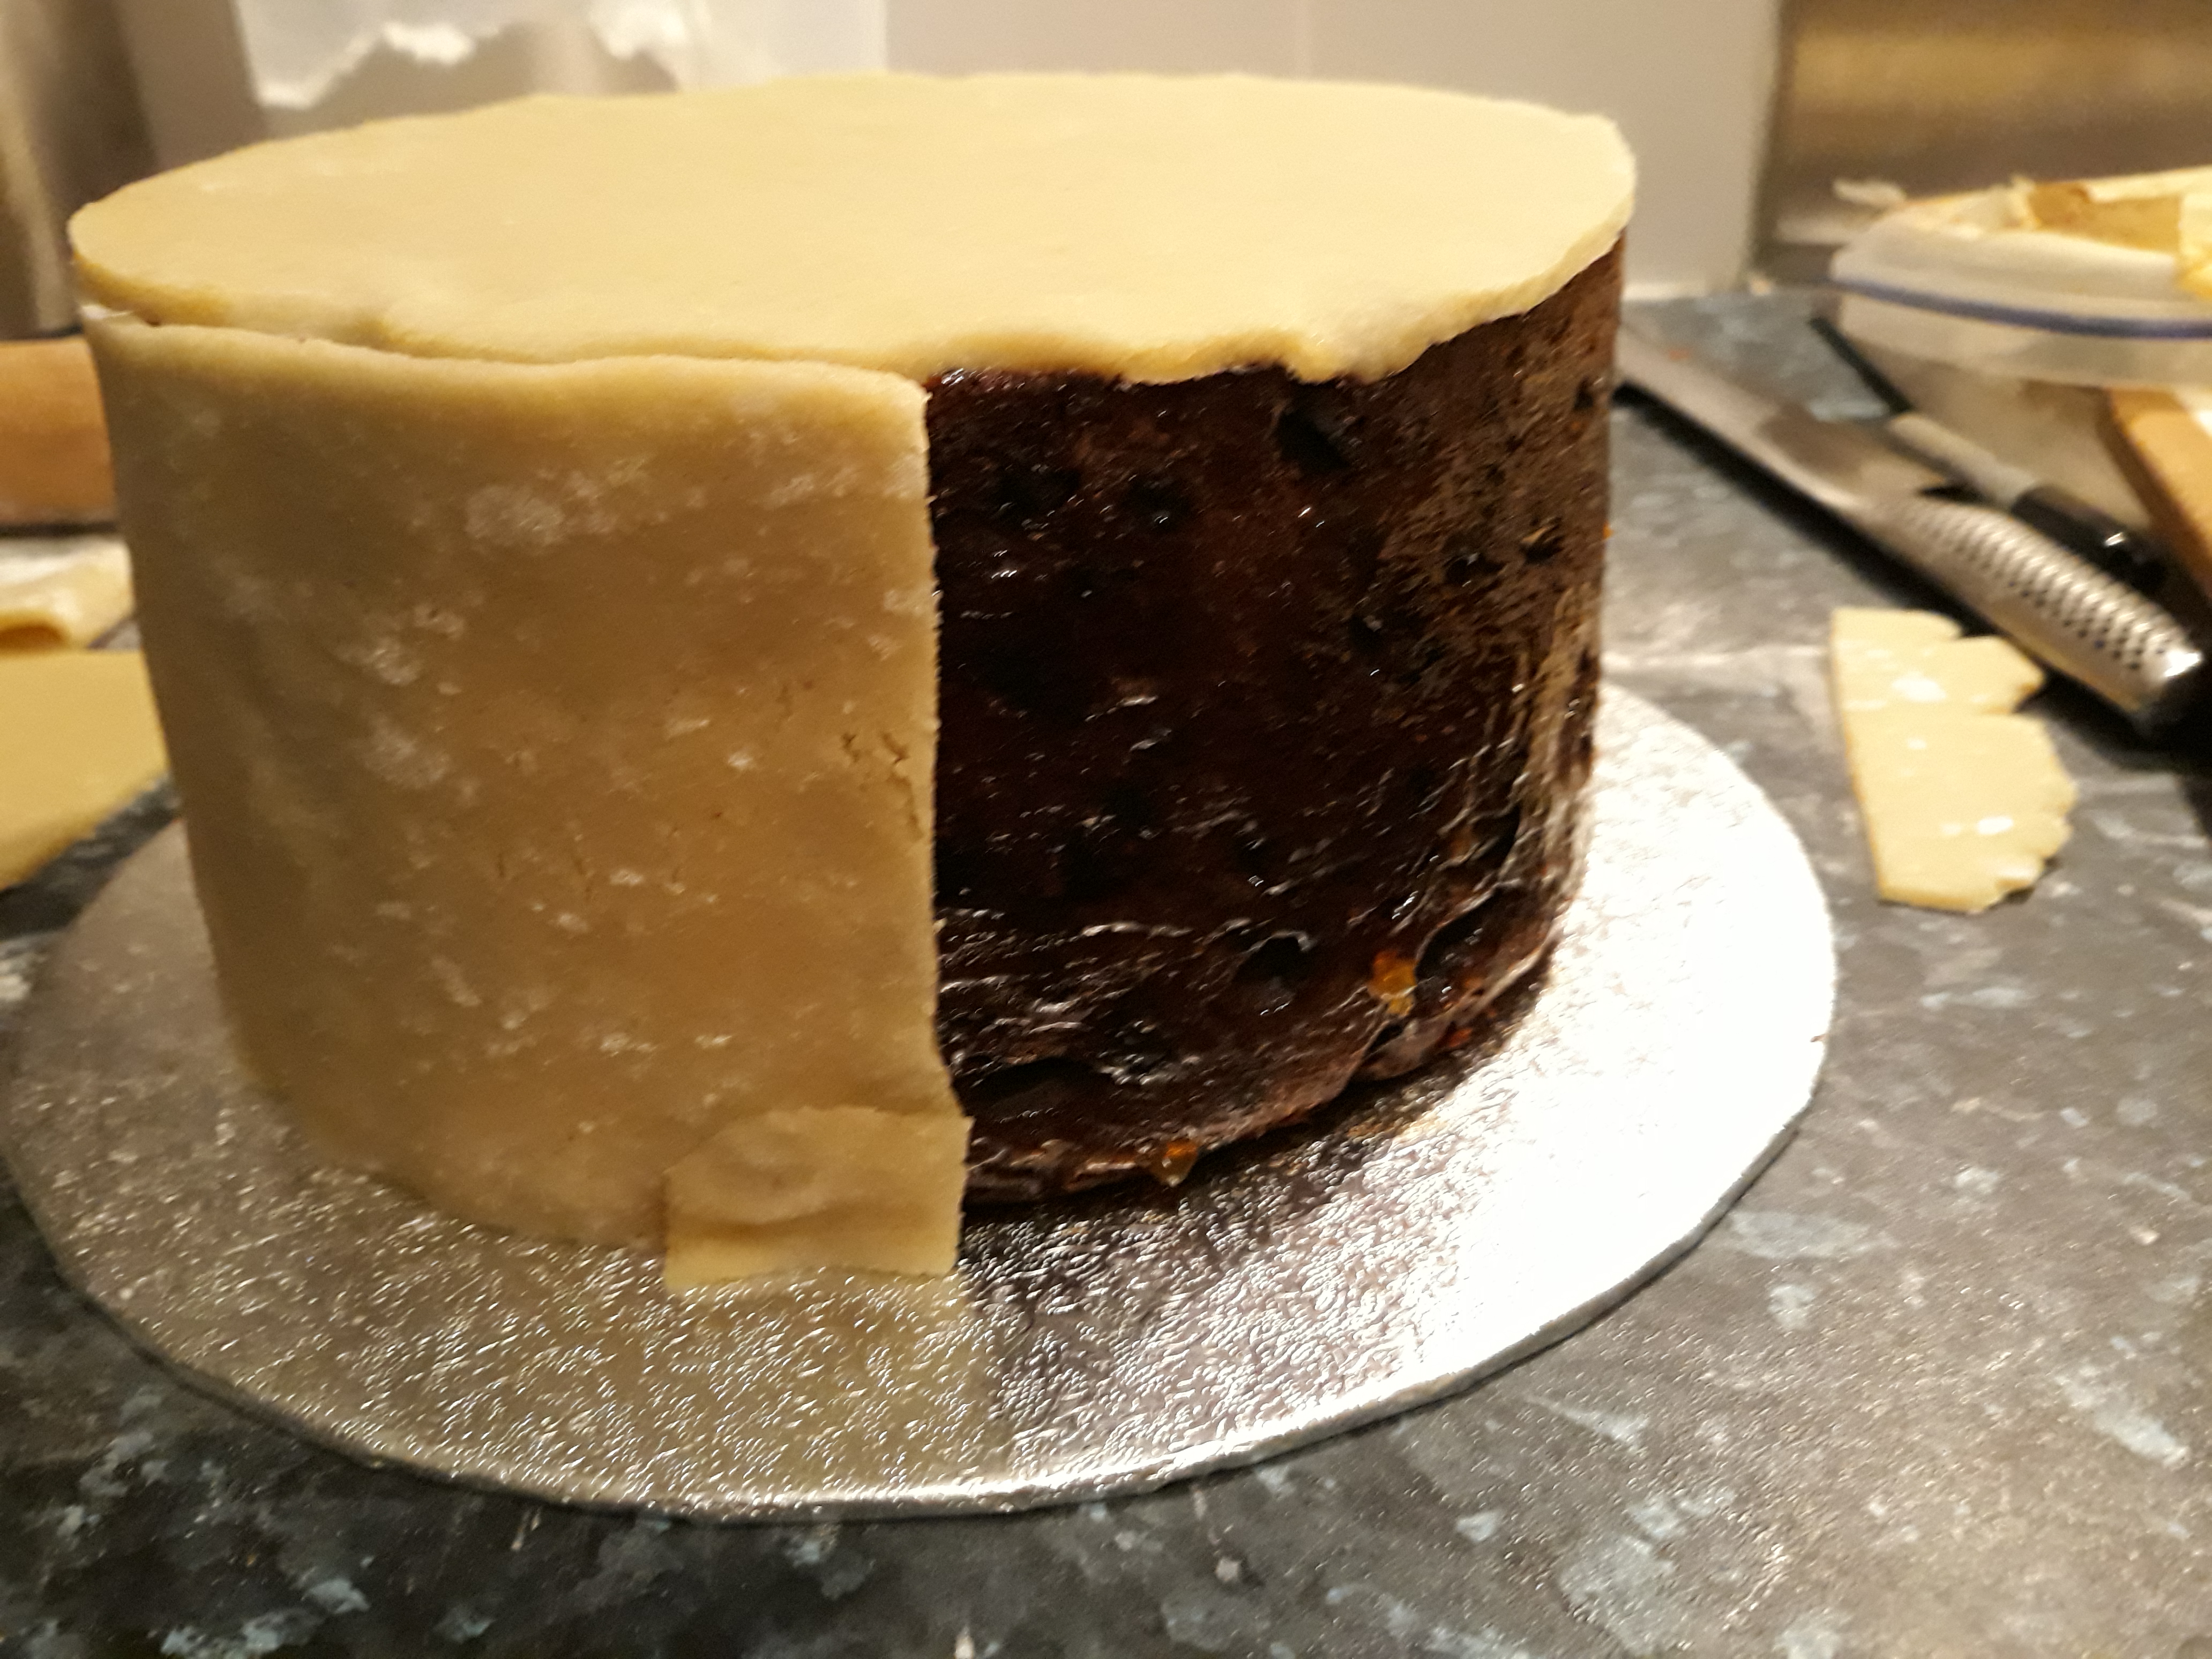
Pick up the marzipan still stuck to the paper, place it on top of the cake and peel off the paper.
Next, take the remaining third of the paste and roll that out into strips the same height as the cake and secure them to the cake. Press the edges together as you go as well as any cracks that may appear.
You need to leave the cake for a couple of days to dry a little before adding the icing (should you want to).
If you like the blogs and podcast I produce, please consider treating me to a virtual coffee or pint, or even a £3 monthly subscription: follow this link for more information.
Royal Icing
Royal icing is the classic icing for the Christmas cake – it is ‘royal’ because it was the British Royal Family that used in for their wedding cakes, and naturally if the Royals did it, then we copied it. Icing had been around since the eighteenth century; before that, there wasn’t the technology to refine the sugar appropriately. The first icing was similar to royal icing, it was spread over the top of the cake but then the cake was returned to the oven to set hard. The final result was a nice flat, shiny surface like that of a frozen lake, hence we call the stuff icing. Elizabeth Raffald mentions it in The Experienced English Housekeeper (1769) – the first written recording of the word.
Royal icing is the most popular icing because it can be piped and coloured easily. Plus it is easy to make , which a bonus. Here’s how:
2 medium egg whites
2 tsp lemon juice
500g icing sugar, sieved
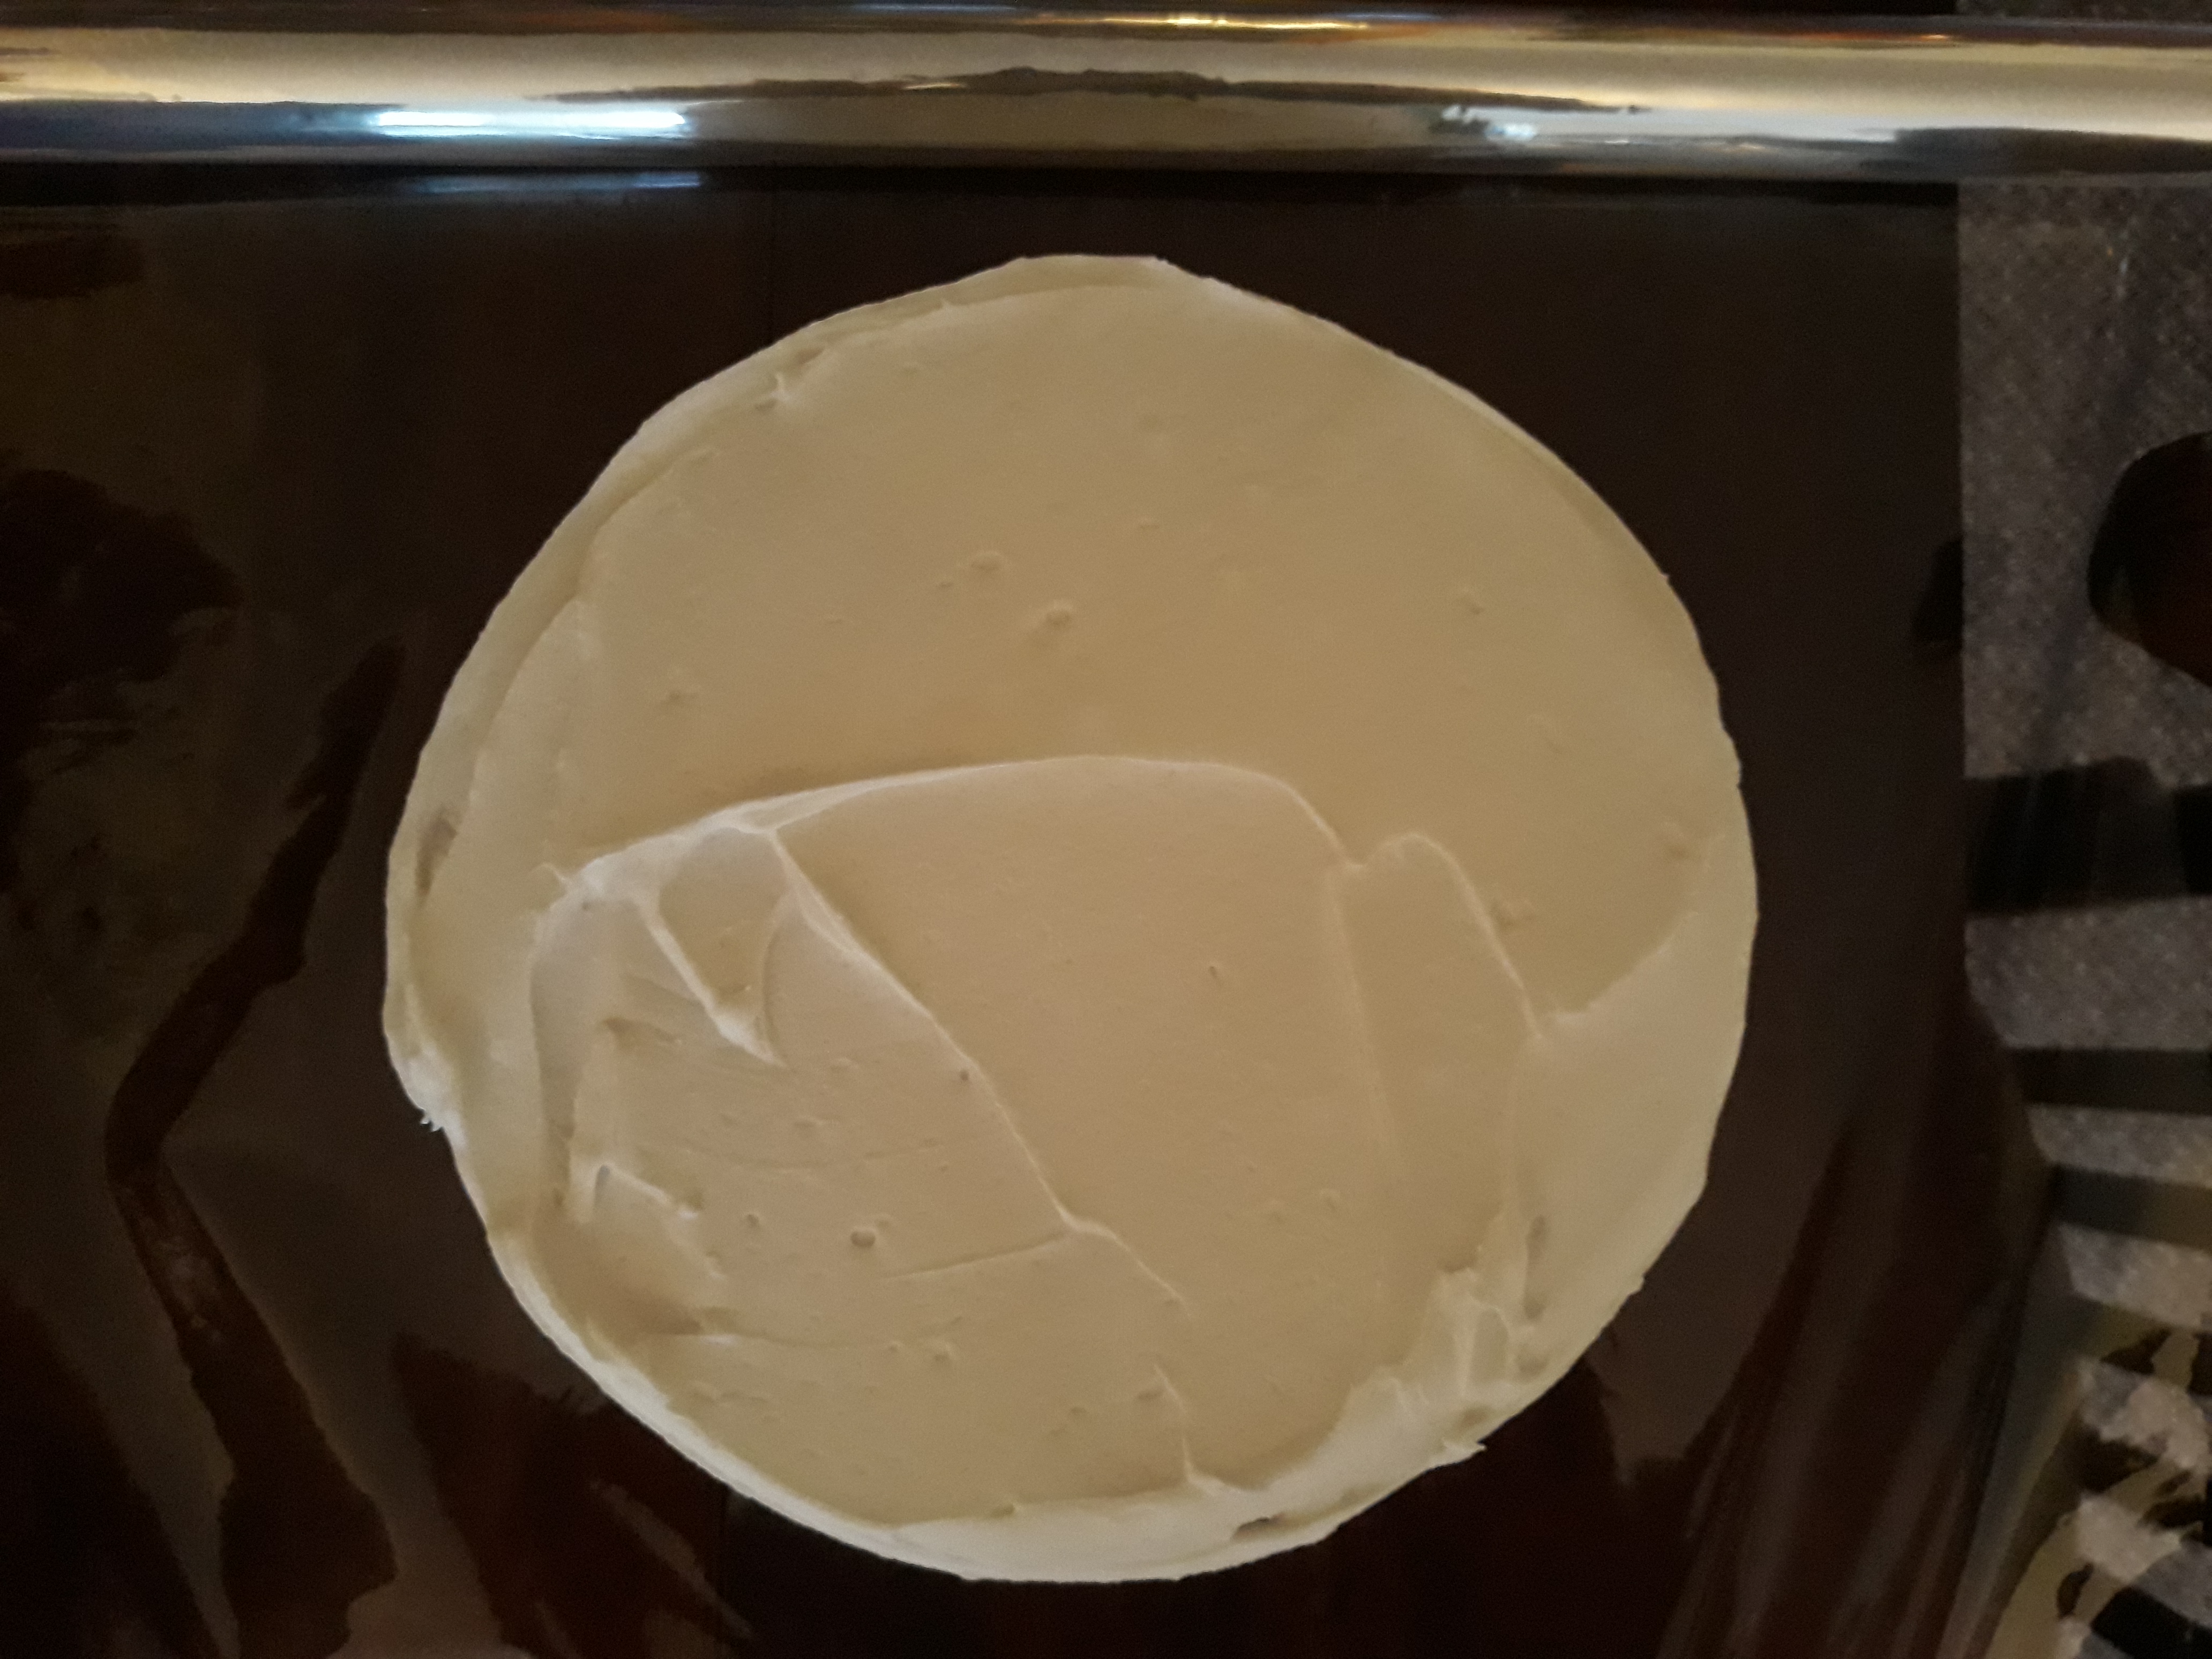
Whisk the egg whites until frothy but not yet stiff and then stir in the lemon juice. Add icing sugar to the egg white bit by bit, mixing as you go – an electric beater comes in very handy here, but you can use a wooden spoon if your forearms are up to the job. The icing can be used straight away.
Spread the mixture all over the cake using a palette knife to smooth it out. Dipping the knife in very hot water is a good way of getting the icing super-smooth, but I like it a bit more rough-and-ready. You can reserve some of the icing for piping of course, but that has never really been my thing – I should have a go one time though!
A simple and effective way of decorating the cake is to use the side of a knife to make a nice spiky snow effect. When decorated, leave it for two or three days to set hard.
Christmas cake, Christmas pudding, mince pies – if you don’t like dried fruit you are in trouble at Christmastime!
When families in the sixteenth century made their Christmas puddings for the big day, they would often use some of the mixture, with the addition of flour and eggs, to bake and eat for Eastertime. These were obviously rather rich families. It was liked so much that the rich fruitcake was made for Christmas too. We also dropped it from the Easter menu for some reason.
I used to be of the belief that the addition of the marzipan and royal icing (see here for recipes) came much later when a cake was banned from Christmas. The last day of Christmas is Twelfth Night (the 5th of January) and it used to be traditional to make a Twelfth Night cake that contained almonds and was covered in marzipan. Oliver Cromwell, the Lord Protector of England, and the other Puritans banned the feasting on that special day in the 1640s (he also banned mince pies as well) complaining that there was too much excess. Christmas Day remained a public holiday and some feasting was allowed, so people simply made their Christmas cake and covered that in marzipan instead, and so the Christmas cake was born.
This is sadly untrue. The Christmas cake with its double wrapping of marzipan and royal icing is an 18th century invention – Elizabeth Raffald has the first recipe for a cake such as this, and it was for a ‘Bride’s Cake’, i.e. a wedding cake.
Britain’s biggest ever party-pooper: Oliver Cromwell
You don’t have to cover it with the marzipan and royal icing though, in Yorkshire (my home county) it is popular to eat the Christmas cake with some nice cheese such as Wensleydale or Cheddar instead.
I love Christmas cake, so I thought I would give you the recipe I always use – it is adapted from Jane Grigson’s English Food (click here to see my other pet project) – and it has never failed on me. As I said a couple of posts ago, if you want to eat top-quality food at Christmas, you need to make your own, or spend a fortune at Harrod’s. Plus the cake is made well in advance – I usually make mine 6 weeks before Christmas so it can mature. Once you’ve cooked it, you only have to feed it with a little brandy to make it nice and moist.
This recipe is of course for an English-style Christmas cake; the Scottish, Welsh and Irish have their own versions, all in a similar vein, but with a few differences. I’ll blog about them at some point.
It makes one hefty 8 inch/20 cm cake, for a smaller cake, half the amounts and bake in a 6 inch / 15 cm tin for 2 1/2 hours.
Ingredients:
900 g mixed dried fruit (currants, raisins and sultanas)
125 g of whole roasted almonds (or hazelnuts or walnuts, or a mixture)
125 g chopped candied citrus peel
125 g rinsed glacé cherries quartered or left whole
300 g plain flour
1 1/2 tsp mixed spice
the grated rind of a lemon
250 g salted butter, softened
250 g soft dark brown sugar
1 tsp vanilla extract
1 tbs black treacle (or molasses)
4 eggs
1/2 tsp bicarbonate of soda
1 tbs warmed milk
brandy
Preheat your oven to 140⁰C (275⁰F).
Begin by mixing all the dried fruit, almonds, candied peel and cherries in a large bowl. Next, sift in the flour, turning in and coating the fruit, then mix in the spices and fresh lemon rind.
Now cream the butter sugar in a separate bowl, then mix in the vanilla and black treacle. Beat in four eggs one by one until incorporated, and the mix in the fruit and the flour. For the final stage, dissolve the bicarbonate of soda in the warmed milk, stir it in, and then add enough brandy to slacken the mixture slightly, so that it achieves a dropping consistency – you don’t want a dry cake, now do you?
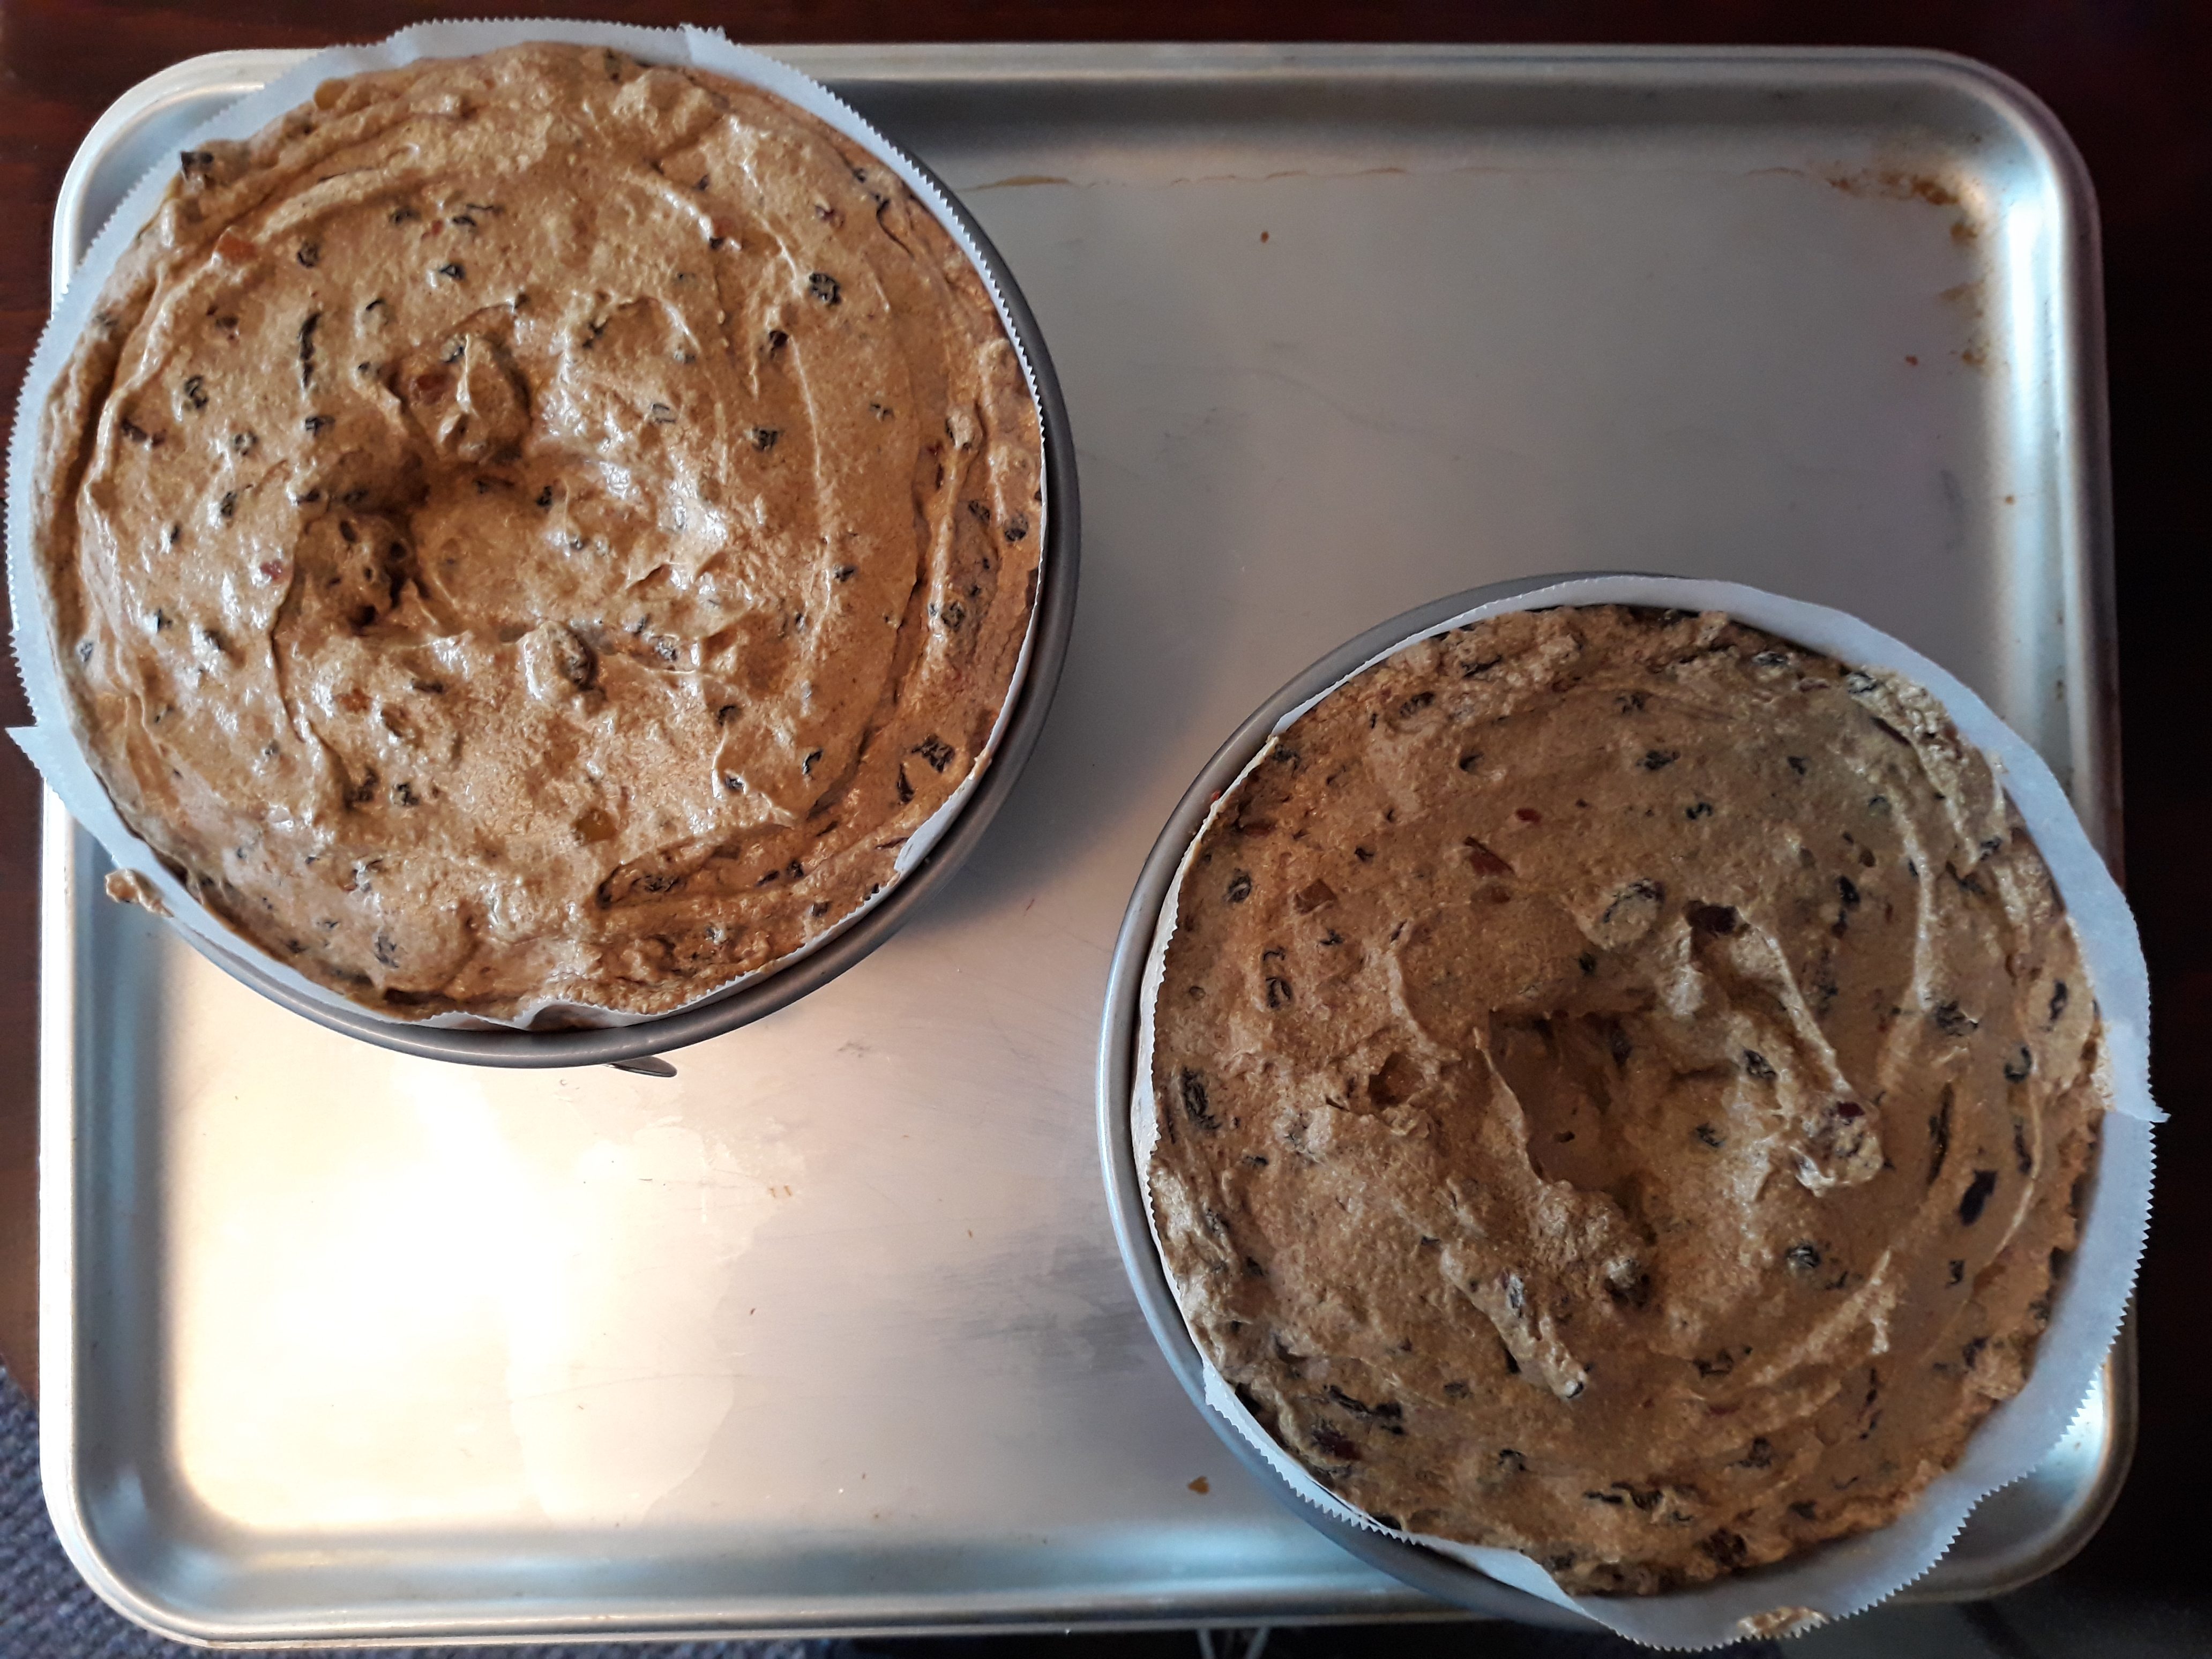
Line an eight inch cake tin with greaseproof paper and pour the mixture in, hollowing the top a little to compensate for it rising in the oven.
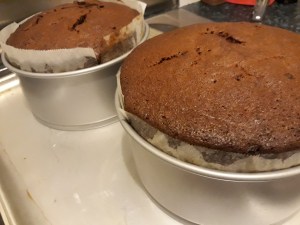
Cover with a layer of brown paper to prevent scorching and bake for 3 to 3 ½ hours. Test it after 3 hours with a skewer. When done, leave to cool in its tin overnight. Wrap in greaseproof paper or foil and keep in an airtight container.
Ideally, the cake should sit for at least a month to mature, but 2 or 3 weeks is also fine. Whilst it sits, you need to feed it with a sprinkle of 2 or 3 tablespoons of brandy, turning the cake each time it is fed.
The cake is ready to eat when sufficiently fed and matured, however, you might want to add a layer of marzipan and royal icing.
If you like the blogs and podcast I produce, please consider treating me to a virtual coffee or pint, or even a £3 monthly subscription: follow this link for more information.
That lady I fancied I was looking at her, though, as far as I could see, she had the figure and complexion of a roly-poly pudding – William Makepeace Thackeray, Notes of a journey from Cornhill to Grand Cairo, 1846
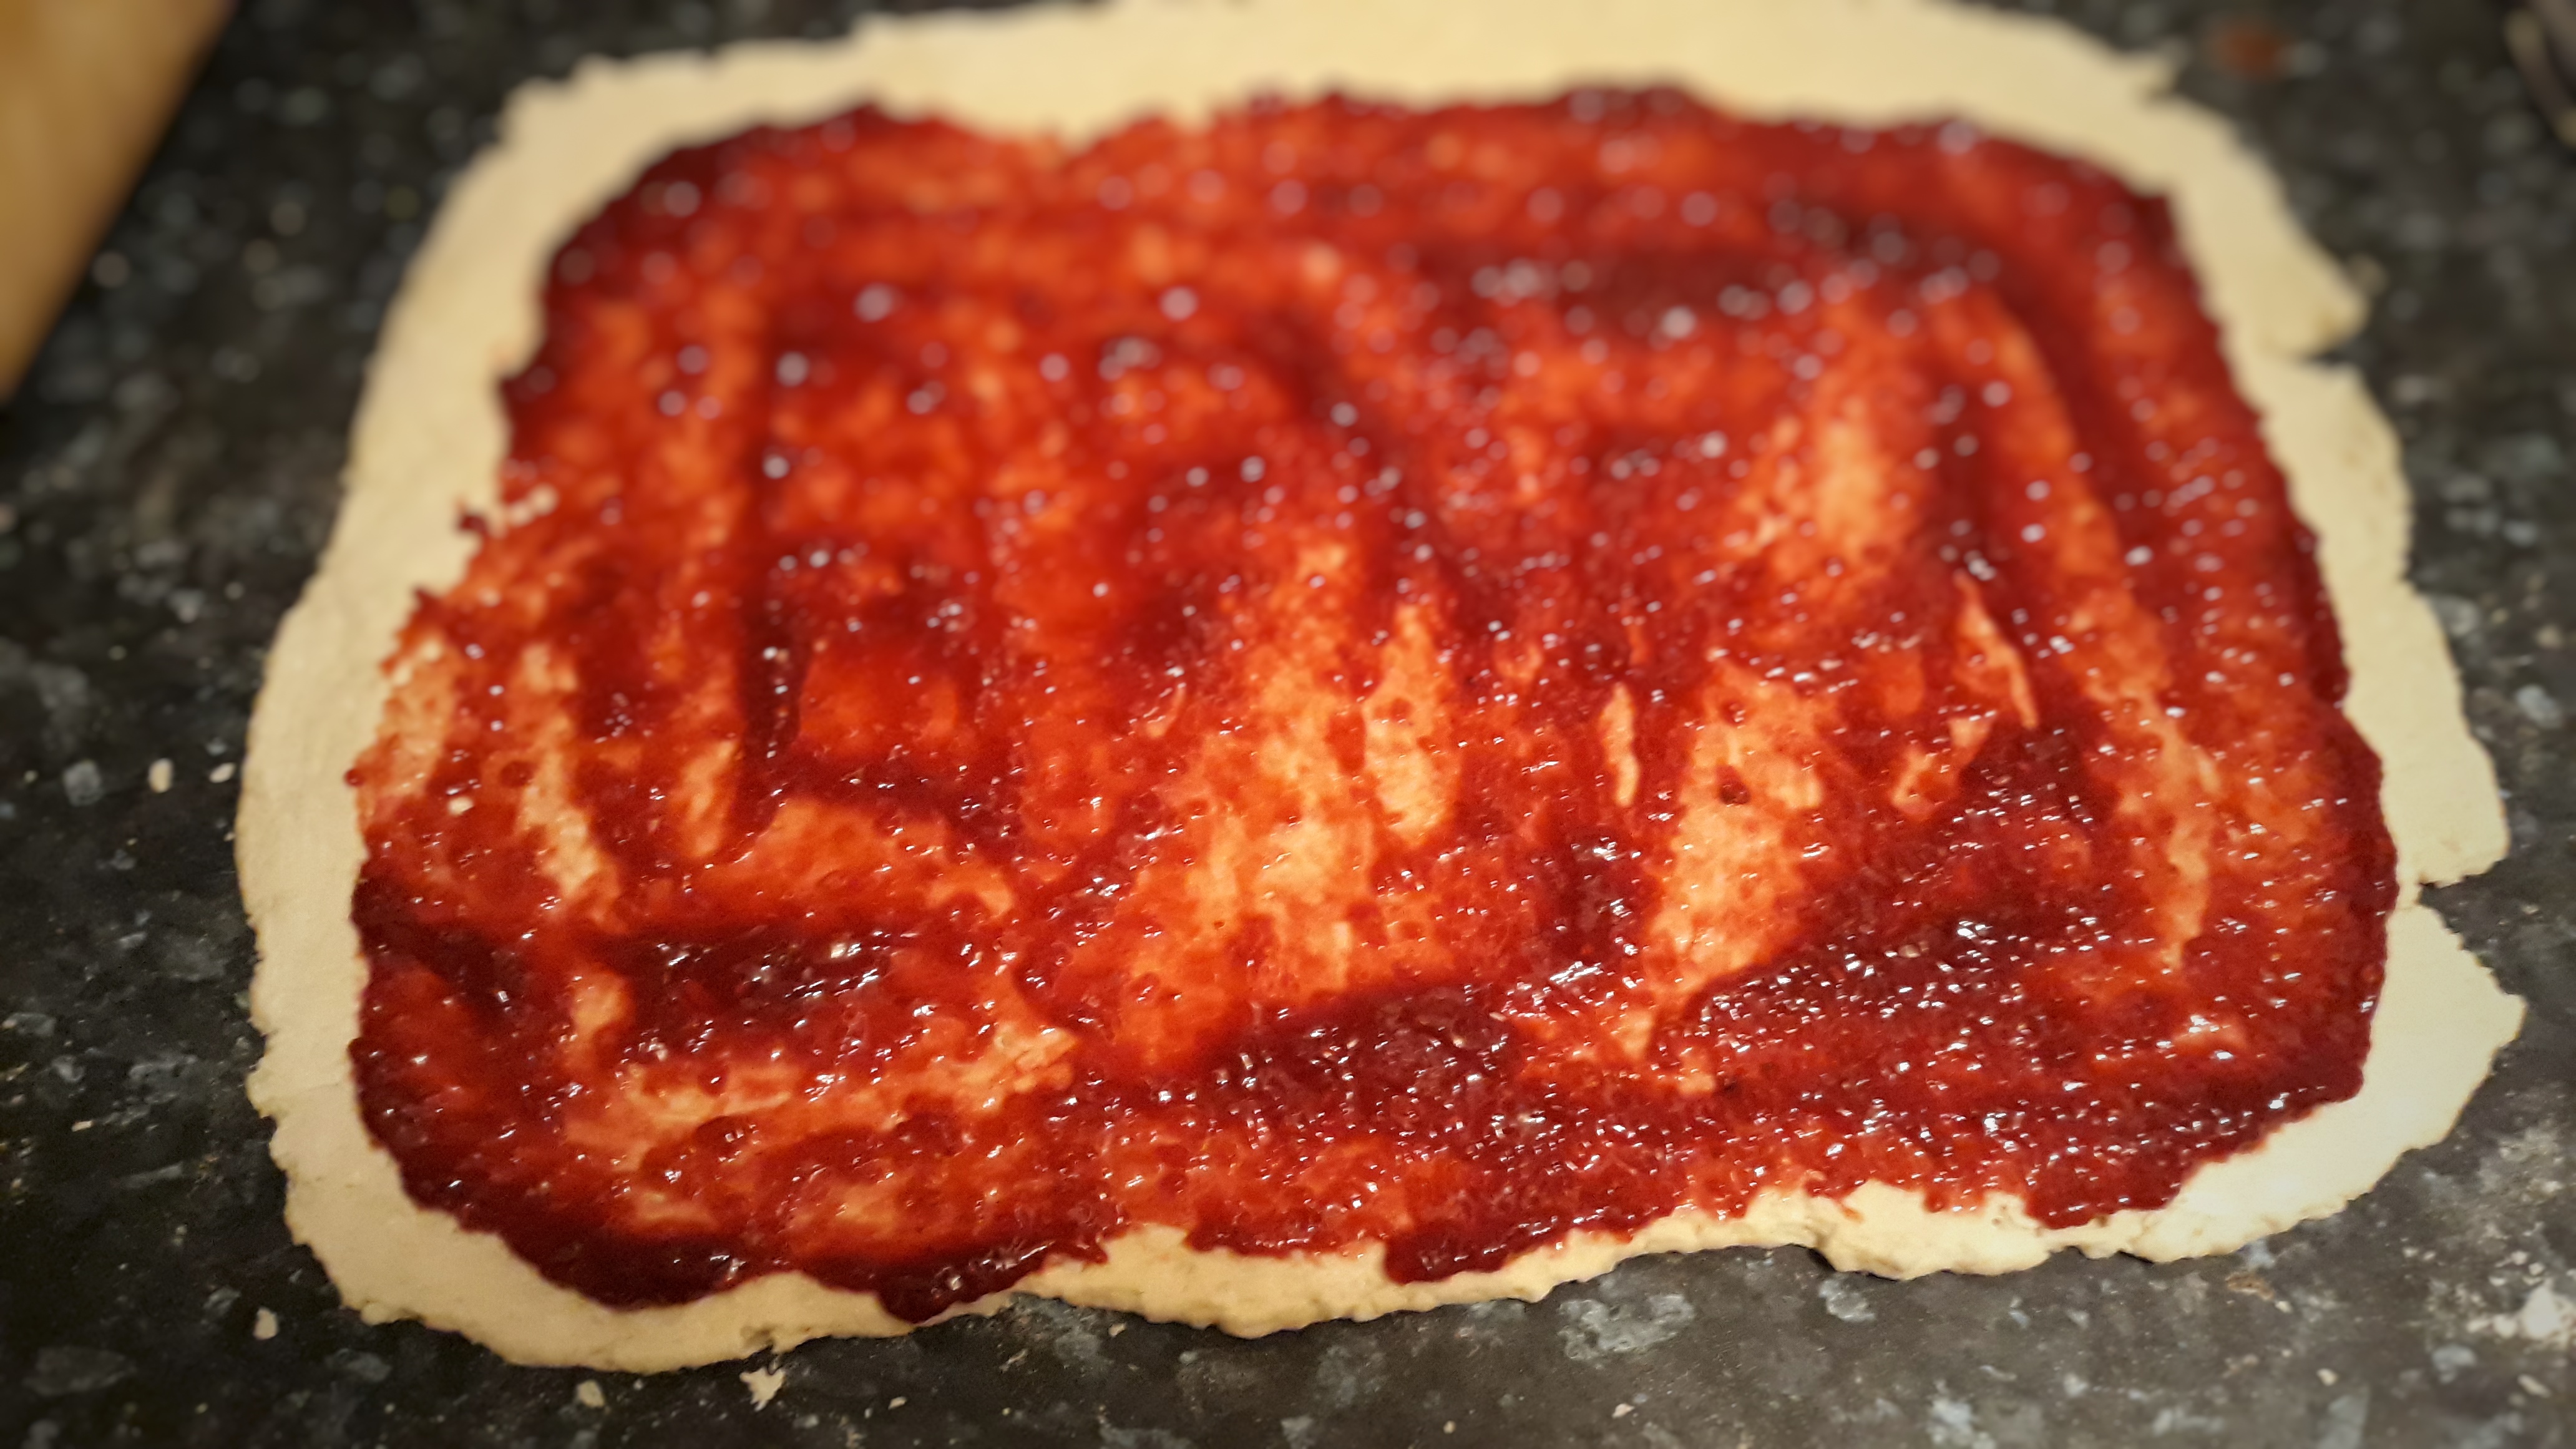
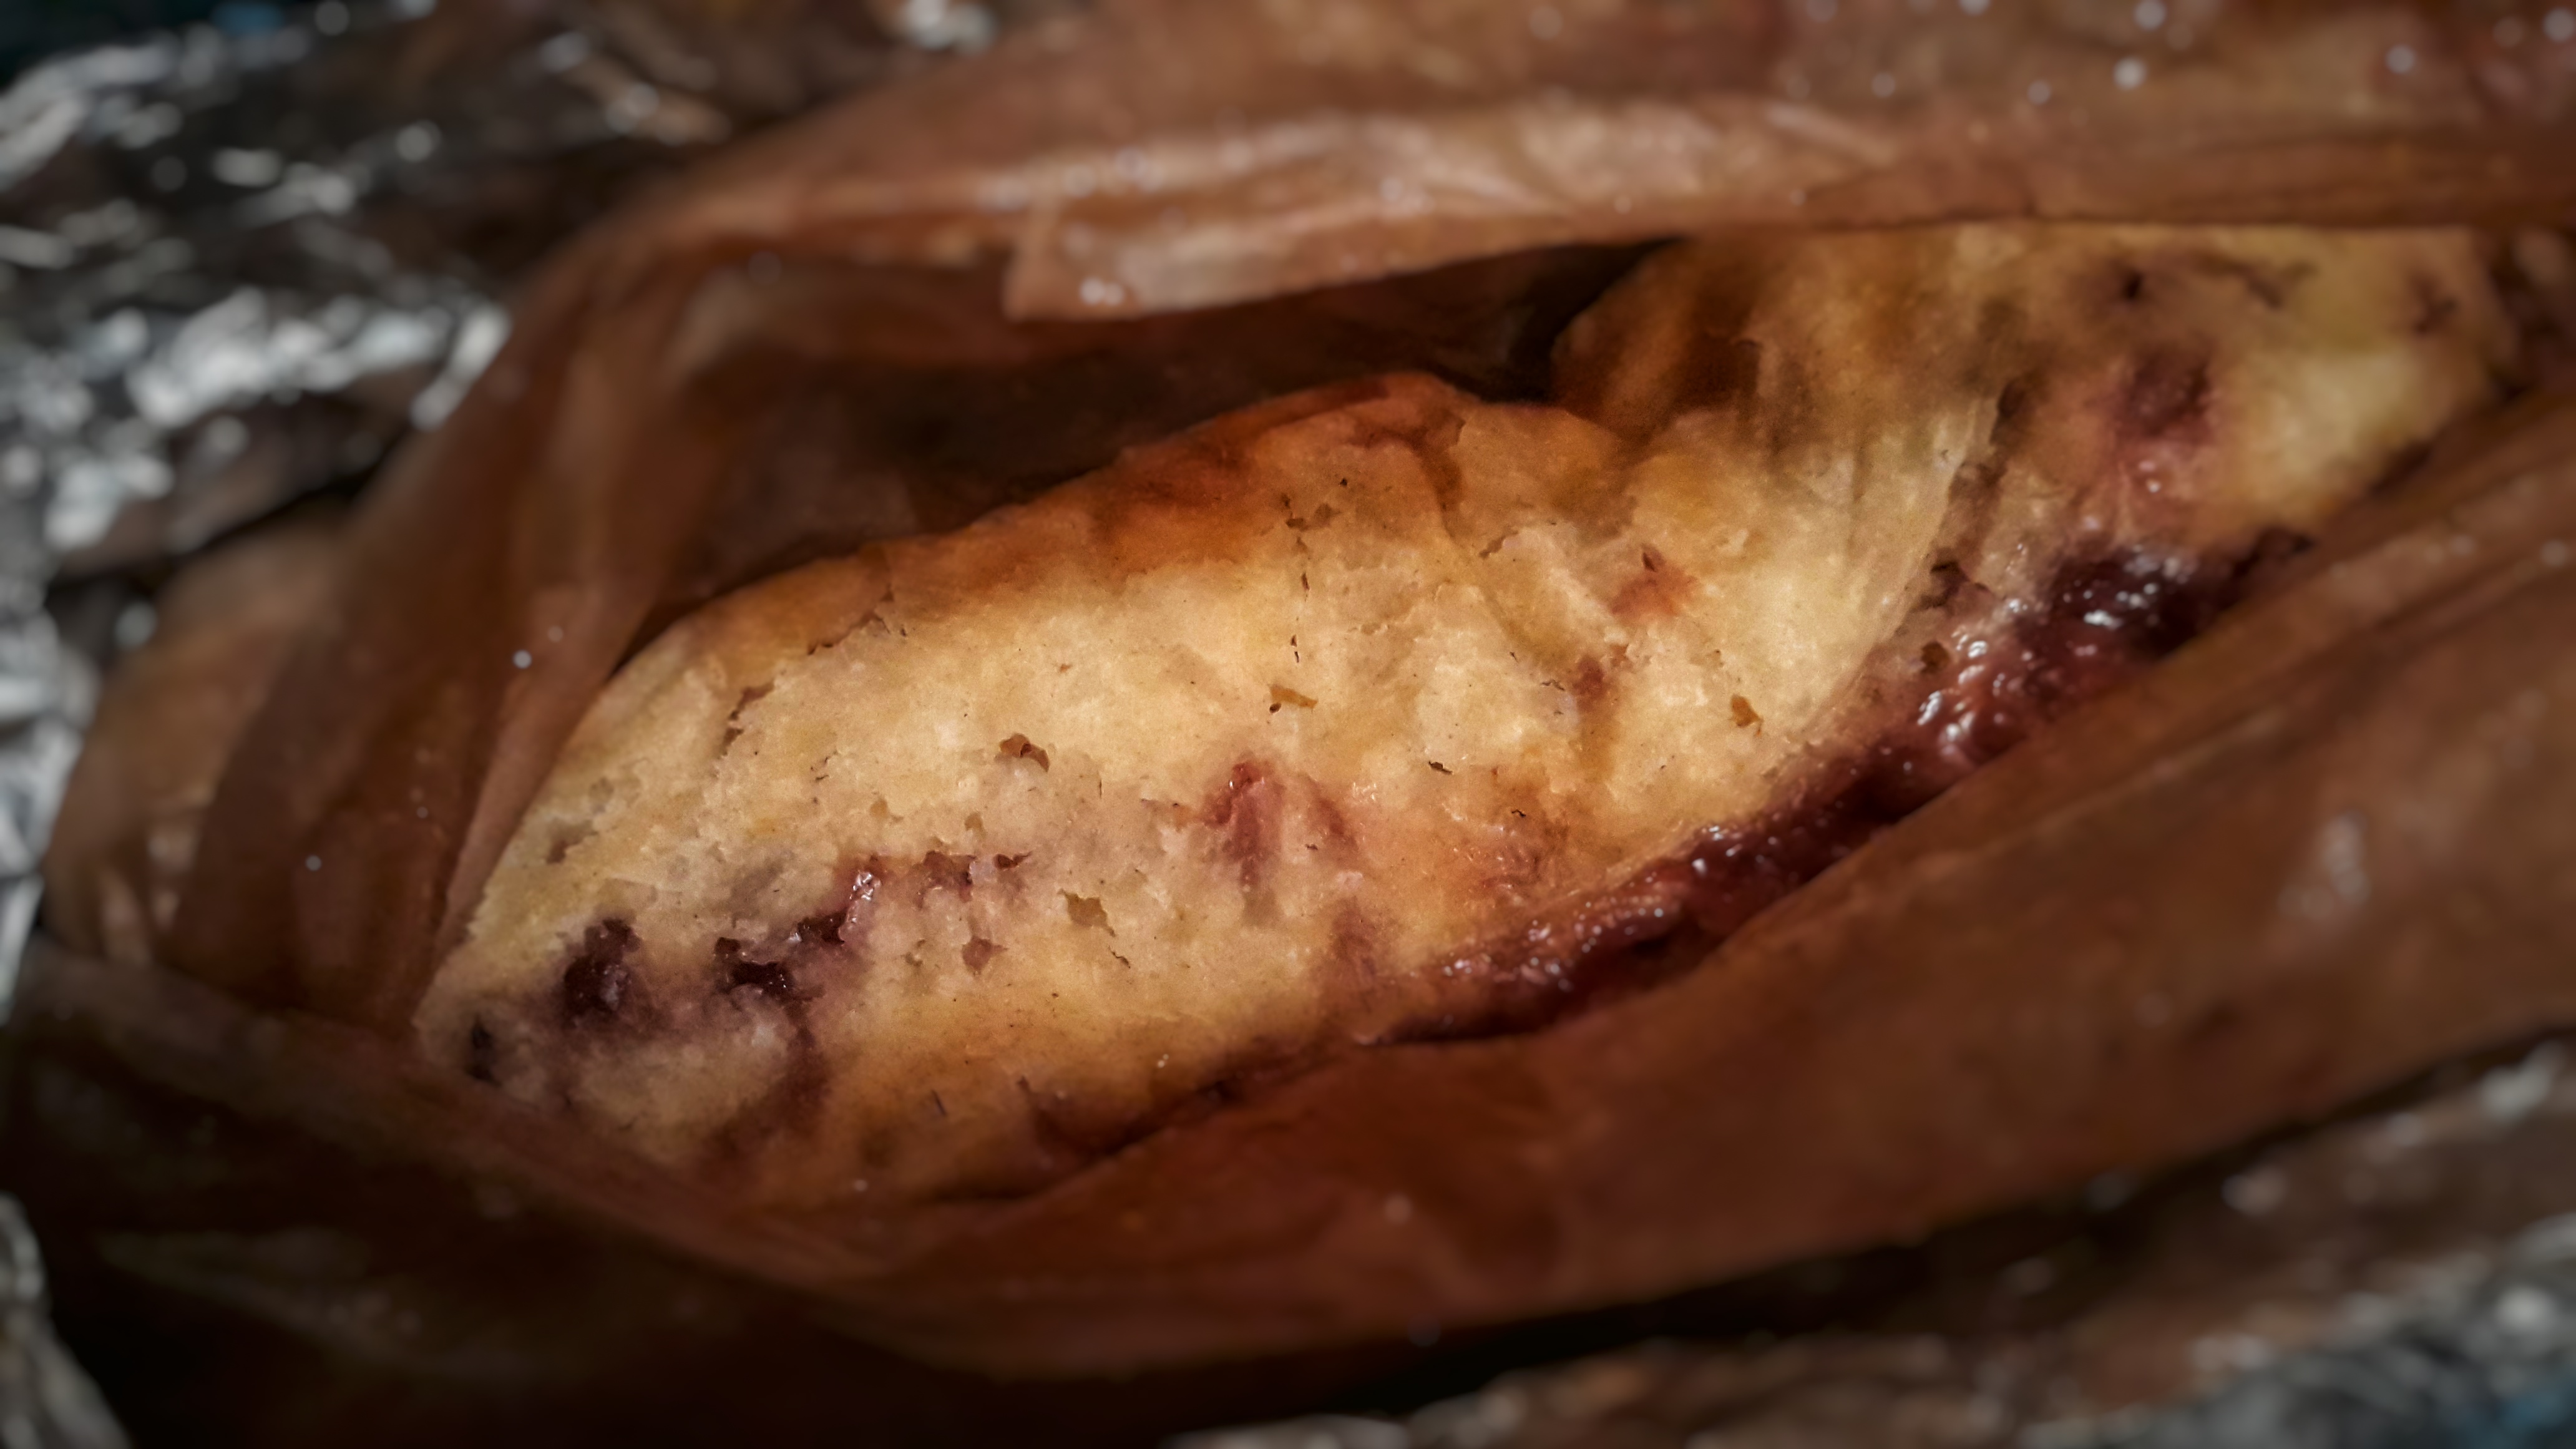
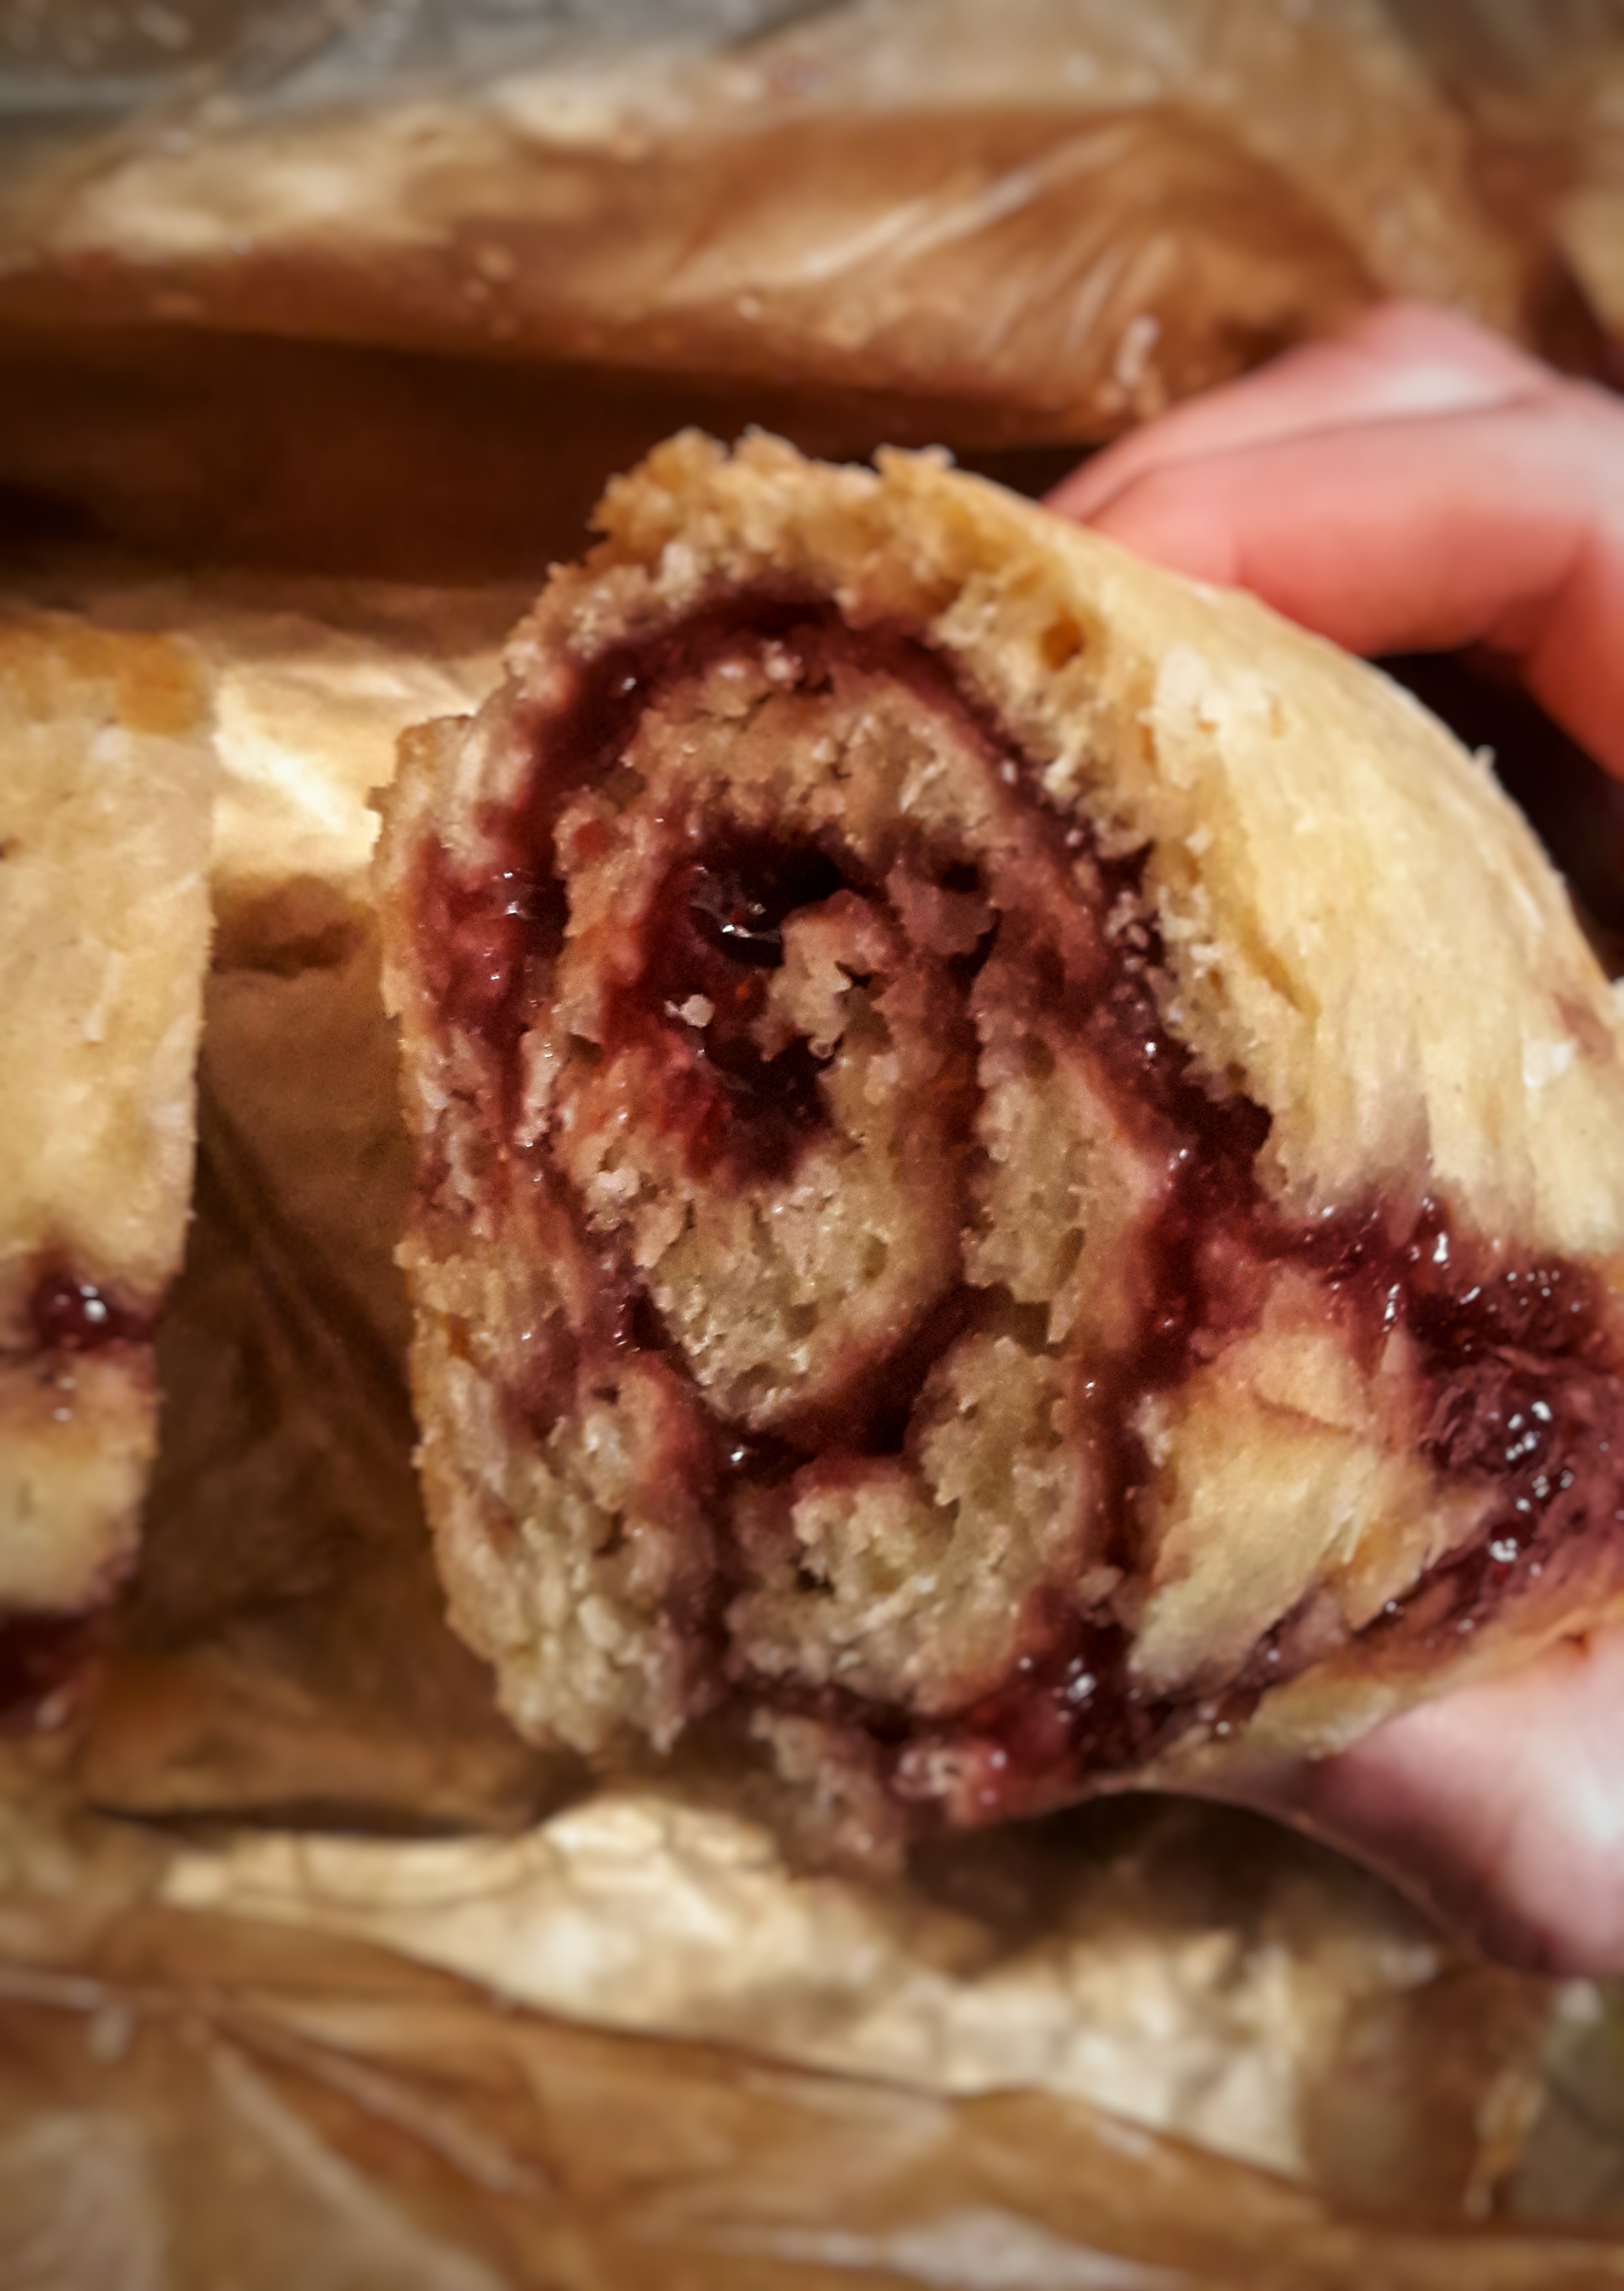
If you ask most British people what their most favourite childhood dessert is, the jam roly-poly pudding would be one of the top rankers; it certainly is one of mine. A roly-poly is a pudding made from suet dough that is spread with jam and then rolled up. Originally, it was boiled in some muslin, but is these days steamed or baked. Other fillings can be done such as golden syrup, apples or prunes. I have never tried a sweet roly-poly with anything other than jam, and even then I will only use raspberry or blackcurant jam. There are also savoury roly-poly puddings. It was common to boil the roly-poly in a shirt sleeve, giving it the nick-name ‘dead man’s arm’. I’ve never actually made any kind of pudding by boiling it in muslin, never mind a shirt sleeve. Next time I do a pudding I will do it the old-fashioned way. After all this is a history blog, isn’t it? What makes a pudding a pudding? Click here.
This pud seems to have been invented during the first half of the nineteenth century, no mention of it occurs before 1800 as far as I see, apart from writings about a game called Roly-Poly.
ROLY-POLY. (1) A pudding made in round layers, with preserves or treacle between…
(2) A low, vulgar person.
(3) A game played with a certain number of pins and a ball…
James Orchard Halliwell-Phillips, A dictionary of archaic and provincial words Vol II, 1847
Here is my recipe for jam roly-roly poly, the suet pastry shouldn’t be sweet; the sweetness should come from the jam and custard (with which it is always served). You can swap any preserve for the jam if you like, I imagine lemon curd would be good. It feeds at least six people and is pretty good value for money – these sorts of wintertime desserts are supposed to warm and fill you. At some point I’ll give the apple and prune one a try and put the recipes for them on here too.
If you like the blogs and podcast I produce, please consider treating me to a virtual coffee or pint, or even a £3 monthly subscription: follow this link for more information.
First, make the suet pastry. If you haven’t made pastry before, don’t worry, suet pastry is the easiest of all the pastries to make. In a bowl, mix the flour, sugar and suet together. Using a butter knife, mix in a little liquid. When incorporated, add a little more. Keep adding and incorporating until a dough begins to form, then start using your hands to form a soft, but not sticky dough.
If you add too much liquid add a bit more flour. Now roll out the dough into an oblong as long as your steaming receptacle (I use a large roasting tin with trivet) and spread it with jam.
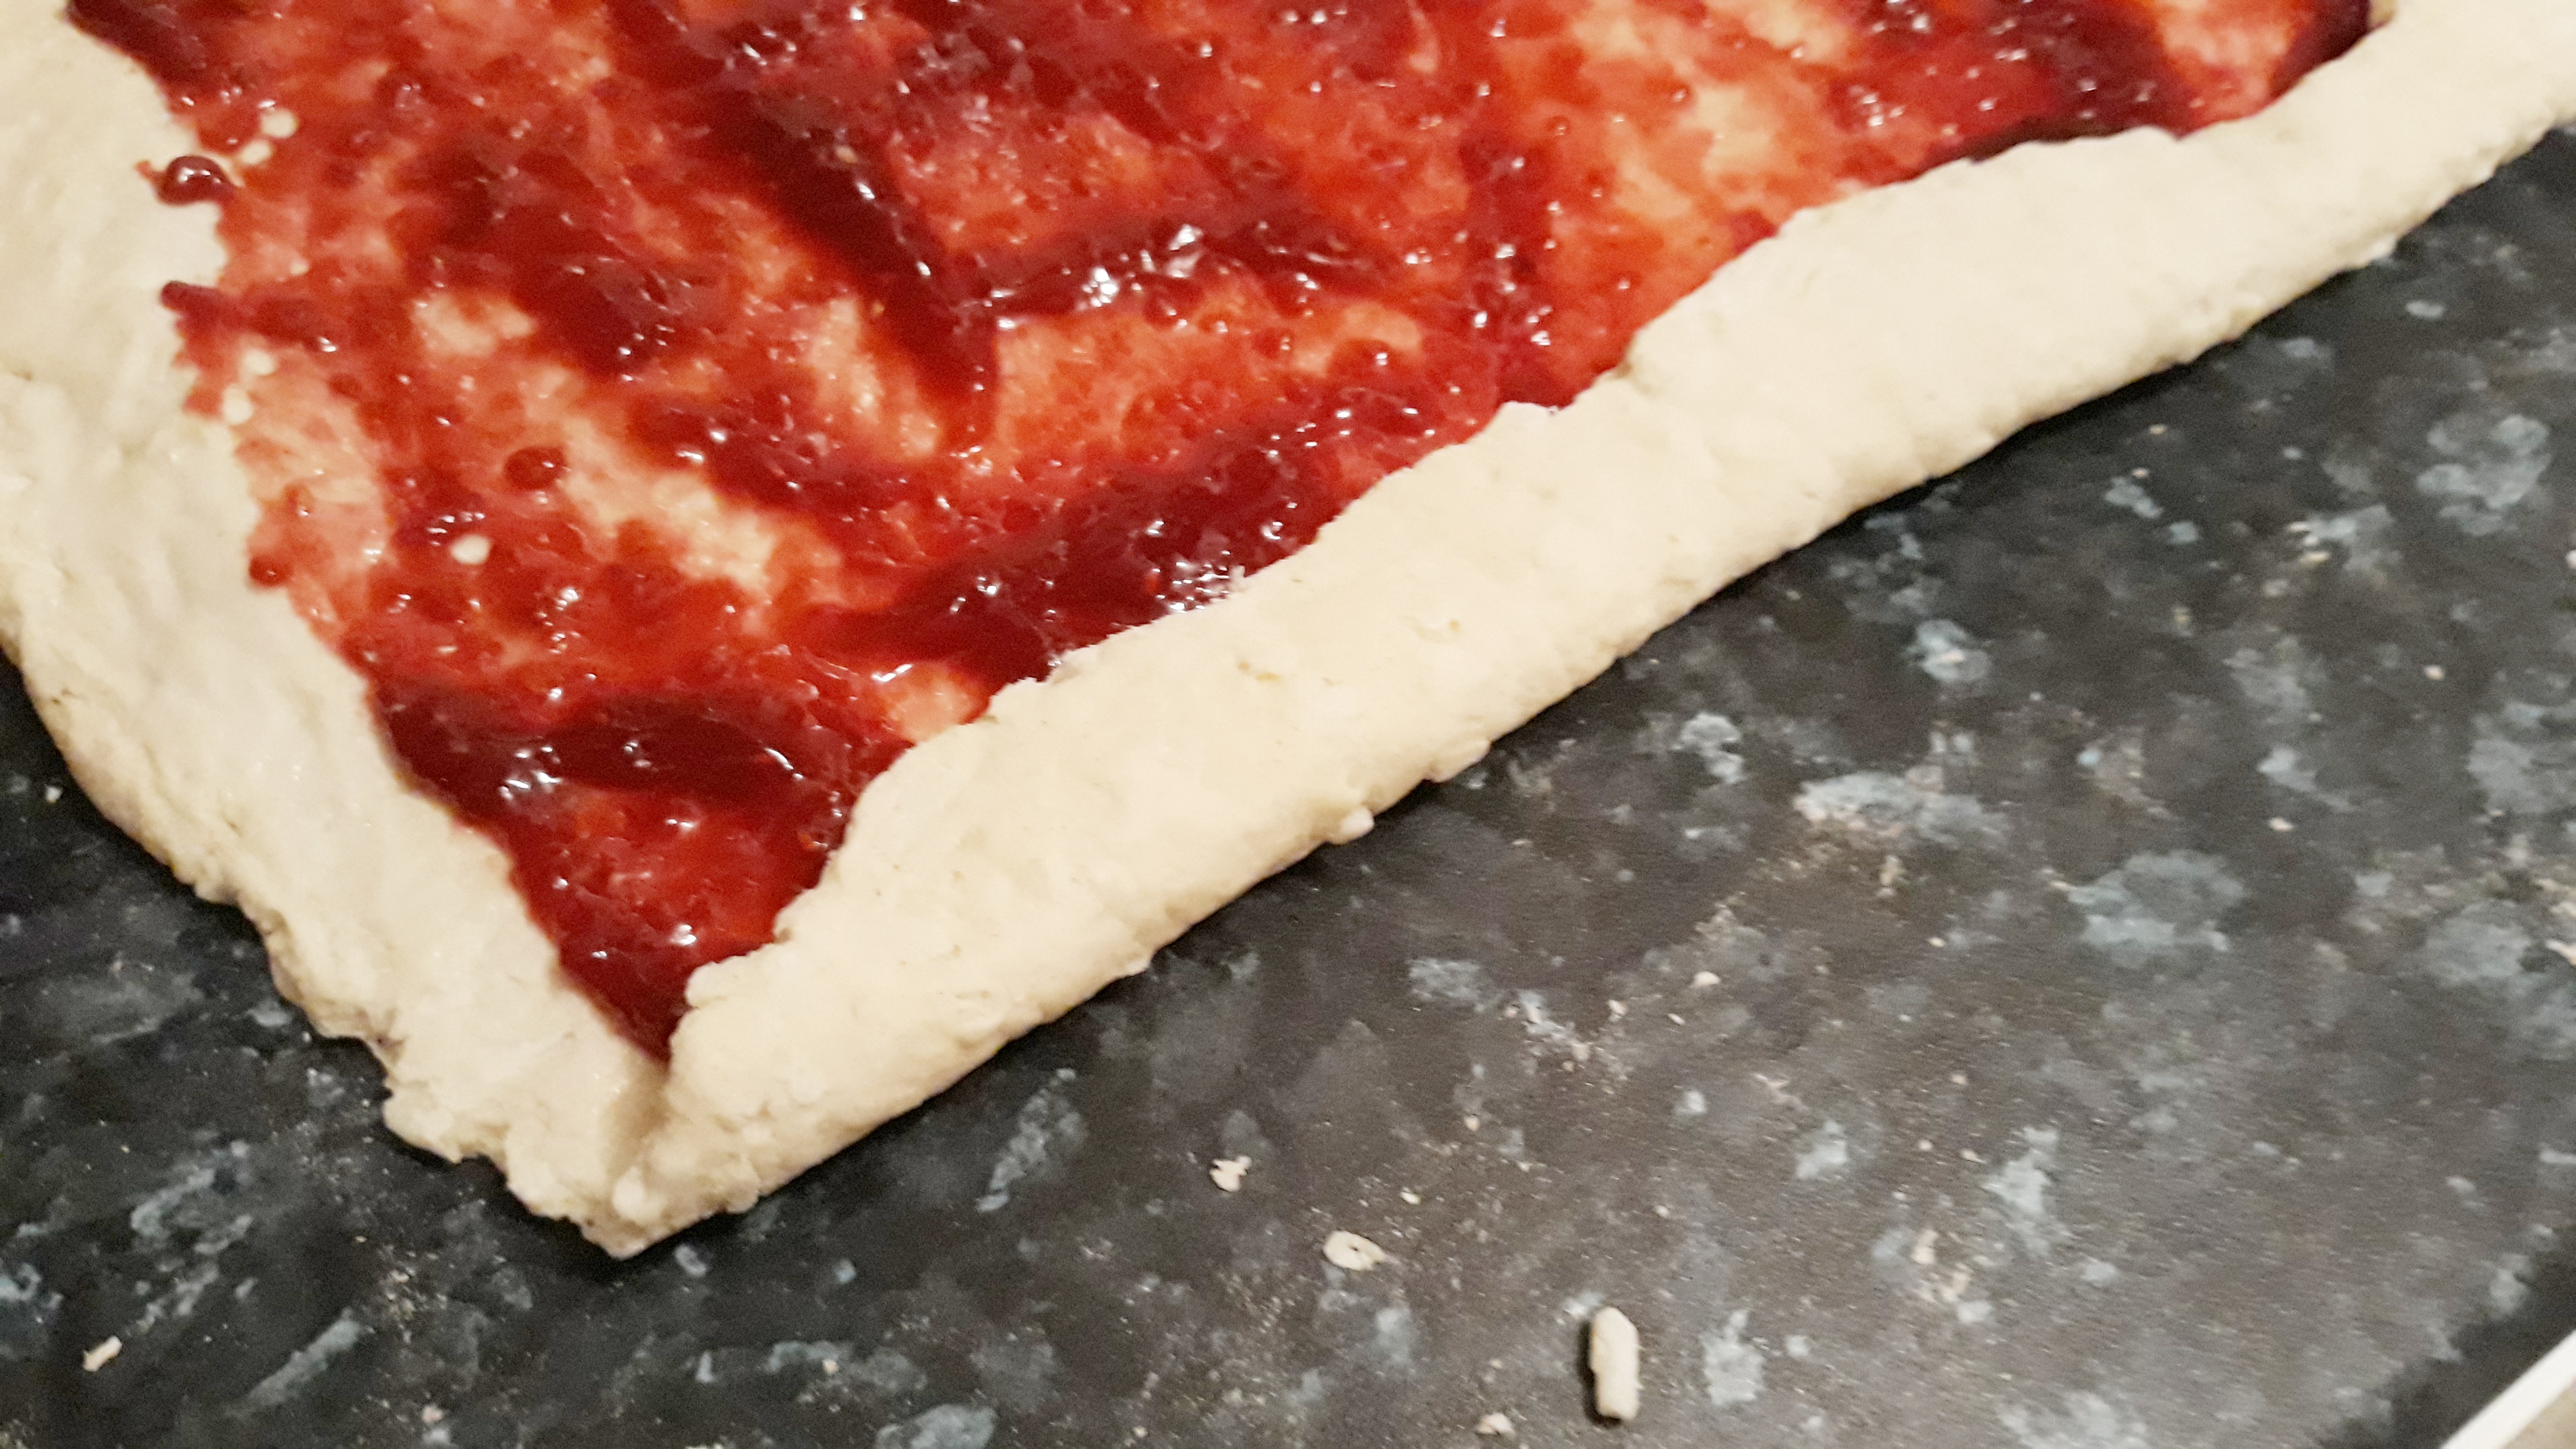
Make sure you leave a space of a centimetre at each side and a space of 2 cm along the top length of the rolled out pastry.
Moisten the edges all the way round with a little water and fold over the first part of the dough.
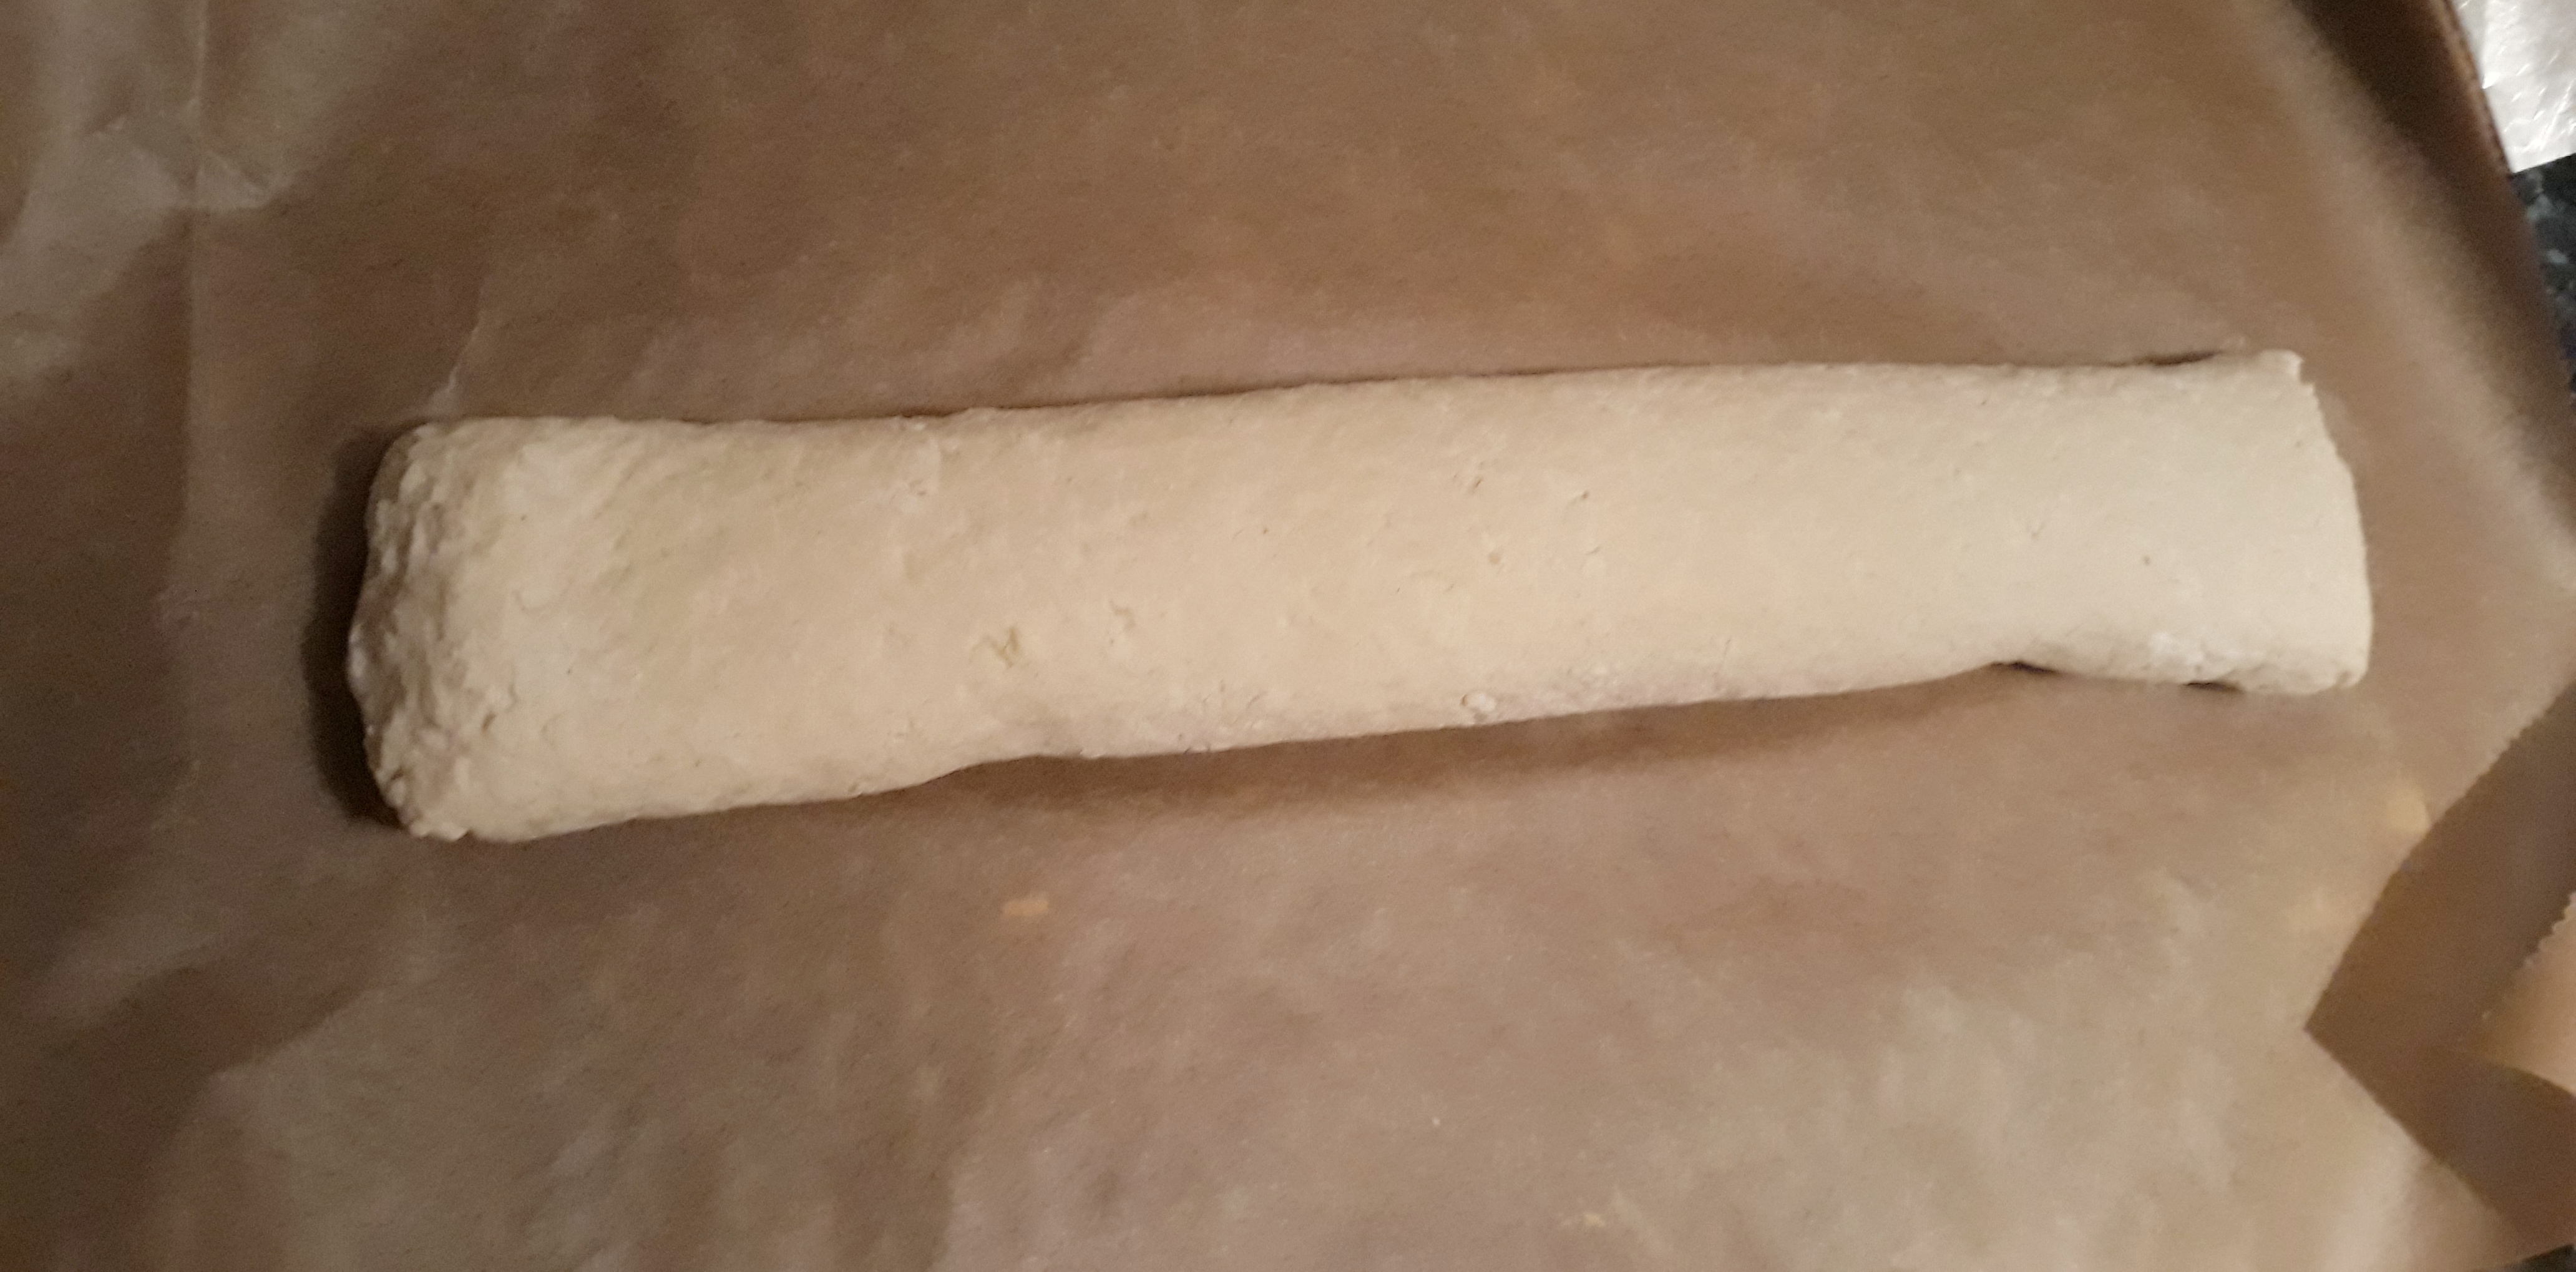
Carefully roll it up, making sure that the jam doesn’t get pushed to the edge, spilling out. Fold the ends under to prevent the jam from escaping.
Sit the rolled pudding on some greaseproof paper and fold the edge up in a pleat, tucking the edges under, making sure there is room for the pudding to expand.
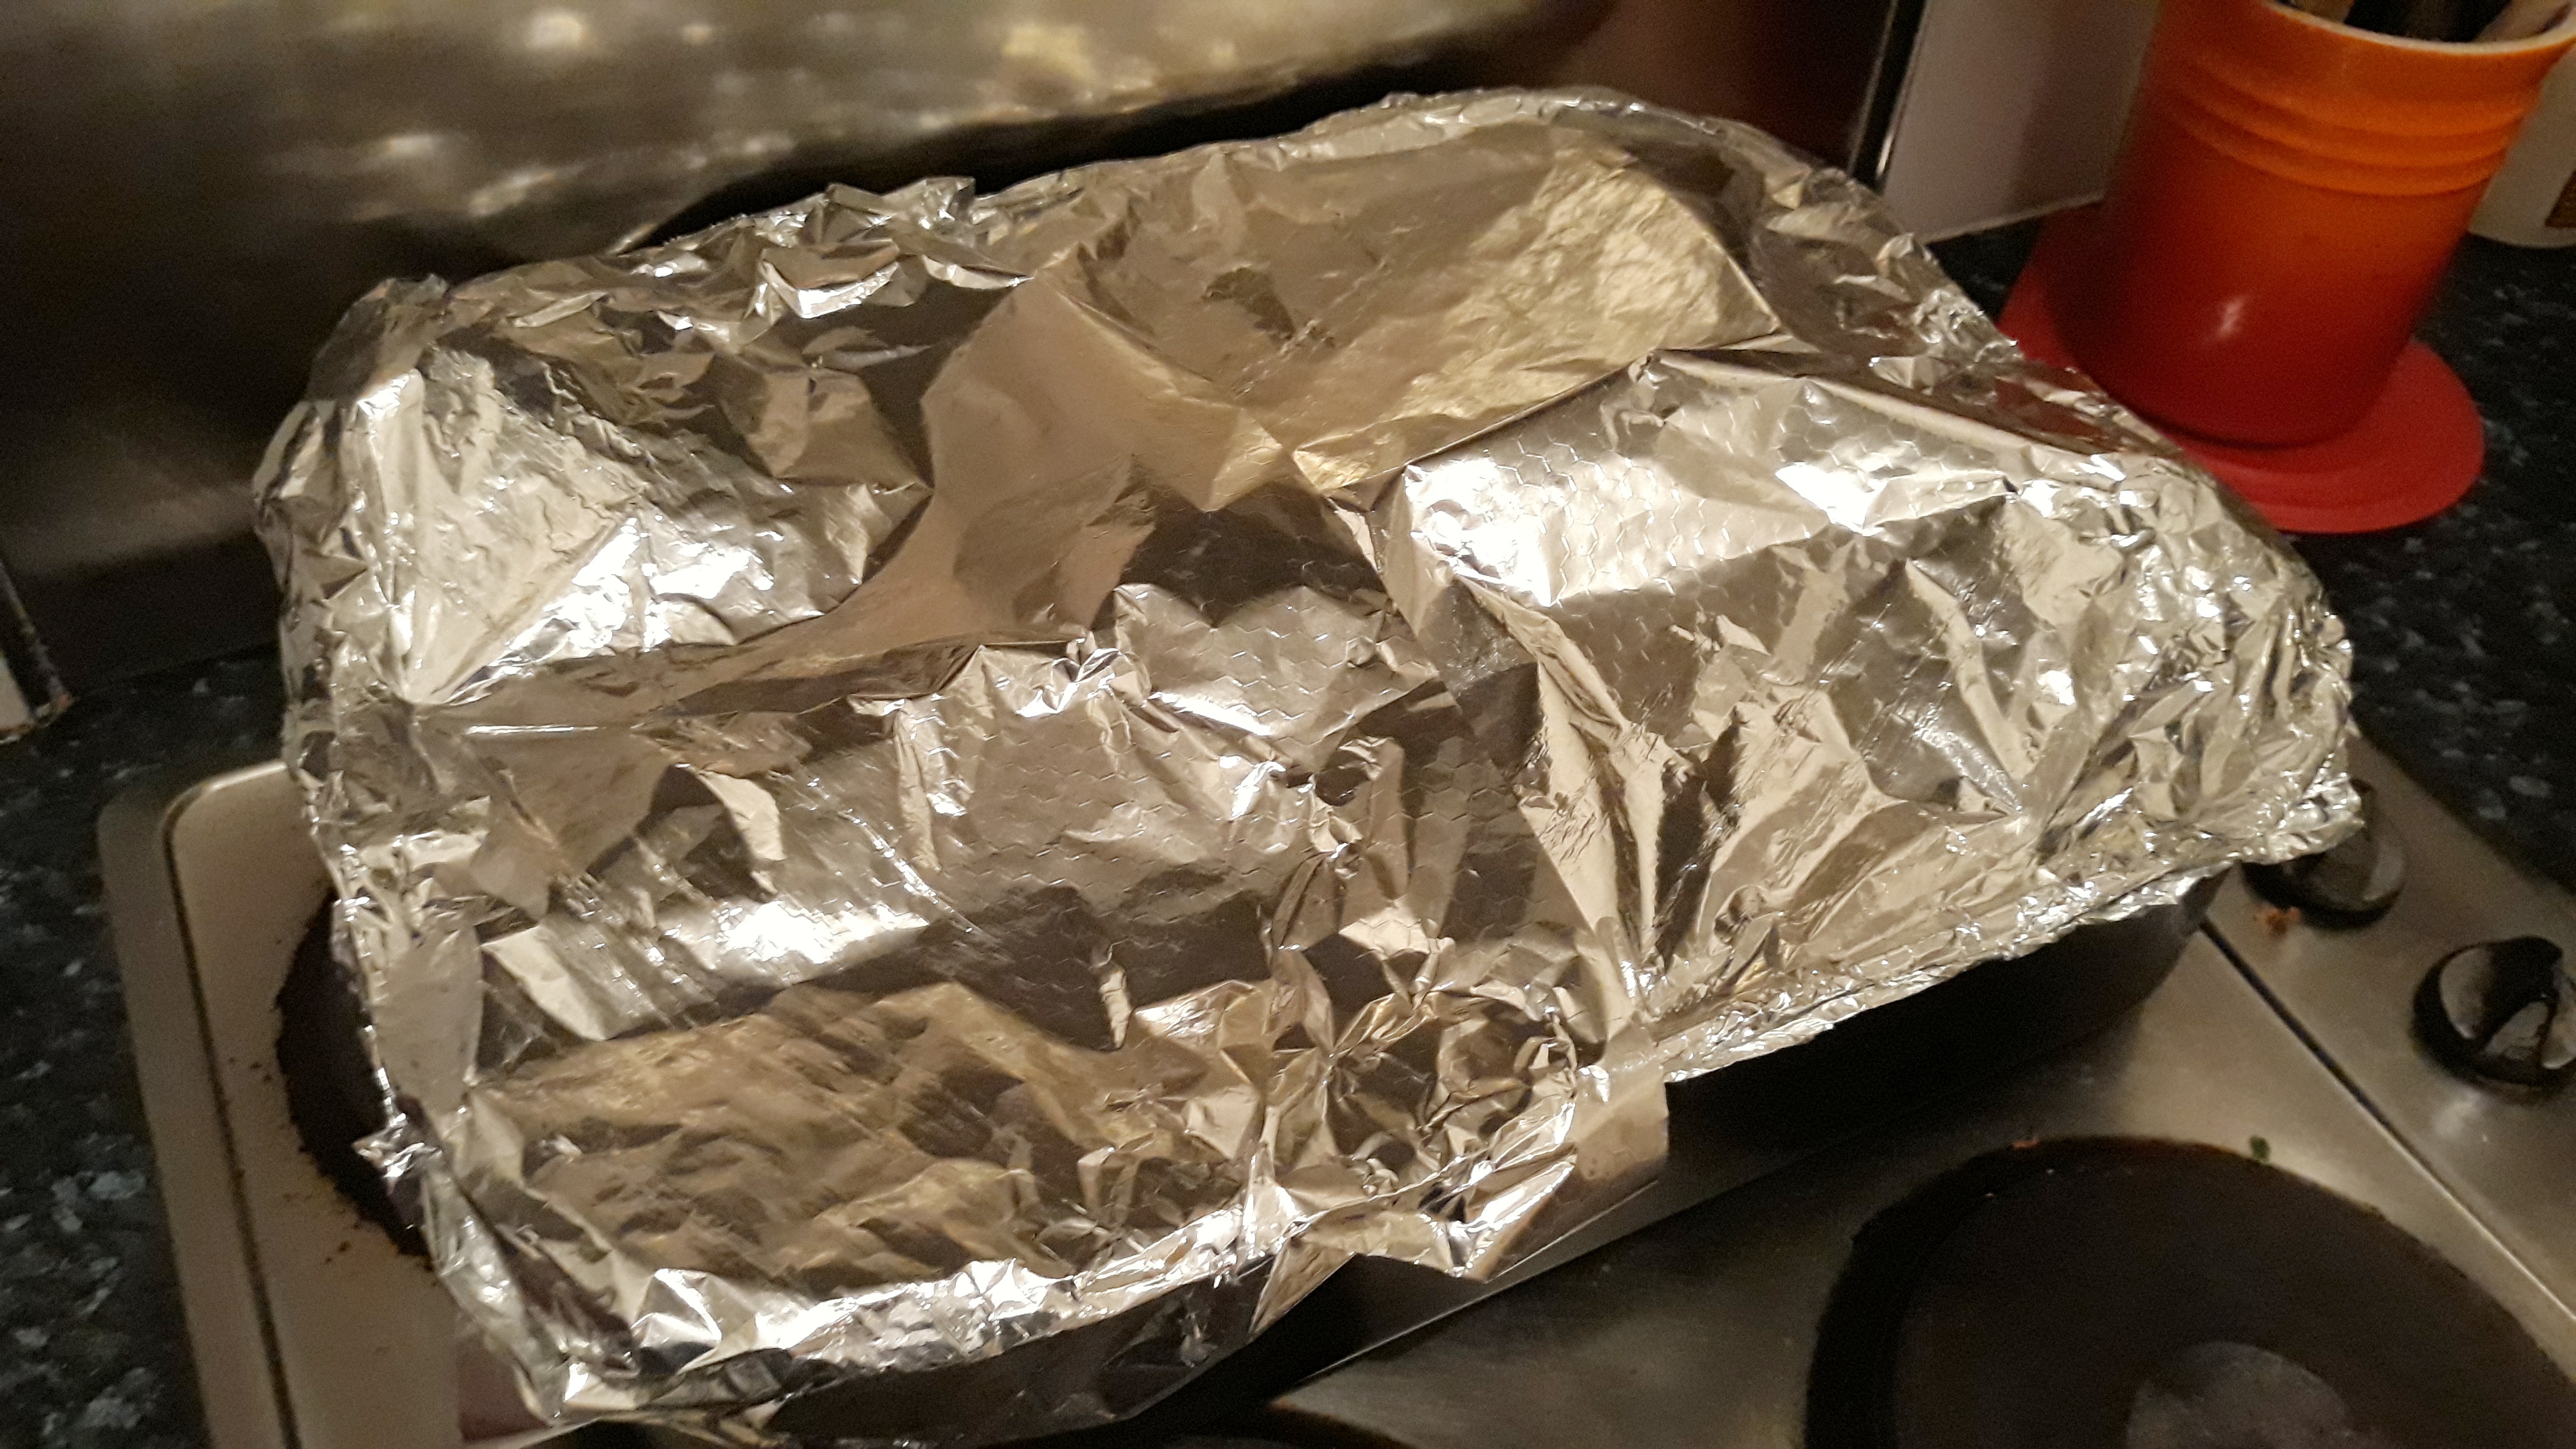
Next, sit that on some foil, and again secure by folding a pleat and scrunching the edges.
Place the pudding on a trivet in a roasting tin. Cover the whole thing with foil, making it nice and tight around the edges – you don’t want steam (and therefore heat) to escape. Leave one corner unsecured so you can pour a kettle of hot water inside, then secure the final edge. Place over one or two hobs and get the water up to a good boil. After around 20 minutes, turn the heat down to medium-low and leave the pudding to steam for 90 minutes.
When the time is up CAREFULLY remove the foil – don’t get yourself a steam burn at this point! Remove the pudding and let it stand for 5 or 10 minutes before you unwrap, slice and serve it.
If you like, especially if the pudding hasn’t browned very much in the steaming process, just before the end of the cooking time, preheat the oven to 200⁰C (400⁰F). Take the roly poly out of its little tin prison, place on a baking tray and pop it in the oven for 10 minutes to crisp up.
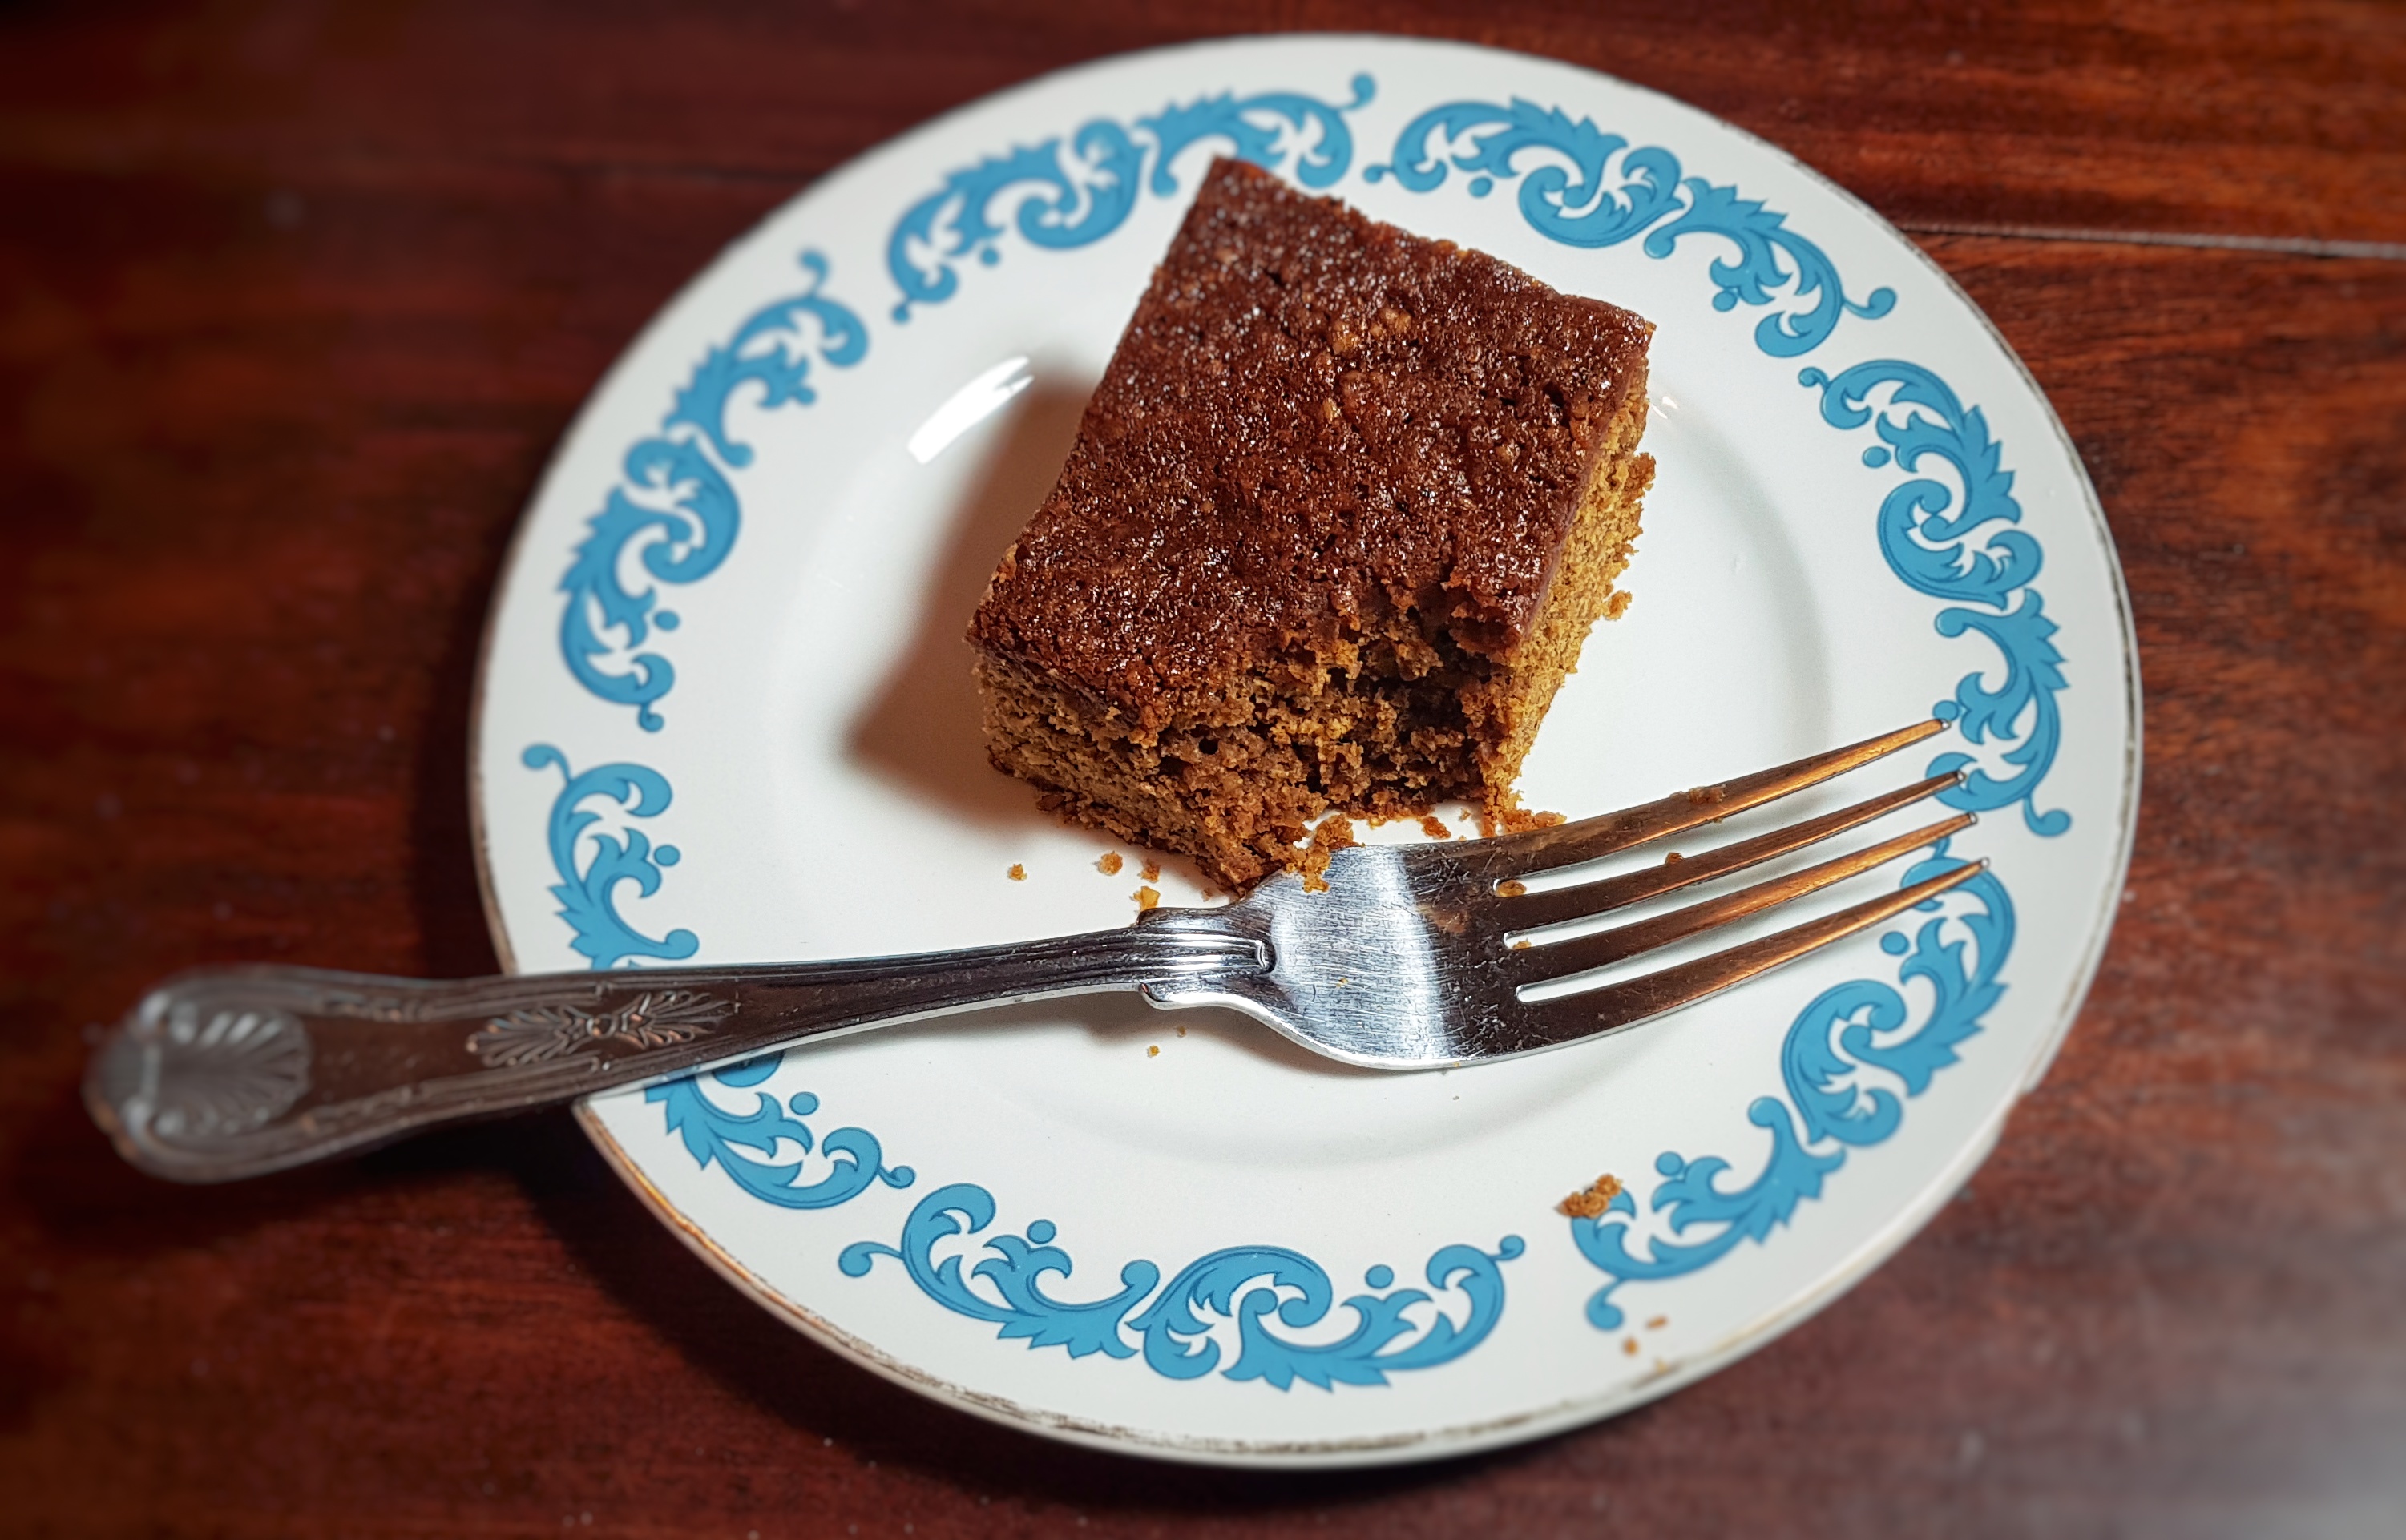
God, I love Yorkshire parkin. If you are not familiar with it, it’s a strongly-spiced sticky gingerbread-cum-cake flavoured with treacle and dark brown sugar that is traditionally eaten on Guy Fawkes Night (the fifth of November, aka Bonfire Night) and for me, it is what makes that day complete. It seems like it should be a recipe that has always been, but the earliest mention of it I can find from a primary source in my research is from 1842; a certain Richard Oastler wrote a letter to Sir Thomas Thornhill (who would later become the High Sherrif of Suffolk and a Tory MP) telling him that he’d recieved one on the 1st day of March from Mrs John Leach of Huddersfield. The recipe does go back a little further than that though; most likely created some time during the Industrial Revolution by working-class folk as oats and treacle were important elements of the diet in those times. The word parkin was a popular surname in Yorkshire and means Peter. There are other parkins – such as Lancashire parkin – but it doesn’t contain oats and is not, in my very biased opinion, as good because of it.
Making this cake, really brought memories of Bonfire Night as a child growing up in Yorkshire and I must admit, I did have a massive pang of homesickness. Fireworks and bonfires are all well and good, but for me it is always about the food.
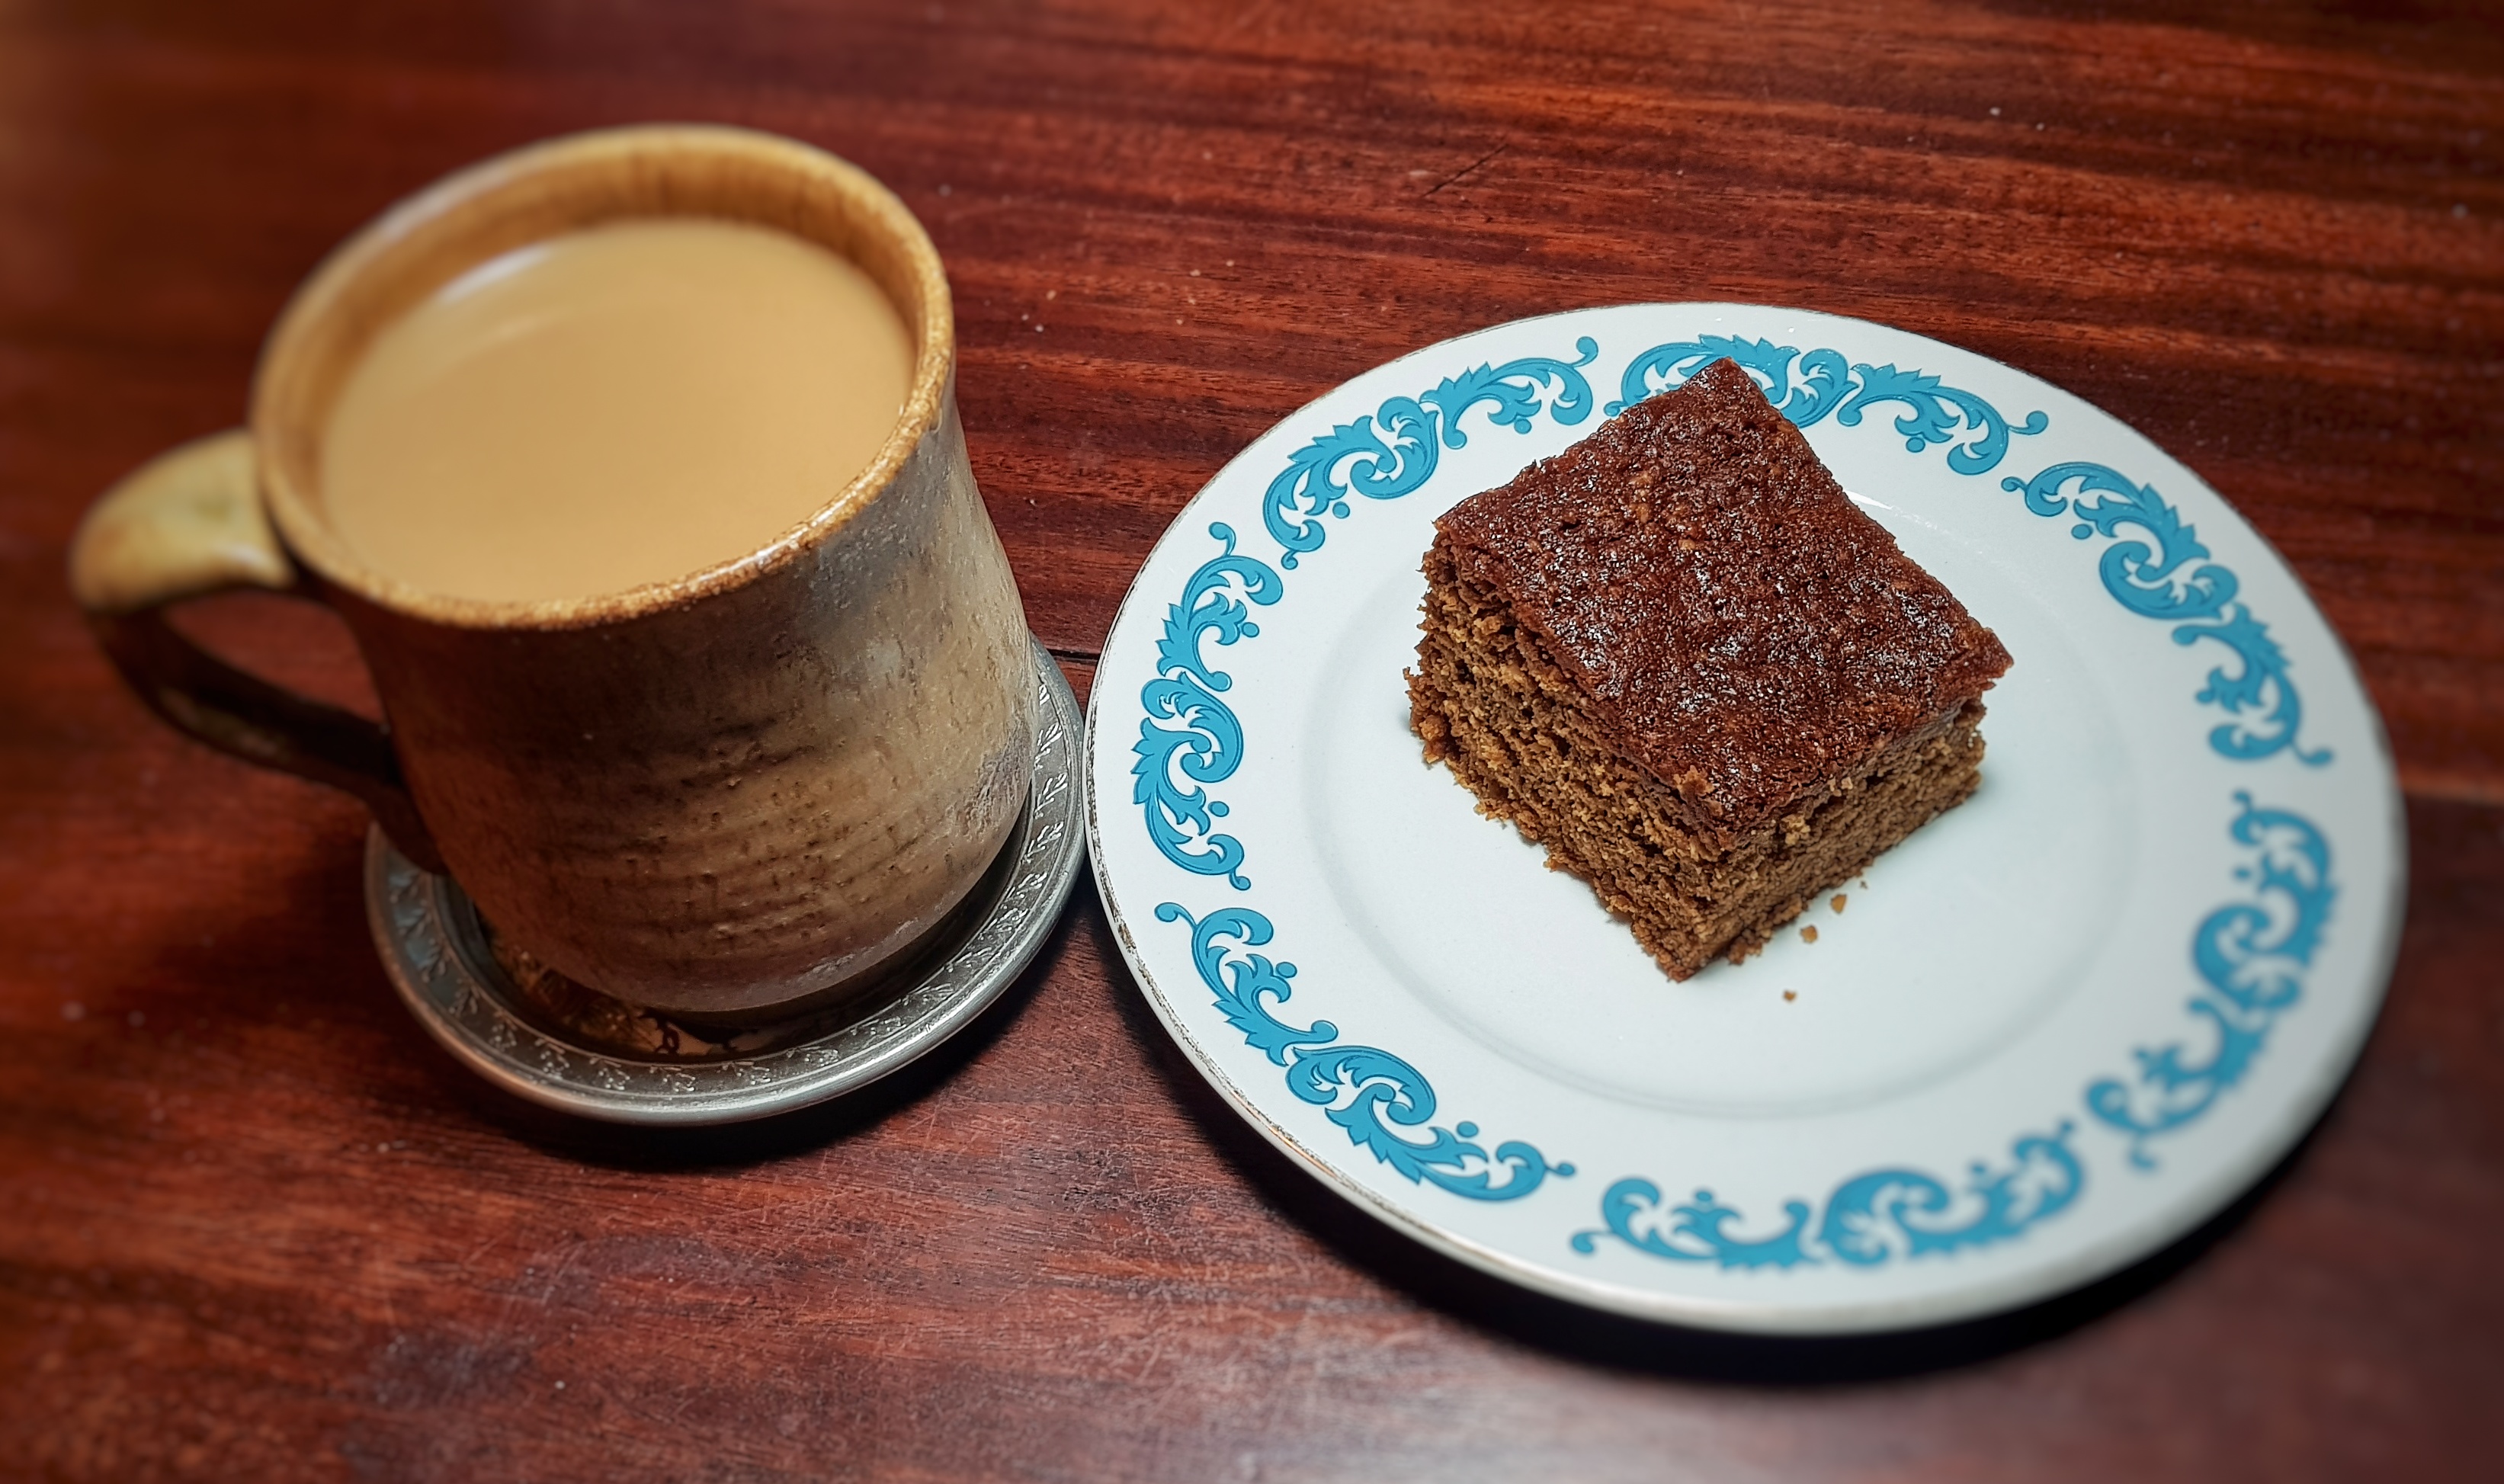
This cake has to be eaten to be believed; it will instantly make you feel a million times better if you are feeling down, now that the clocks have gone back. It has to be eaten with a piping hot cup of tea in one hand, preferable in front of a roaring bonfire. Failing that, a roaring fire inside with the dog.
The ingredients are very important here – any non-Brits may not be aware of two of the key ingedients: black treacle and golden syrup. Black treacle is essentially molasses so you can easily substitute there. However, many recipes that ask for golden syrup suggest using corn syrup as an alternative. Please, please, please do not do that. They are incomparable, find a shop with a British ‘aisle’ and get the real thing. Accept no substitute. The history of Lyle’s Golden Syrup is an interesting one and I shall tackle that in another post soon, along with some more golden syrup-based recipes. The recipe calls for weights of treacle and syrup – the best way to do this without creating a nighmarish sticky mess of a kitchen, is to place your saucepan onto the weighing scales, tare them, and then add the syrup and treacle directly.
One last thing… almost as important as the ingredients, is the aging of the parkin. No matter how tempting it may be, do not eat the parkin on the day you have made it. It needs to be kept in an airtight box or tin for at least three days. The cake needs a bit of time for the flavours and stickiness to develop.
If you like the content I make for the blogs and podcast, please consider supporting me by buying me a virtual coffee, pint or even a subscription : just click on this link.
Ingredients:
225 g butter
110 g soft dark sugar
60 g black treacle (or molasses)
200 g golden syrup
140 g medium oatmeal (often sold sold as quick-oats)
200 g self-raising flour
1 tsp baking powder
4 tsp ground ginger
2 tsp nutmeg
1 tsp mixed spice
2 large eggs, beaten
2 tbs milk
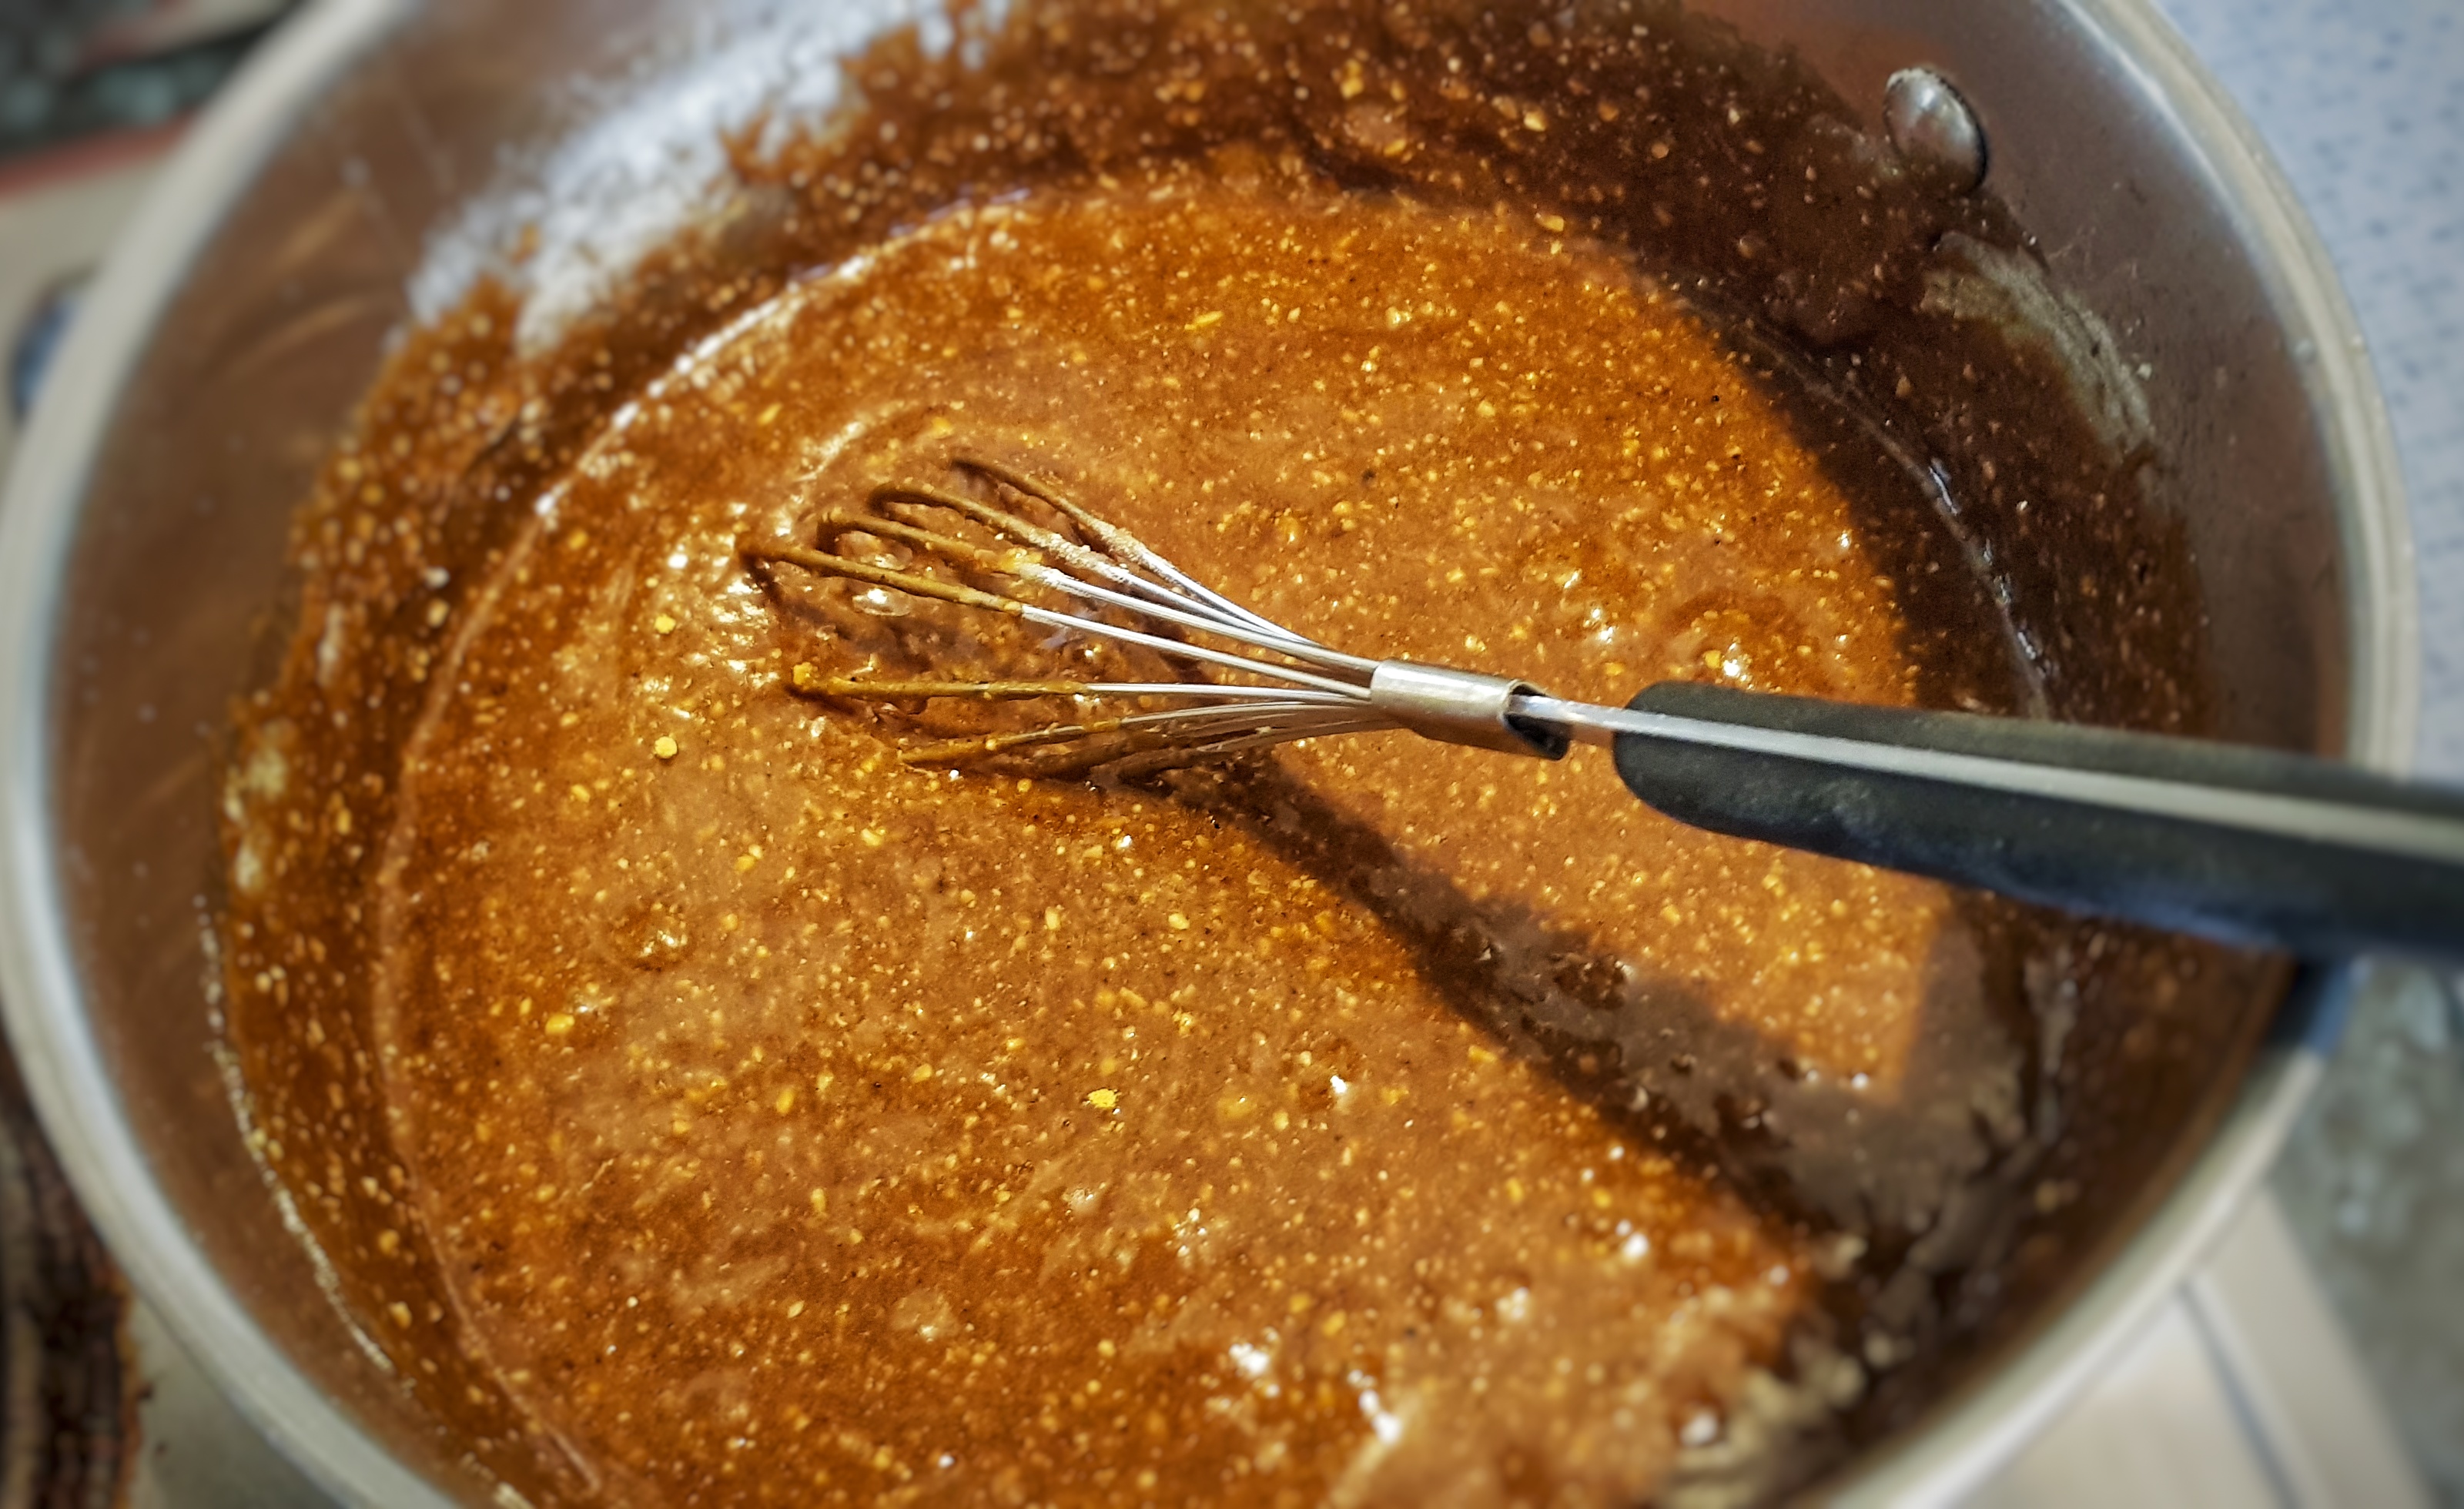
Preheat the oven to 140⁰C (275⁰F) and lightly grease a square (21 x 21 cm) 7 x 7 inch cake tin. In a saucepan, melt together the butter, brown sugar, black treacle and golden syrup. It is important to do this on a medium-low heat, you don’t the sugars to boil, just to meld together.
Whilst they are melding, stir all the dry ingredients in a large mixing bowl and when the syrup mixture is ready, tip it in. Use a wooden spoon to beat the wet ingredients into the dry. Now incorporate the eggs – do this bit-by-bit, or you run the risk of curdling the mixture. Lastly, slacken the mixture with the milk and pour the whole lot into your cake tin.
Cook for 1 hour and 30 minutes and cool it in the tin. Once cool, keep the parkin in an air-tight cake tin or tub and keep for at least three days before cutting into squares.
Here is a recipe of mine that I cook on a regular basis these days. I love lamb, but it is a wee bit pricey over here in the States compared to Britain, so to cook it here regularly, I go for the cheapest available cut – the shank. When I think of famous British lamb dishes, it is one that springs straight to mind, and yet, it is missed out of Jane Grigson’s English Food. (For those of you not in the know: I am trying to cook every recipe in the aforesaid tome – this link – and part of this blog’s job is to fill in the gaps.) At some point, I shall write a blog post about lamb and mutton in general with a list of British dishes – I will be aiming to add every recipe for those dishes too.
The shank is the bottom part of the rear legs of the sheep, and it is normally removed from the upper portion; the meat in the shank is much tougher than the rest of the leg and therefore needs to be cooked longer, if you wanted to roast an entirely whole leg, you would either end up with tough shank meat, or overcooked leg meat. So long, slow cooking is what you need for lamb shanks – if you look at one, you’ll see that there is a lot of connective tissue there, and it is this that takes time to break down. If you haven’t cooked this cut of meat before don’t be squeamish – this tough tissue becomes wonderfully soft and unctuous if you treat it right and it is very easy to cook. All you need is a little time…
When I was doing the research for this recipe, I expected to find many old recipes for this classic, and yet I couldn’t a single recipe for it from the eighteenth or nineteenth centuries – many books mention the cut, but use it only for stock-making. However, they do suddenly appear around the time of the Great War. So perhaps rationing made this dish popular. If anyone has any information on this, I would be most grateful.
If you like the blogs and podcast I produce, please consider treating me to a virtual coffee or pint, or even a £3 monthly subscription: follow this link for more information.
The recipe I give here is simple and straight-forward and can easily be played around with. Adding some tomatoes and warming spices as well as some dried fruit such as raisins or prunes would give it a Moroccan touch, or adding some chilies, cumin, coriander seed and leaf as well as some crispy-fried onions and yoghurt would make it an Indian-style feast. I am, for the purposes of the blog, going for the classic British style. What makes this recipe good is the inclusion of gently fried onions and a good health dash of Worcester sauce.
Ingredients:
2 large, or 4 small lamb shanks
one roughly chopped onion
one roughtly chopped carrot
one roughly chopped celery stick
one leek, sliced, with trimming reserved
8 peppercorns
a spring each of rosemary and thyme
parsley stalks
a bay leaf
a glass of red wine (optional)
a tablespoon of sunflower oil
3 thinly-sliced cloves of garlic
one thinly-sliced onion
4 oz thinly-sliced mushrooms
one carrot, diced
one leek, sliced
Worcester sauce
salt and pepper
Place the shanks and the chopped onion, carrot, celery and leek trimmings in a roasting tin and roast for 25 minutes at 200⁰C (400⁰F). When nicely browned, place the lamb and vegetables in a large heavy-duty pan, along with the herbs and spices. Deglaze your roasting tin with the optional glass of wine, or simply use some water.
Pour the nice burnt bits along with the wine or water into the pan. Add water to almost cover, bring to a boil and simmer with a close lid for three hours.
When the meat is cooked, fish it out and put on a plate and strain the stock into a jug. Give the pan a quick wipe with a cloth and put it back on the heat along with the oil. When good and hot add the onions and garlic keep them moving in the pan and after three or four minutes, add the mushrooms. Fry for until the onions are tinged with brown. Now add the stock back to the pan along with the carrot and leek and bring to boil, and reduce the stock by around half its volume.
Place the shanks in the pan, turn down the heat and let them warm through again. Season with the Worcester sauce, salt and pepper.
For me, lamb shanks must be served with mashed potatoes and a green vegetable such as broccoli, kale or cabbage.