
Hello! I thought some of you might be interested in a post I just published on the other blog, Neil Cooks Grigson.
Tag Archives: roast
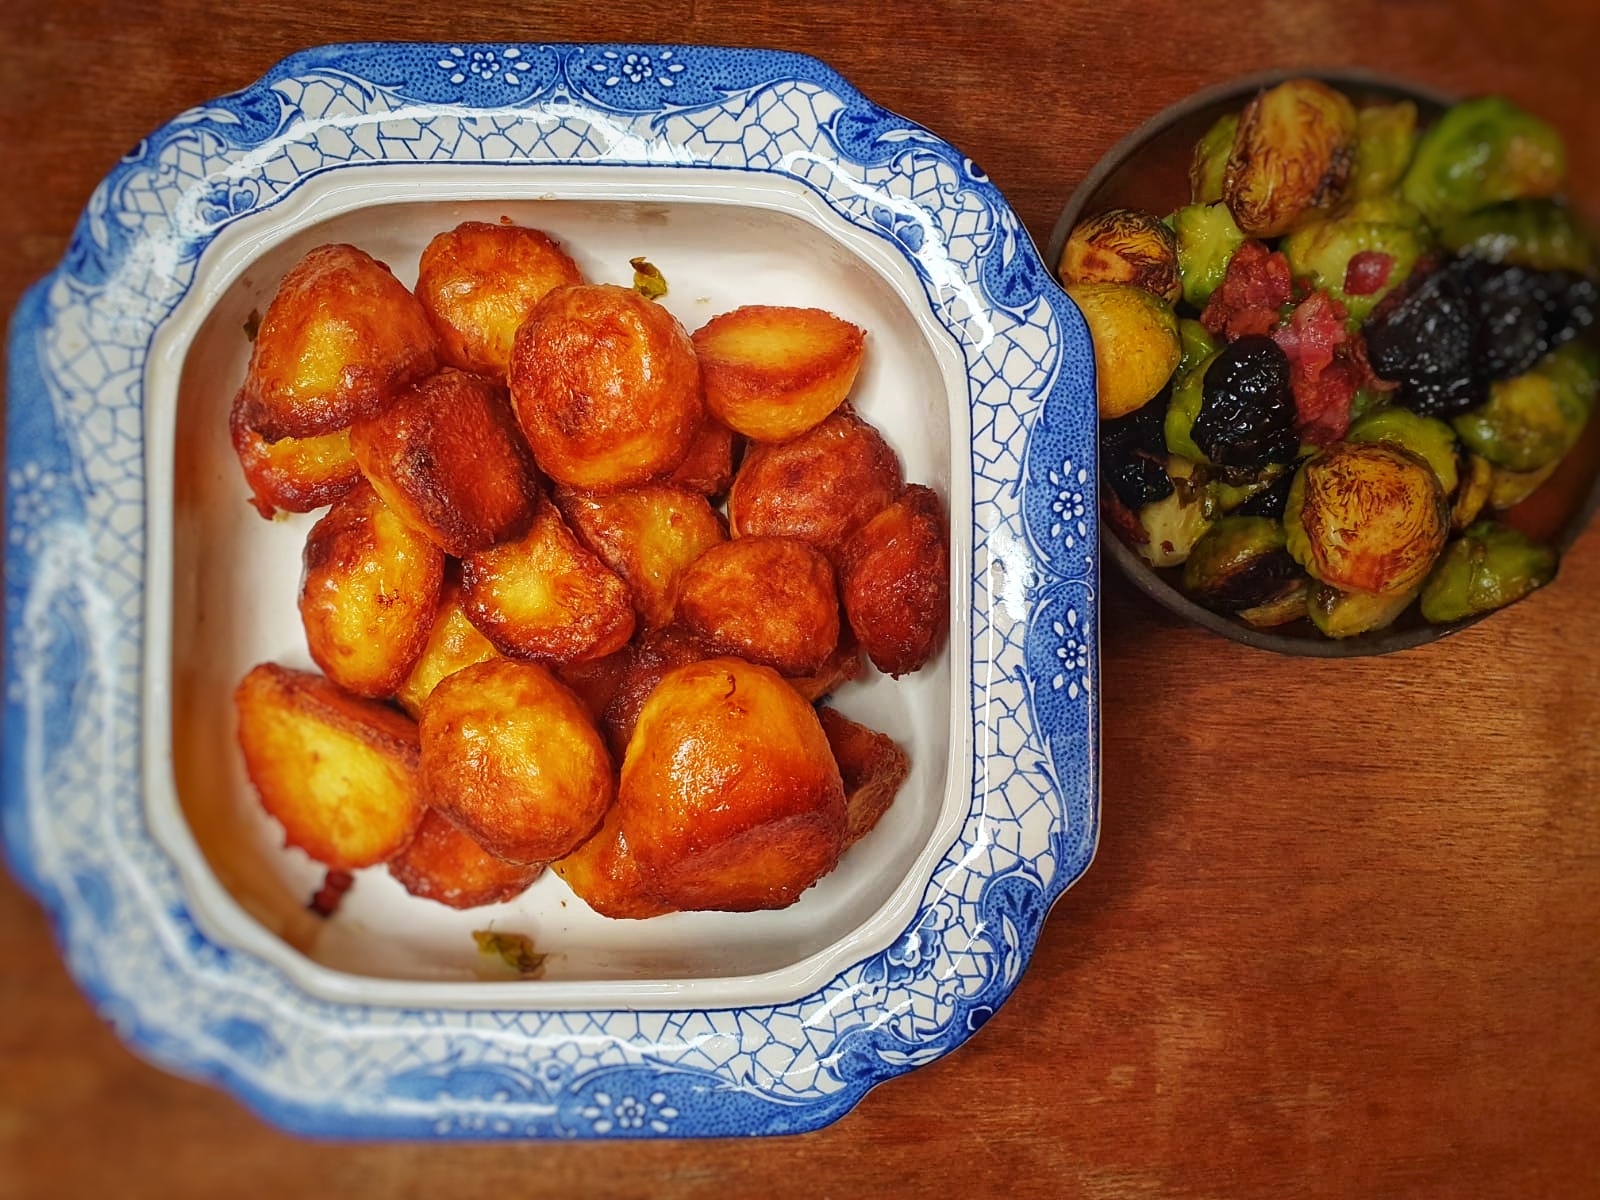
My Foolproof Roast Potatoes
I told my social media followers that my Christmas recipe this year was going to be roast turkey and I said that I would also provide the recipes for two sides. I provided four options: roast potatoes, Brussels sprouts, bread sauce and cranberry sauce/jelly. Roast potatoes received the most votes so here we go.[1]
I believe that the roast potatoes are almost as important as the roast meat, perhaps more important. Whether it’s the Christmas dinner or the weekly Sunday roast, if you mess up the roasties, everyone will be sad, and there’s a good chance you’ll be forever shunned by friends and family.
So I provide you with my method. It’s tried and tested and I reckon foolproof! Don’t worry about precise weights/volumes of ingredients or sizes of roasting trays; this recipe is most adaptable so use what you have. What is important, however, is the type of potato used and the fat or oil in which they are cooked.
The potatoes must be of the floury type: Maris Piper, King Edward and Albert Bartlett varieties are easy to find in the supermarkets, but for me the supreme variety of spud when it comes to roasting is the Alouette. It’s technically a waxy potato, but when roasted the centre is like the creamiest mashed potato. It’s not widely available in supermarkets, but keep a look out at greengrocers and farmers’ markets; you will not be sorry should you happen upon some and buy a kilo or two. I bought mine from Unicorn in Manchester.
Next, we need good fat or oil. I used approximately equal amounts of lard and rapeseed oil. All solid animal fats are good: beef dripping, goose fat and duck fat are great alternatives – they all have high smoking points and make for a crisp potato. As for plant-based oils, you must avoid olive oils completely and go for high smoke point ones like rapeseed, groundnut or sunflower. Avoid the solid, white vegan fats, they are bad for you and the environment. You don’t have to go half and half either, you can use all oil or all animal fat: I vary it depending on what oils and fats I have in the store cupboard/fridge.
Anyway, let’s get to it.
If you like the blogs and podcast I produce and would to start a £3 monthly subscription, or would like to treat me to virtual coffee or pint: follow this link for more information. Thank you.
Recipe
Make sure to use a deep roasting tin and that it is big enough to fit all of the potatoes in a single layer. Notice too there are no herbs thrown in, but if you want to add some be my guest.
If making roasties for the Christmas dinner, you can slide the tray of oil or fat into the oven as soon as the turkey comes out.
Good, floury potatoes, peeled
Salt
Plant-based oils and/or solid animal fats
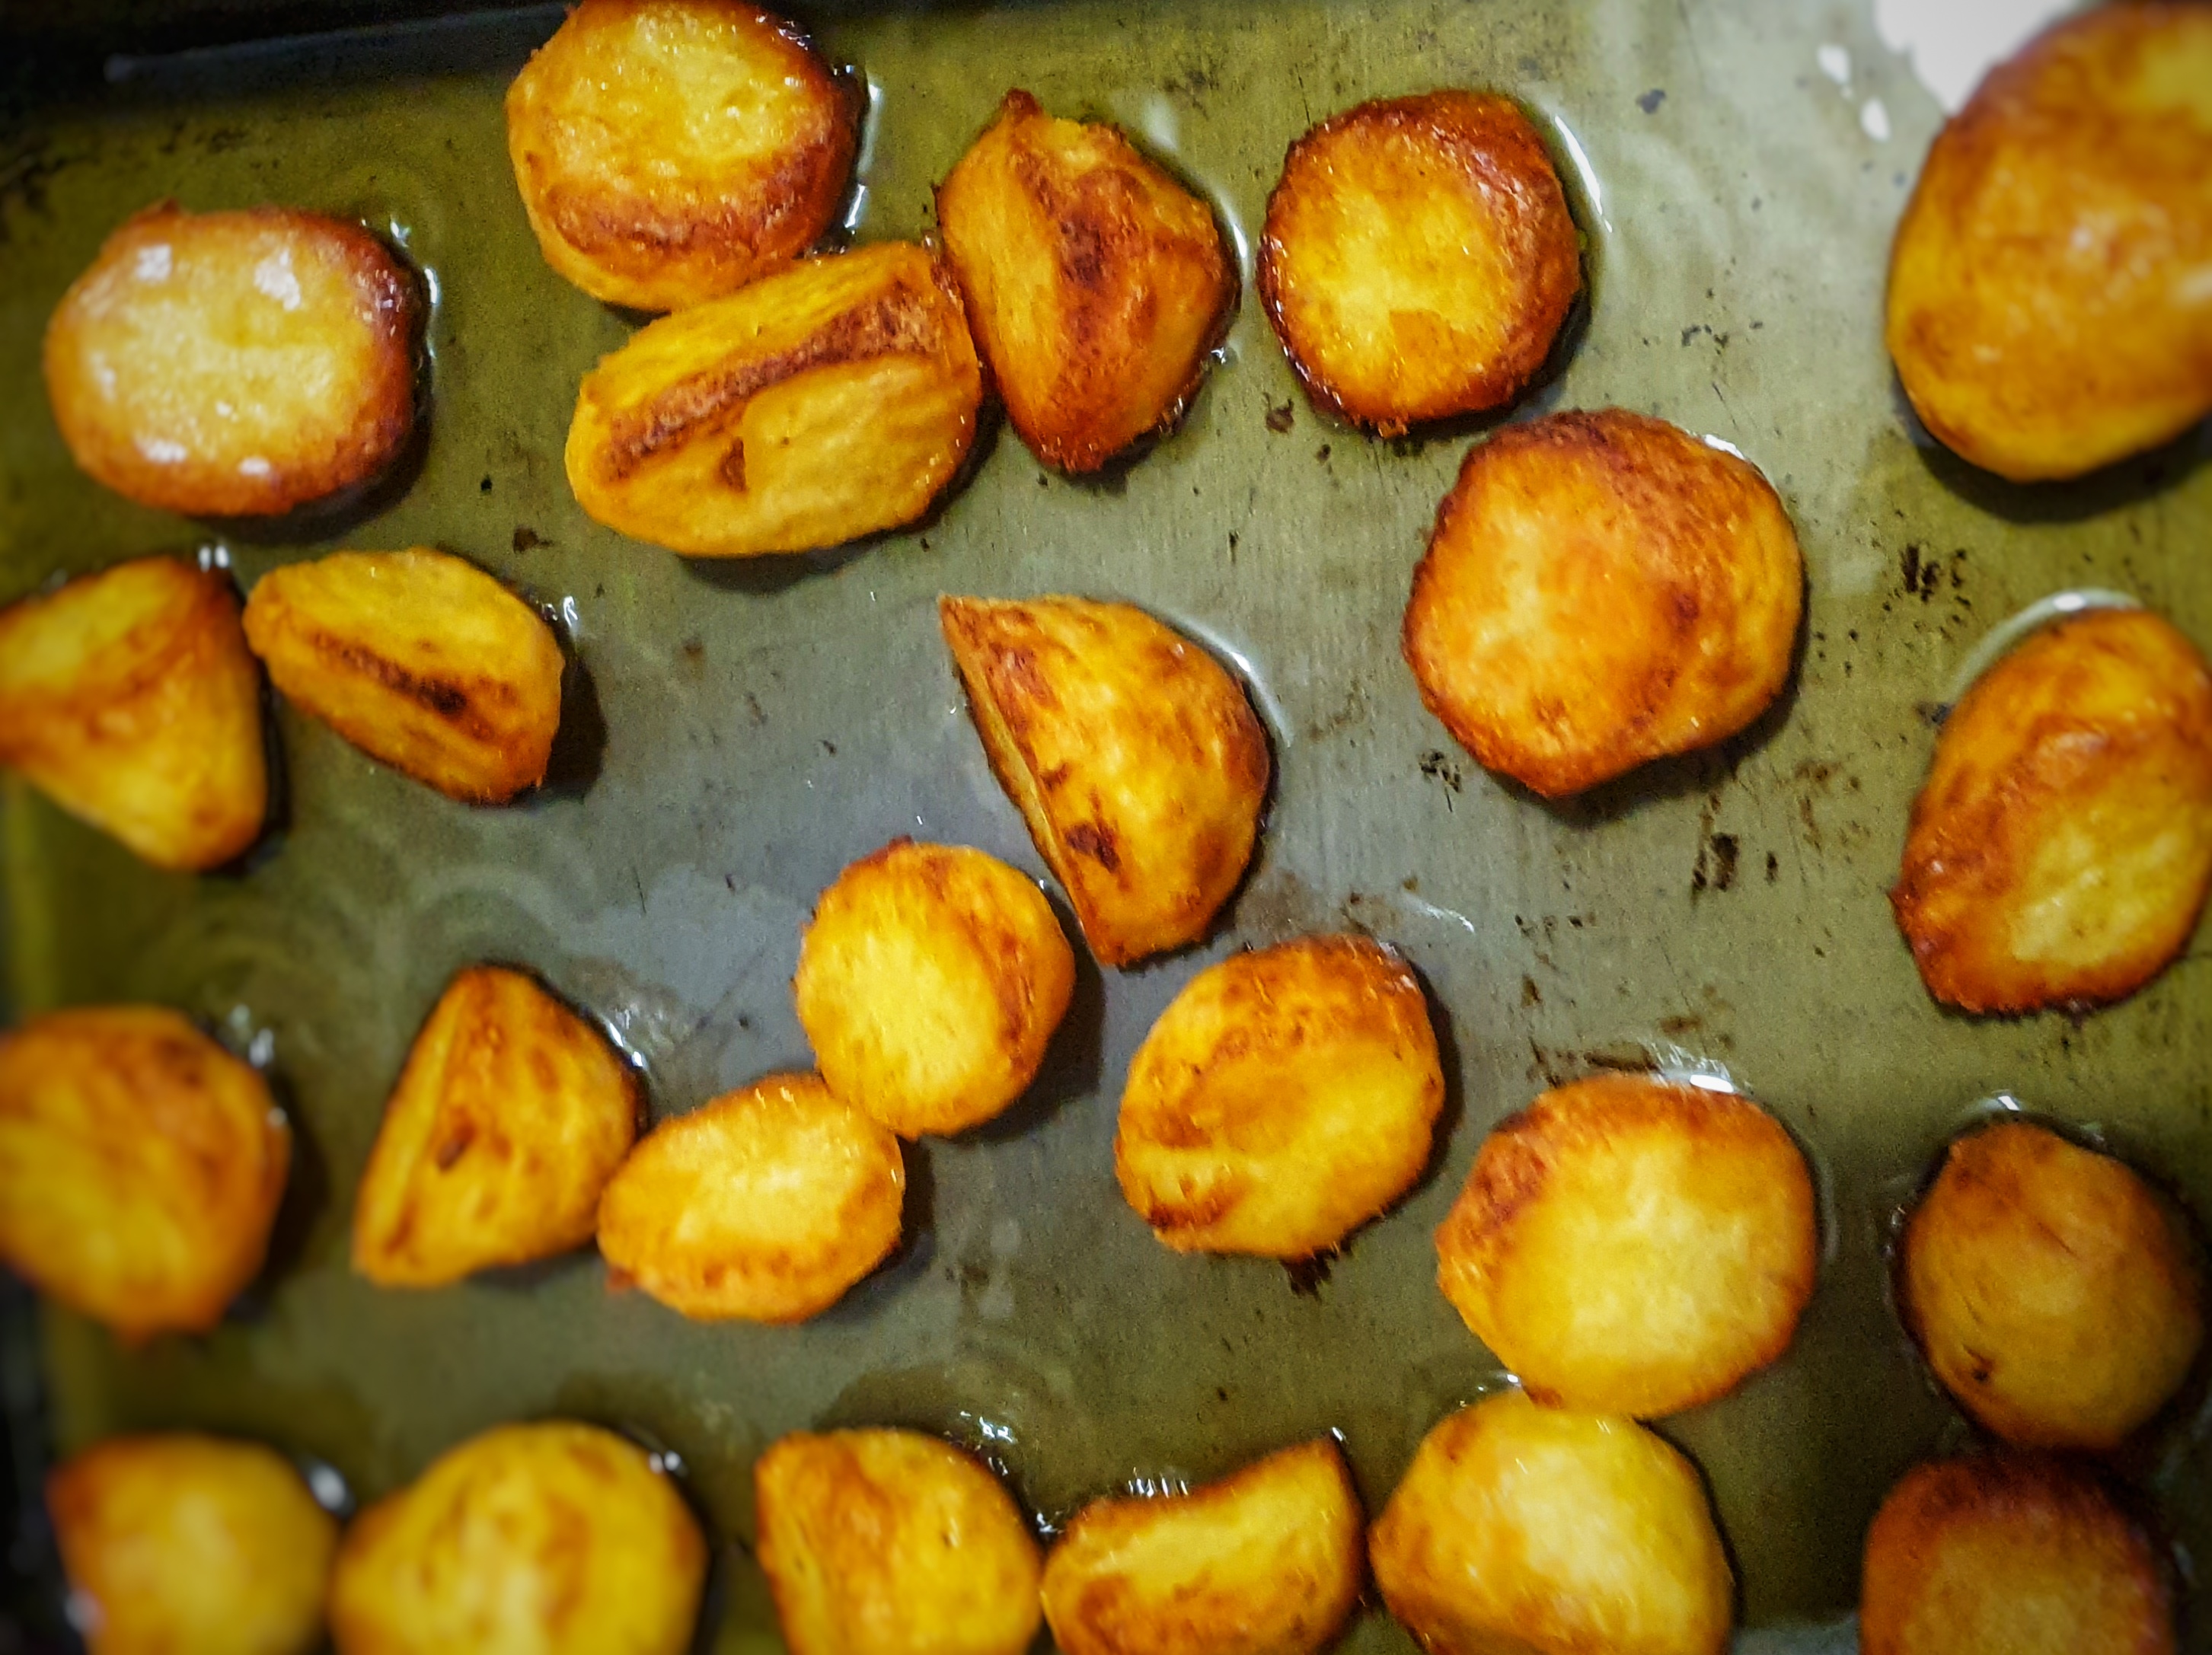
Preheat your oven to 190°C (if you followed my turkey recipe, the oven will already be at this temperature). Add enough oil or fat to the tin so that it comes to a depth of between 0.5 to 0.75 centimetres. Slide it into the oven to get nice and hot.
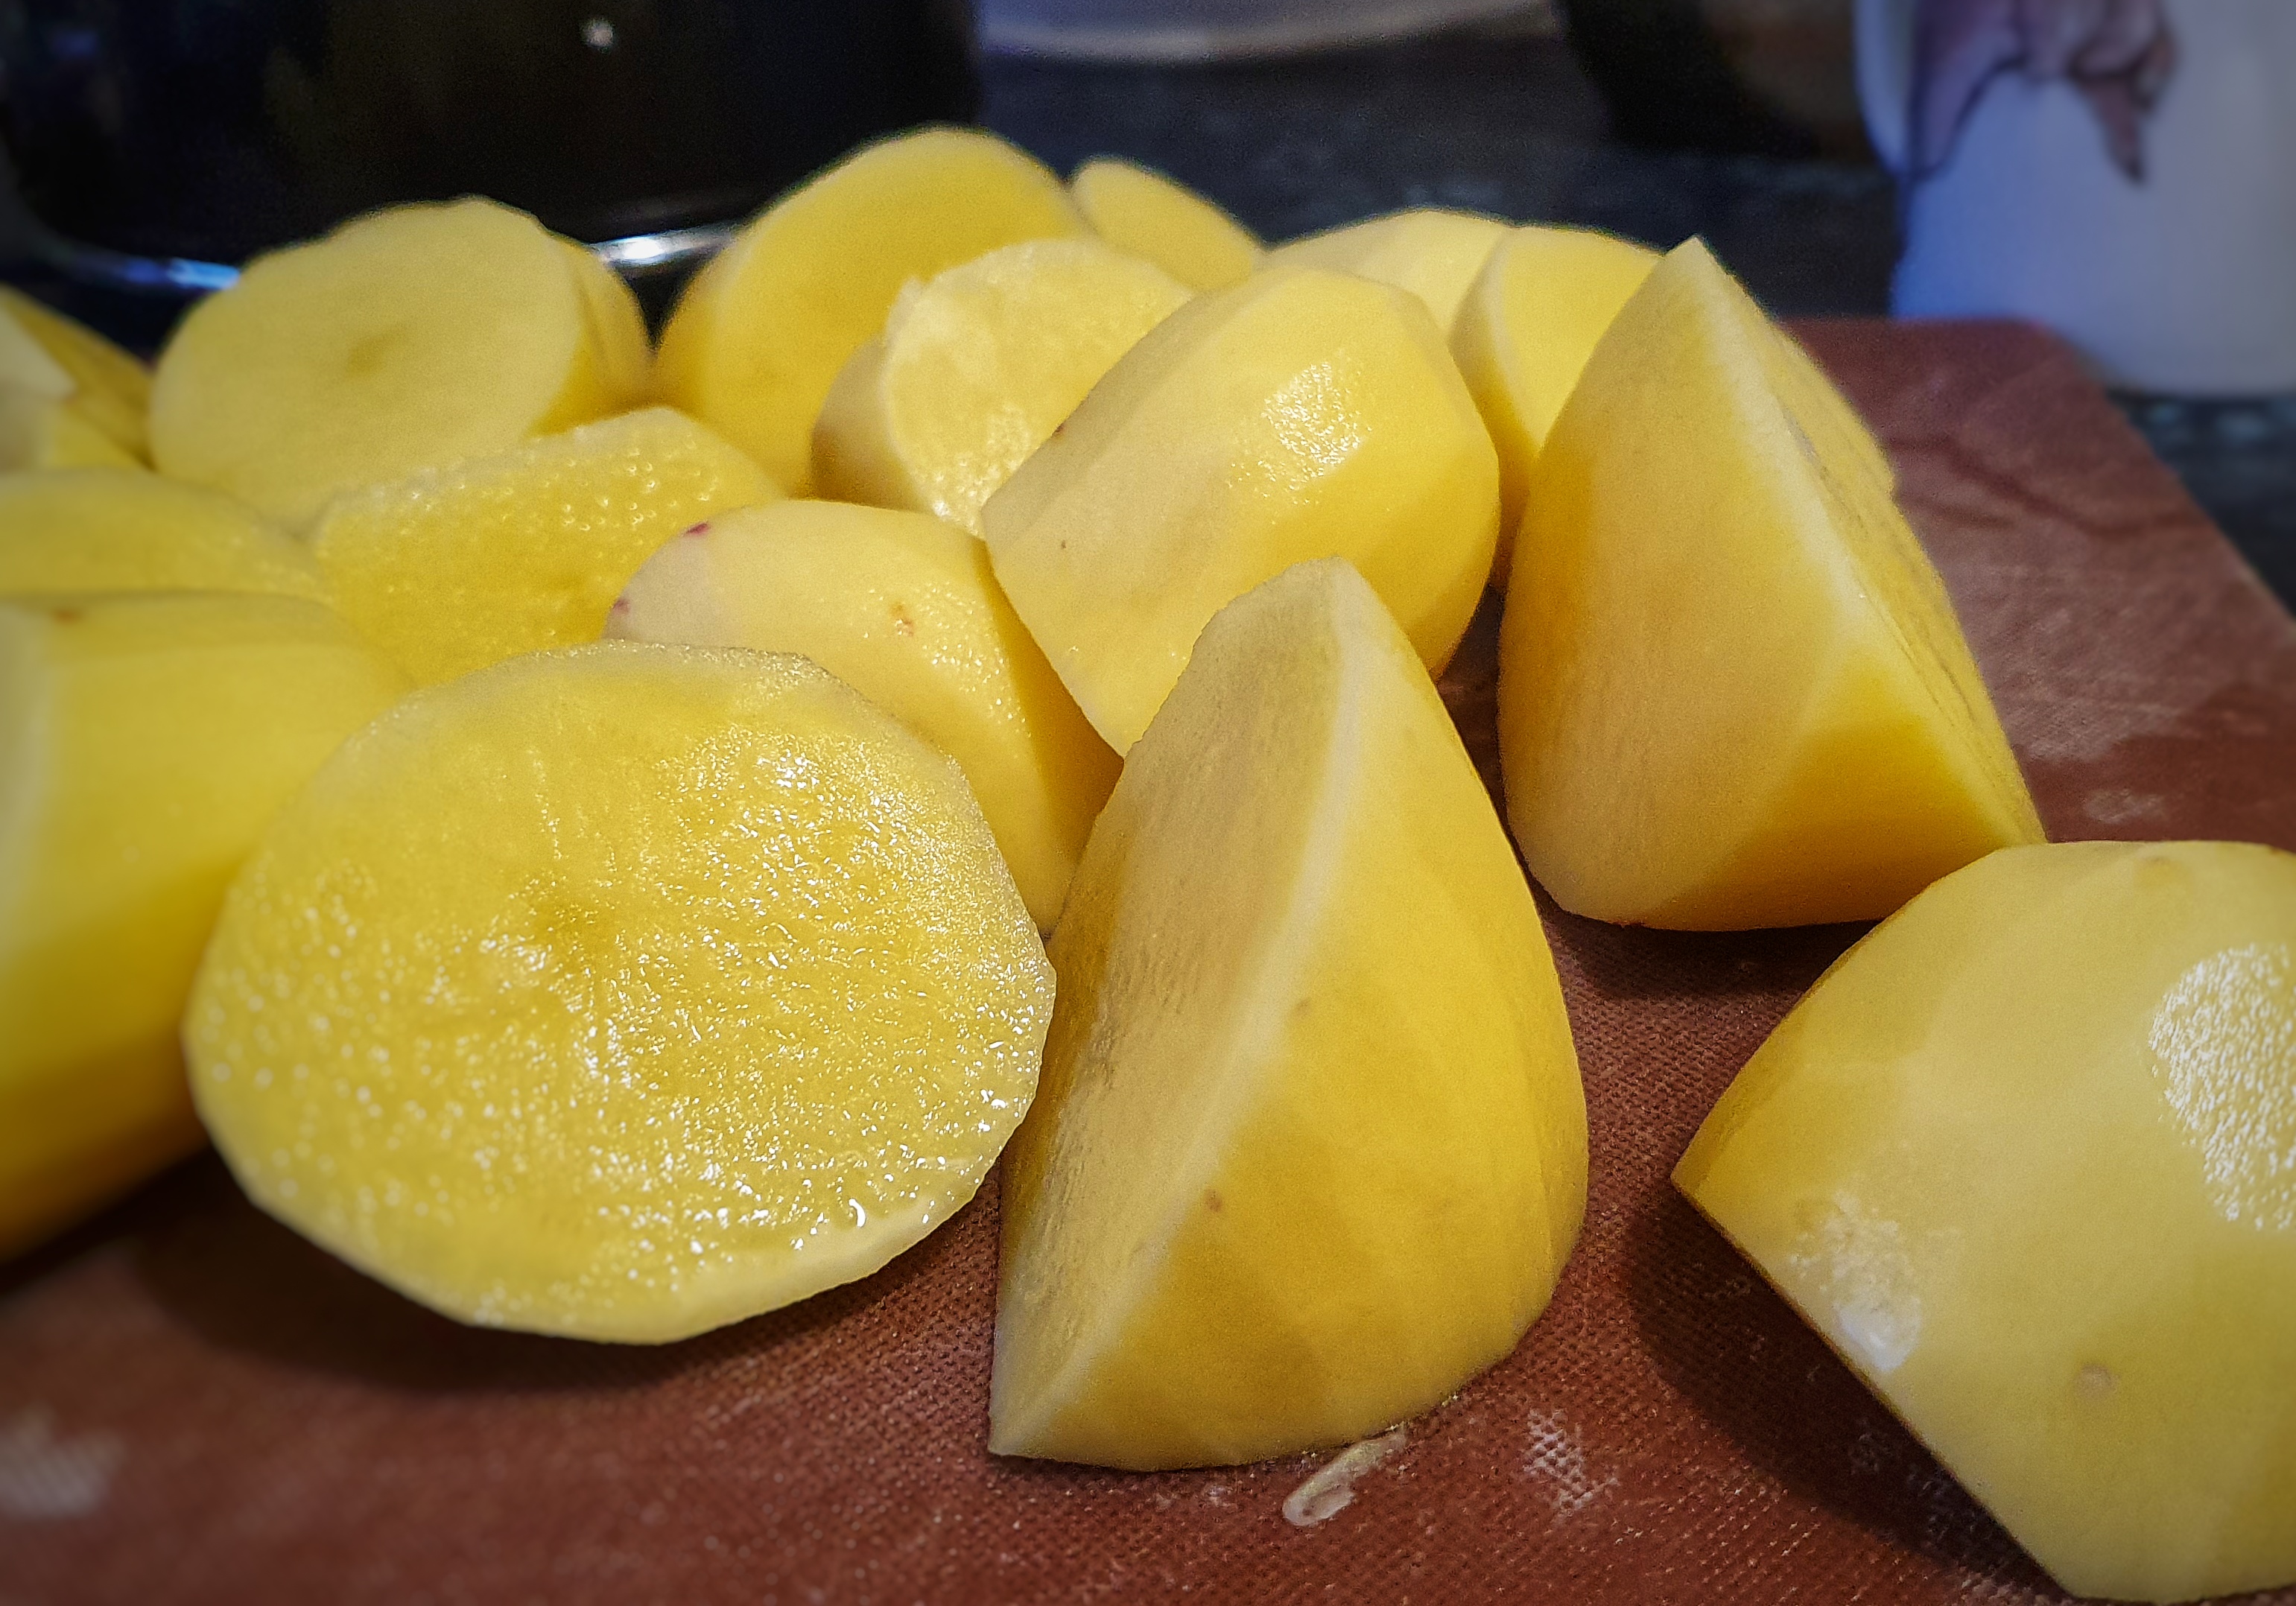
Cut your potatoes into good-sized pieces[2] making cuts at angles so that there are sharp, angular pieces: the pointier, the crispier; the crispier the better.
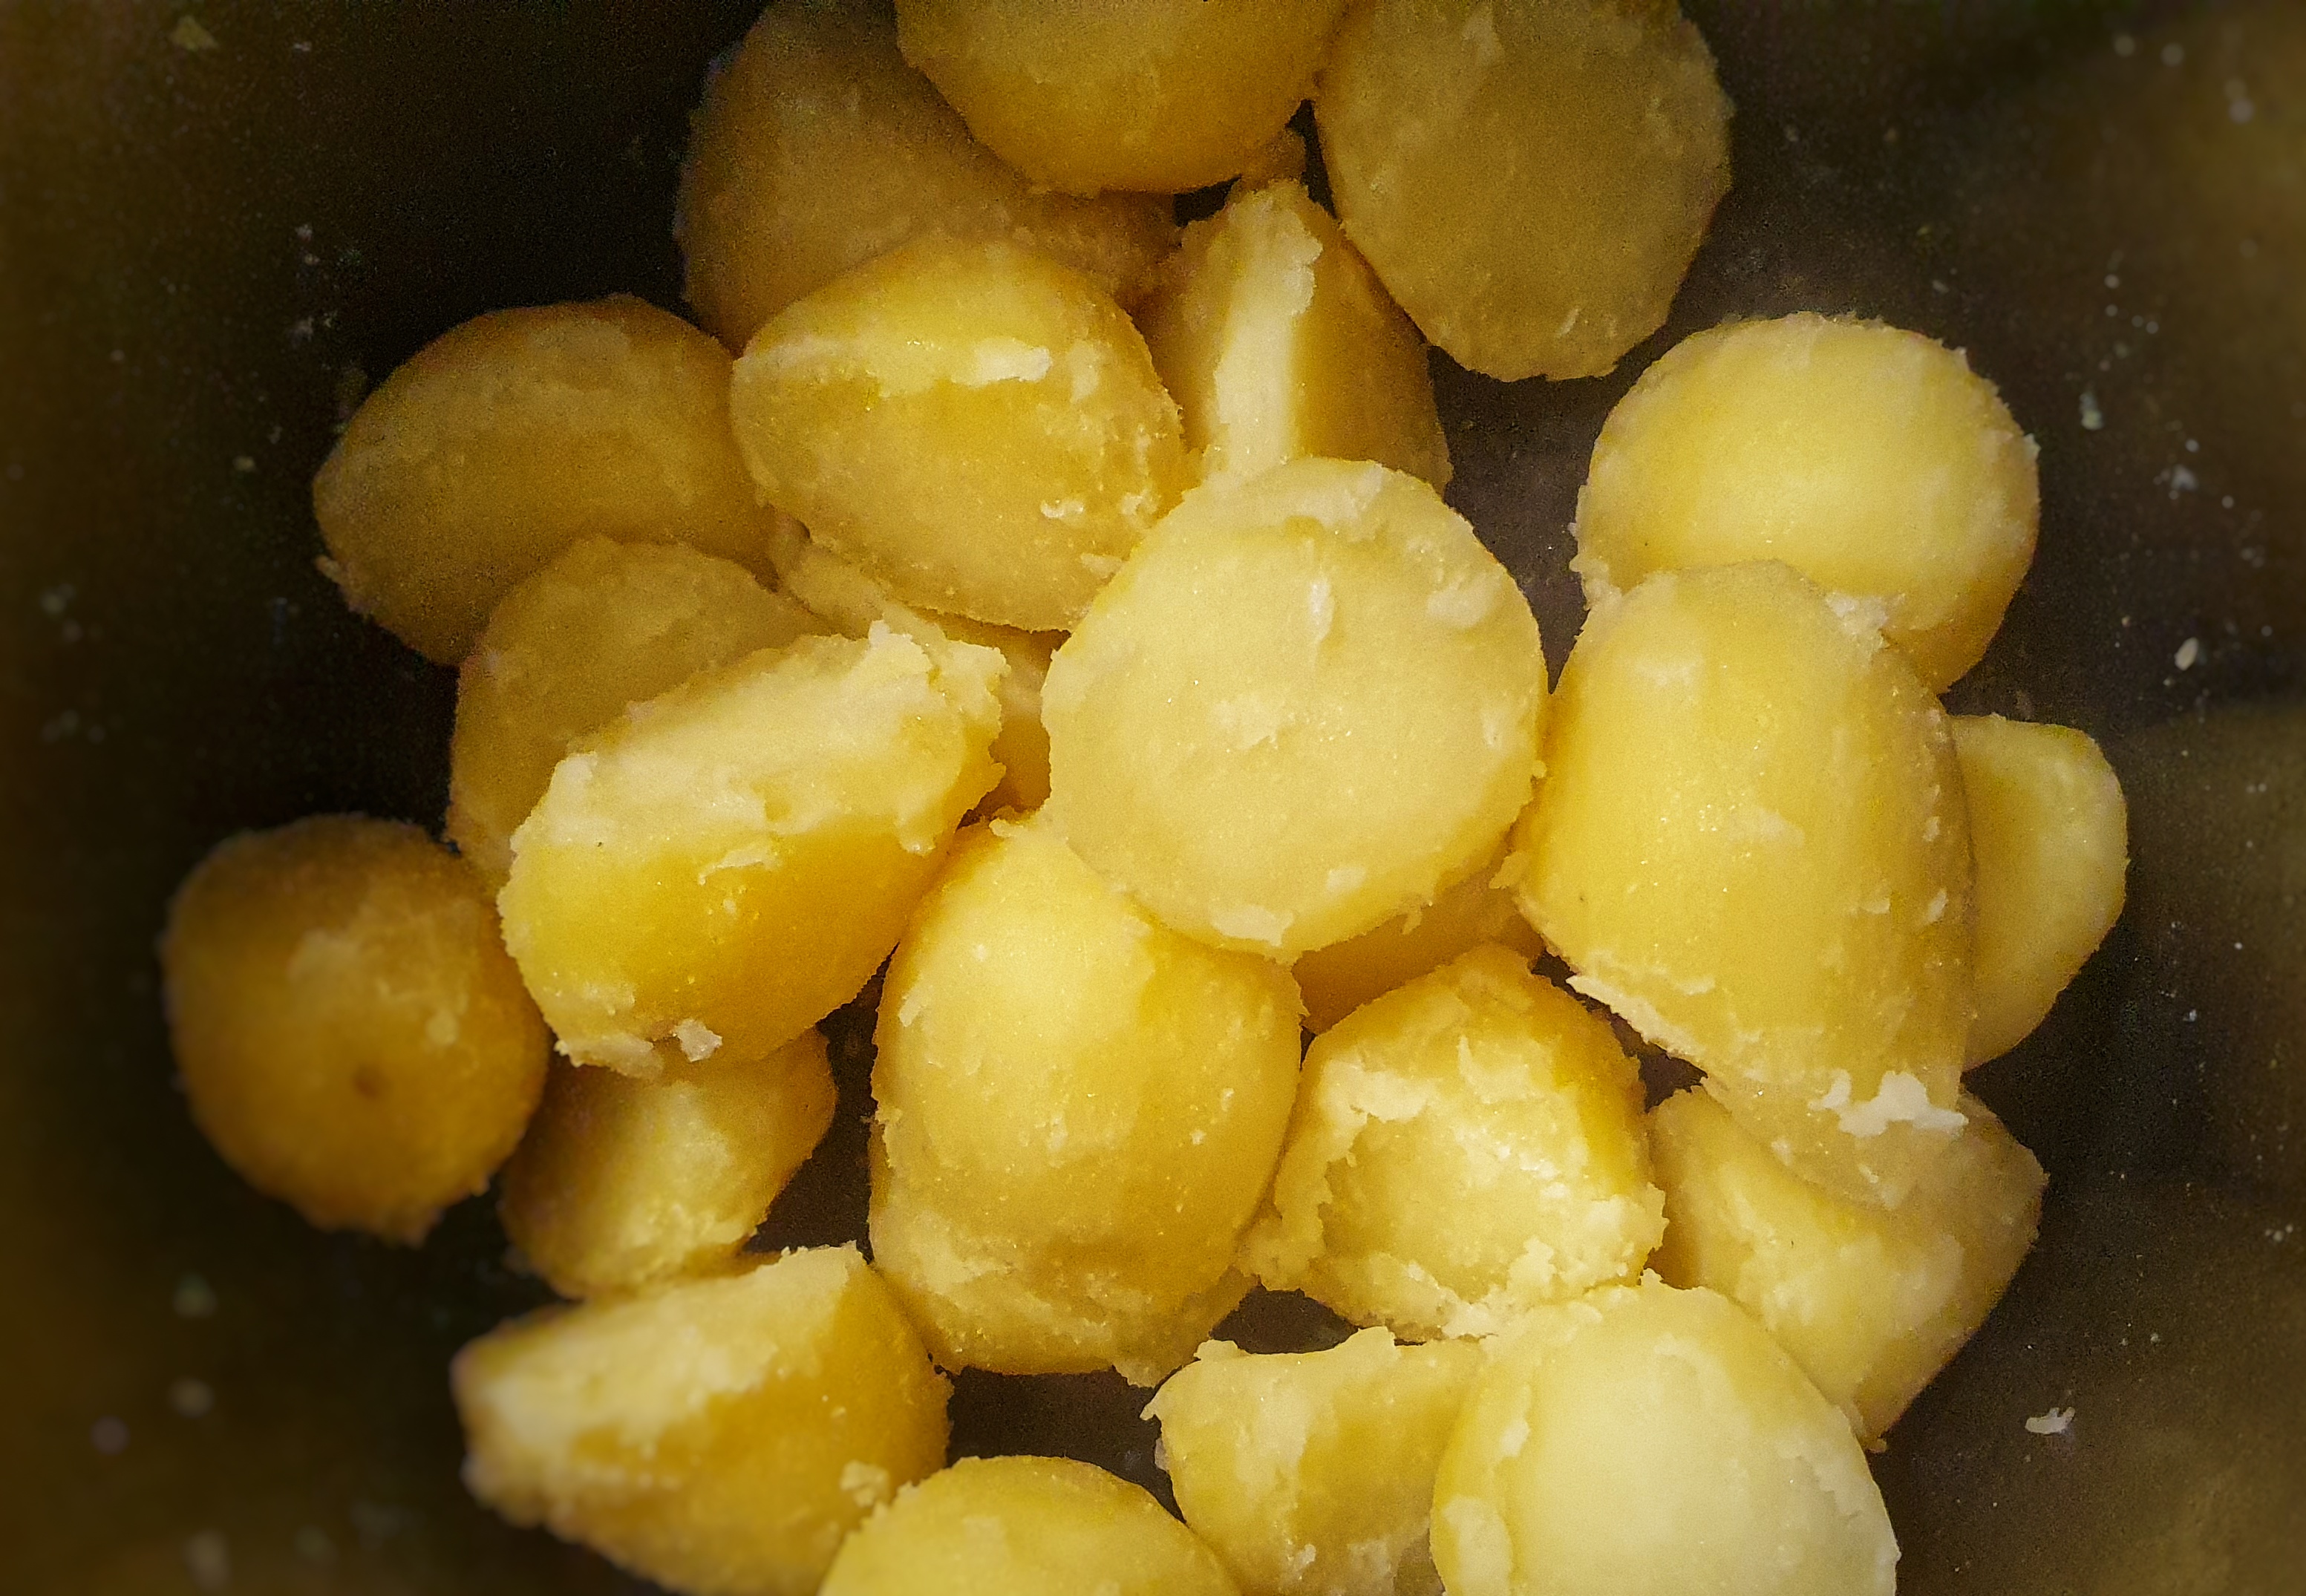
Get a large pot of water that had been liberally dosed with salt boiling and add the potatoes. Cover and bring back to a boil, and once boiling again, set a timer for 6 minutes.
When the time is up, strain the cooking water and allow the potatoes to steam dry for a few minutes, then place them back in the pan, cover the lid and give them a good shake to fluff up the edges (wear oven gloves, don’t get a steam burn). Leave the lid off the spuds again so that they can steam a little longer. You can do this stage well in advance if you like – even the previous day.
Gingerly remove the roasting tin and place the potatoes in the oil, spacing them out in a single layer. Use a pair of tongs to help. Slide the roasting tin back into the oven. After 15 minutes turn them over, and keep turning them every 15 minutes or so until crisp on the outside and cooked through the centre. It will take around an hour.
Using tongs, place in a warmed serving dish or bowl and serve.
Notes
[1] Sprouts came second – recipe coming very soon.
[2] I’m not going to dictate to you what a good size is; it’s all down to personal preference, but as a guide, medium potatoes get cut into quarters or sixths, and larger ones into eighths.
Roast Turkey and Giblet Gravy
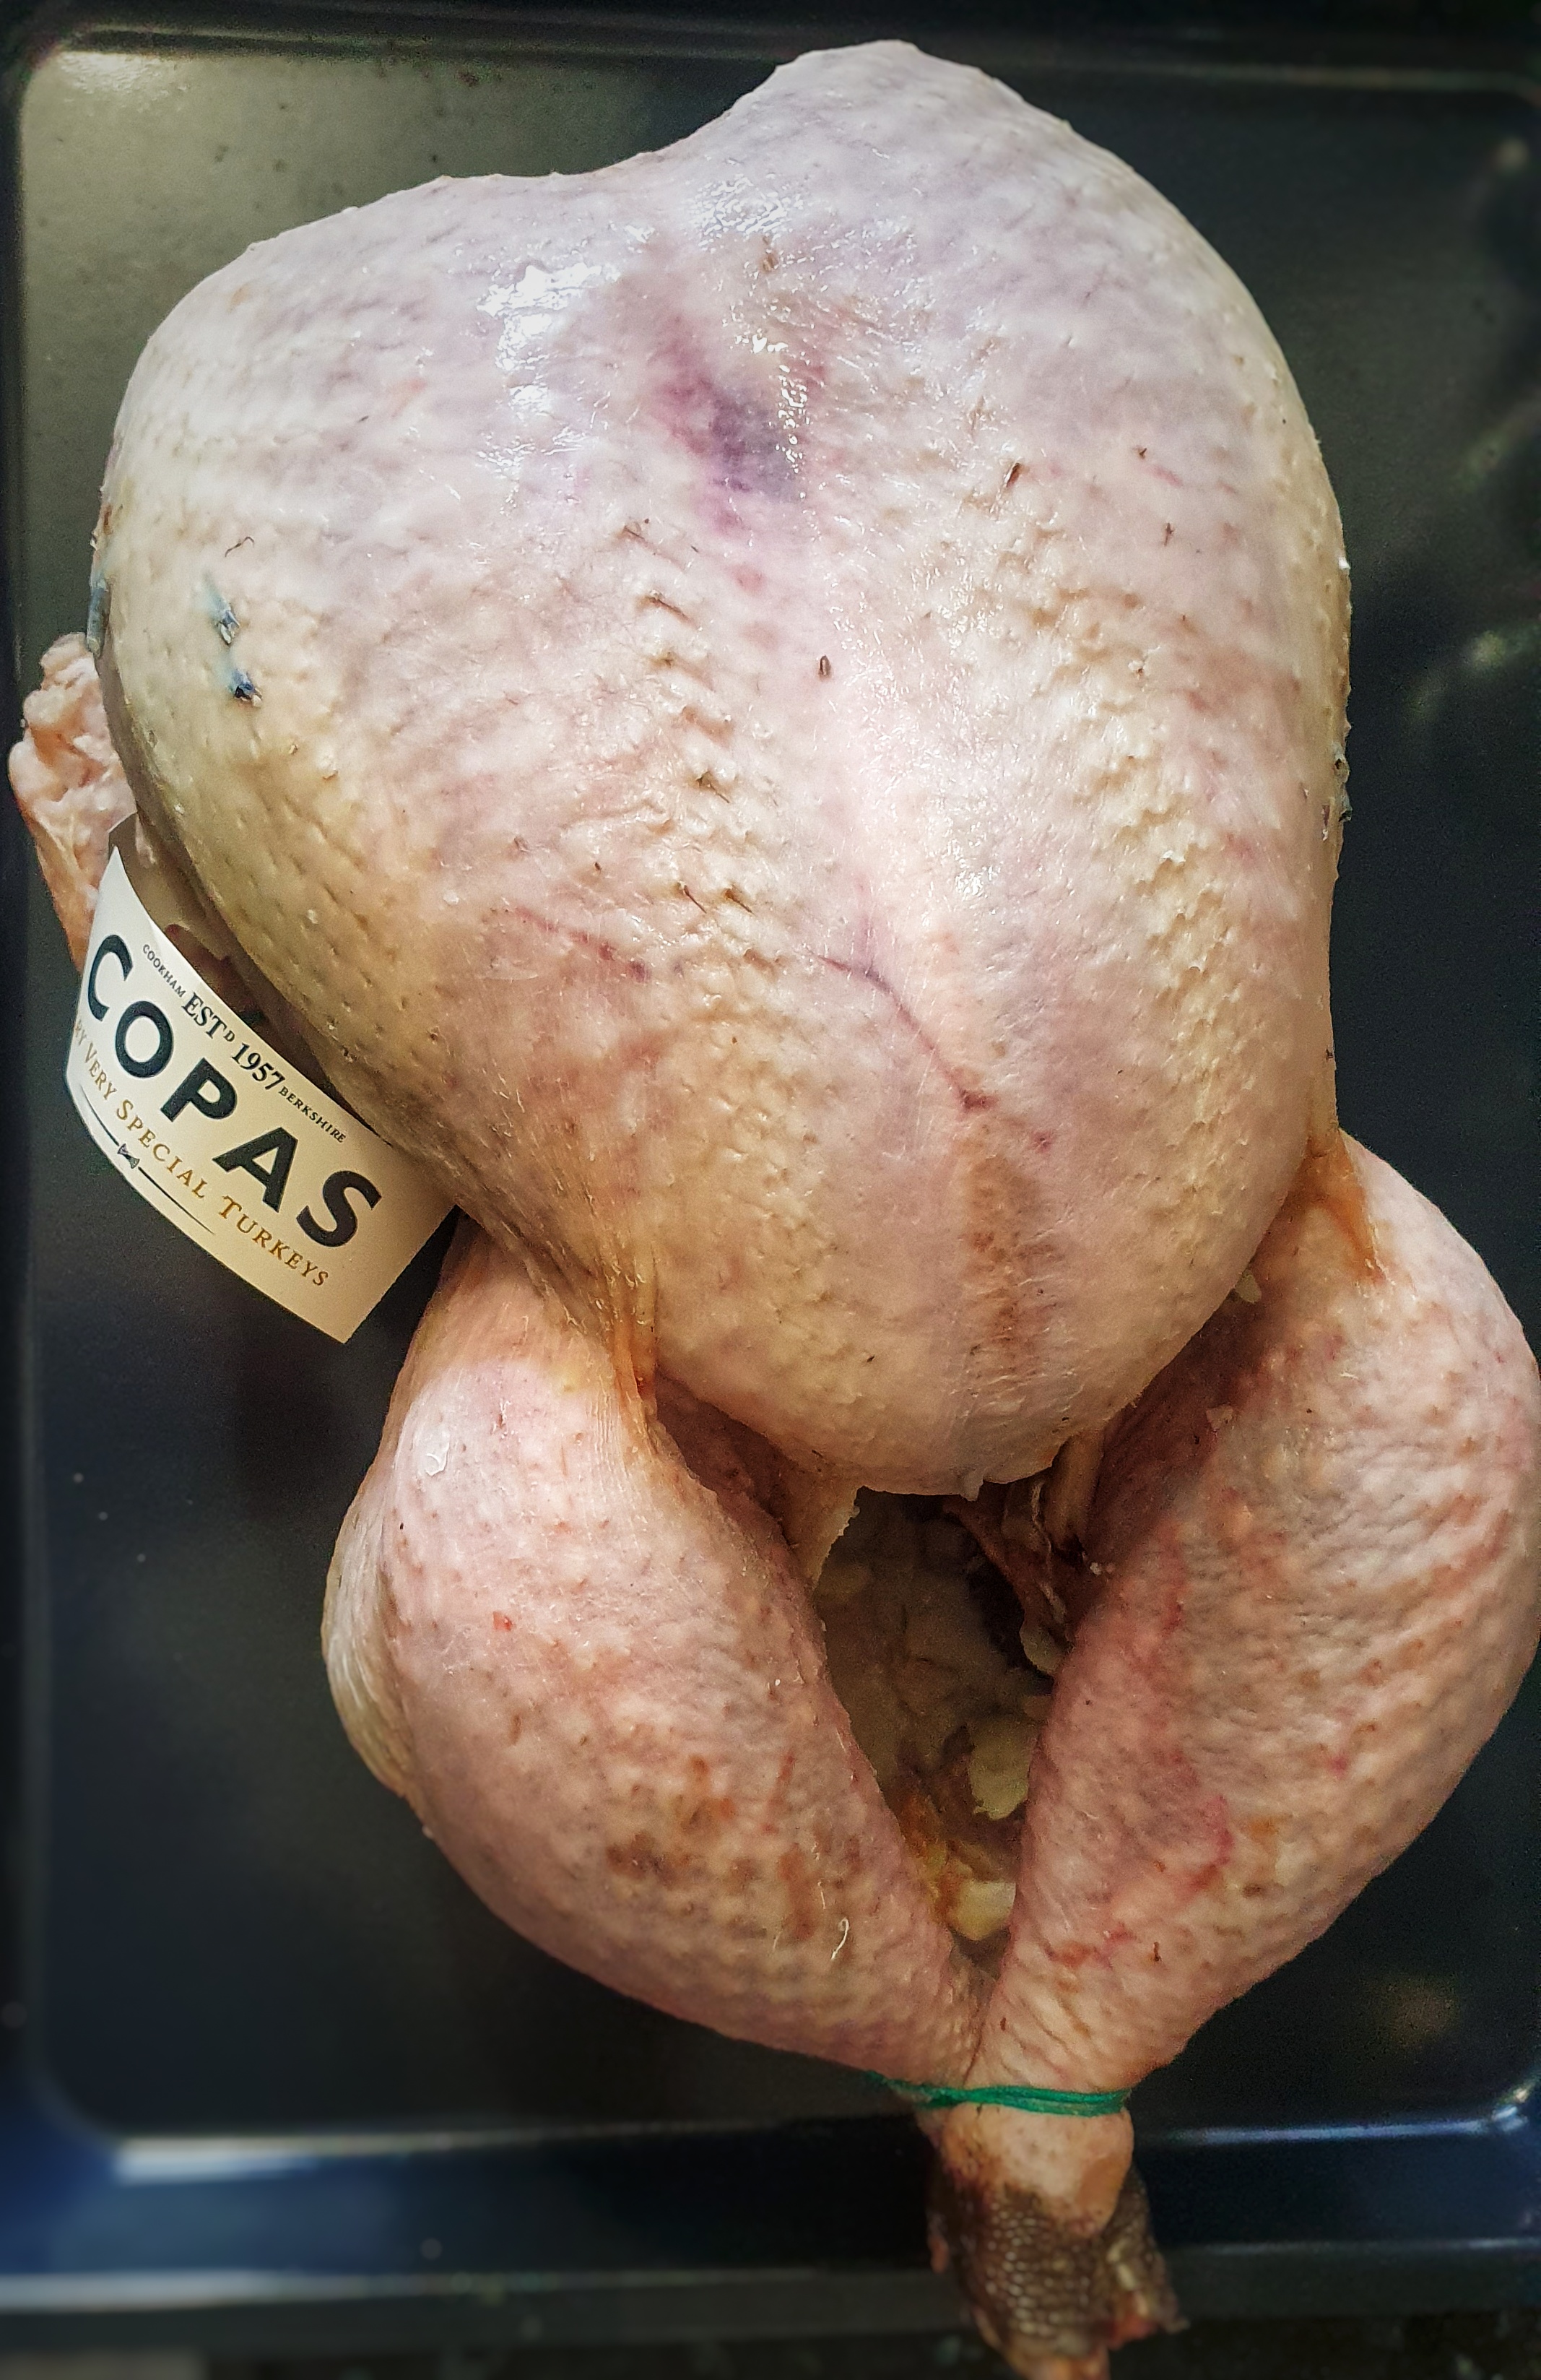
This blog post complements the recent episode of The British Food History Podcast called Turkey with Tom Copas.
If you feel inspired to order a Copas turkey, you need to get your order in by 16 December to avoid disappointment.
In the episode, we discussed the best way to roast turkey and we concluded that as long as you baste the bird and calculate the cooking time properly, it will be delicious. Tom even says that there’s no need to cover the turkey with bacon. While I agree with him, I do like the crispy bacon and the delicious, perfectly seasoned juices that come from the roasting turkey. My way of roasting turkey is very similar to how I cook a chicken.
What we didn’t discuss is the giblets! Please don’t waste them, they can be turned into lovely rich gravy when combined with the roasting juices. It’s important to get the giblet stock on about 45 minutes before the turkey goes in the oven (or you could prepare it in advance).
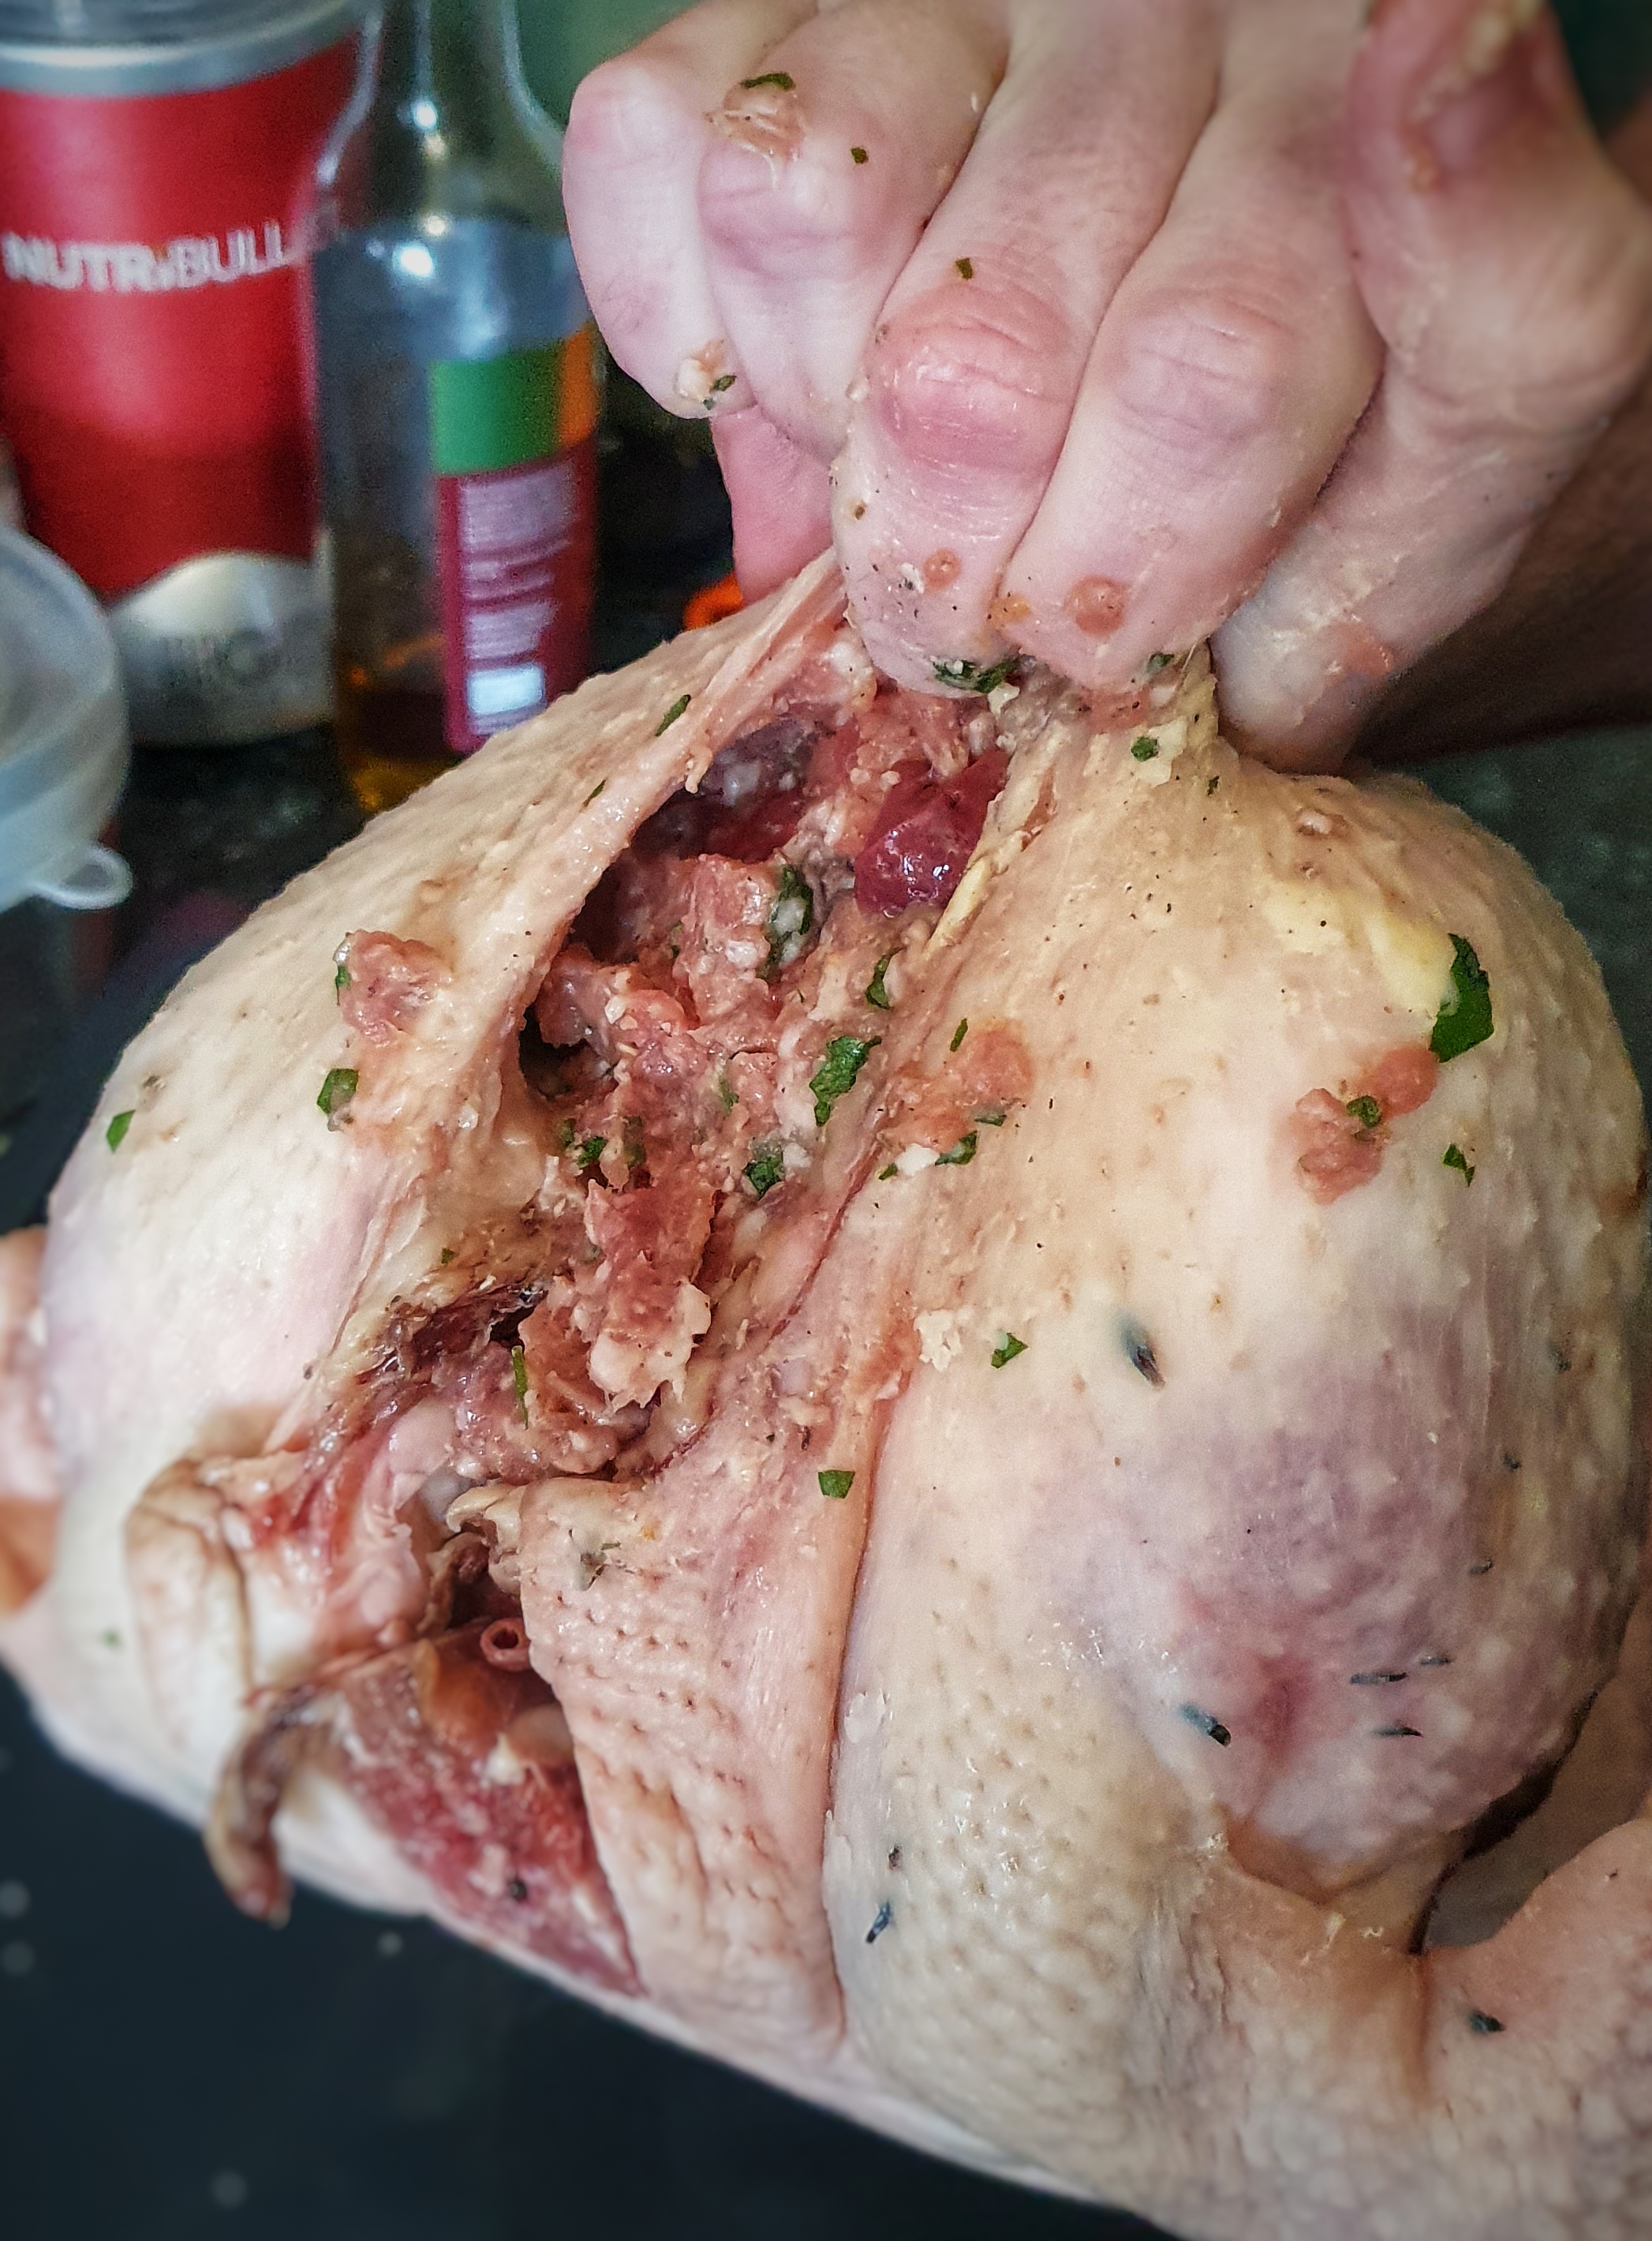
If you want to stuff the turkey, I suggest you stuff the neck only because an empty cavity means quicker cooking and a more succulent turkey.
Right, let’s get to it.
If you like the blogs and podcast I produce and would to start a £3 monthly subscription, or would like to treat me to virtual coffee or pint: follow this link for more information. Thank you.
To Roast a Turkey
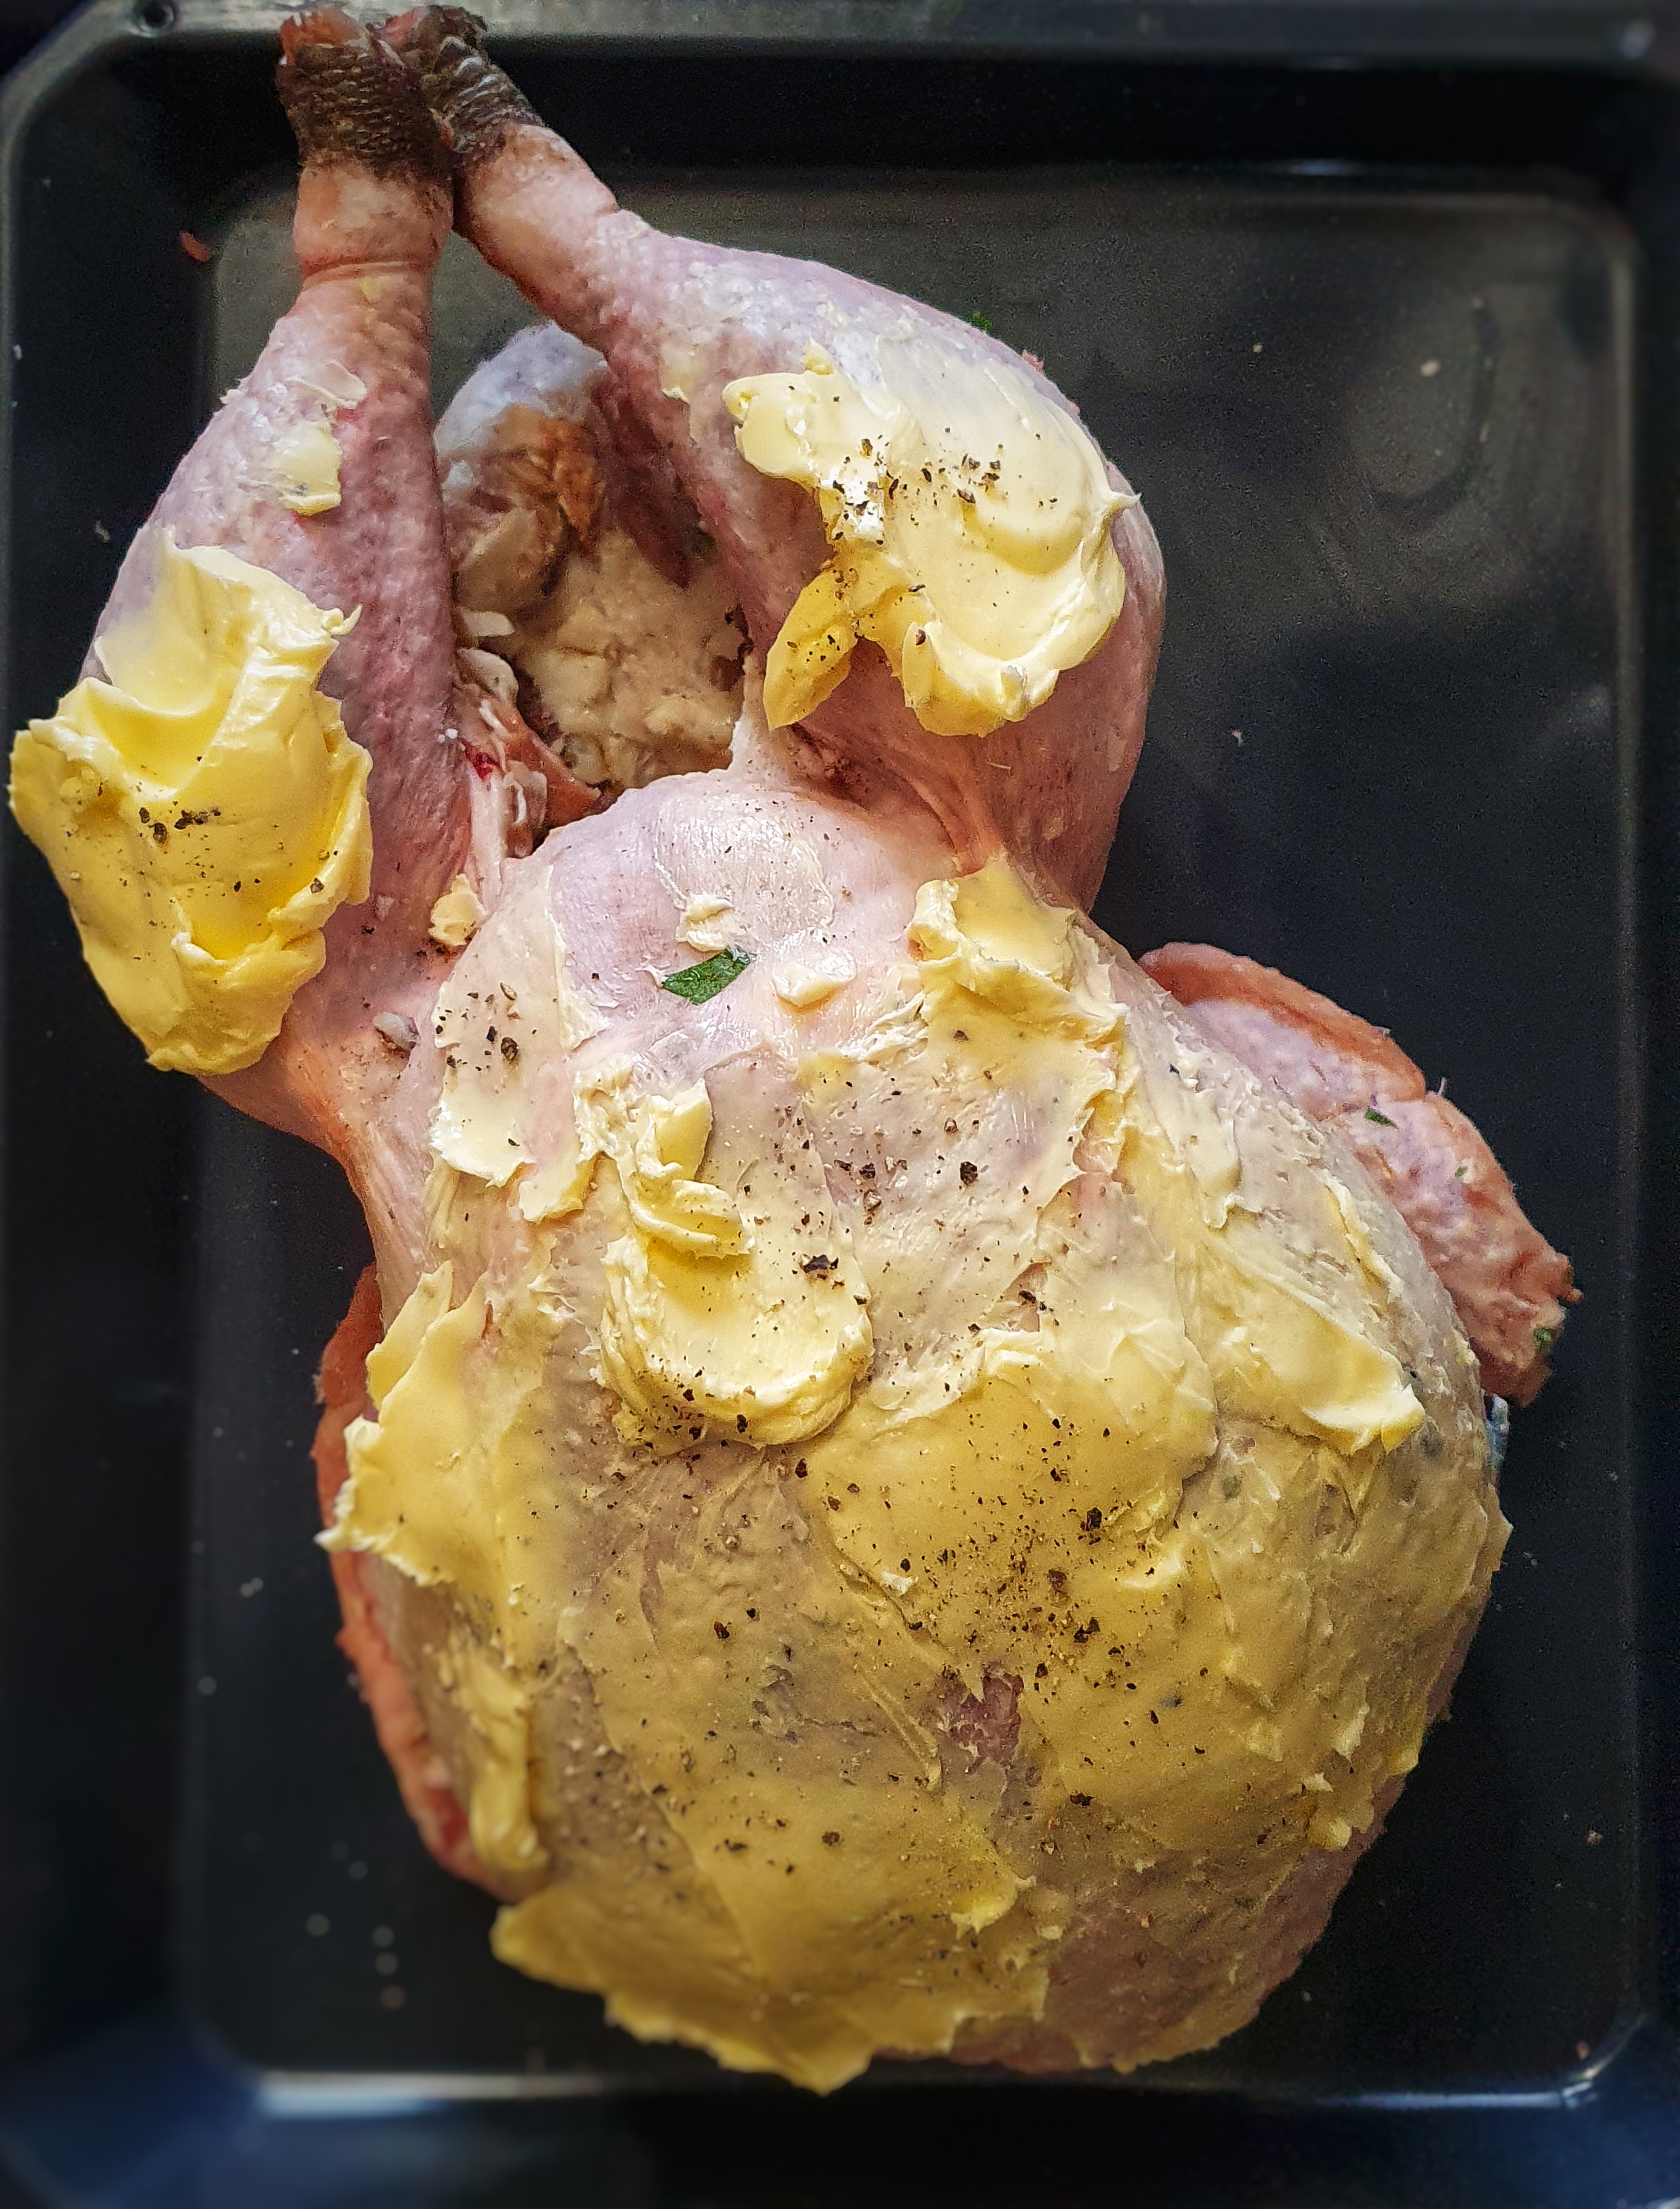
You don’t have to use bacon if you don’t want to, but butter is essential. It adds richness, helps the bird keep moist and gives the skin a lovely deep brown colour.
1 free-range turkey
250 g salted butter, softened
Freshly ground black pepper
Around 14 rashers of dry-cured streaky bacon (optional)
Stuffing (optional)
Halved or quartered carrots and parsnips (optional; see recipe)
As soon as you get up on Christmas morning, take the turkey out of the fridge, untruss it, and when it’s time to cook the turkey, preheat your oven to 190°C.
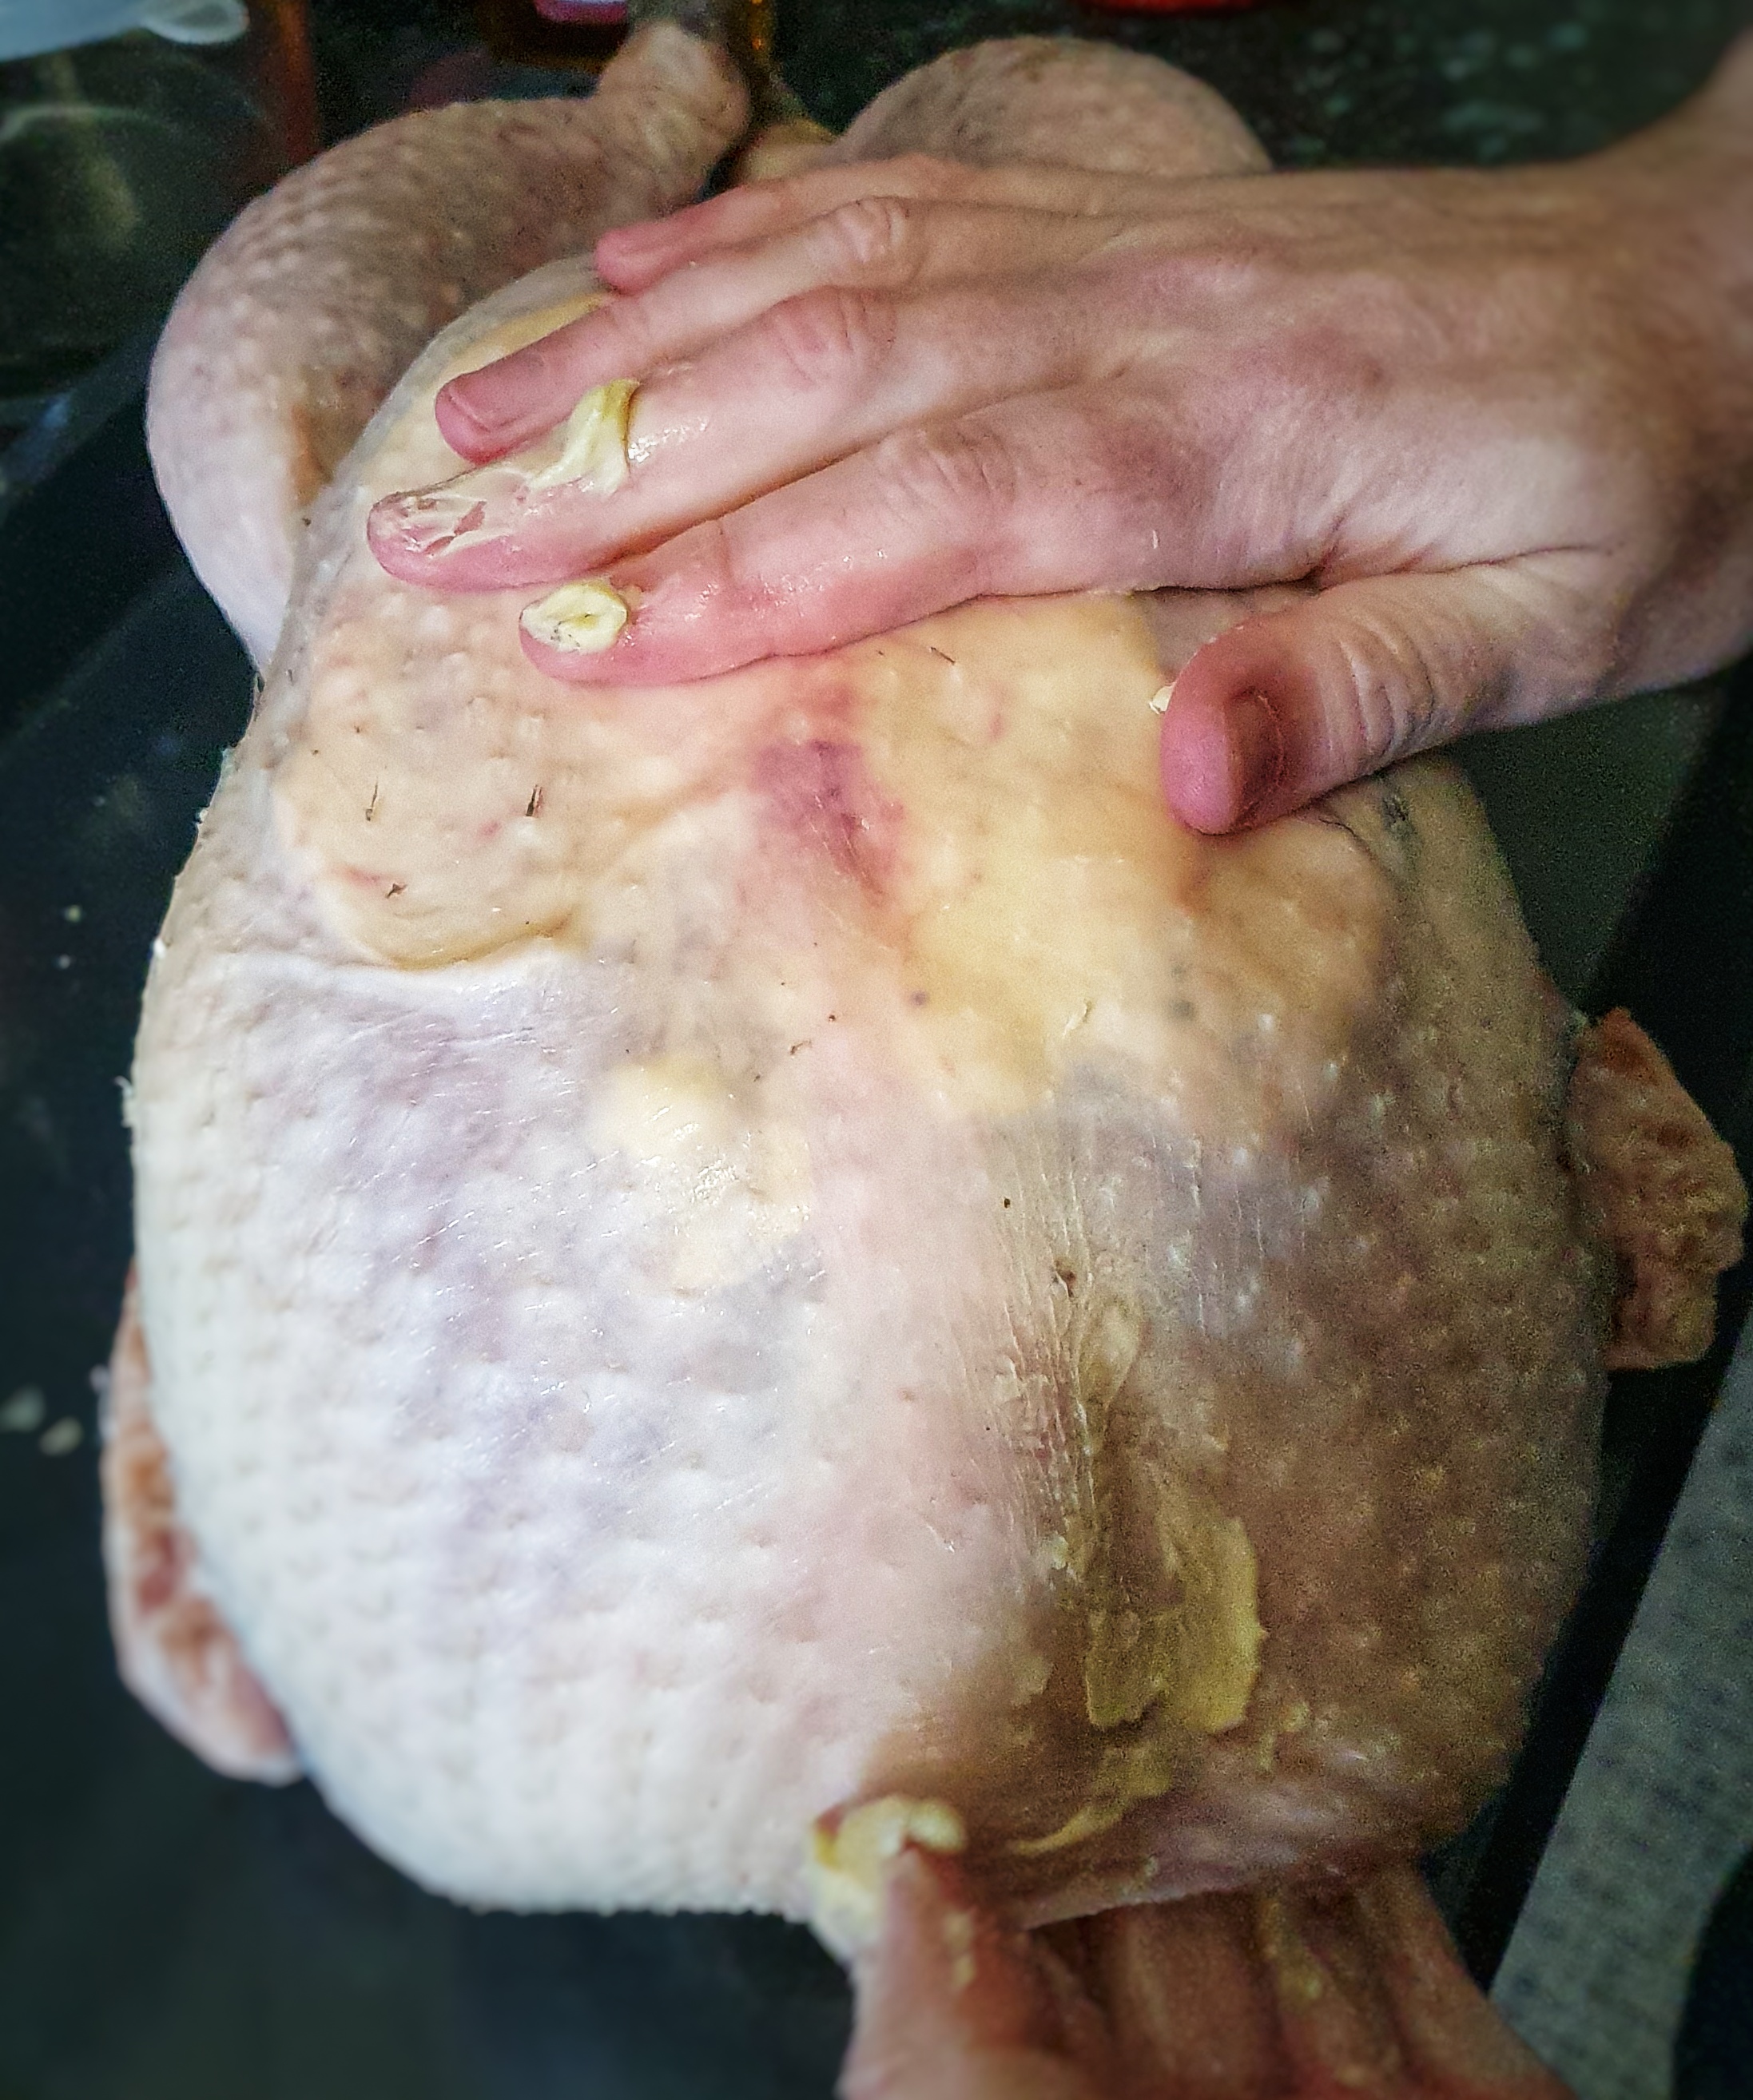
Sit the turkey on a board, legs facing towards you, then make a tear in the skin where the breast starts and lift the skin away from the breast. Don’t rush – you don’t want to tear the skin. Put half the butter between the skin and breast and massage it as far back as possible. If you are using stuffing, add this under the skin too and tuck the flap of neck skin underneath. If there’s not much neck skin, don’t worry, it can be secured with a skewer.

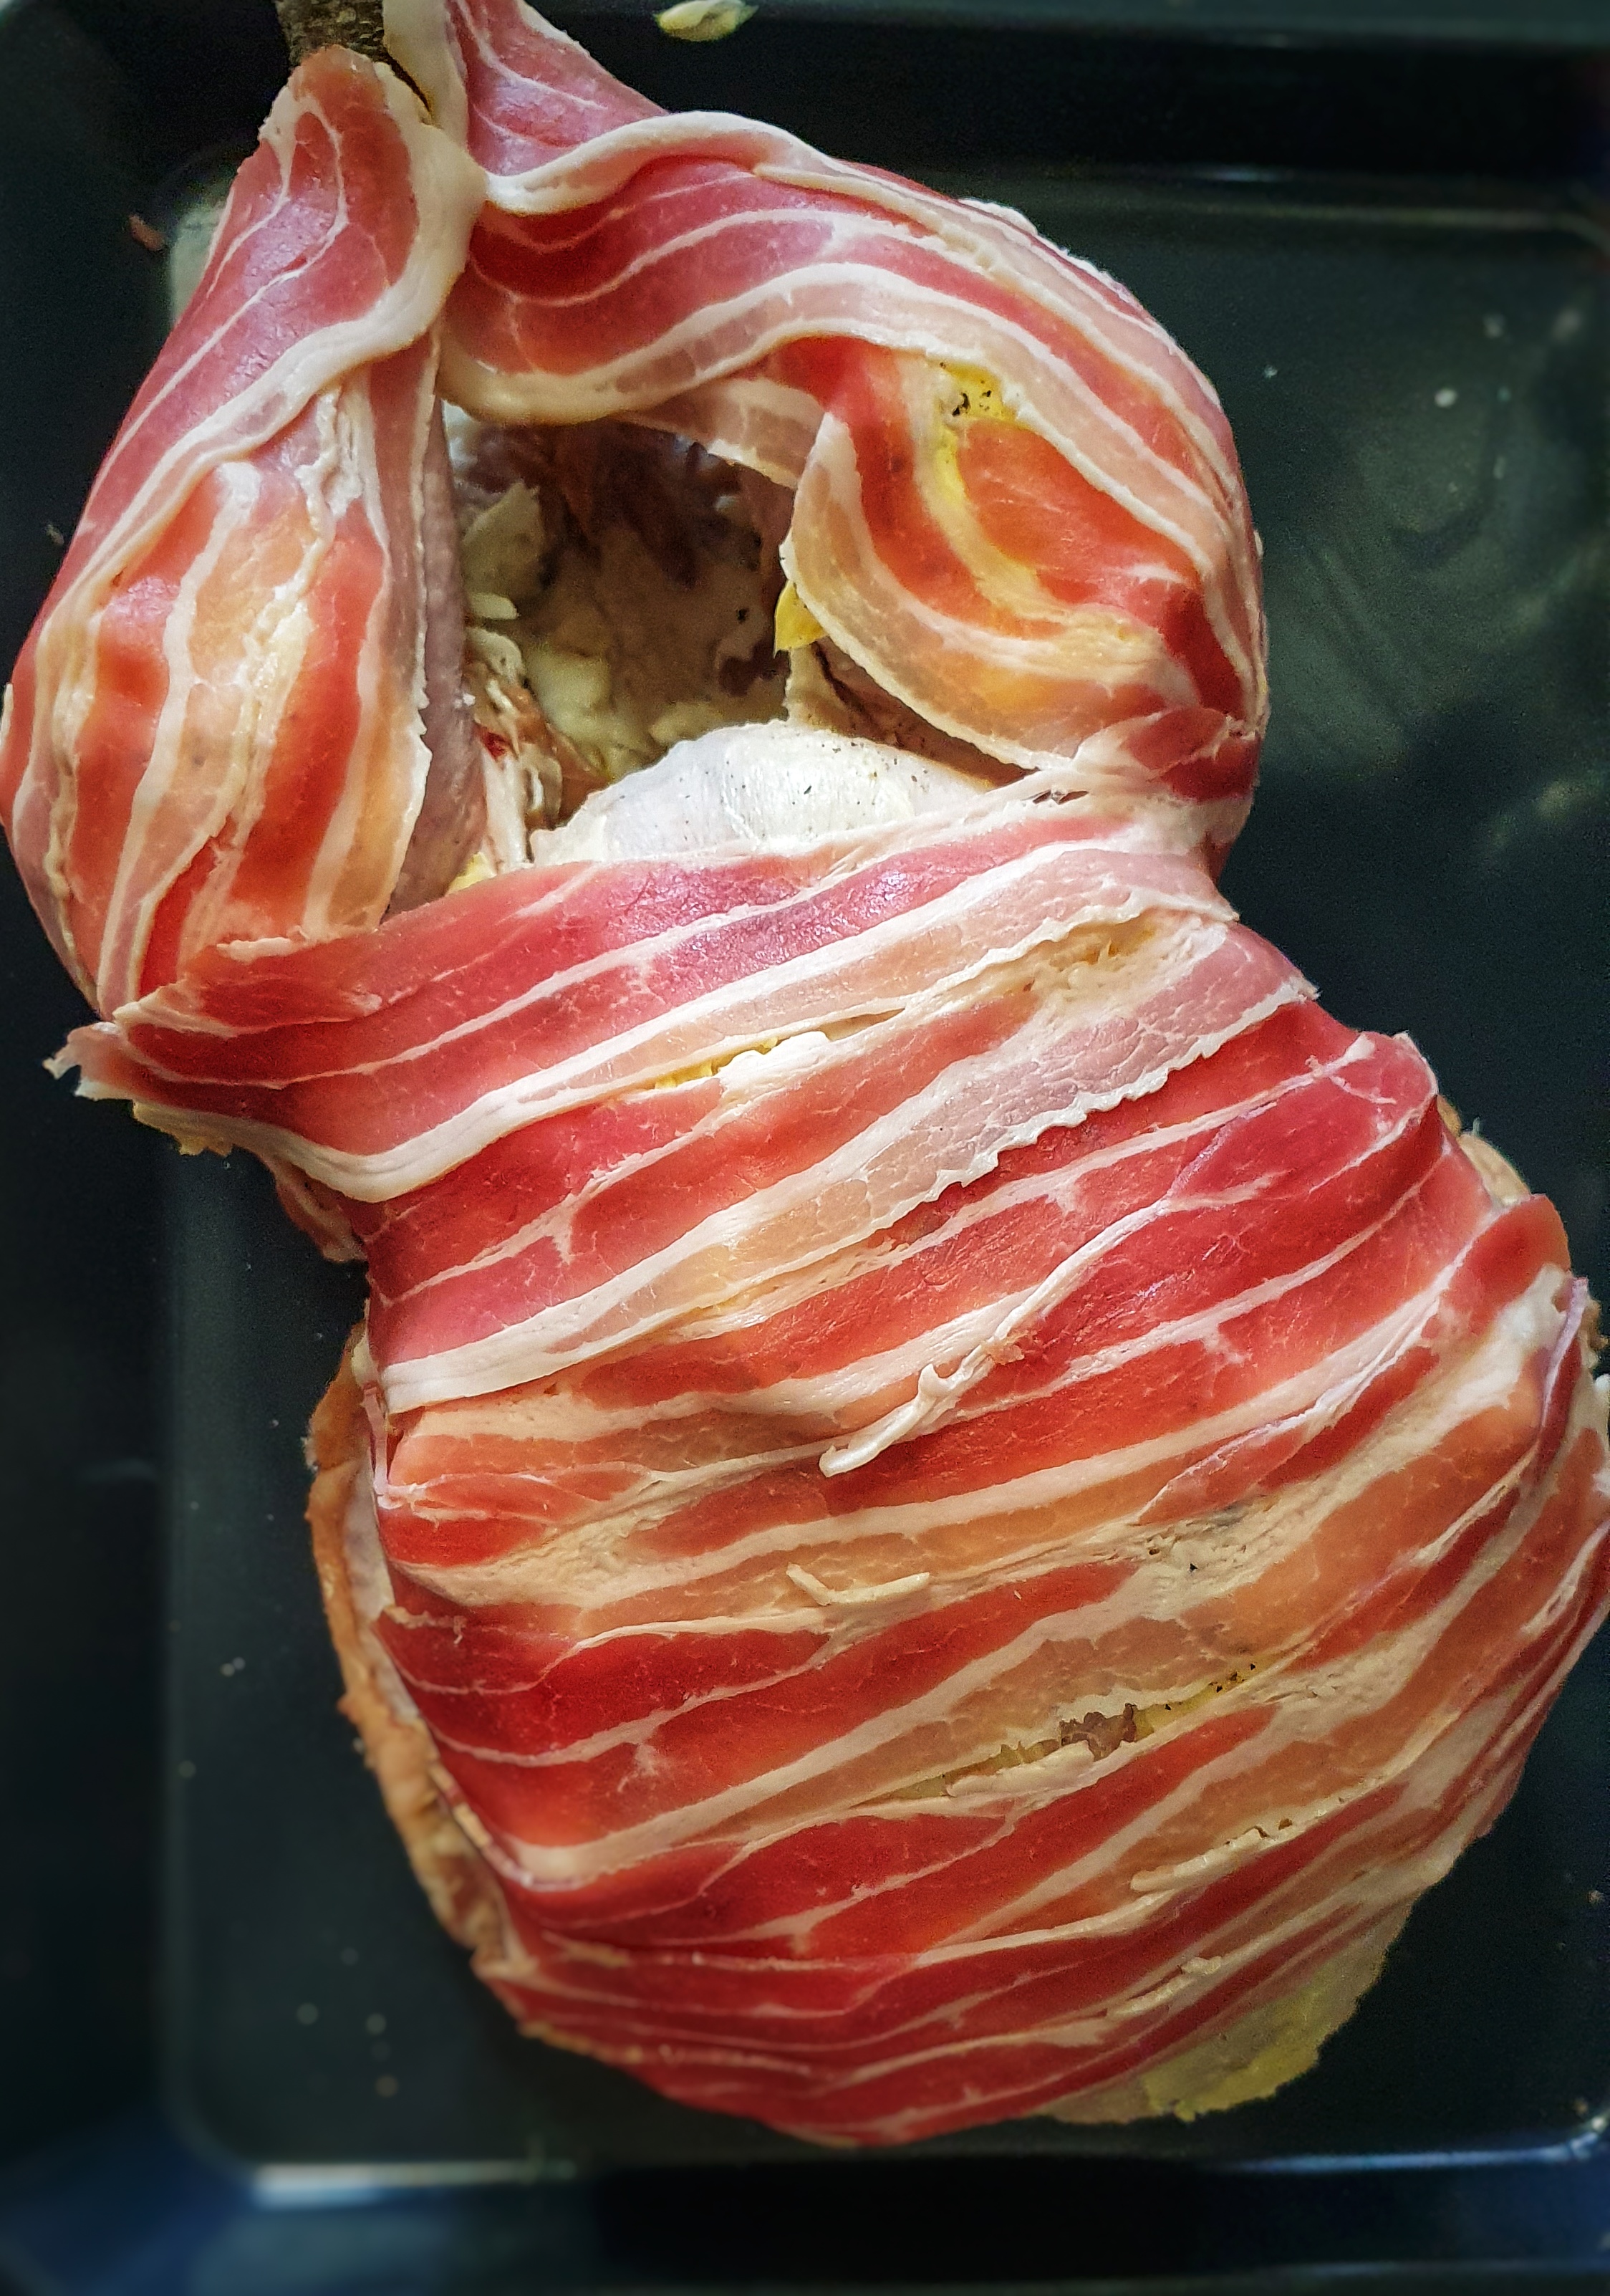
Smear the rest of the butter over the outside of the turkey and season with plenty of black pepper, then lay the bacon over, overlapping each rasher only slightly.
Weigh the prepared turkey and calculate the cooking time: 30 minutes per kilo. A 4.5 kilo turkey will take 2 ½ hours. If cooking for more than 3 hours, cover the legs with foil.
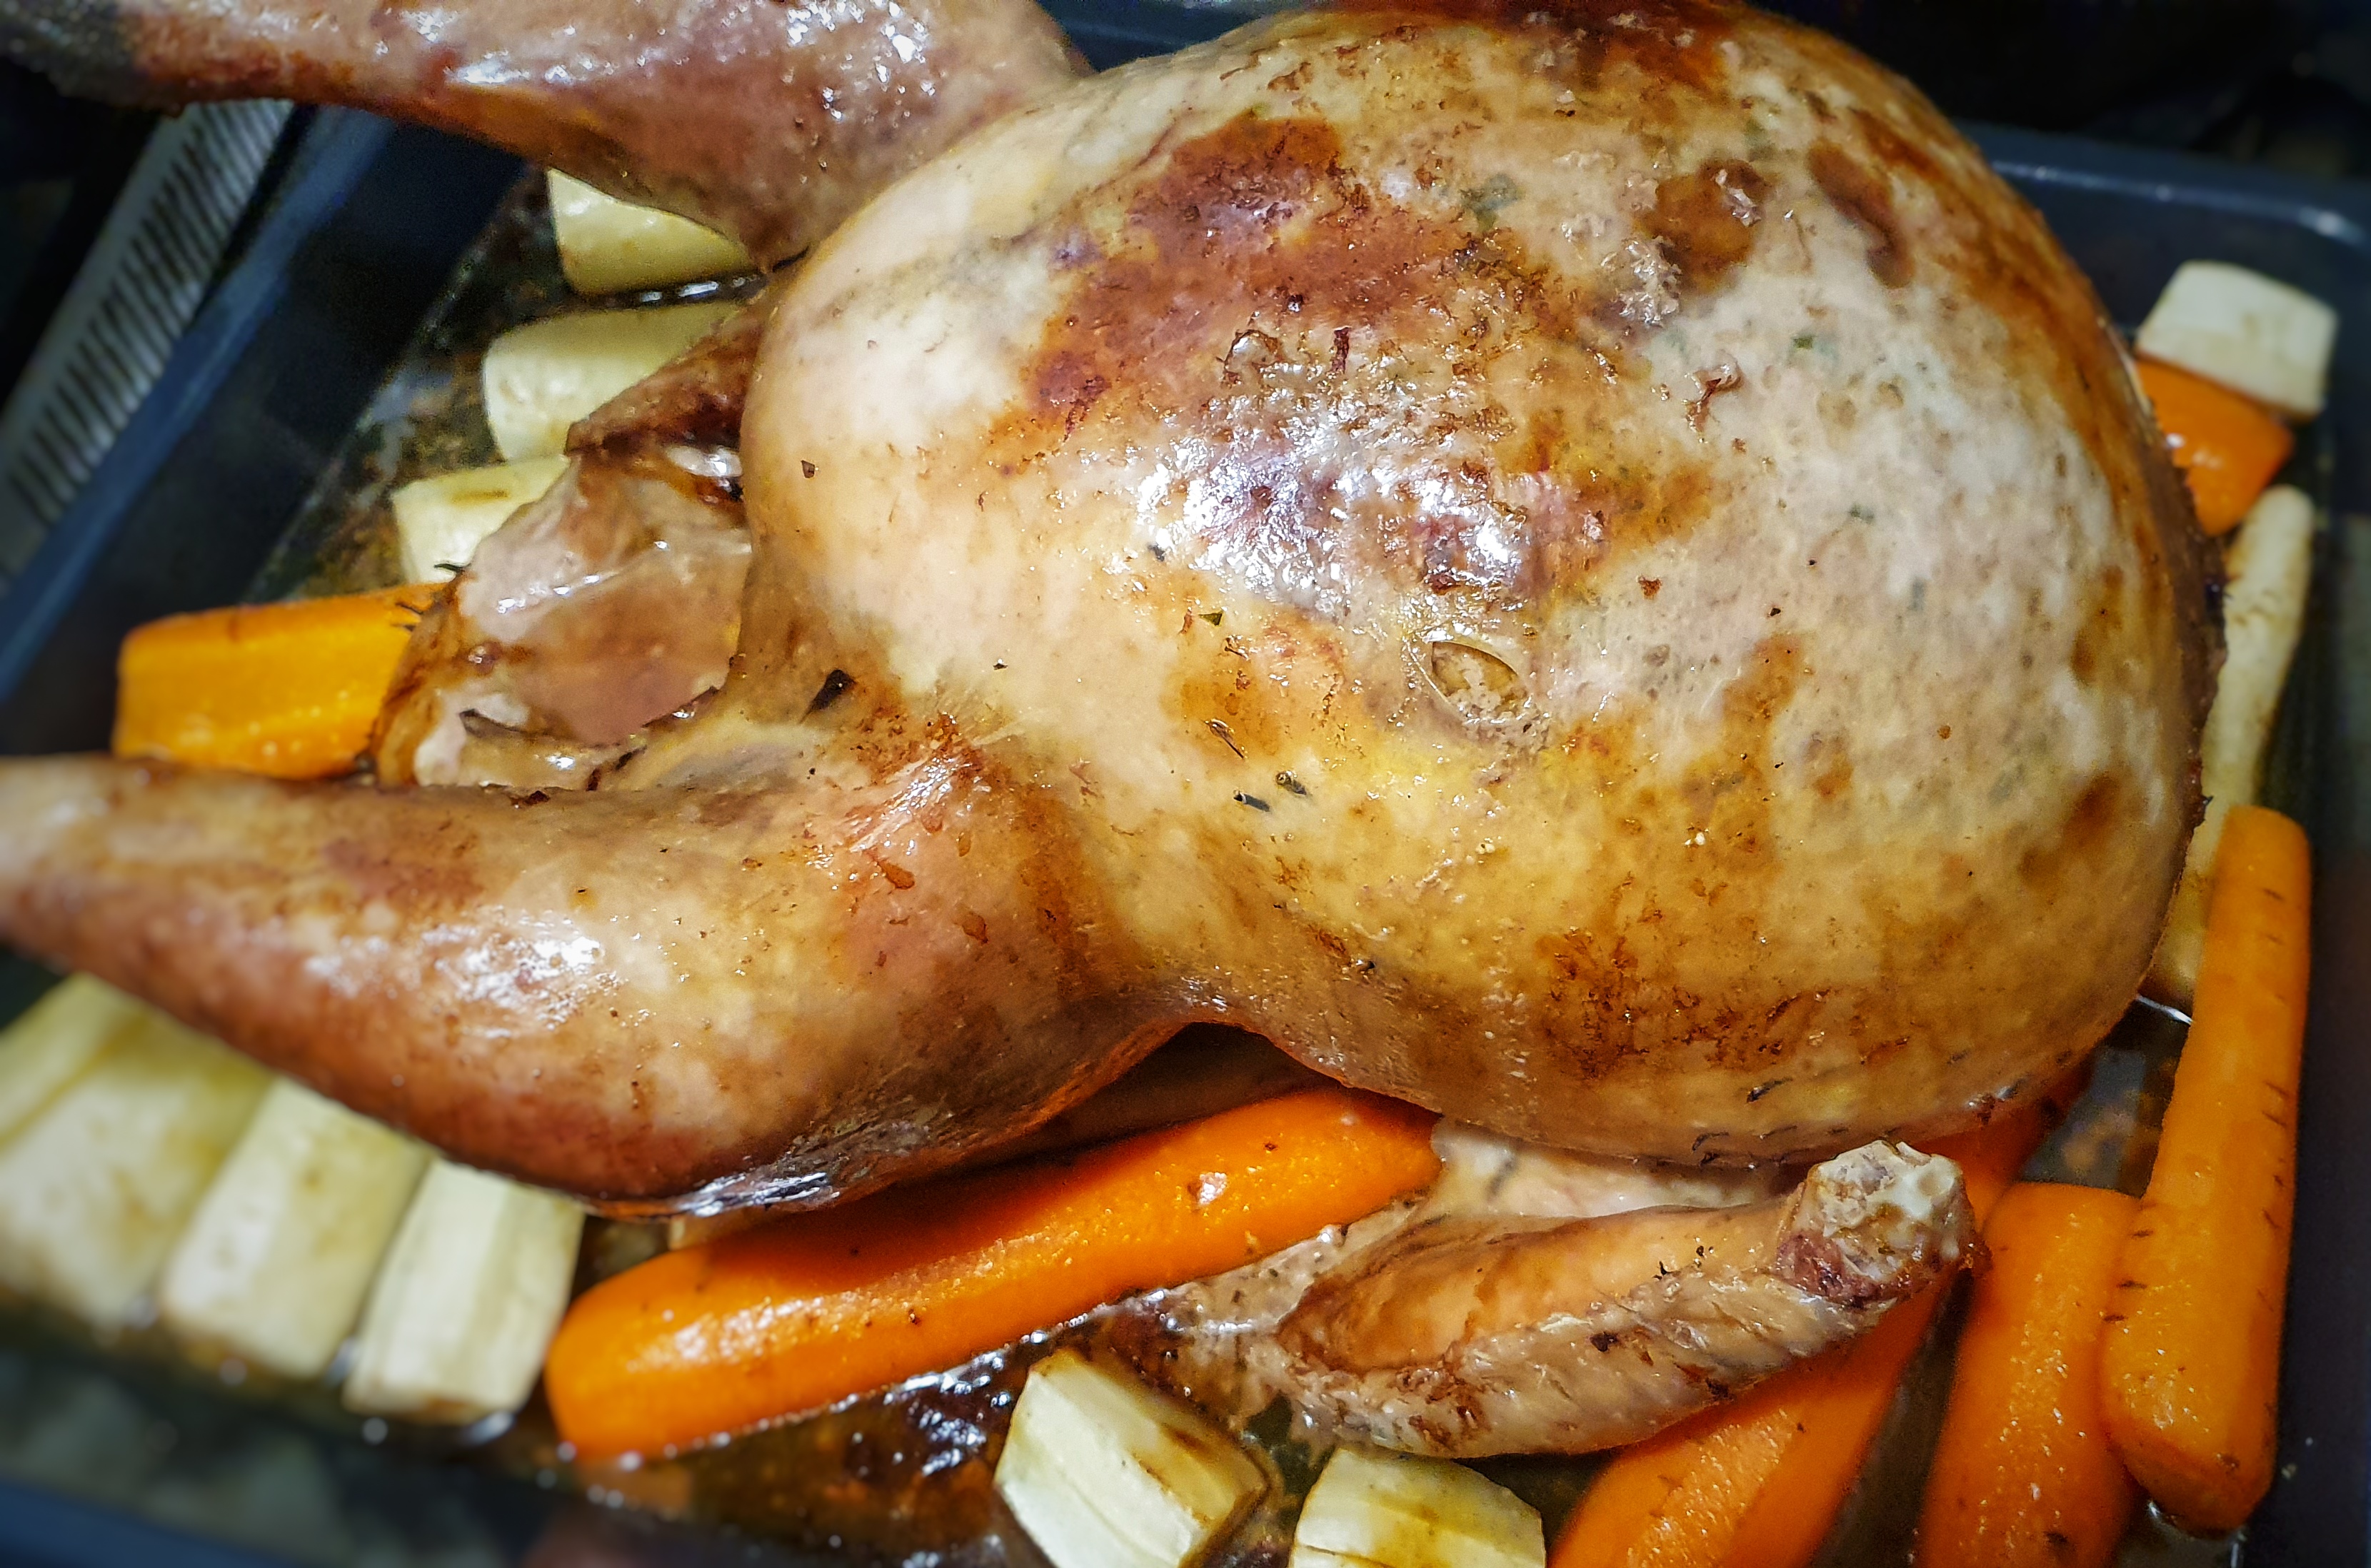
Sit the turkey in its roasting tin, place it in the oven, and leave it for a good 45 minutes before doing anything at all. At the 45-minute mark baste the turkey with any juices; make sure to tip any juices in the cavity into the roasting tin.
Baste every 20 minutes or so. When the bacon is very crispy, remove it and set aside.
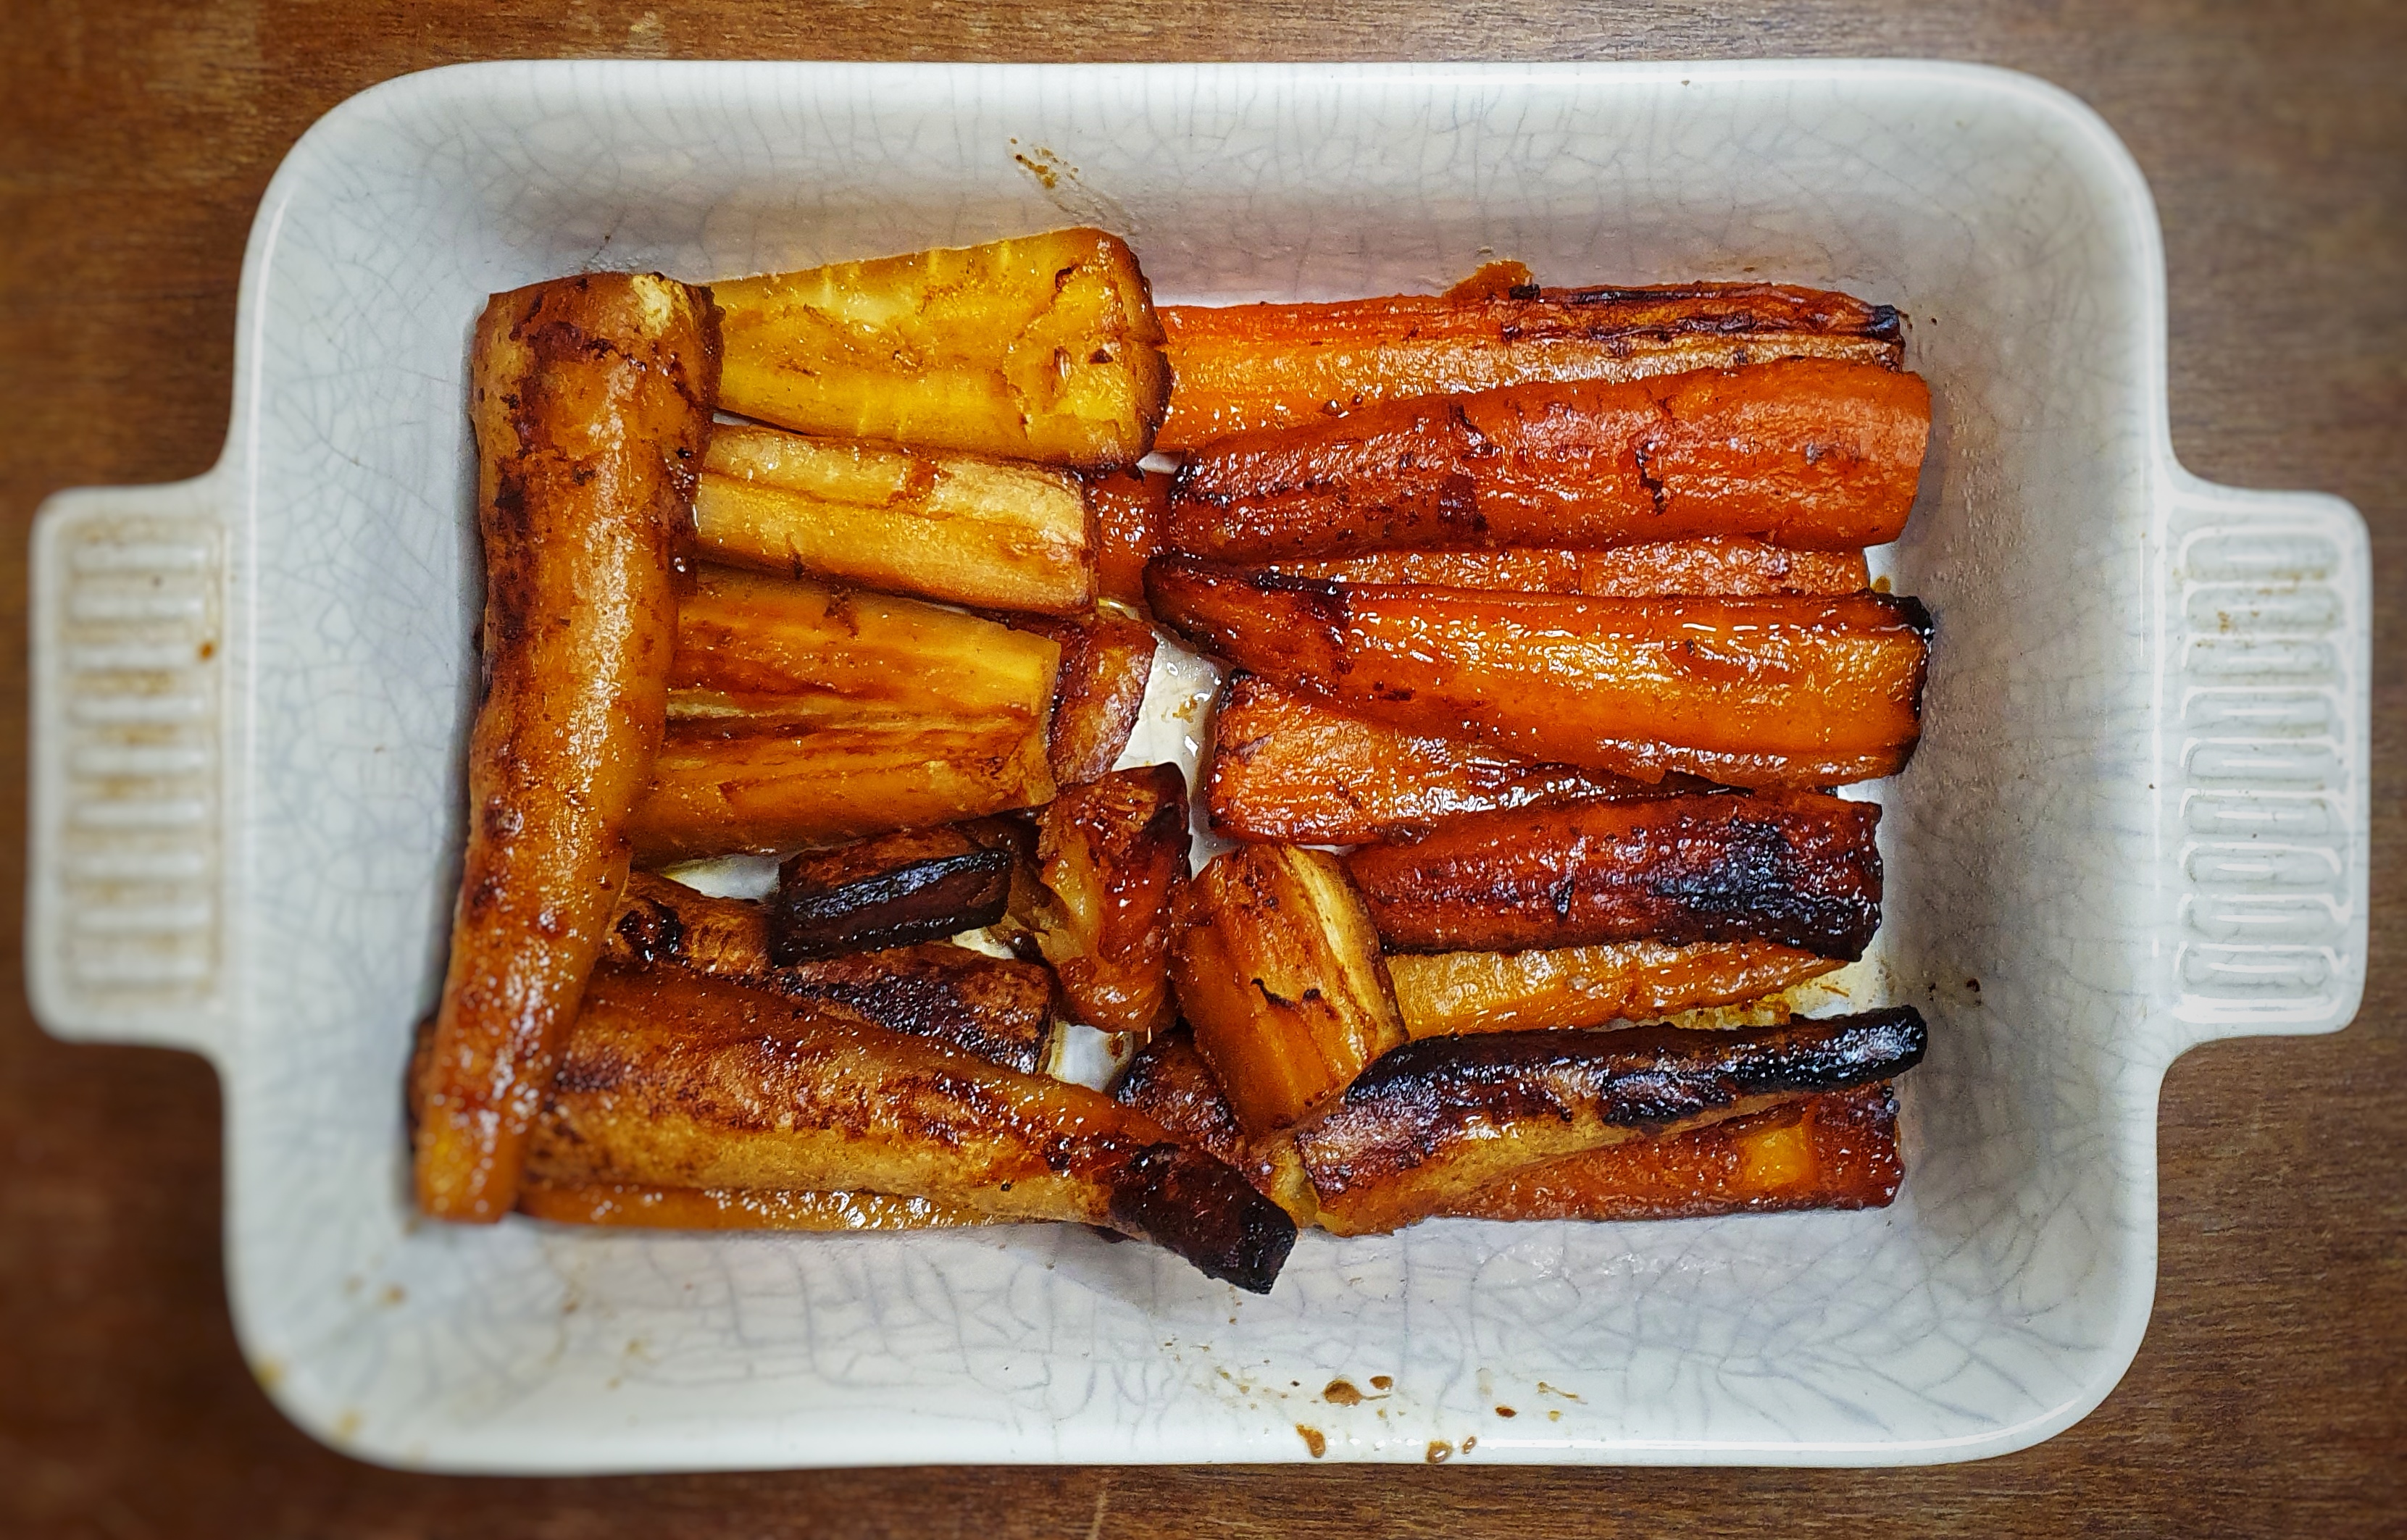
If you like you can add some carrots and parsnips, peeled and halved or quartered to braise in the juices. It’s best to do this when there are 90 minutes to go – don’t forget to turn the veg over each time you braise.
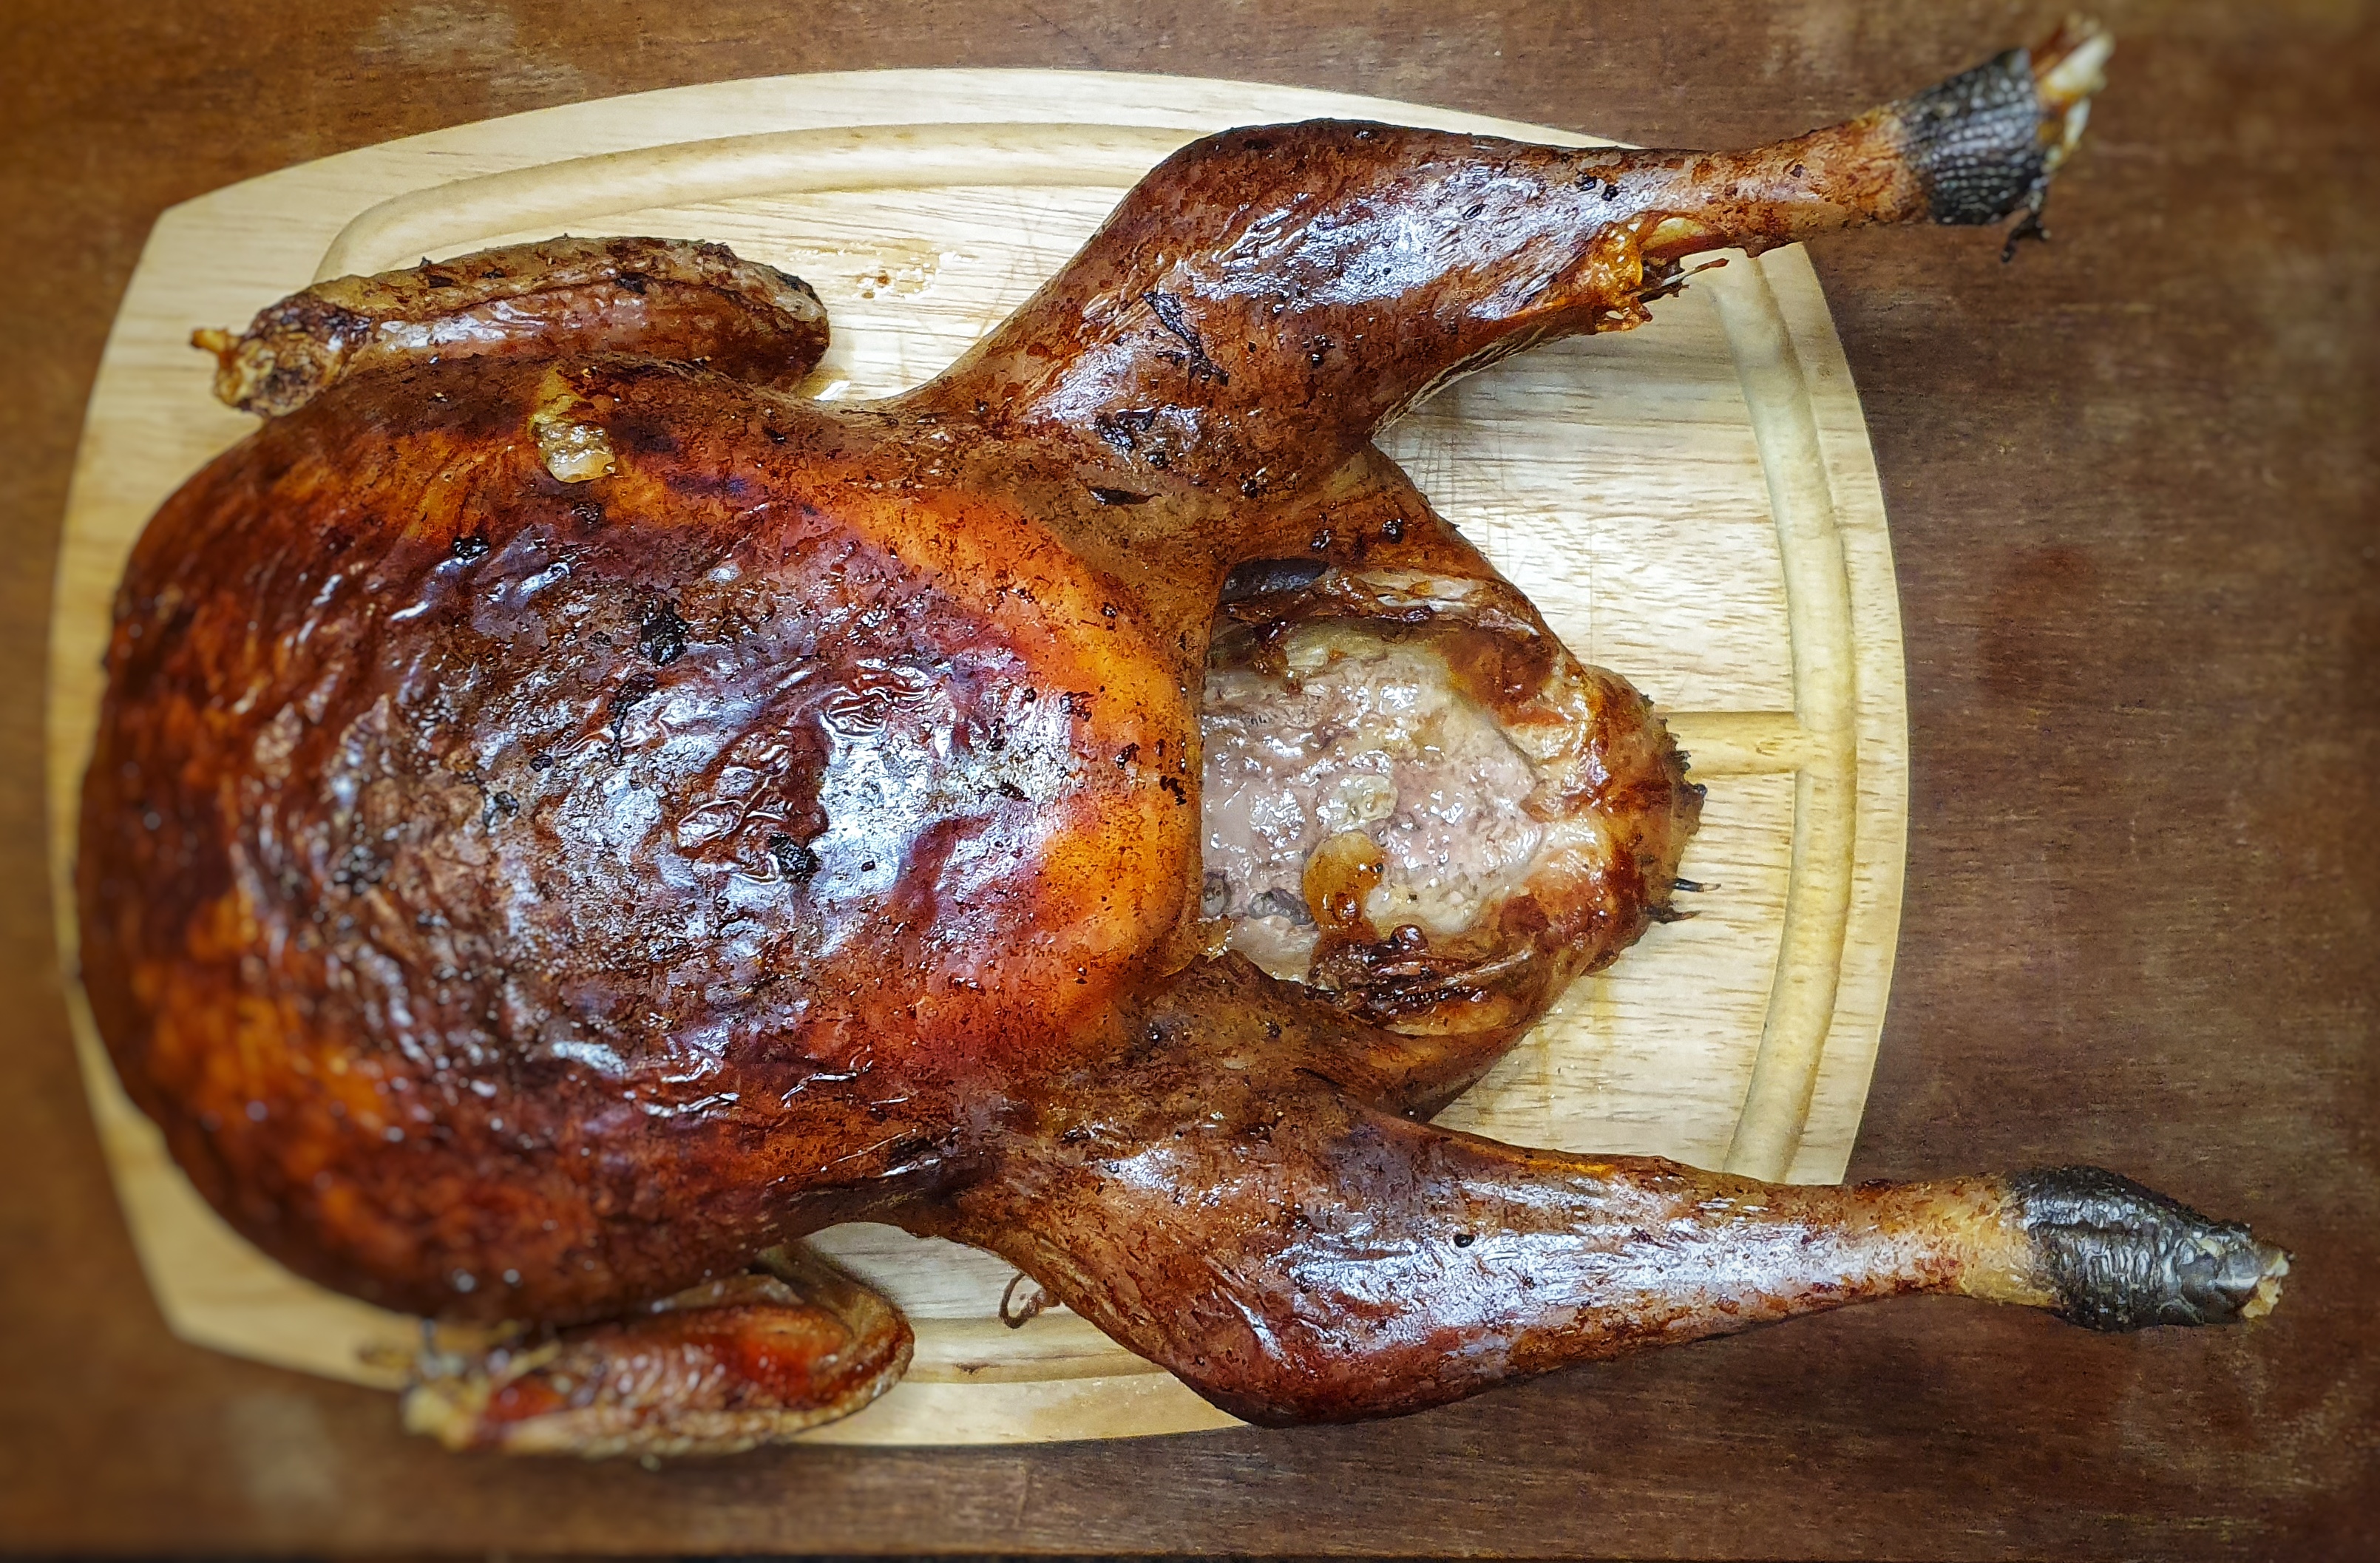
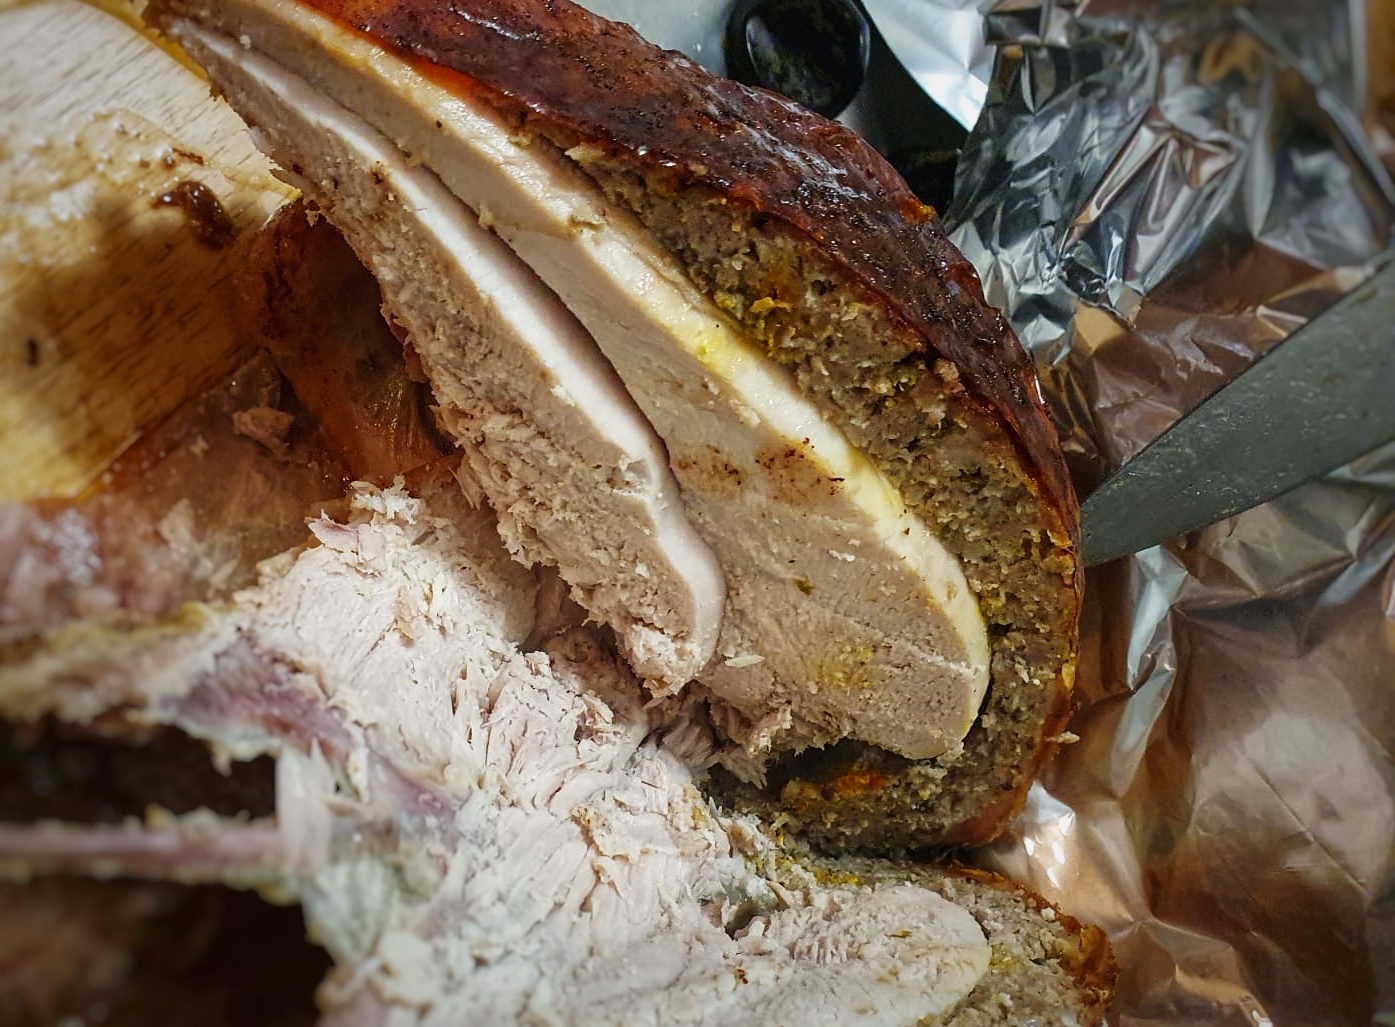
When the time is up, you can test with a digital probe: 68°C is the temperature you are looking for. Take the turkey, place it on a carving board and cover with foil. It will happily rest for one to two hours.
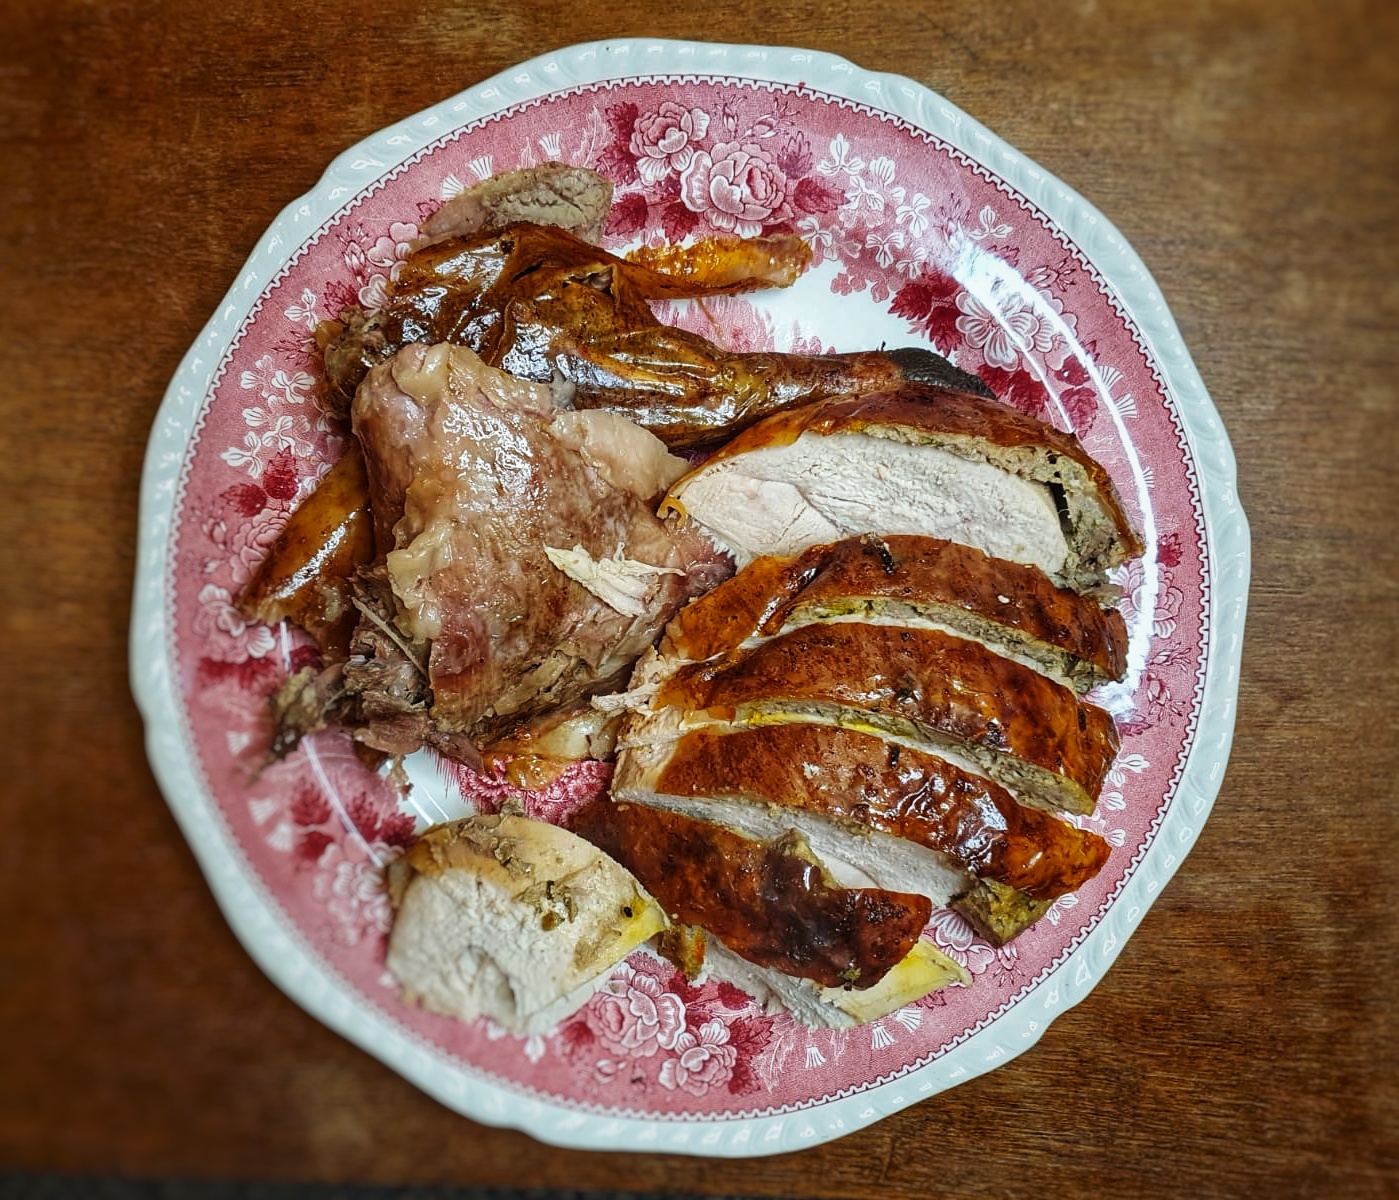
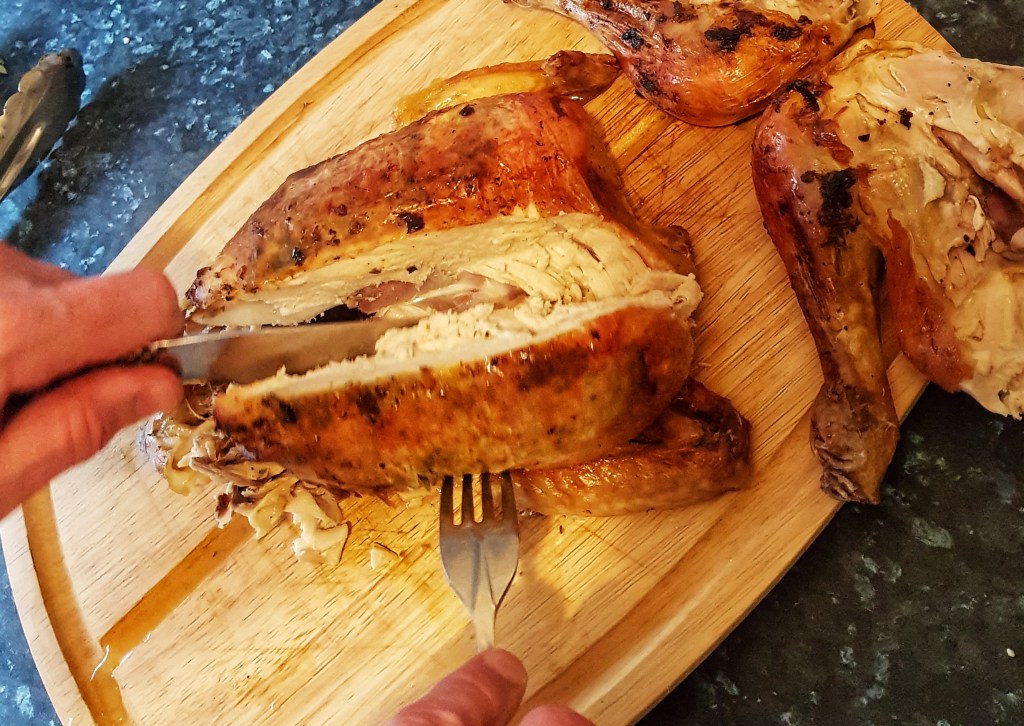
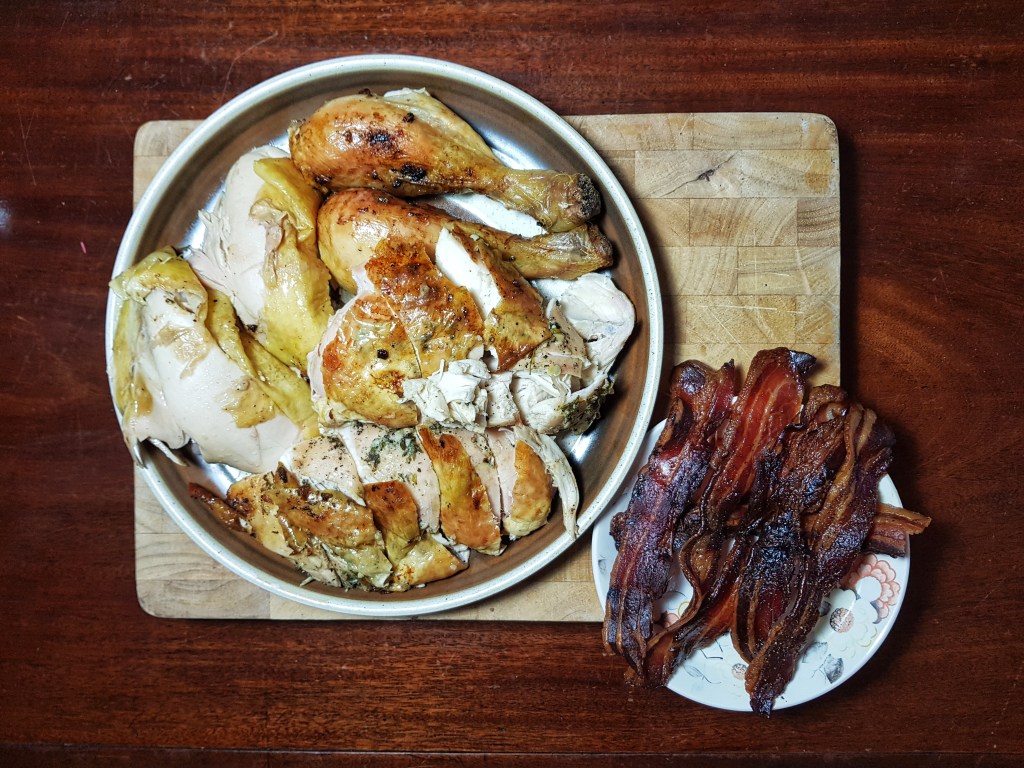
When it’s time to carve, remove the legs and separate them into thighs and drumsticks. For the breast, I find the easiest way is to remove one side completely and then slice it thickly. These can be arranged on a warm serving plate, surrounded by the crisp bacon. Only cut into the second breast if the first one goes (it keeps better that way for leftover feasts).
To Make Giblet Gravy
Don’t waste or fear the giblets! The giblets are the heart, neck, gizzard and liver.[1] Use your vegetable trimmings from the veg to make the stock: though avoid brassicas like sprouts.
For the stock:
Heart, gizzard and neck
A knob of butter
Leek greens, carrot peelings, and some celery trimmings, or 2 outer stems of celery
2 cloves of garlic, lightly crushed
Herbs: bay leaves, parsley stalks, rosemary or thyme sprig tied with string
175 ml white wine
Cold water
For the gravy
Giblet stock
Pan of turkey juices
1 tbs cornflour
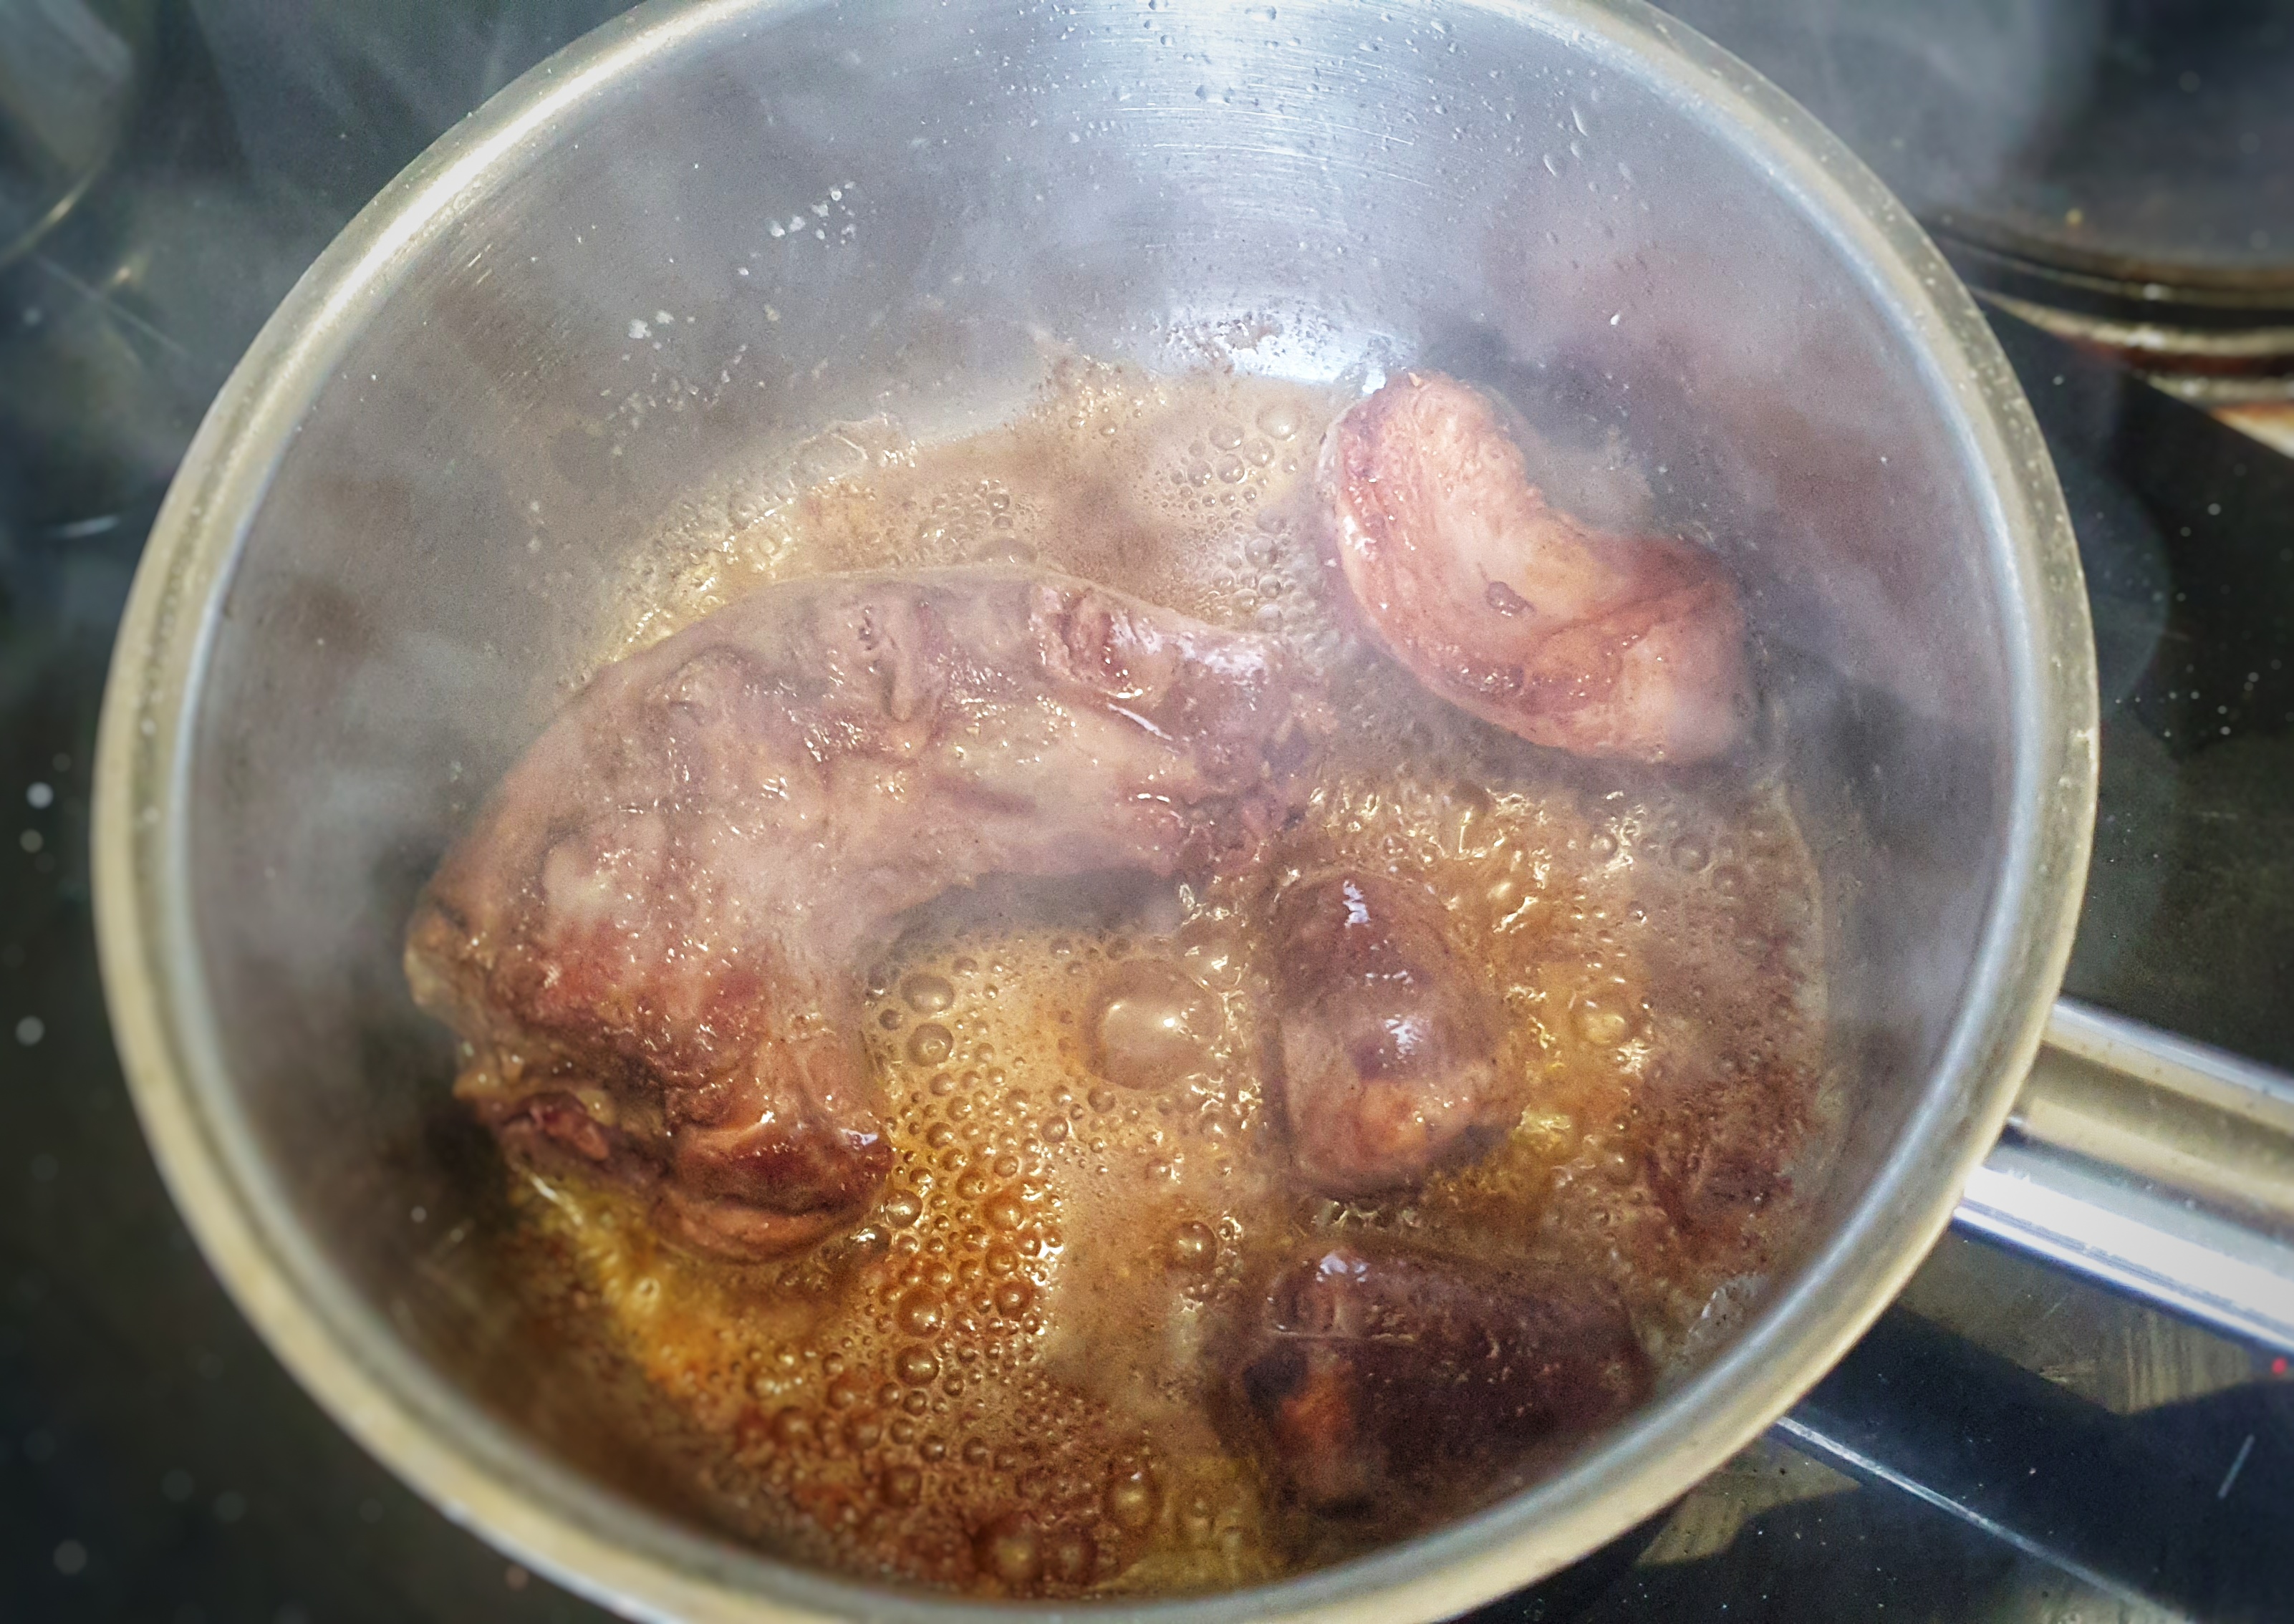
To make the stock, first cut up the giblets into quarters.
In a saucepan, heat the butter until foaming, add the giblets and fry over a medium-high heat until brown – about 5 minutes. Now add the vegetable trimmings, garlic and herbs and wilt them. Cook until they have picked up a tinge of brown, then add the wine. Stir and scrape any nice burnt bits from the bottom. Add water to just cover the contents, put a lid on and bring to a simmer and cook for around 3 hours, then strain through a sieve into a clean pan (or into a tub if you’re making it in advance).

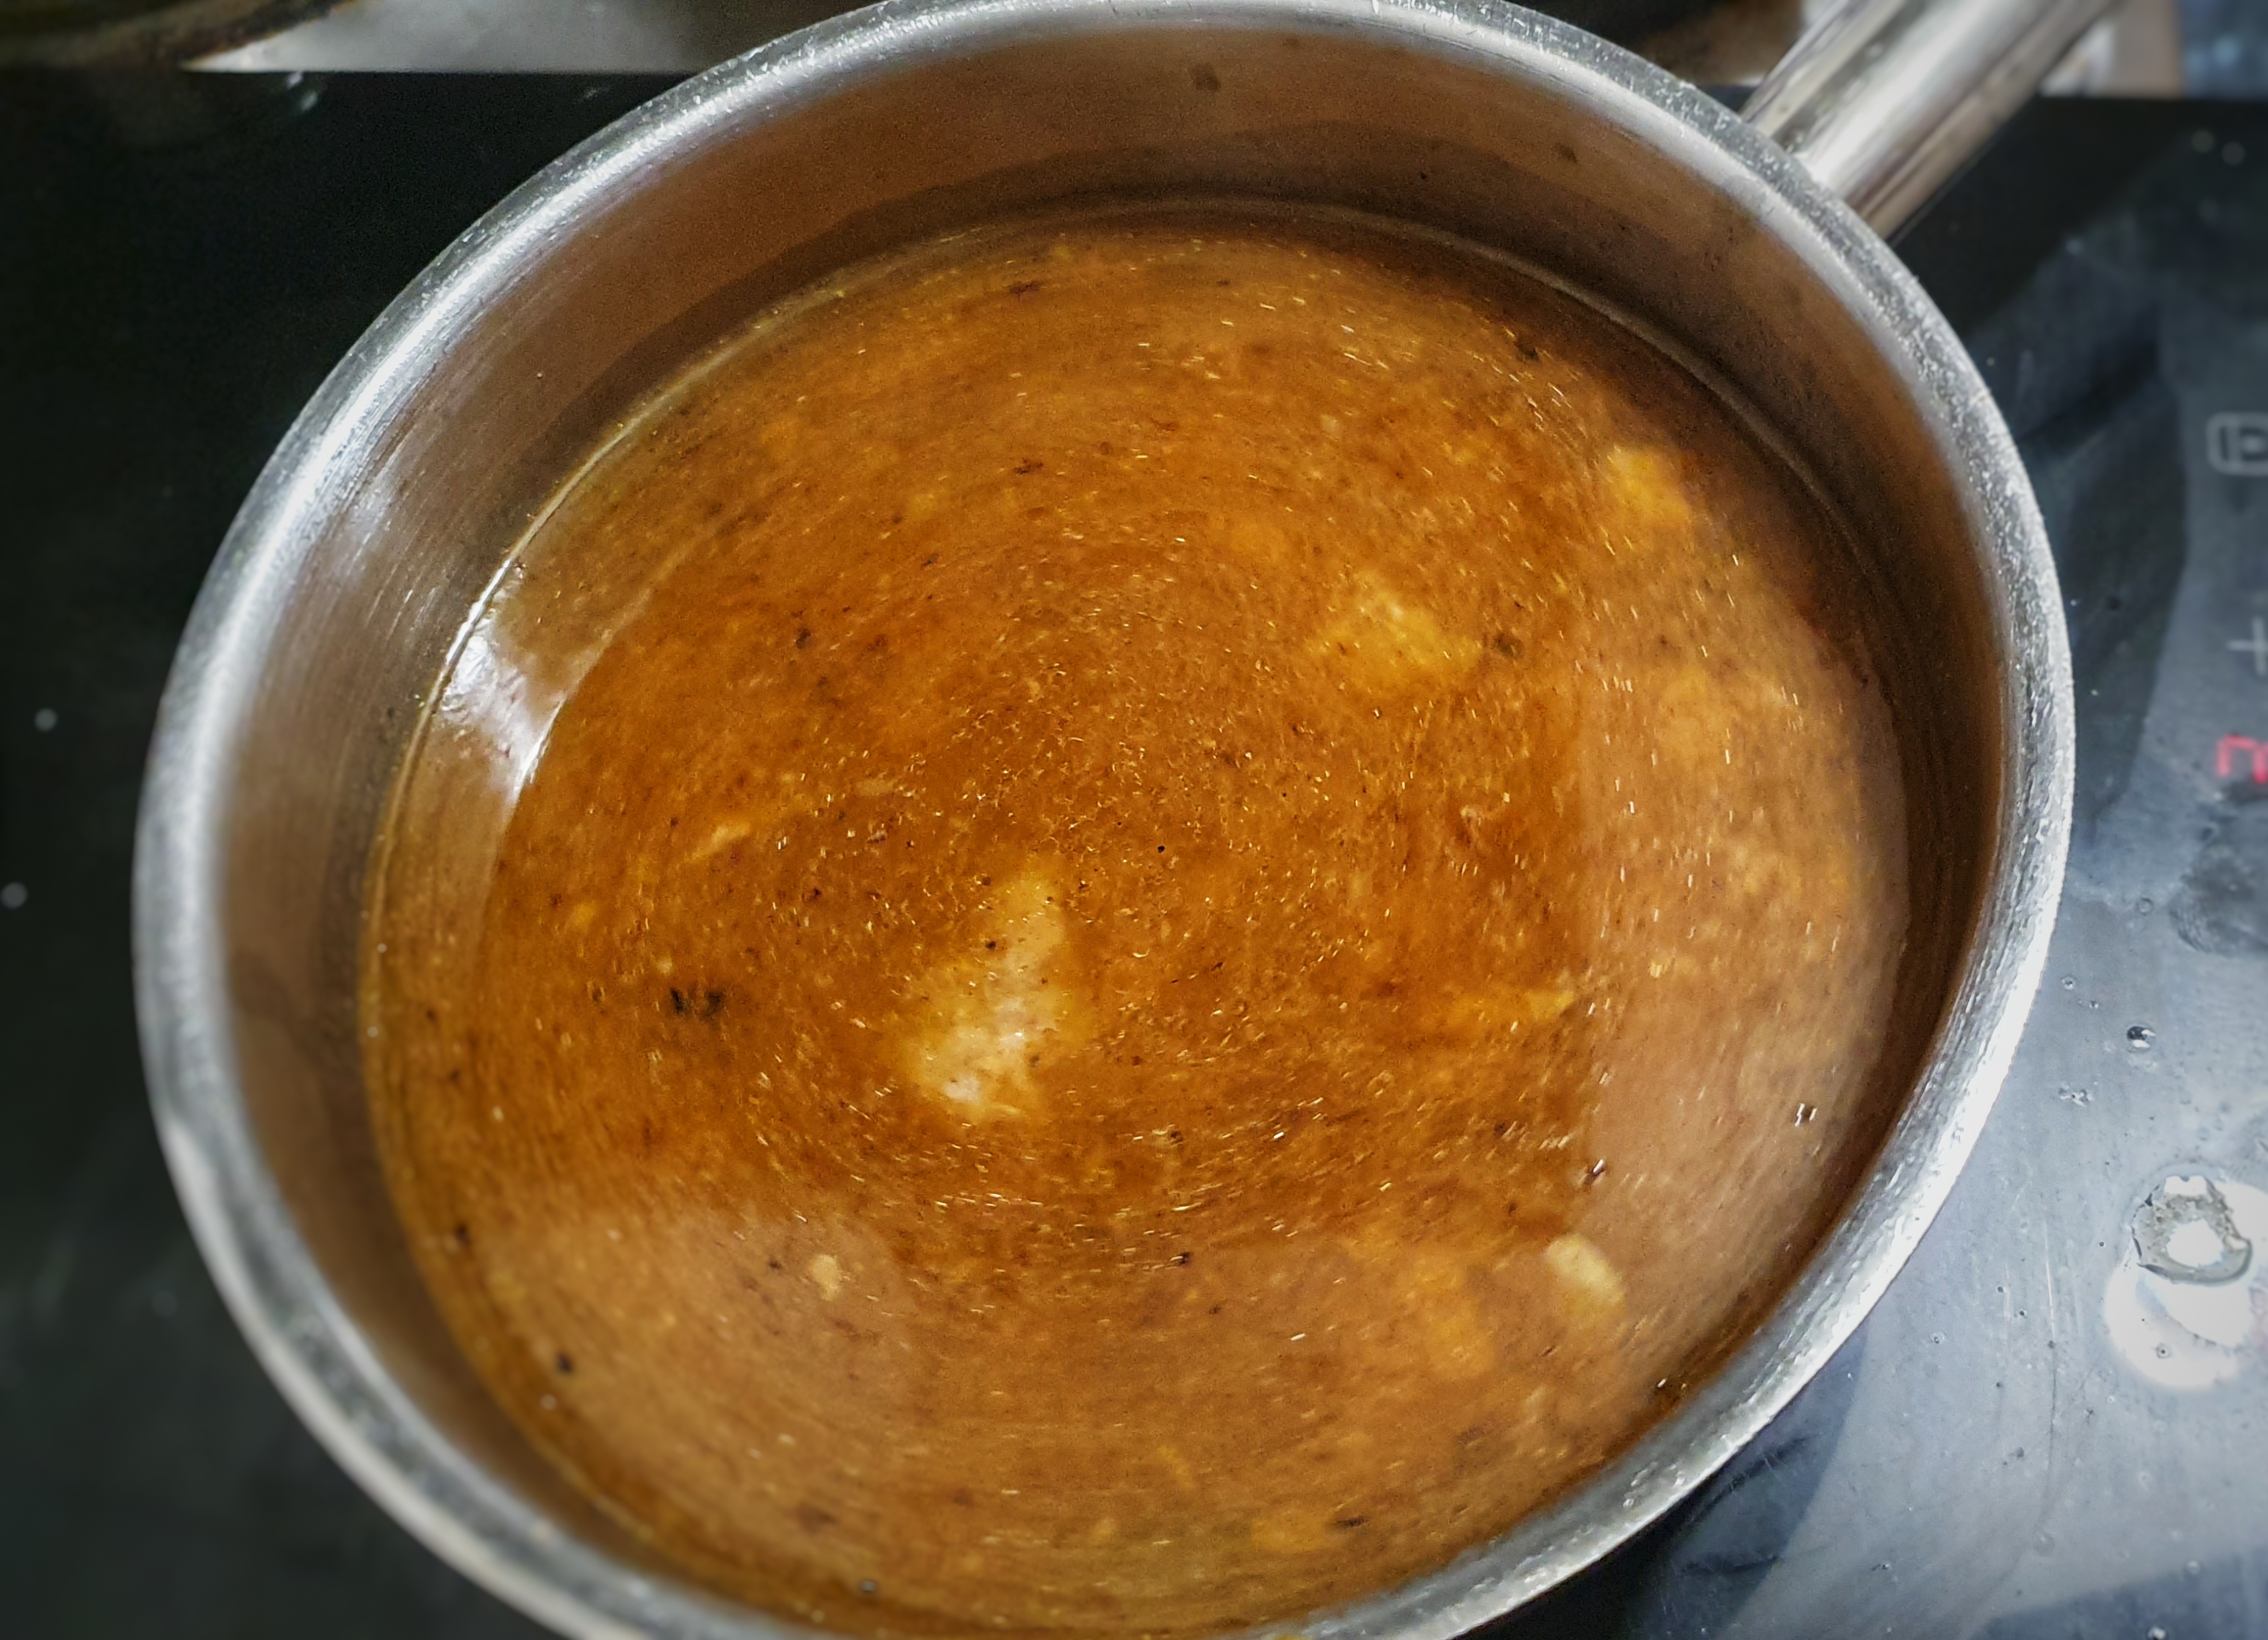
When it’s time to make the gravy, get the stock nice and hot. When the turkey is cooked and is resting on its board, pour the hot stock into the roasting tin and scrape off all the nice treacly burnt bits, then tip the whole thing back into your saucepan. Skim away most of the buttery juices.[2] Bring to a simmer and then add the cornflour which has been first slaked in a little cold water. Stir and simmer unlidded for 10 minutes.
Check the seasoning, though usually I find that the bacon and the salted butter from roasting the turkey have done it for me. Pour the gravy into a jug. You can pass it through a sieve, but I never do. Easy!
[1] Use the liver for the stuffing, or fry it and eat it on toast. You could devil it – recipe for devilling livers can be found here.
[2] But don’t throw the fat away, it can be used for frying vegetables for sauces or soup.
To Roast a Haunch of Venison
Christmas isn’t too far away and the chances are you are probably already discussing what meats you will be roasting on the big day. Well, I am going to stick my neck out and suggest venison. Game used to be a very important part of the Christmas feasting, especially in the countryside, making an excellent centrepiece to the day’s feasting.
Regular readers will know that I love cooking with game, but it has been a while since I cooked some up for the blog. I got the opportunity to cook a nice haunch of venison because I was sent some from Farm Wilder to try out, and my gosh it was good. Apart from the meat being tender and delicious, the deer that make their venison are culled as an important part of land management in Southwest England. Without any natural predators, their numbers are increasing and pretty as they may be, they are very damaging to woodland habitats – in short, they are a menace![1]
For more information about Farm Wilder and their venison, click this link.
The important thing when buying a roasting joint is to buy as large a one as possible; large joints always roast juicier and more evenly. Bear in mind that any excess venison can be chopped and made into a hunter’s pie – essentially a shepherd’s pie but with lamb swapped for venison. I’ve suggested a 2 kg haunch but don’t worry if yours is a different weight, I have included a formula for calculating the roasting time in the method. The haunch is the equivalent of beef topside, but I think it is a much superior joint in both tenderness and flavour.
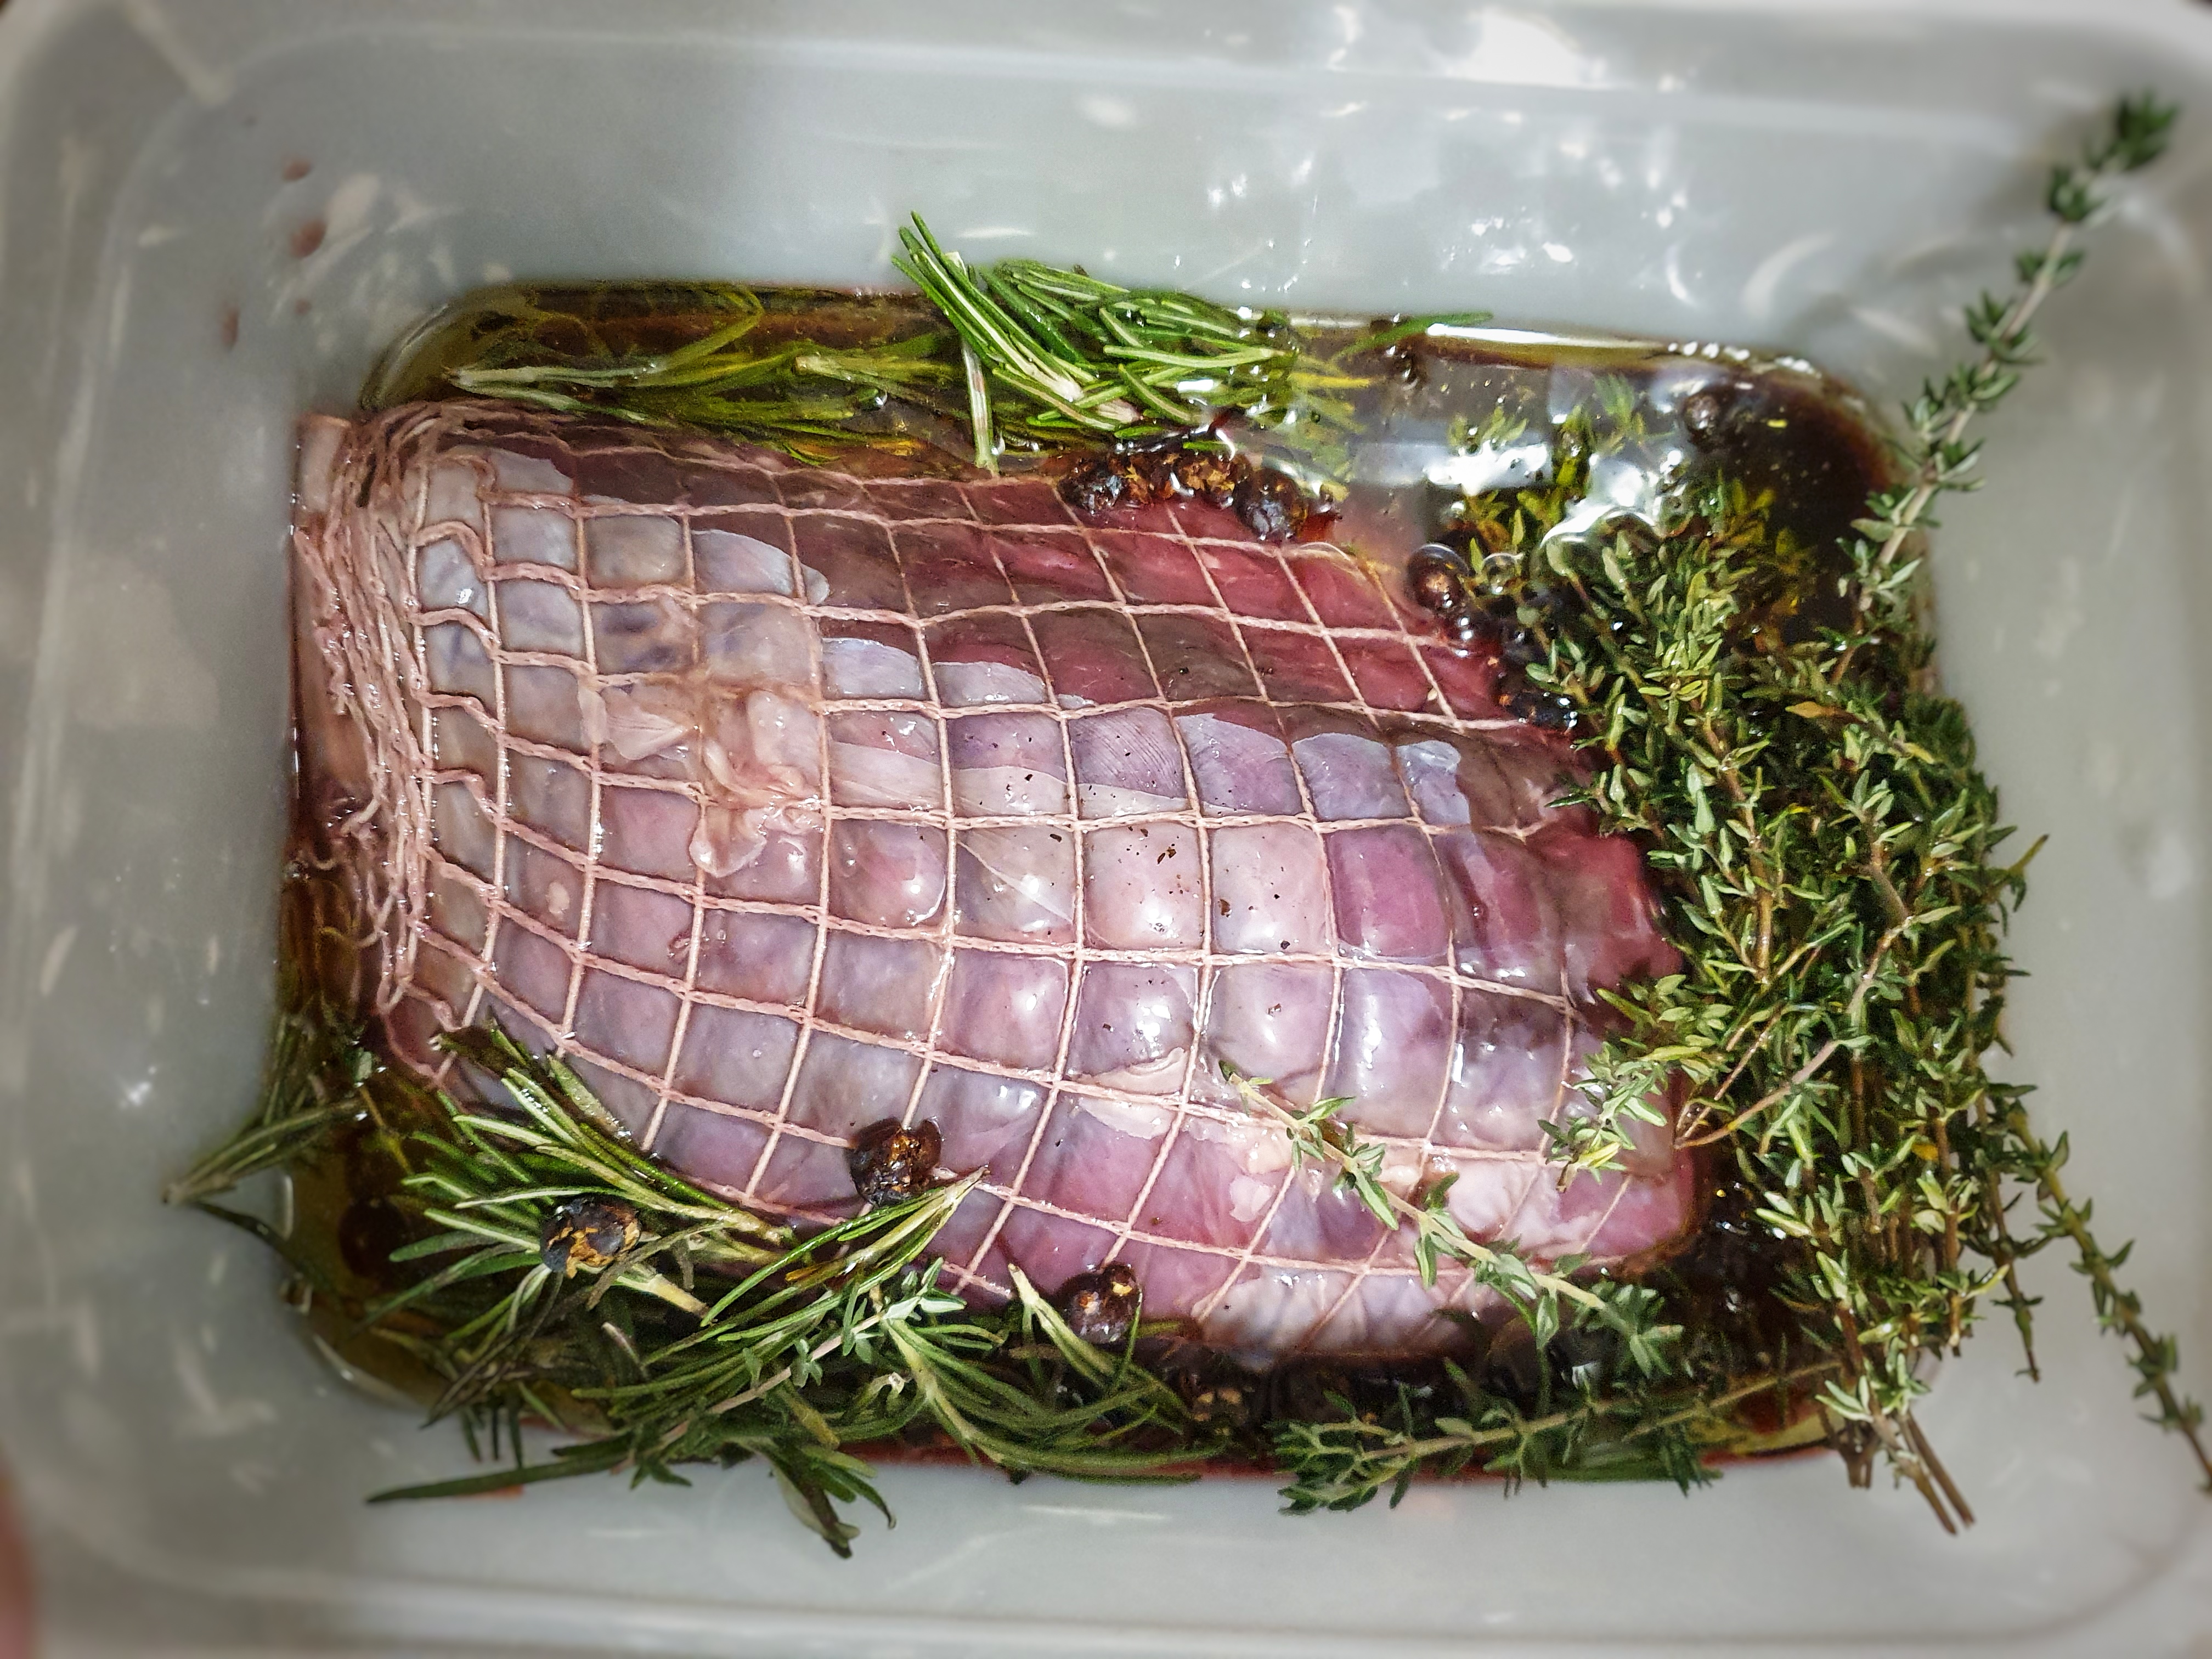
Venison is best marinated before cooking; it adds a complexity of flavour to the meat and makes it even more tender. Many recipes go into great detail about how this should be done using cooked marinades, but I think the best is also the simplest: red wine, red wine vinegar, olive oil and some herbs and spices.
Folk also make a big deal about the meat drying out in cooking (venison being a very lean meat) and there are – again – complex methods to keep the meat moist: larding it with needles or tying sheets of pork backfat or skin around it. These work, but I have found that smearing the joint with plenty of butter and covering it all with smoked streaky bacon works perfectly, adding more depth of flavour; and you get to eat some crispy bacon with your dinner.
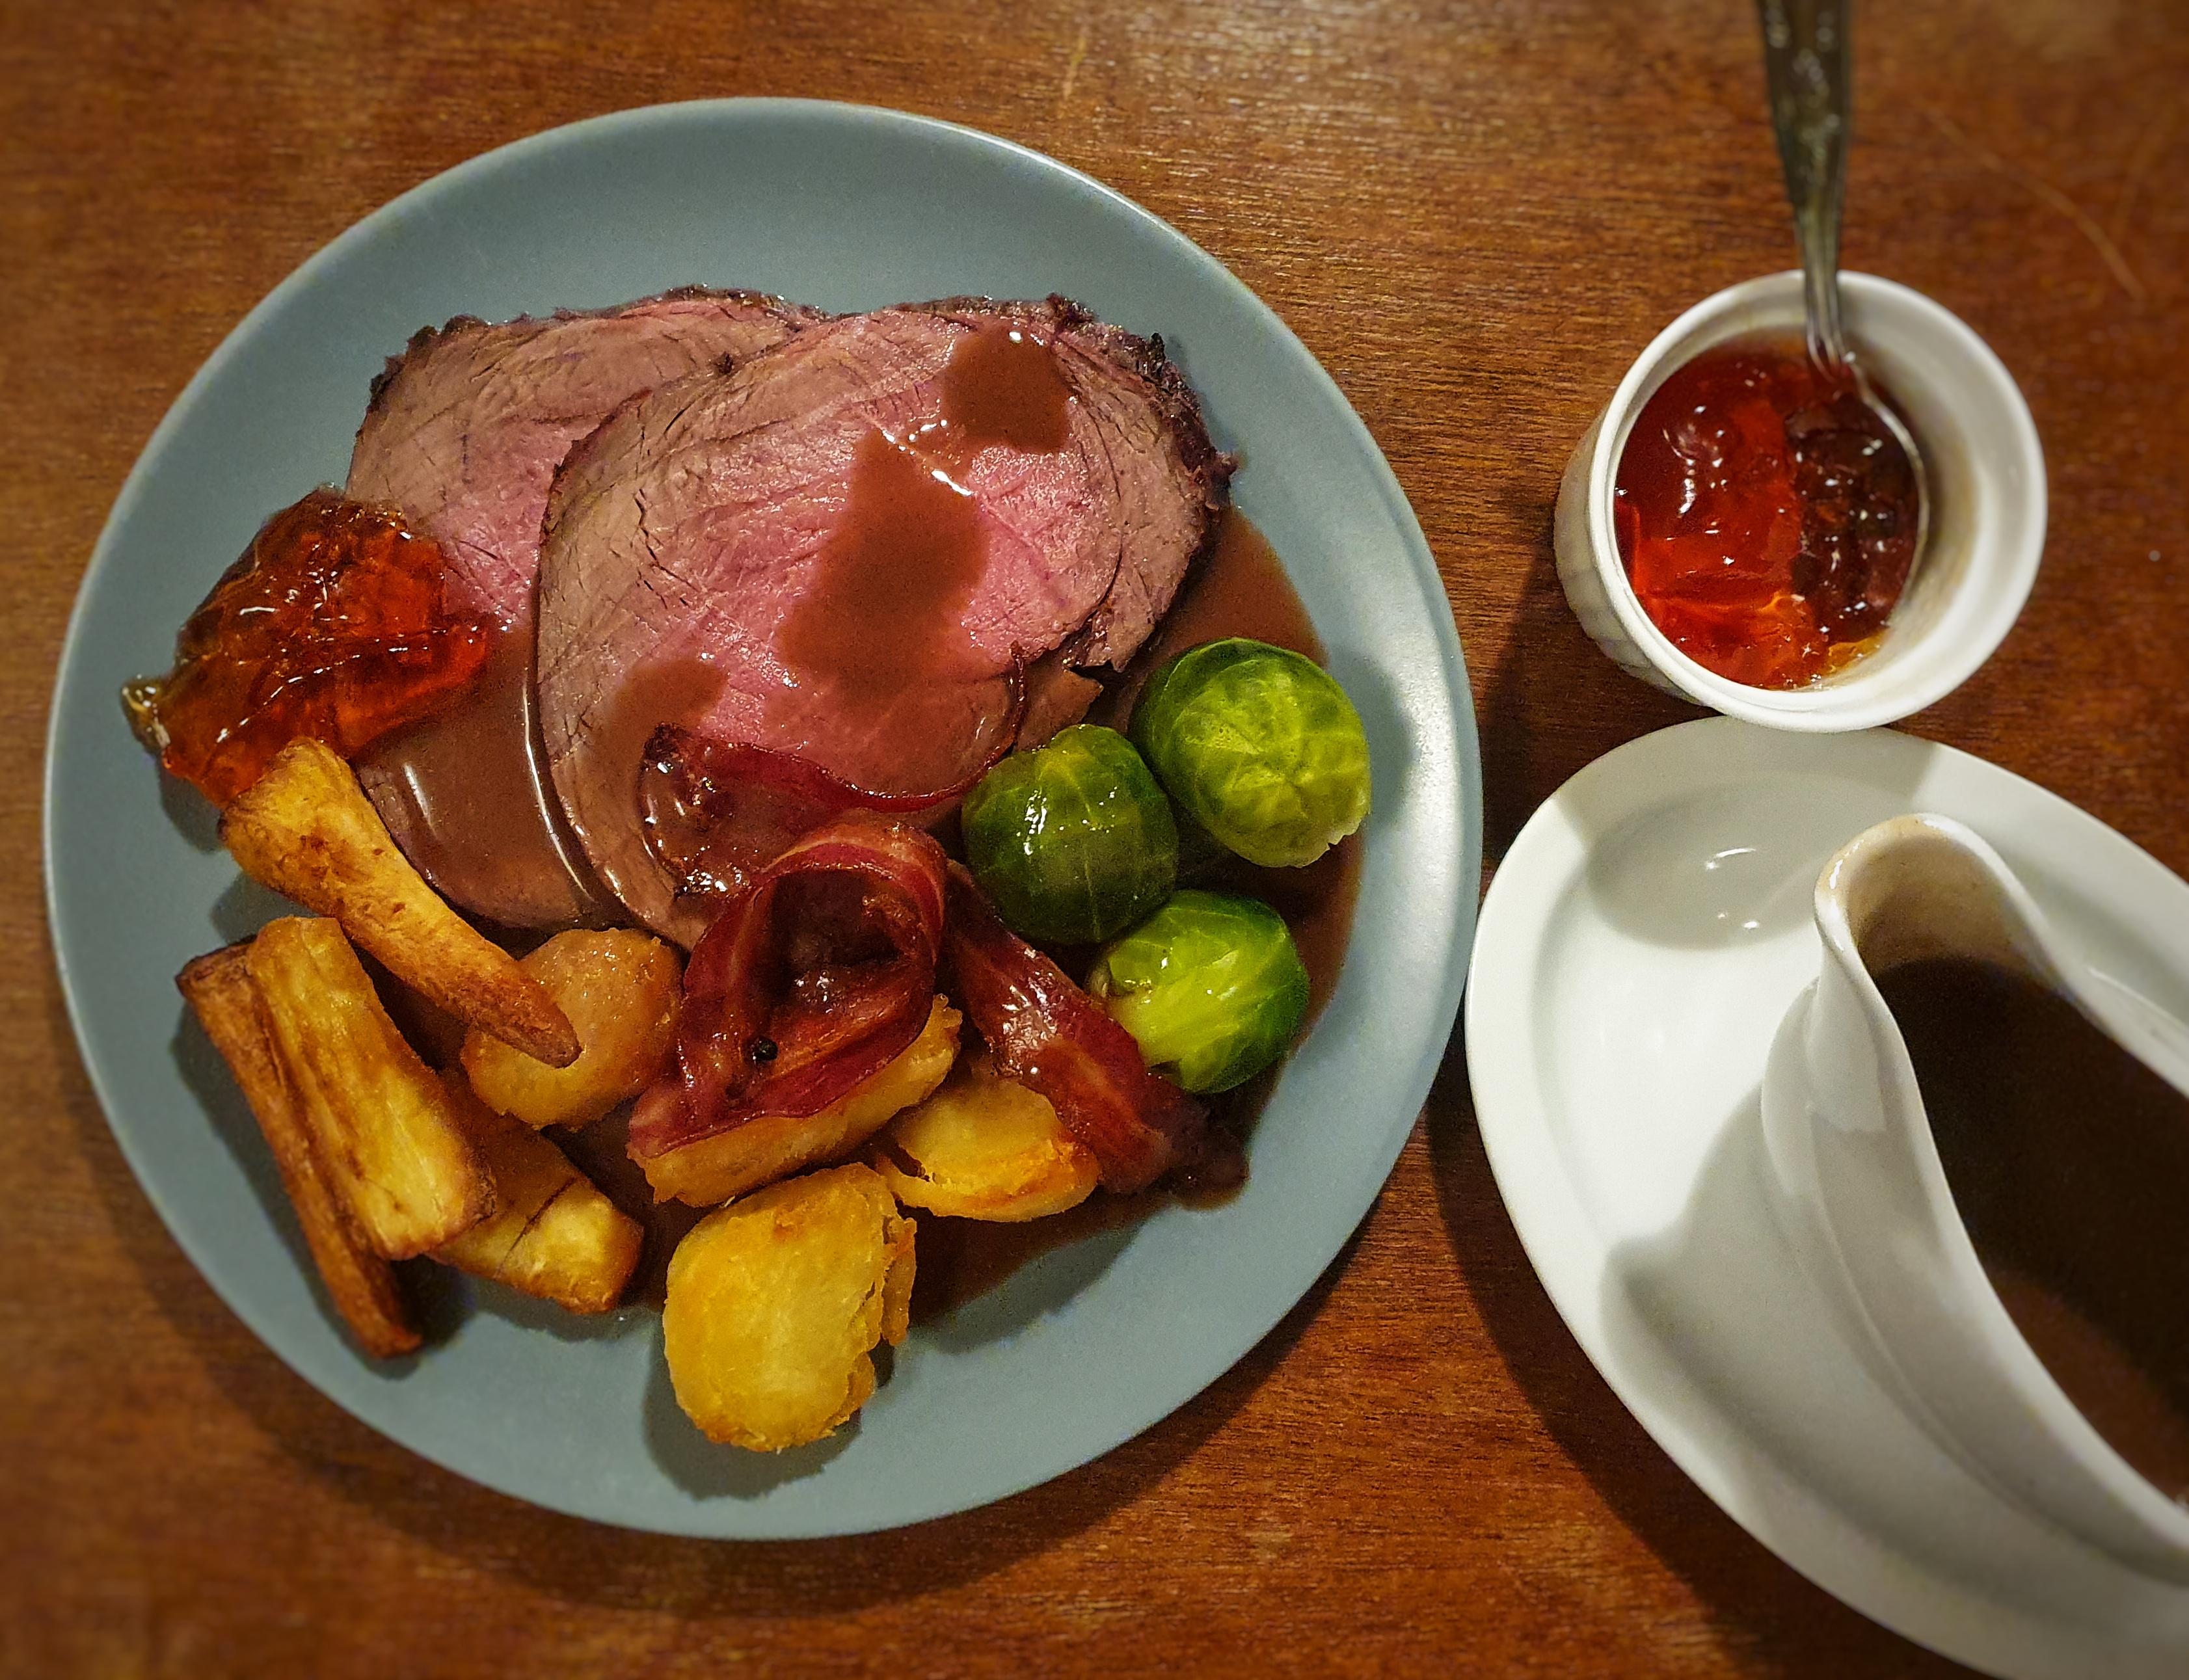
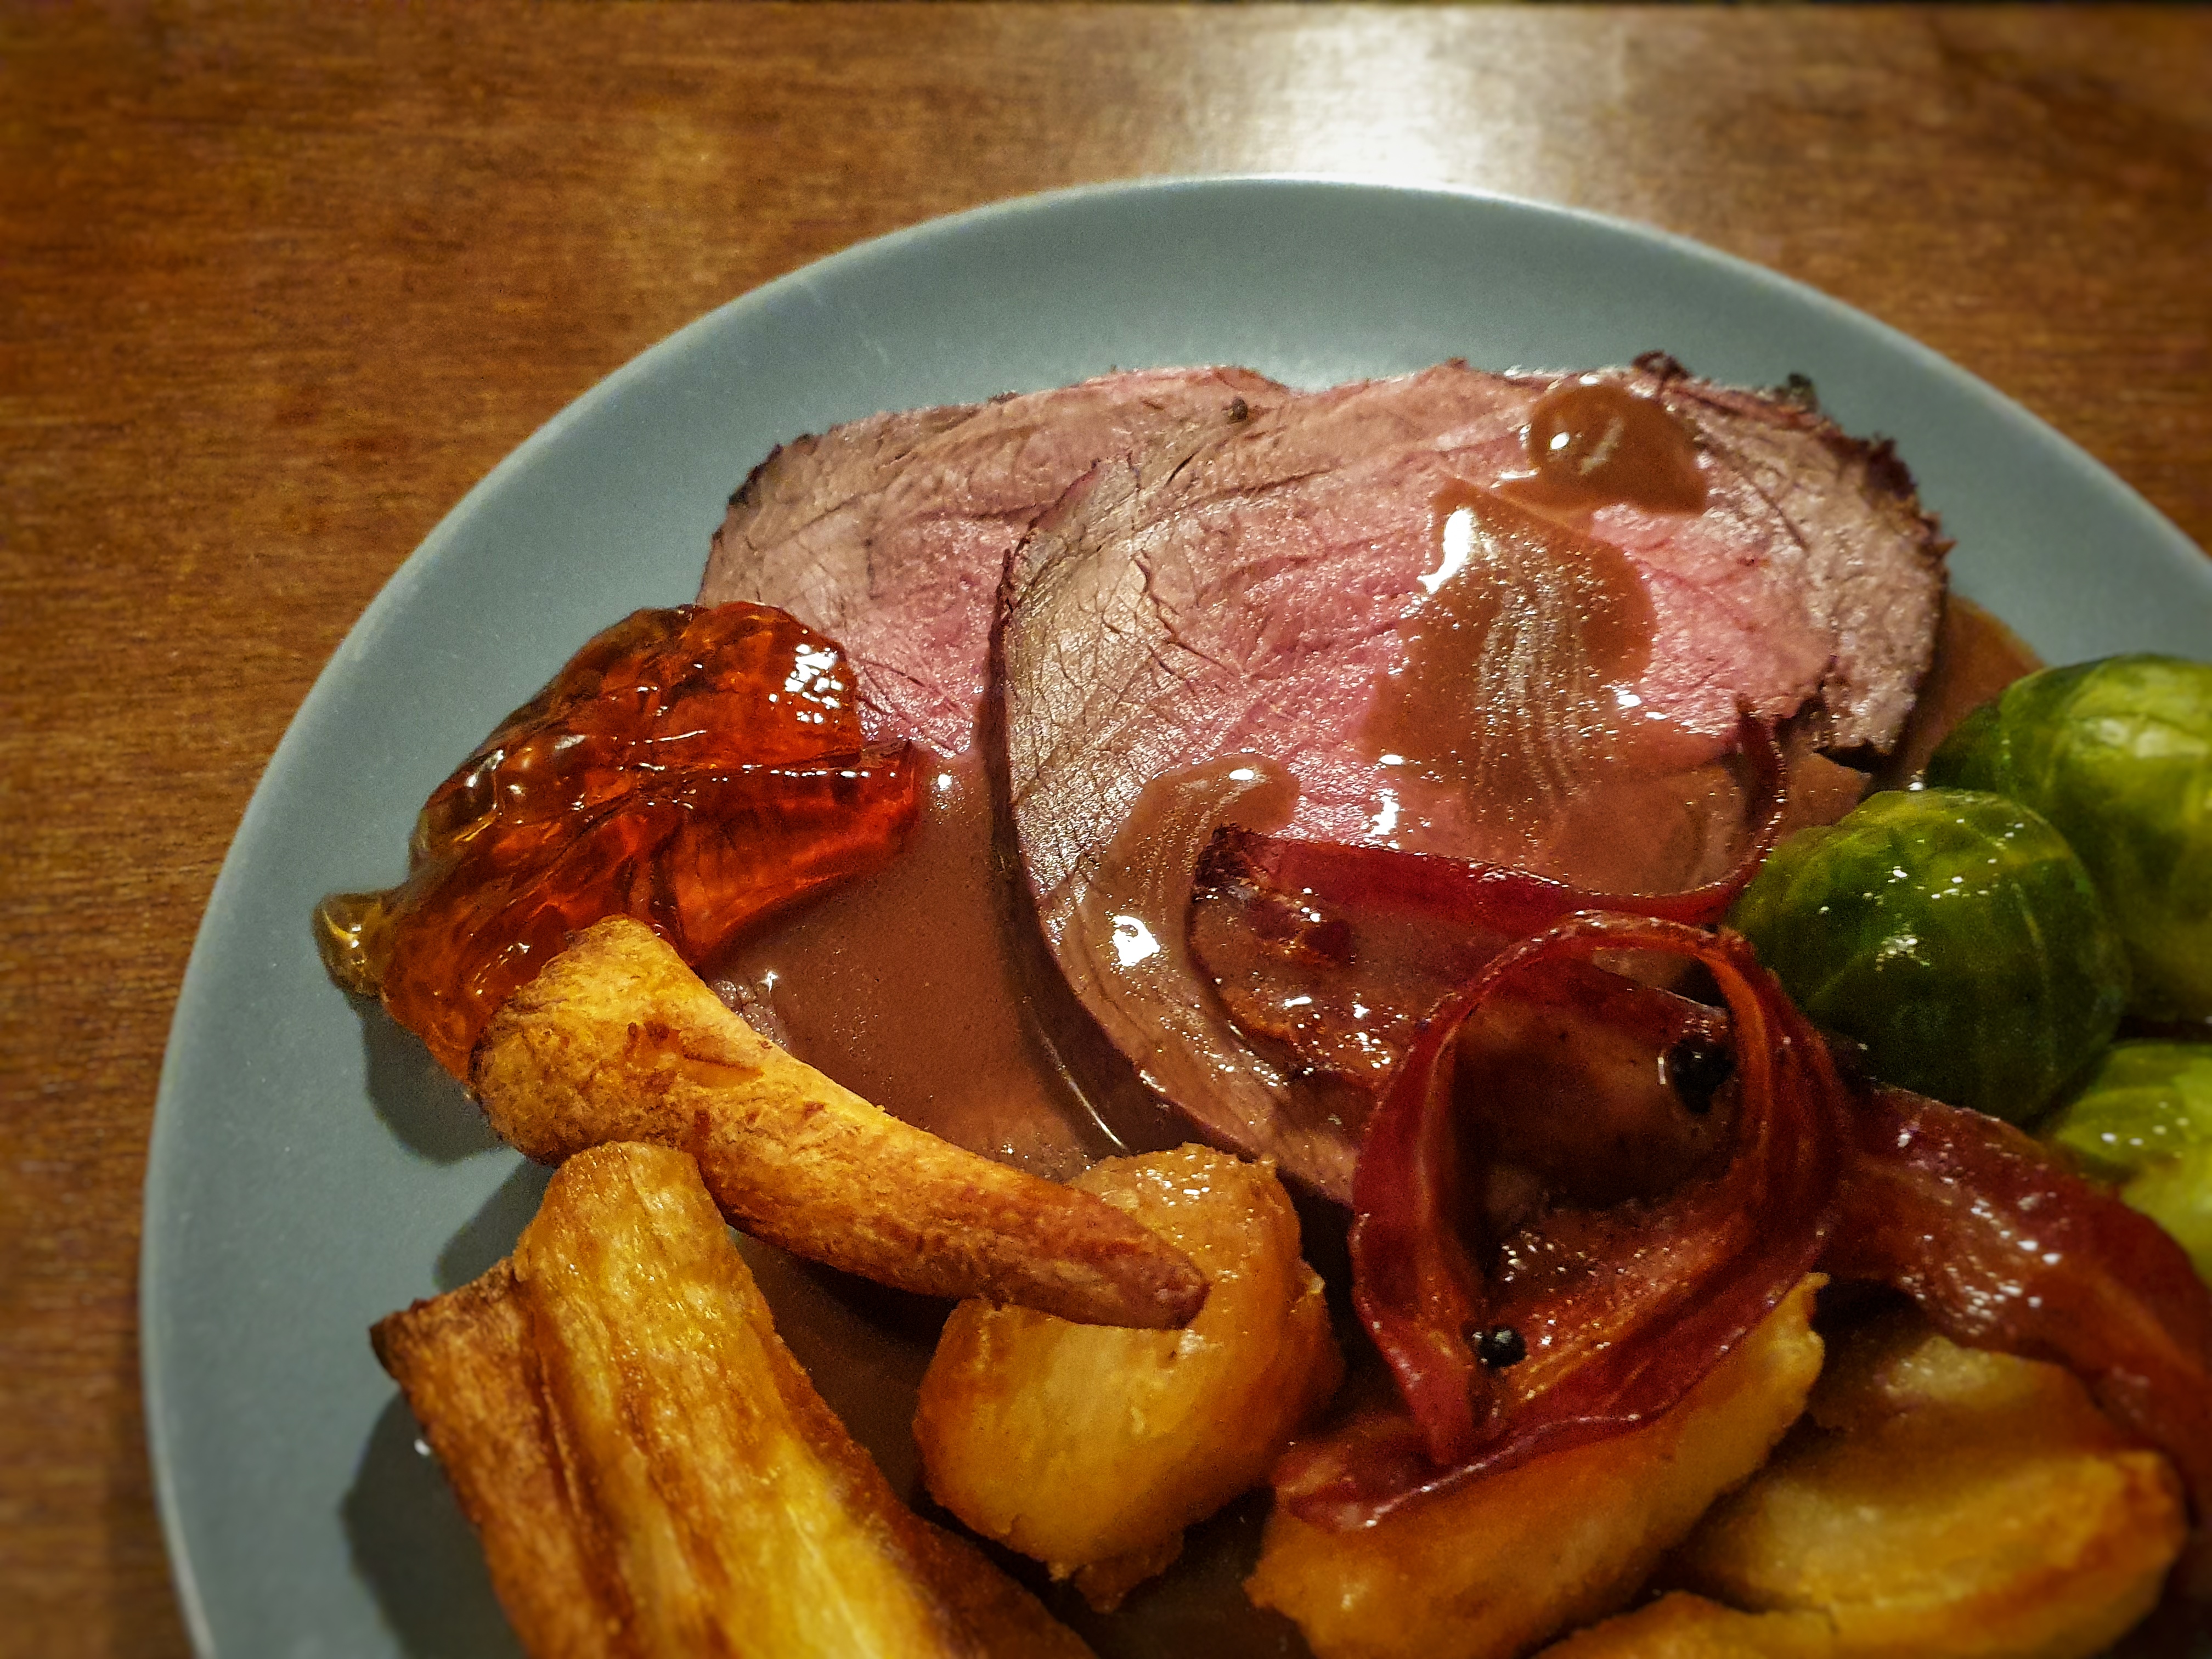
I chose to serve my venison with potatoes and parsnips roasted in duck fat, Brussels sprouts, gravy and a fruit jelly: redcurrant is the easiest to get hold of from the shops, but quince or medlar jelly can be used too.
Serves 8:
2 kg haunch of venison
½ bottle red wine
125 ml red wine vinegar
125 ml olive oil
Around one dozen black peppercorns and juniper berries
A bunch of herbs: e.g., rosemary, thyme, marjoram or winter savoury sprigs, 3 or 4 fresh bay leaves
2 carrots, peeled and sliced
2 sticks celery, trimmed and sliced
1 leek or onion, trimmed and sliced
75 g salted butter, softened
Salt and pepper
6 to 8 rashers of smoked streaky bacon
2 tbs of redcurrant, quince or medlar jelly
2 or 3 tsp cornflour
500 ml beef stock
The day before you want to cook the venison, place it in a tub only slightly larger than the joint itself along with the wine, vinegar and olive oil. Lightly crush the spices, tie the herbs with some string and add those too. Make sure the venison is covered – or mostly covered – by the wine mixture then cover and refrigerate. Turn the meat once or twice if it is not completely submerged.
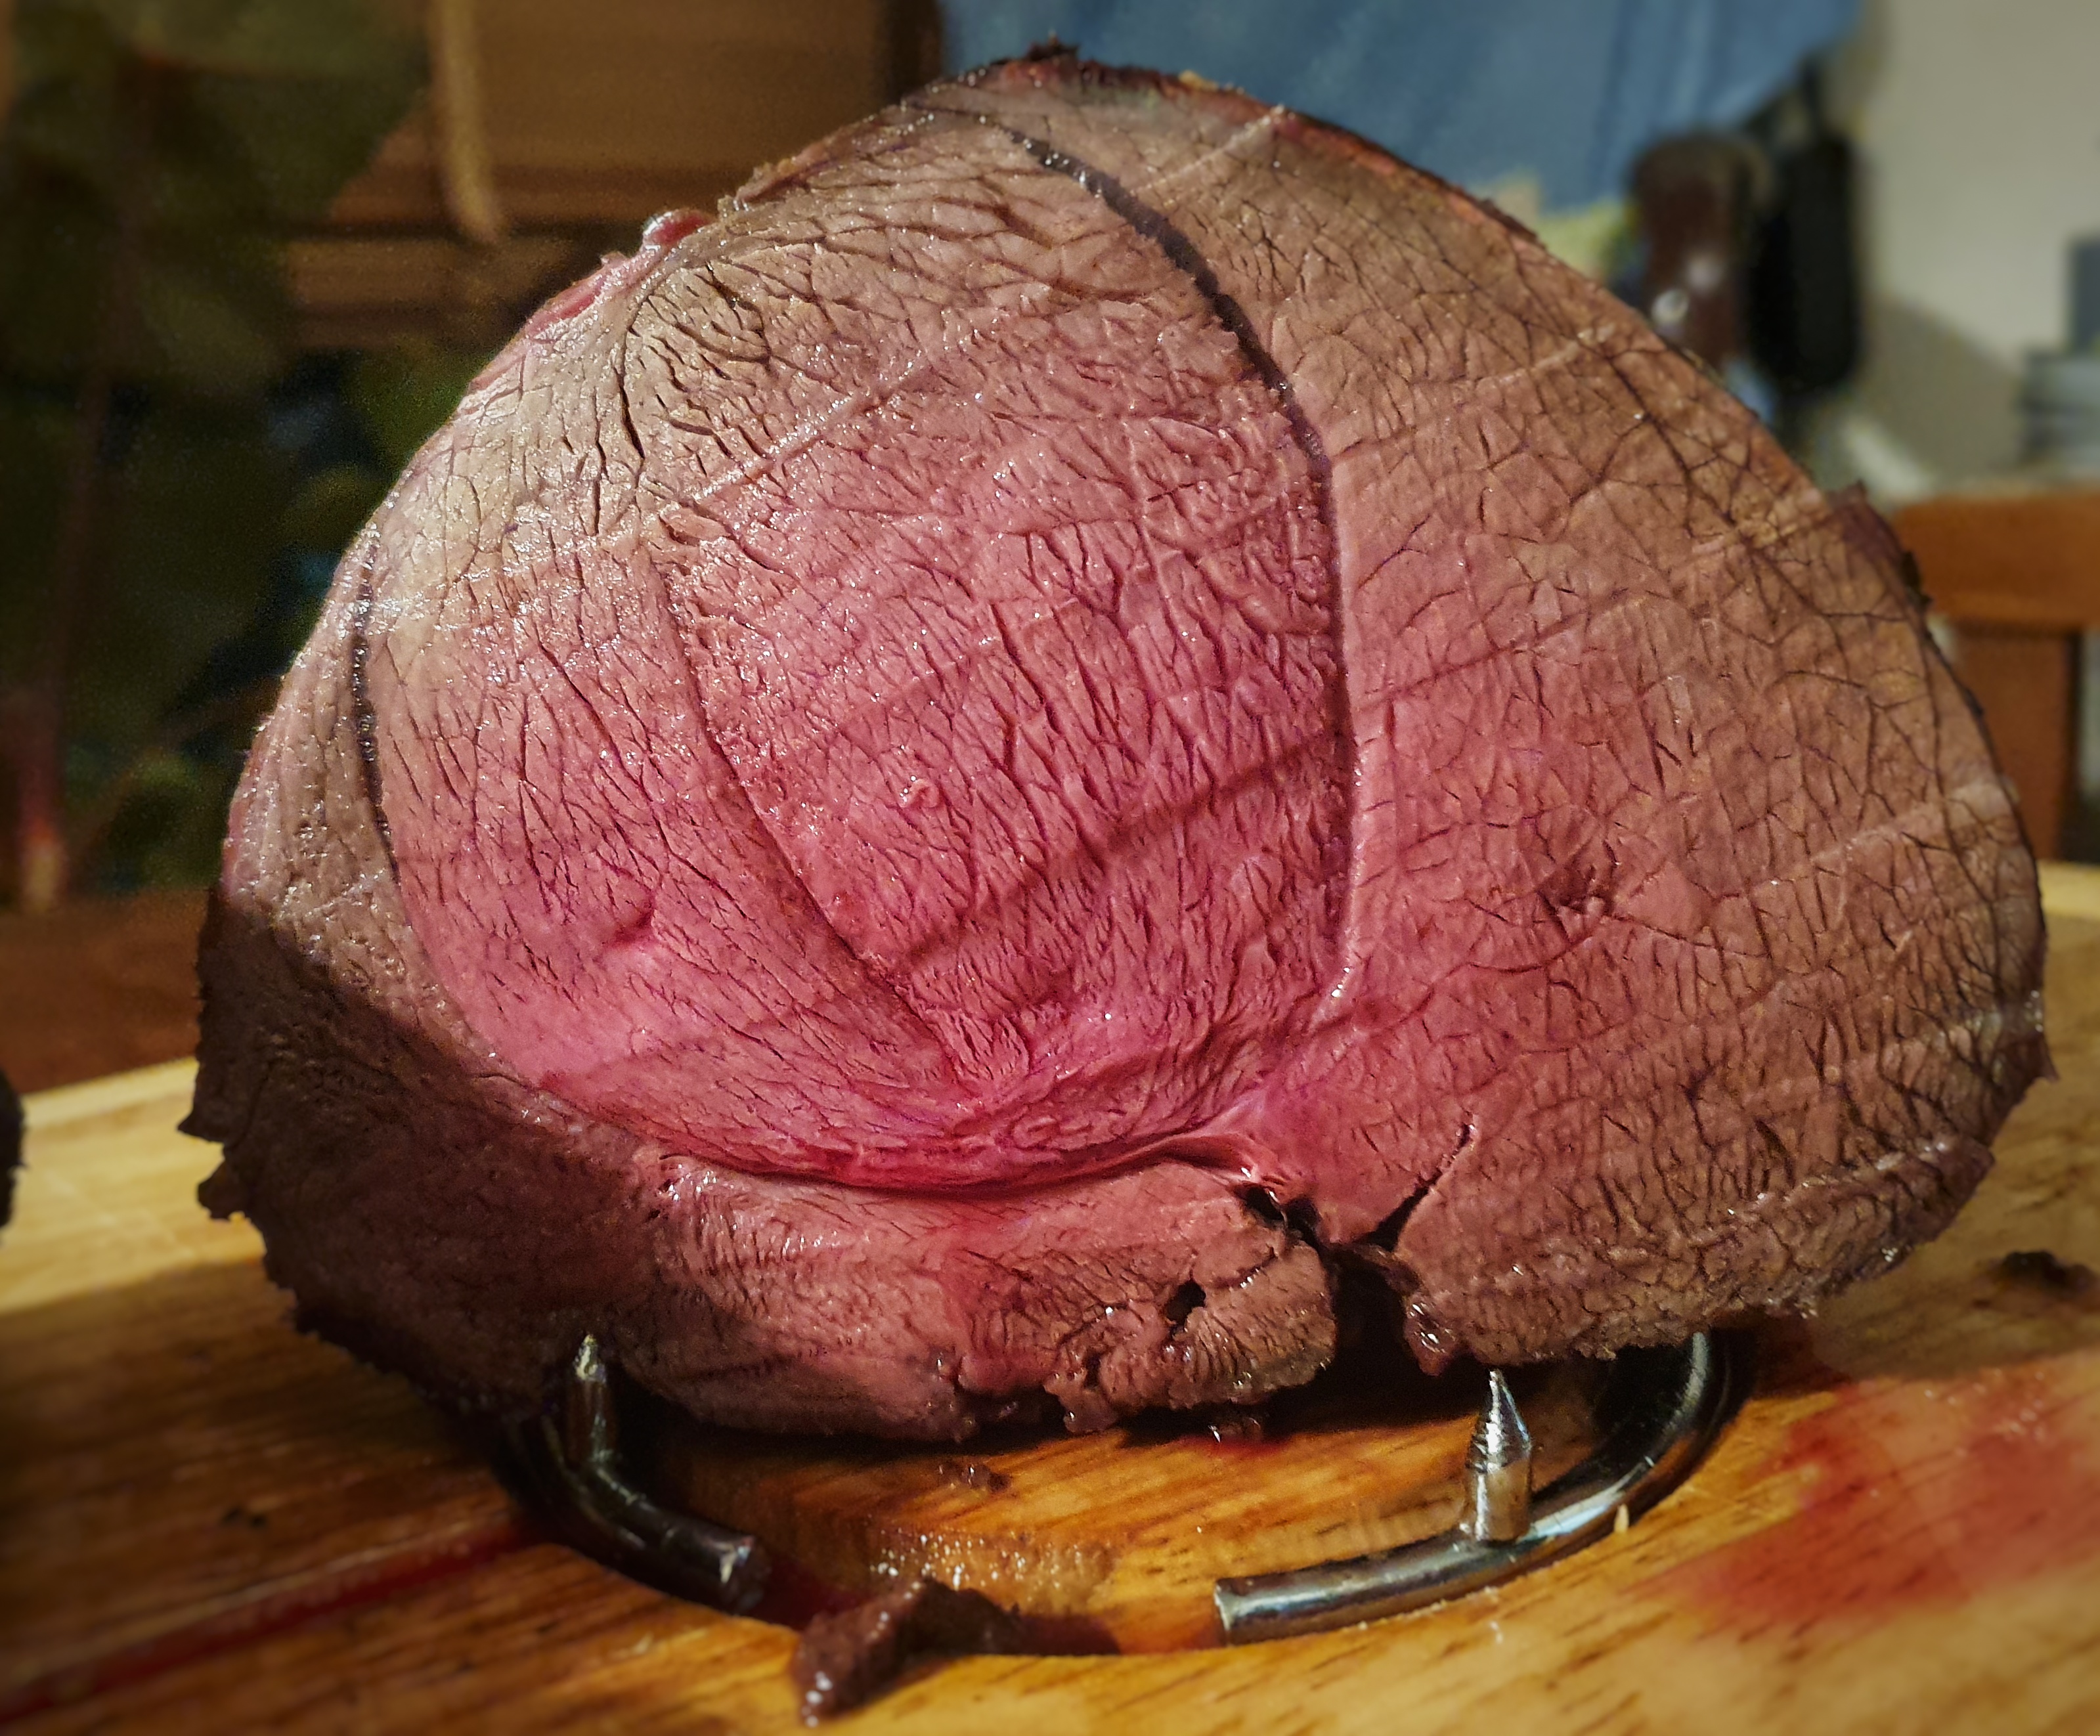
Next day, take the tub out of the fridge a few hours before you want to cook the meat, so it can come up to room temperature. Preheat your oven to 225°C. Calculate your cooking time: for rare meat roast for 15 mins per 500 g of meat plus 15 minutes; for medium 18 mins per 500 g plus 15 minutes.[2]
Now prepare the meat. Spread your vegetables in the centre of the tray and place the venison on top. Dab it dry with some kitchen paper then smear the top with the butter, season well with salt and pepper, then cover the top with the bacon, making sure each rasher overlaps the next slightly.
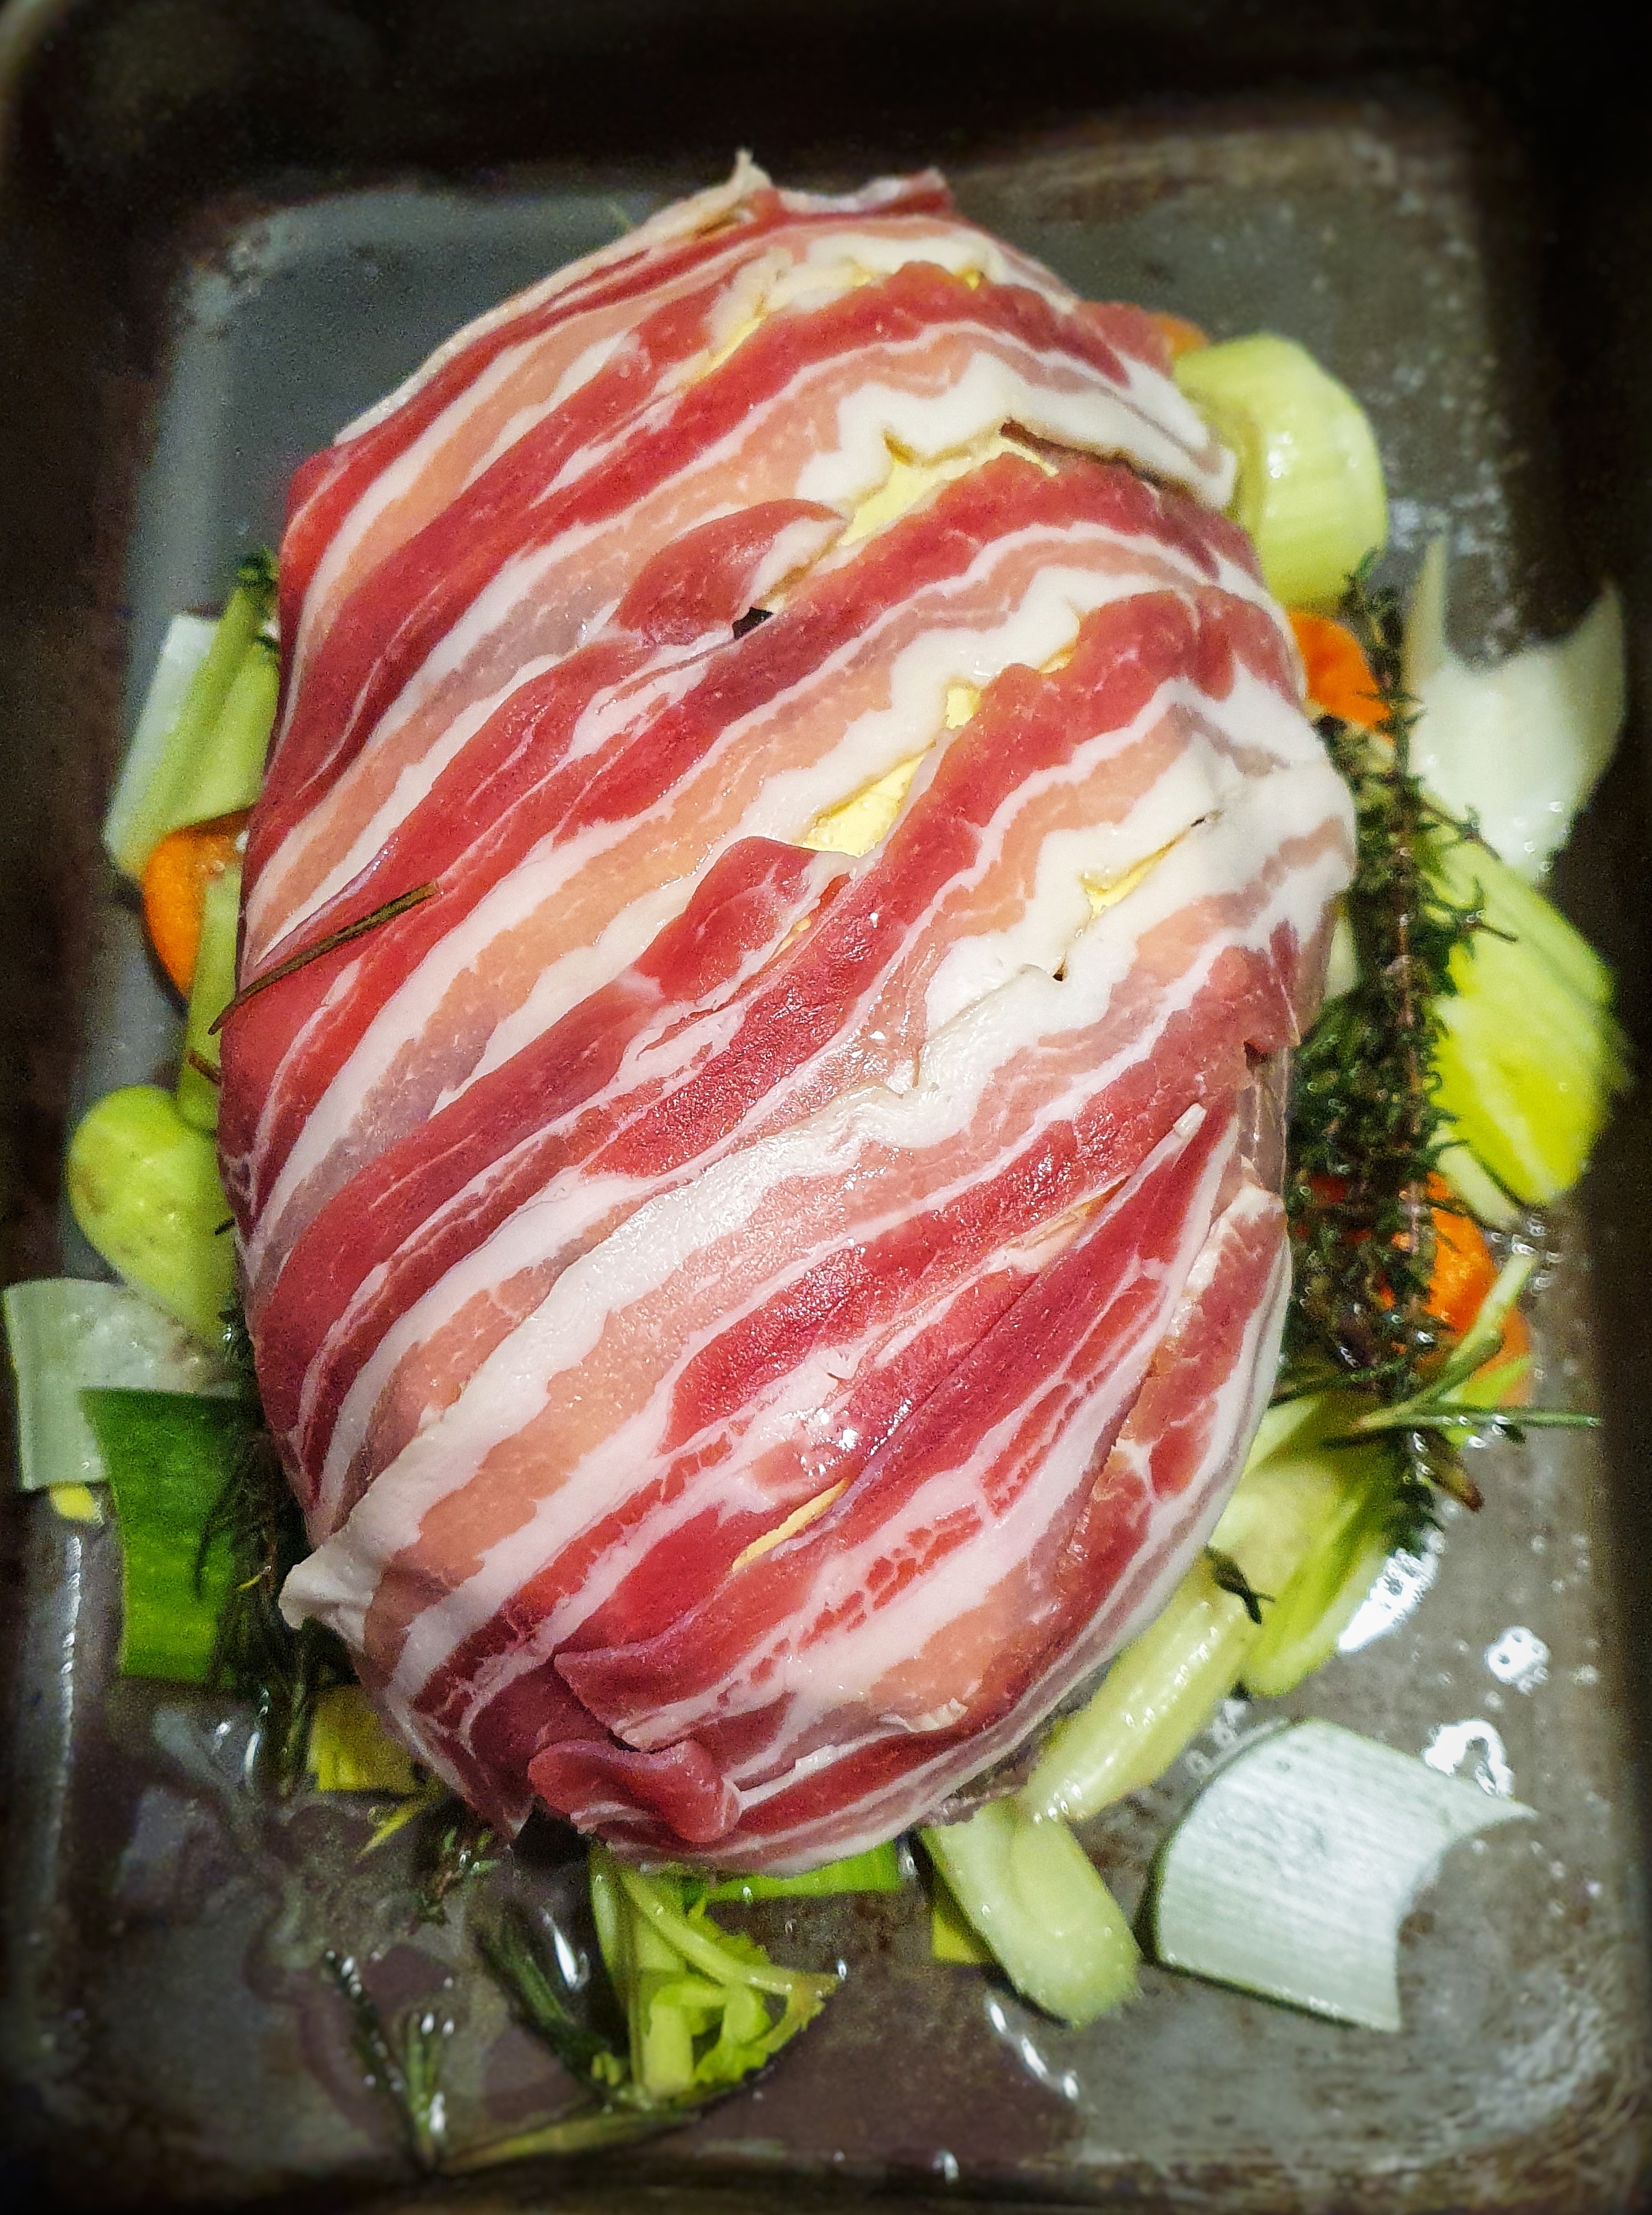
Ladle around half of the marinade into the tin and slide the meat into the oven. Roast for 15 minutes and then turn the heat down to 180°C. Baste the venison every 15 to 20 minutes or so, adding more marinade if it starts to dry up.
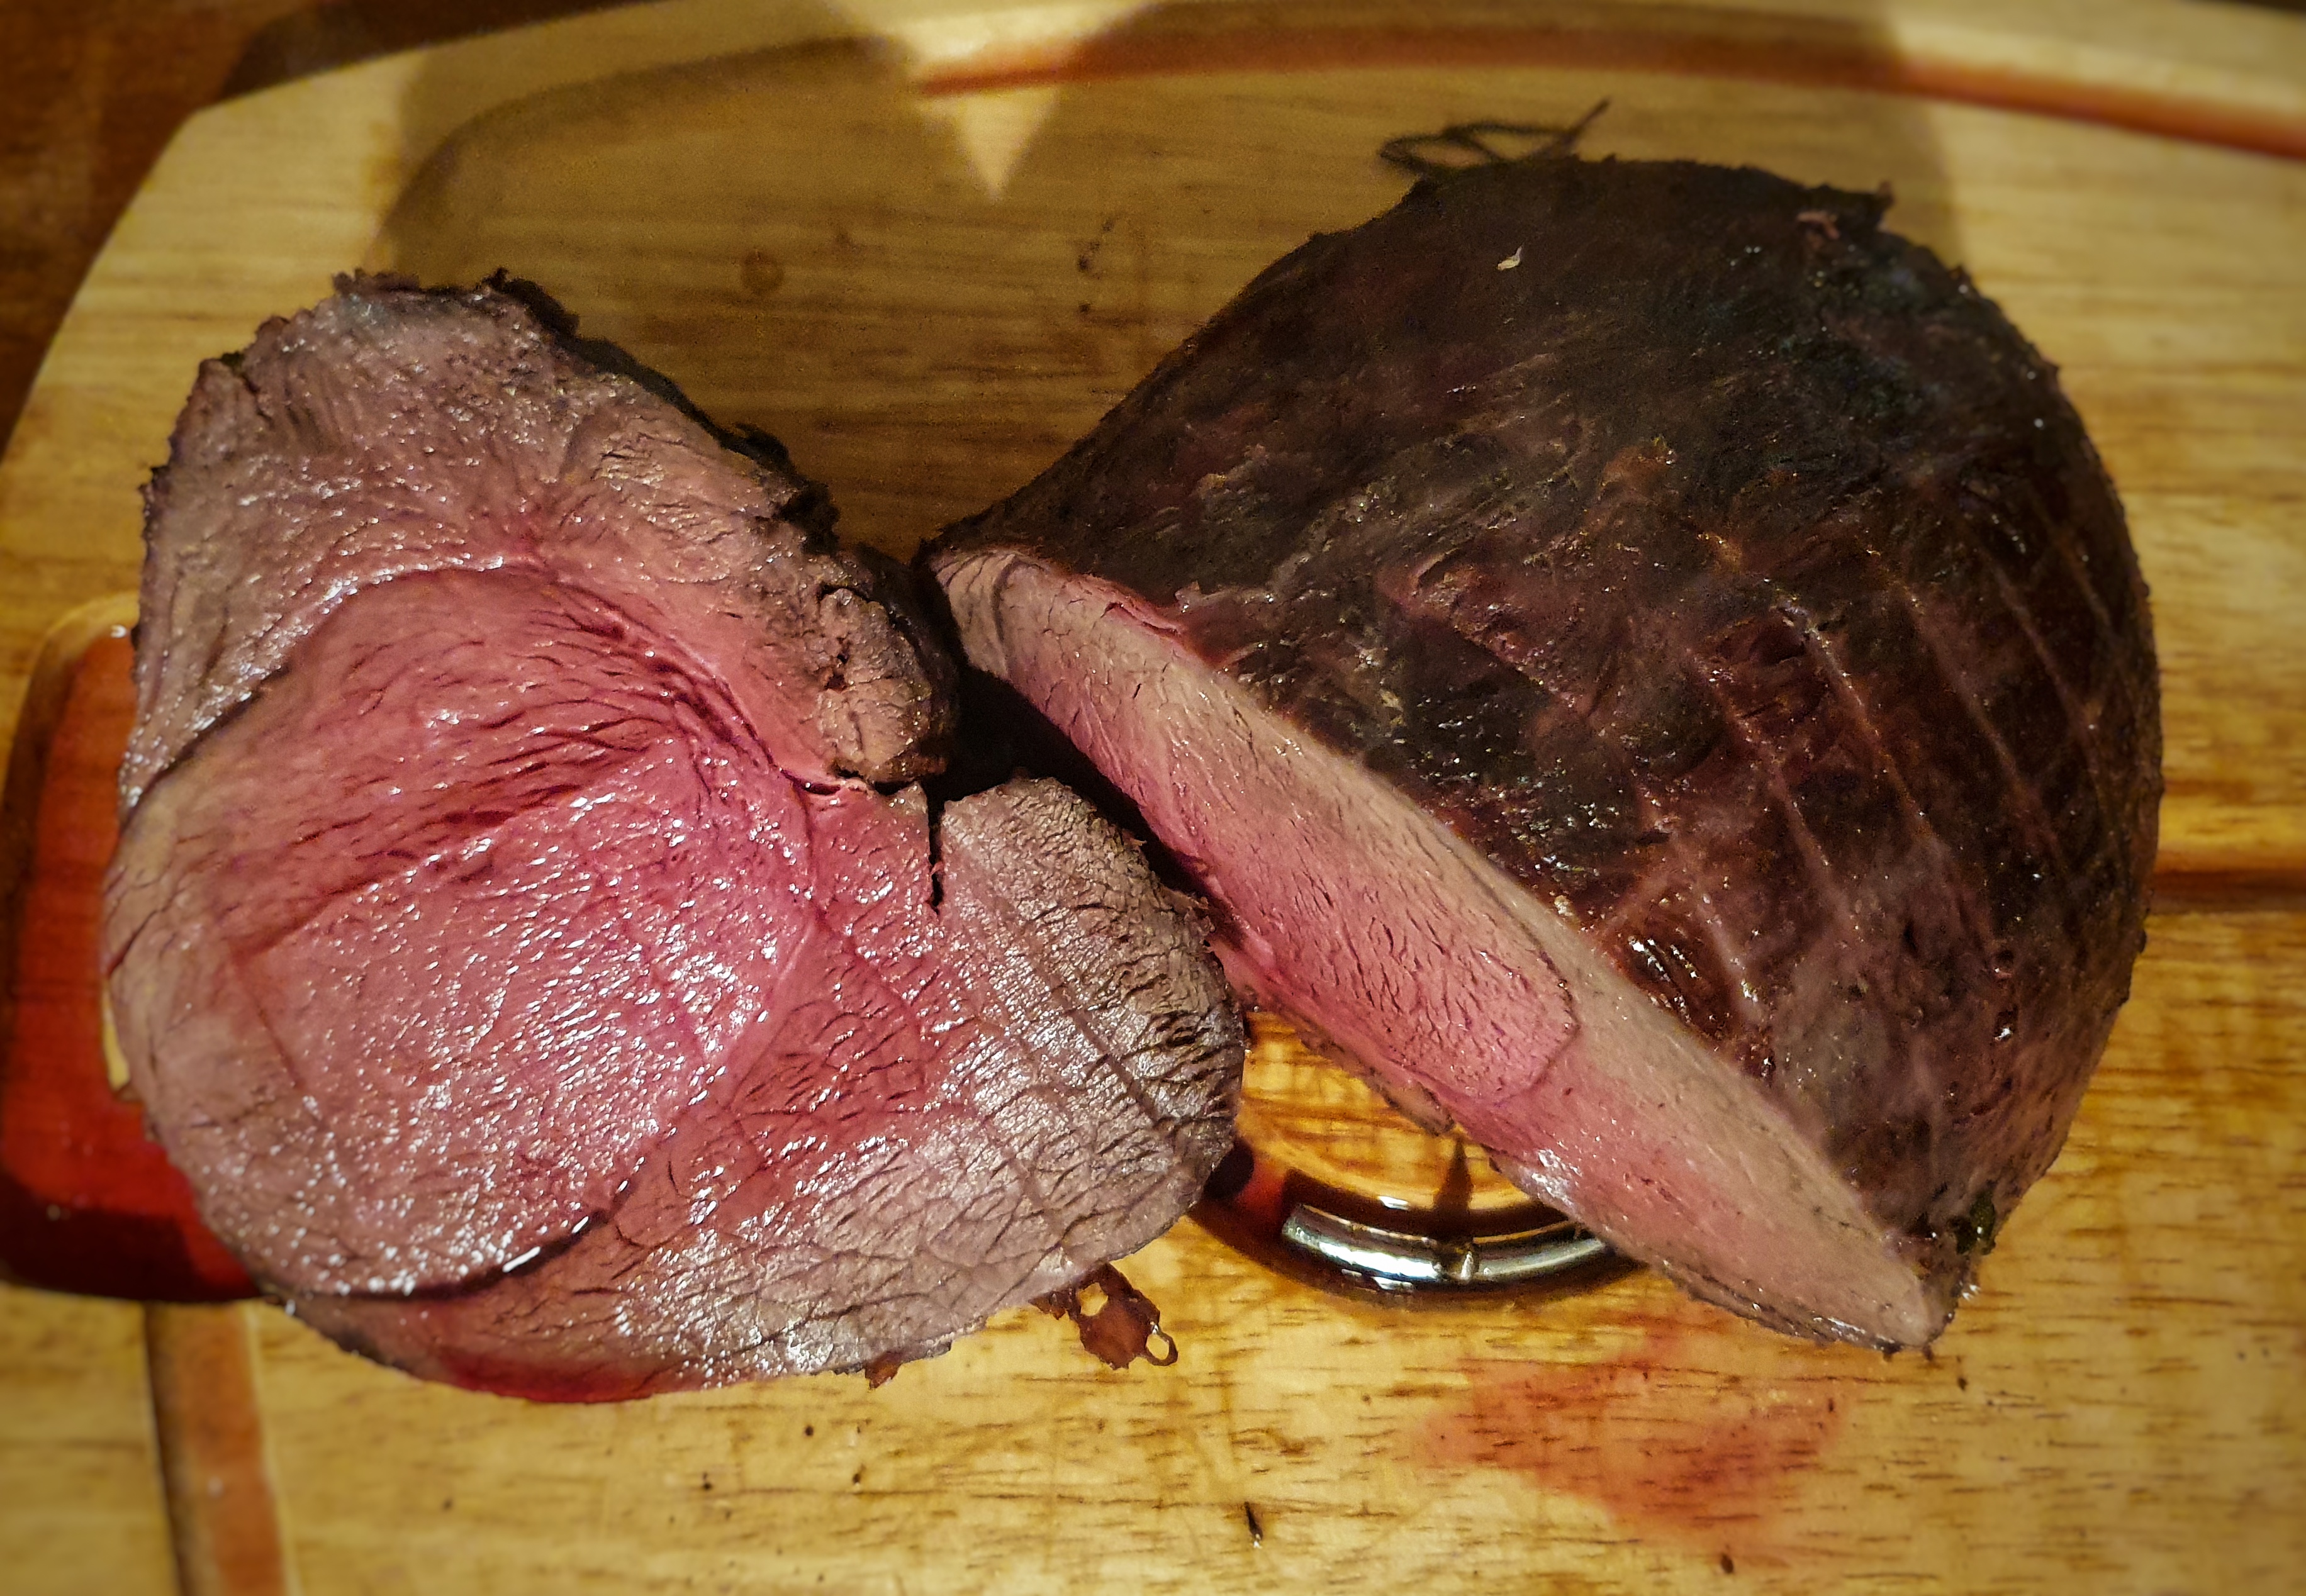
For the last 15 minutes of the cooking time, turn the heat back up to 225°C, remove the bacon, give the meat one more baste, and let it crisp up at the edges. Take the tin out, remove the meat to a board or dish and cover with kitchen foil. It will sit very happily there as you roast your potatoes and cook your veg.
Now make the gravy. Strain the contents of the tin into a jug and spoon or pour a couple of tablespoons (approximately) of the buttery olive oil layer into a saucepan. Discard the rest of the fat. Put the pan over a medium heat and stir in 2 teaspoons of cornflour. Once incorporated, cook for a minute before adding the juices. Mix to blend, before adding the beef stock, mix again and then add the remaining marinade. Cook for 10 minutes, then add the jelly and season with salt and pepper. If the gravy isn’t as thick as you’d like, slake another teaspoon of cornflour in a little cold water and stir it in. When ready, strain into a warm jug.
Remove the outer mesh covering the joint, slice and serve with the gravy, the crisp bacon rashers and extra jelly on the side.
If you like the blogs and podcast I produce and would to start a £3 monthly subscription, or would like to treat me to virtual coffee or pint: follow this link for more information. Thank you.
Notes:
[1] It is for this reason that I consider venison a vegan-friendly food: we’d have to cull them whether we ate meat or not, so we may as well.
[2] If you like your meat well done, I can’t help you.
My Best Yorkshire Pudding Recipe
Carrying on from my conversation about Yorkshire pudding with Elaine Lemm on the podcast recently, I thought I should toss my hat into the ring with my own recipe.
This post complements the episode ‘Yorkshire Pudding with Elaine Lemm’ on The British Food History Podcast:
This is a simple affair, and after some rigorous recipe testing, using fewer eggs or different mixtures of milk and water, as well as different receptacles in which to cook the batter, I think it is both excellent and fool proof. It goes by the tried-and-tested equal ratio method: i.e. equal volumes of plain flour, milk and eggs, plus a good pinch of salt, and animal fat (in my case, lard).
The pudding takes around 40 minutes to cook, the perfect amount of time to rest your roast meat before carving and serving.
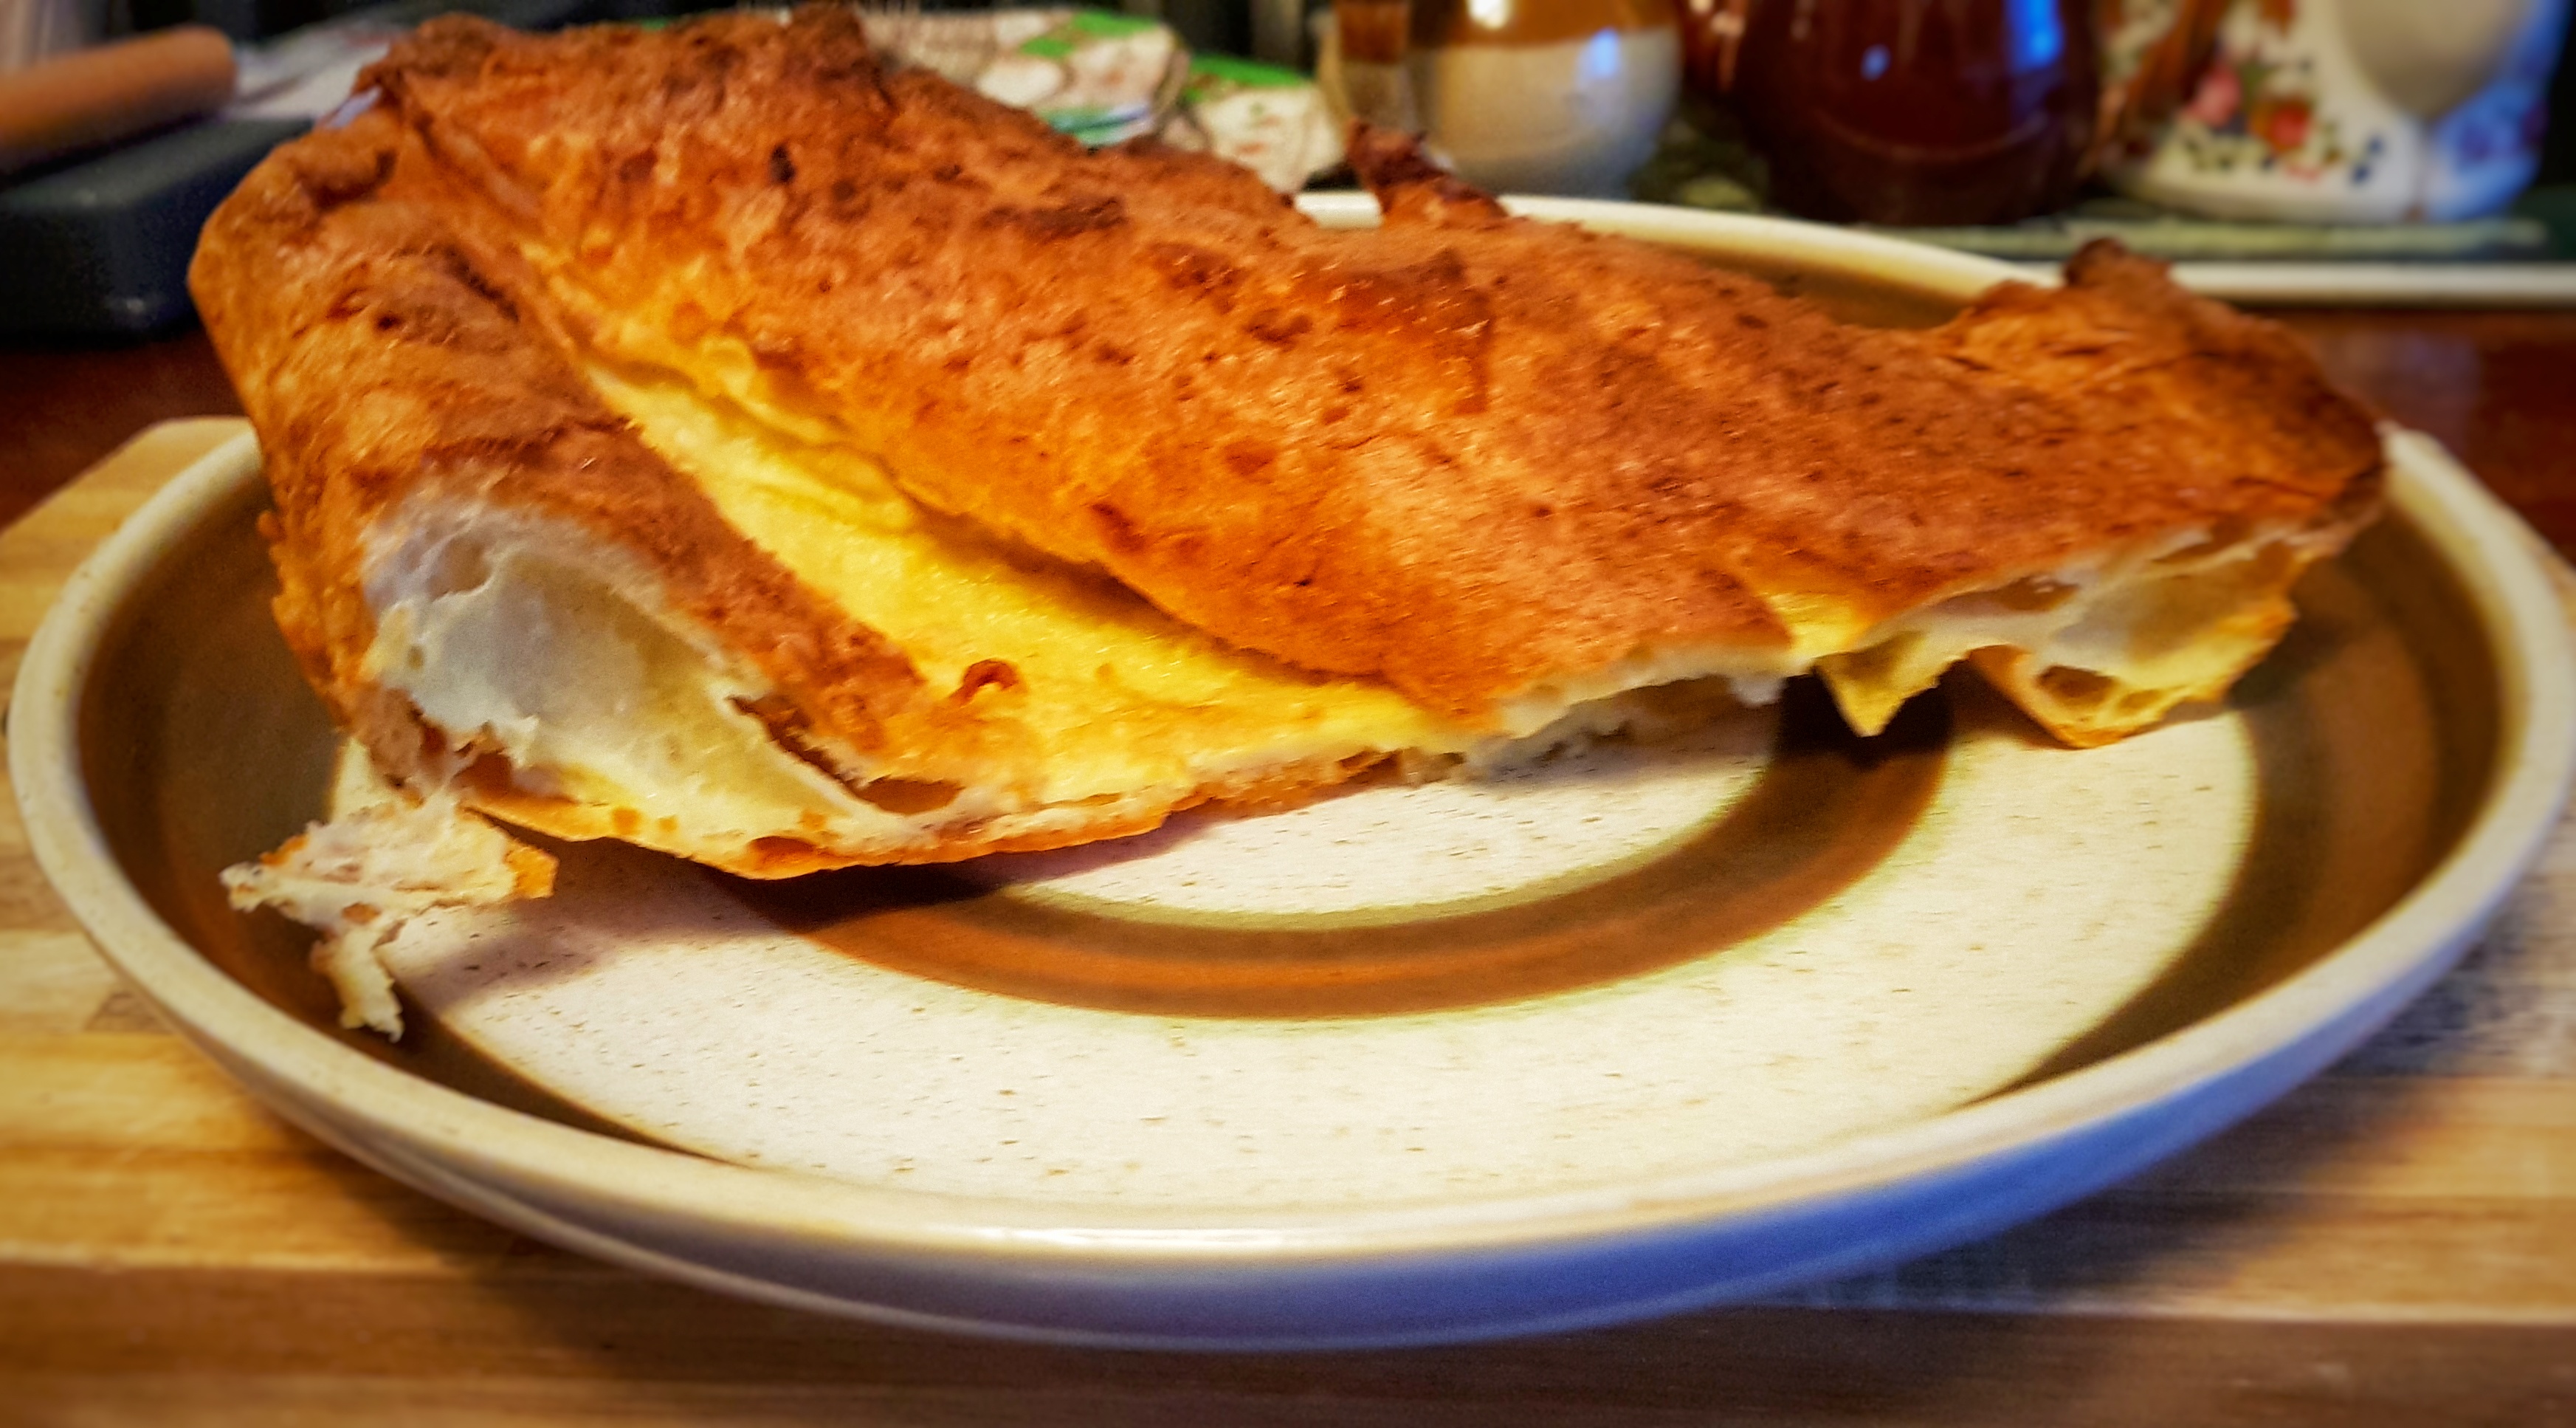
In the podcast episode Elaine and I came to the conclusion that anything made in a muffin tin, isn’t really a proper Yorkshire pudding. Indeed, the consensus on my Special Postbag Edition of the podcast, cooking the batter in a tray achieves the best proportion of crispy, crunchy bits on the fringes and nice puddingy softness in the base. Listen to that episode here:
Have something to add to the debate? Please get in contact or leave a comment at the end of this post, I’m sure I shall be revisiting the subject in future postbag episodes.
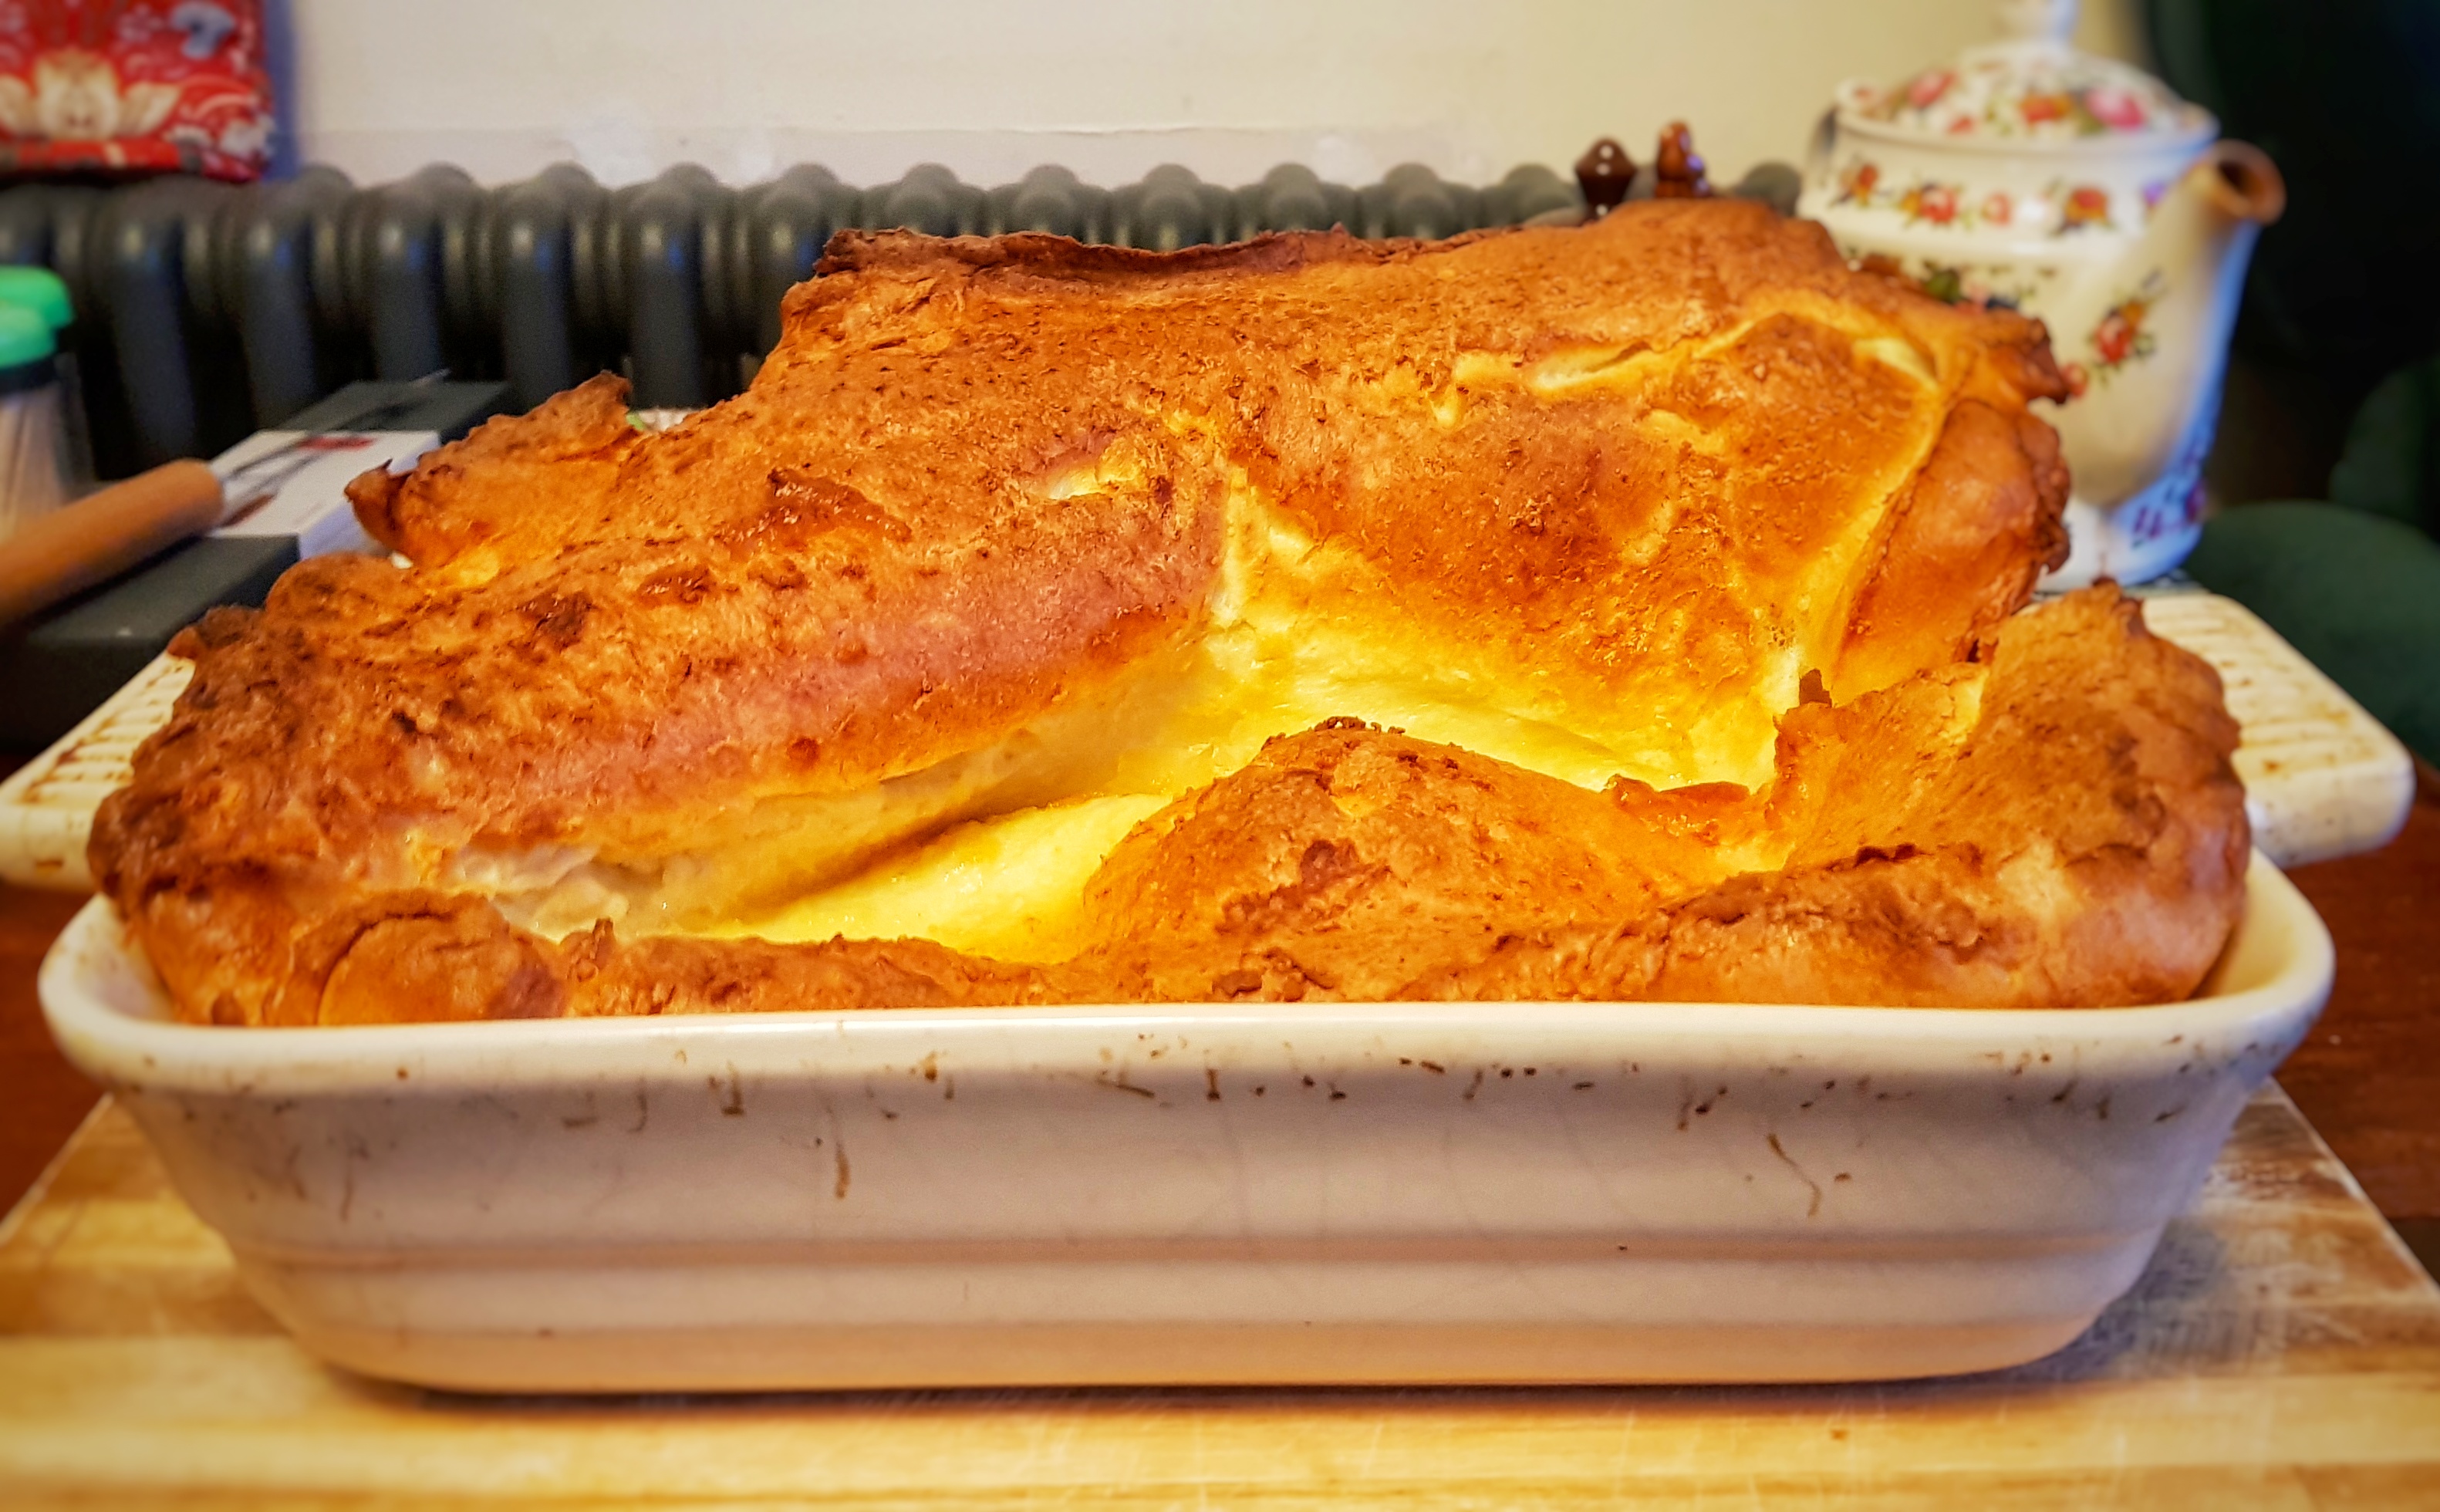
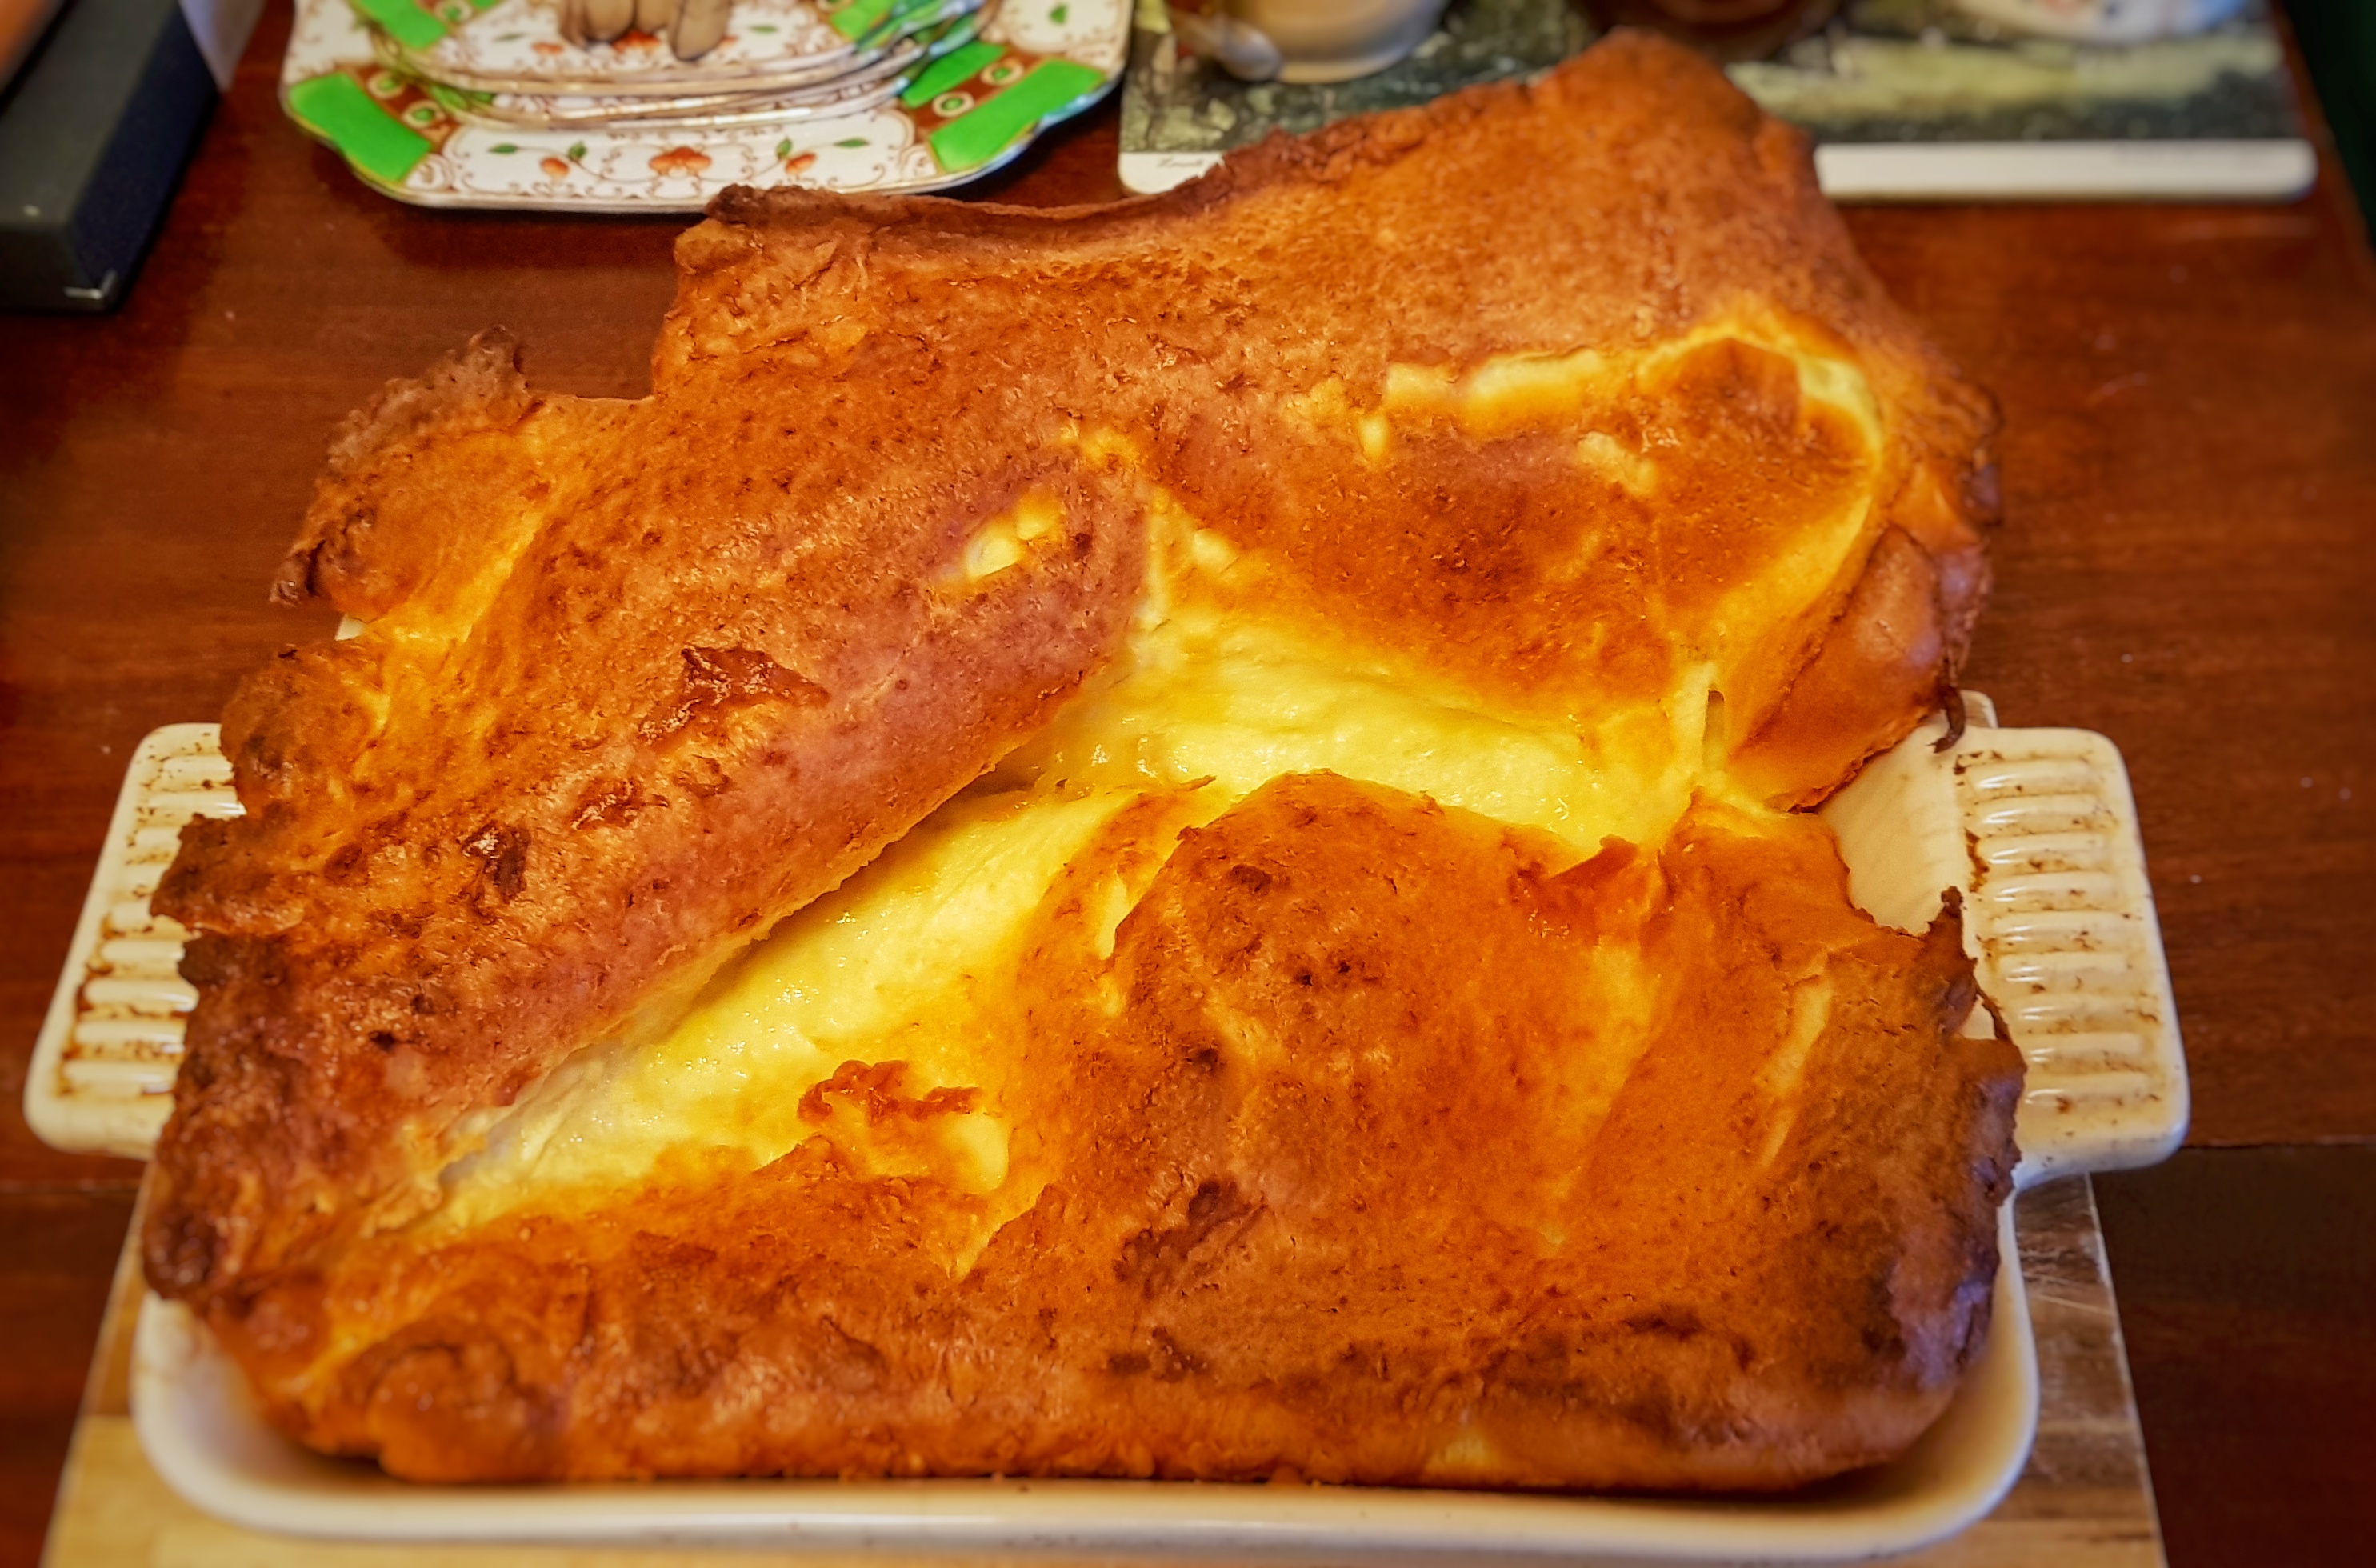
Cooking in a dish that is good and thick is important for a good rise: you need something that will heat up in the oven, but also retain it when the cool batter is poured in. Don’t go for anything flimsy here: a really thick metal tin, or even better, an earthenware dish: it’s thickness and its property of retaining heat creates a pud with a fantastic rise: I got such a good one it almost hit the grill elements in my oven when put on the middle shelf! I give the dimensions of my dish in the recipe, but don’t worry if yours is slightly different; puddings like this are very forgiving with respect to dish size.
If you like the blogs and podcast I produce, please consider treating me to a virtual coffee or pint, or even a £3 monthly subscription: follow this link for more information.
Make the batter a few hours (minimum one) before you want to cook it.
Serves 6 to 8 if eaten with a roast dinner:
¾ cup (180 ml) plain flour
A good three-finger pinch of sea salt
¾ cup (180 ml) eggs
¾ cup (180 ml) milk, full fat, if possible
30 g lard, dripping or goose or duck fat
Put the flour and salt in a bowl, make a well in the centre and pour your eggs inside the well. Use a whisk to combine the eggs and flour, starting in the well, gradually mixing the flour into the eggs. This prevents lumps forming.
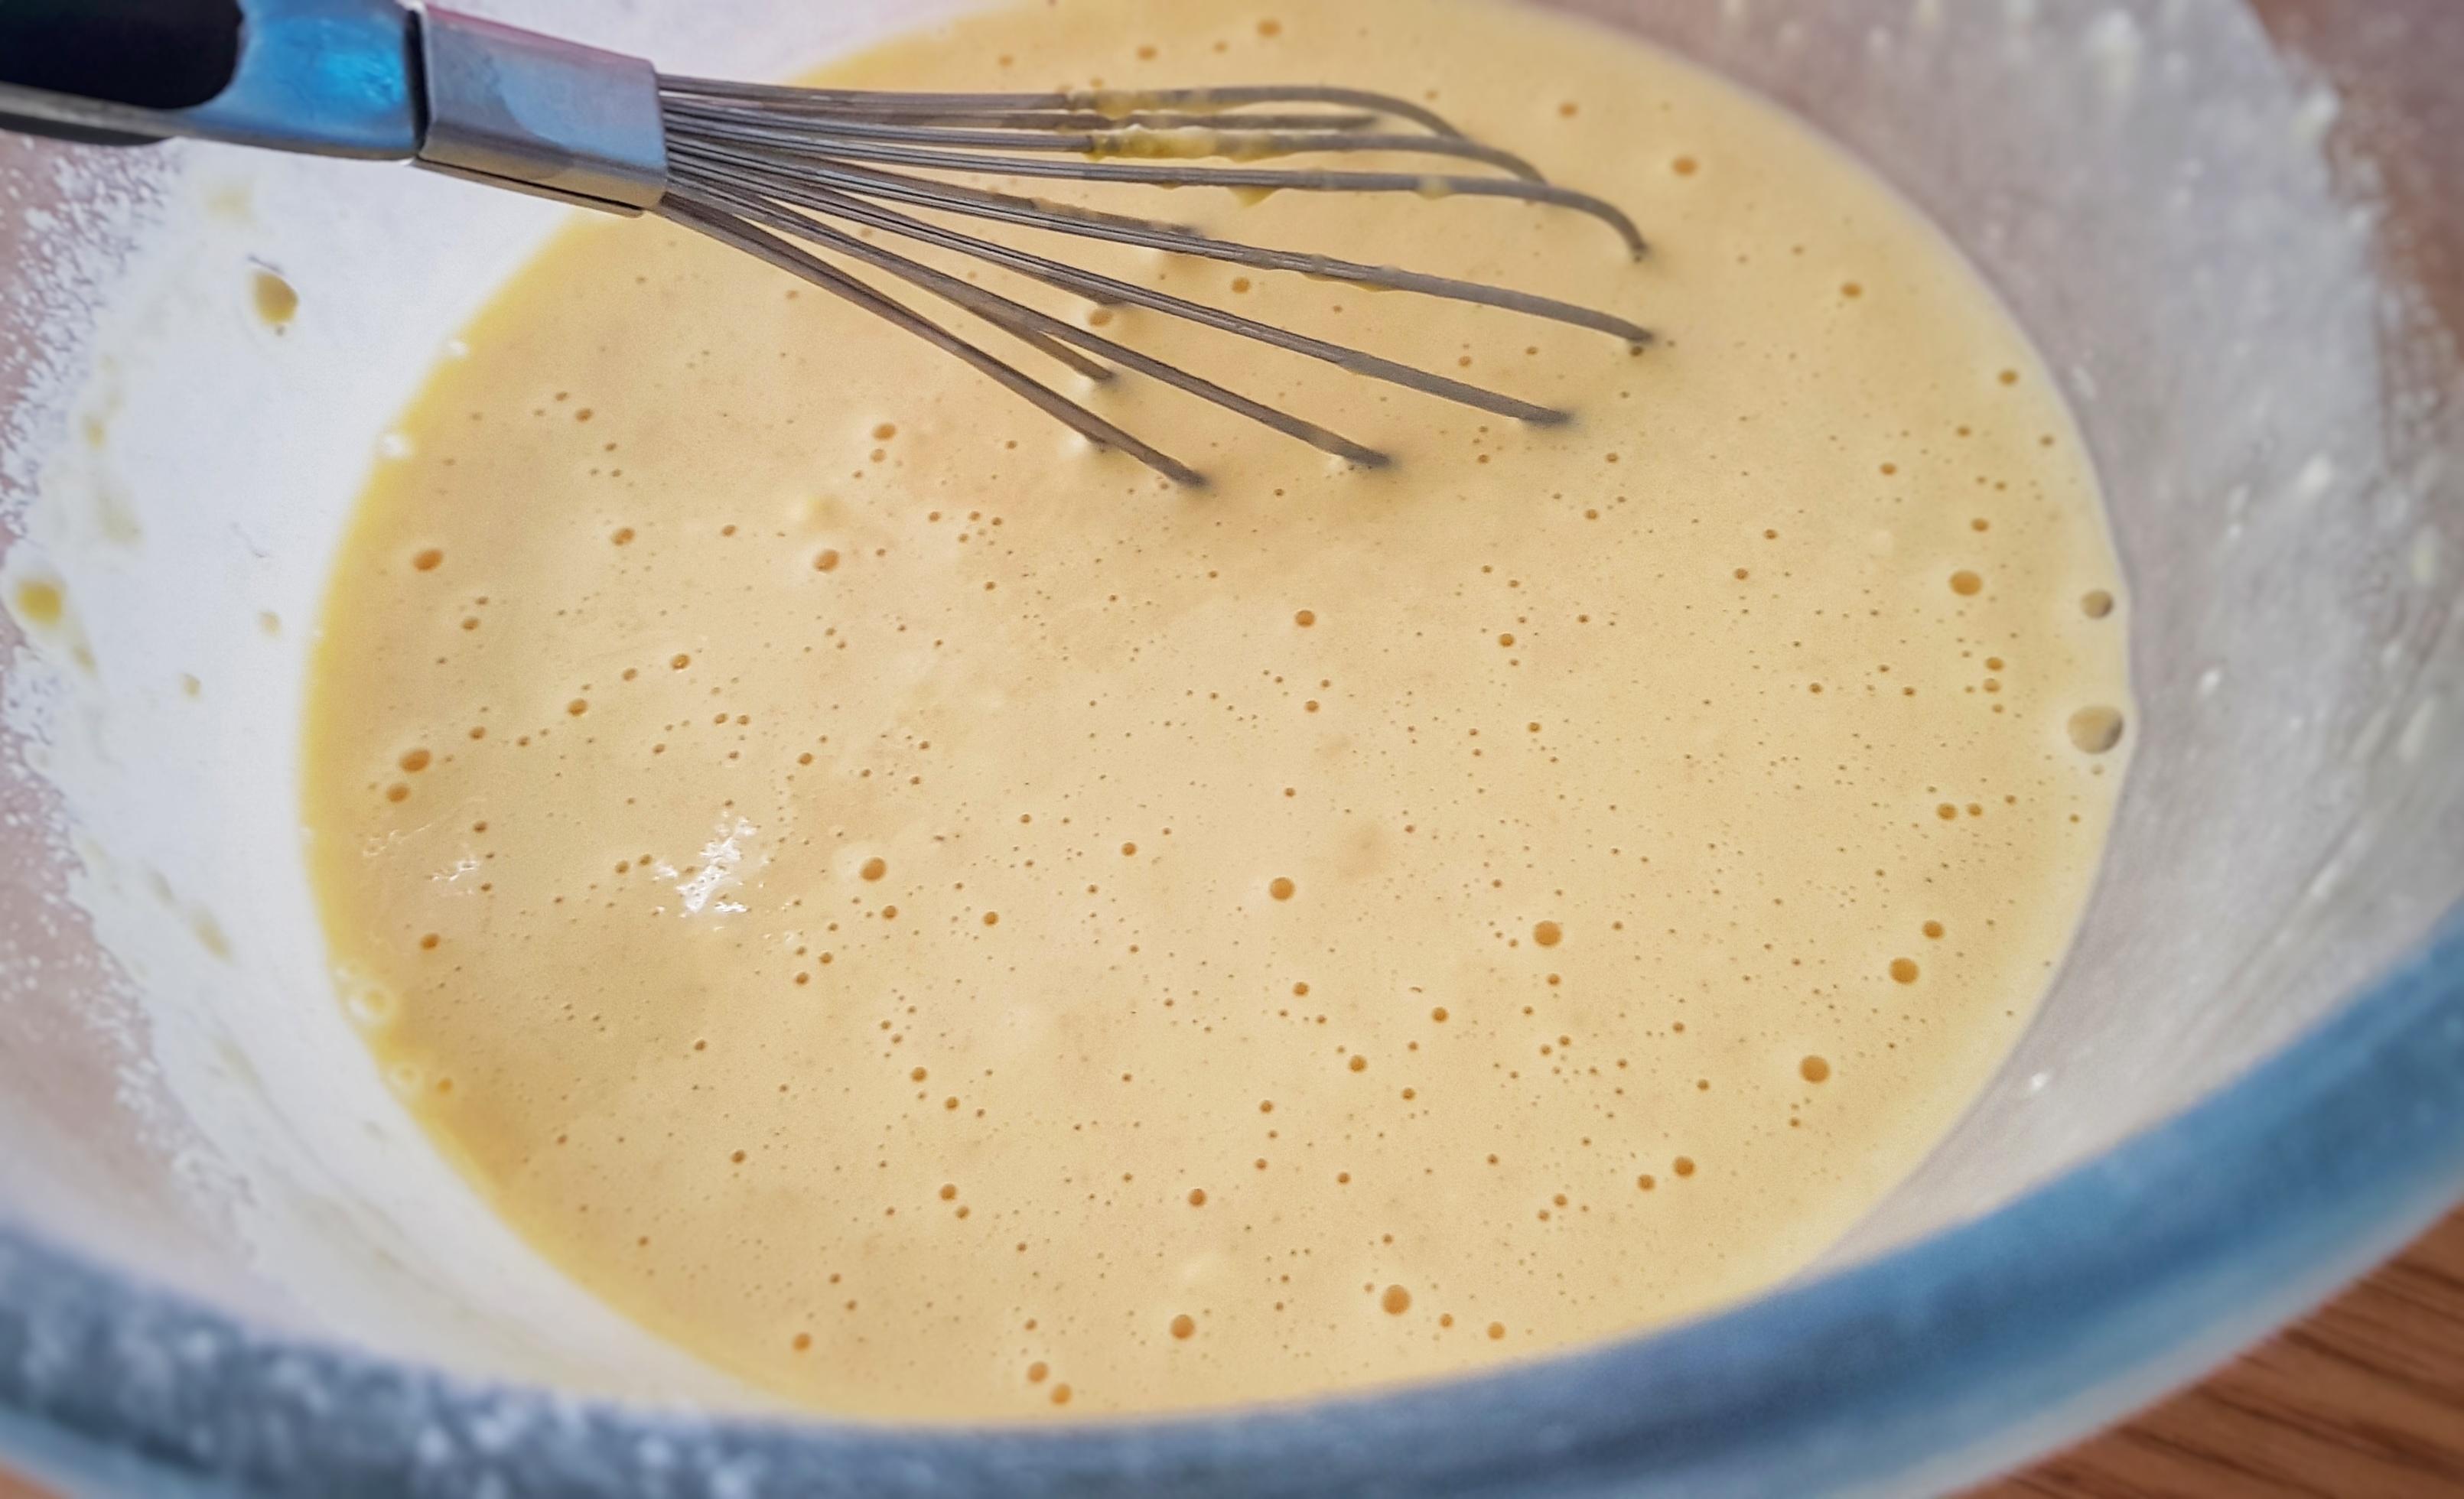
Once the flour and eggs are mixed, add the milk, whisking slowly at first, until it is fully mixed in, then give it a good thrashing for 30 seconds or so. Leave, covered, at room temperature until you want to cook it. If you like, pour the whole lot into a jug, for easier handling later.
When you are ready to cook your pudding, preheat the oven to 200°C.
Place the fat in your tin or dish – I used an earthenware dish of dimension 20 x 28 cm, with steeply sloping sides – and place on the centre shelf of your oven. Give the dish and fat plenty of time to get fully hot: I leave it in there for a good 25 minutes.
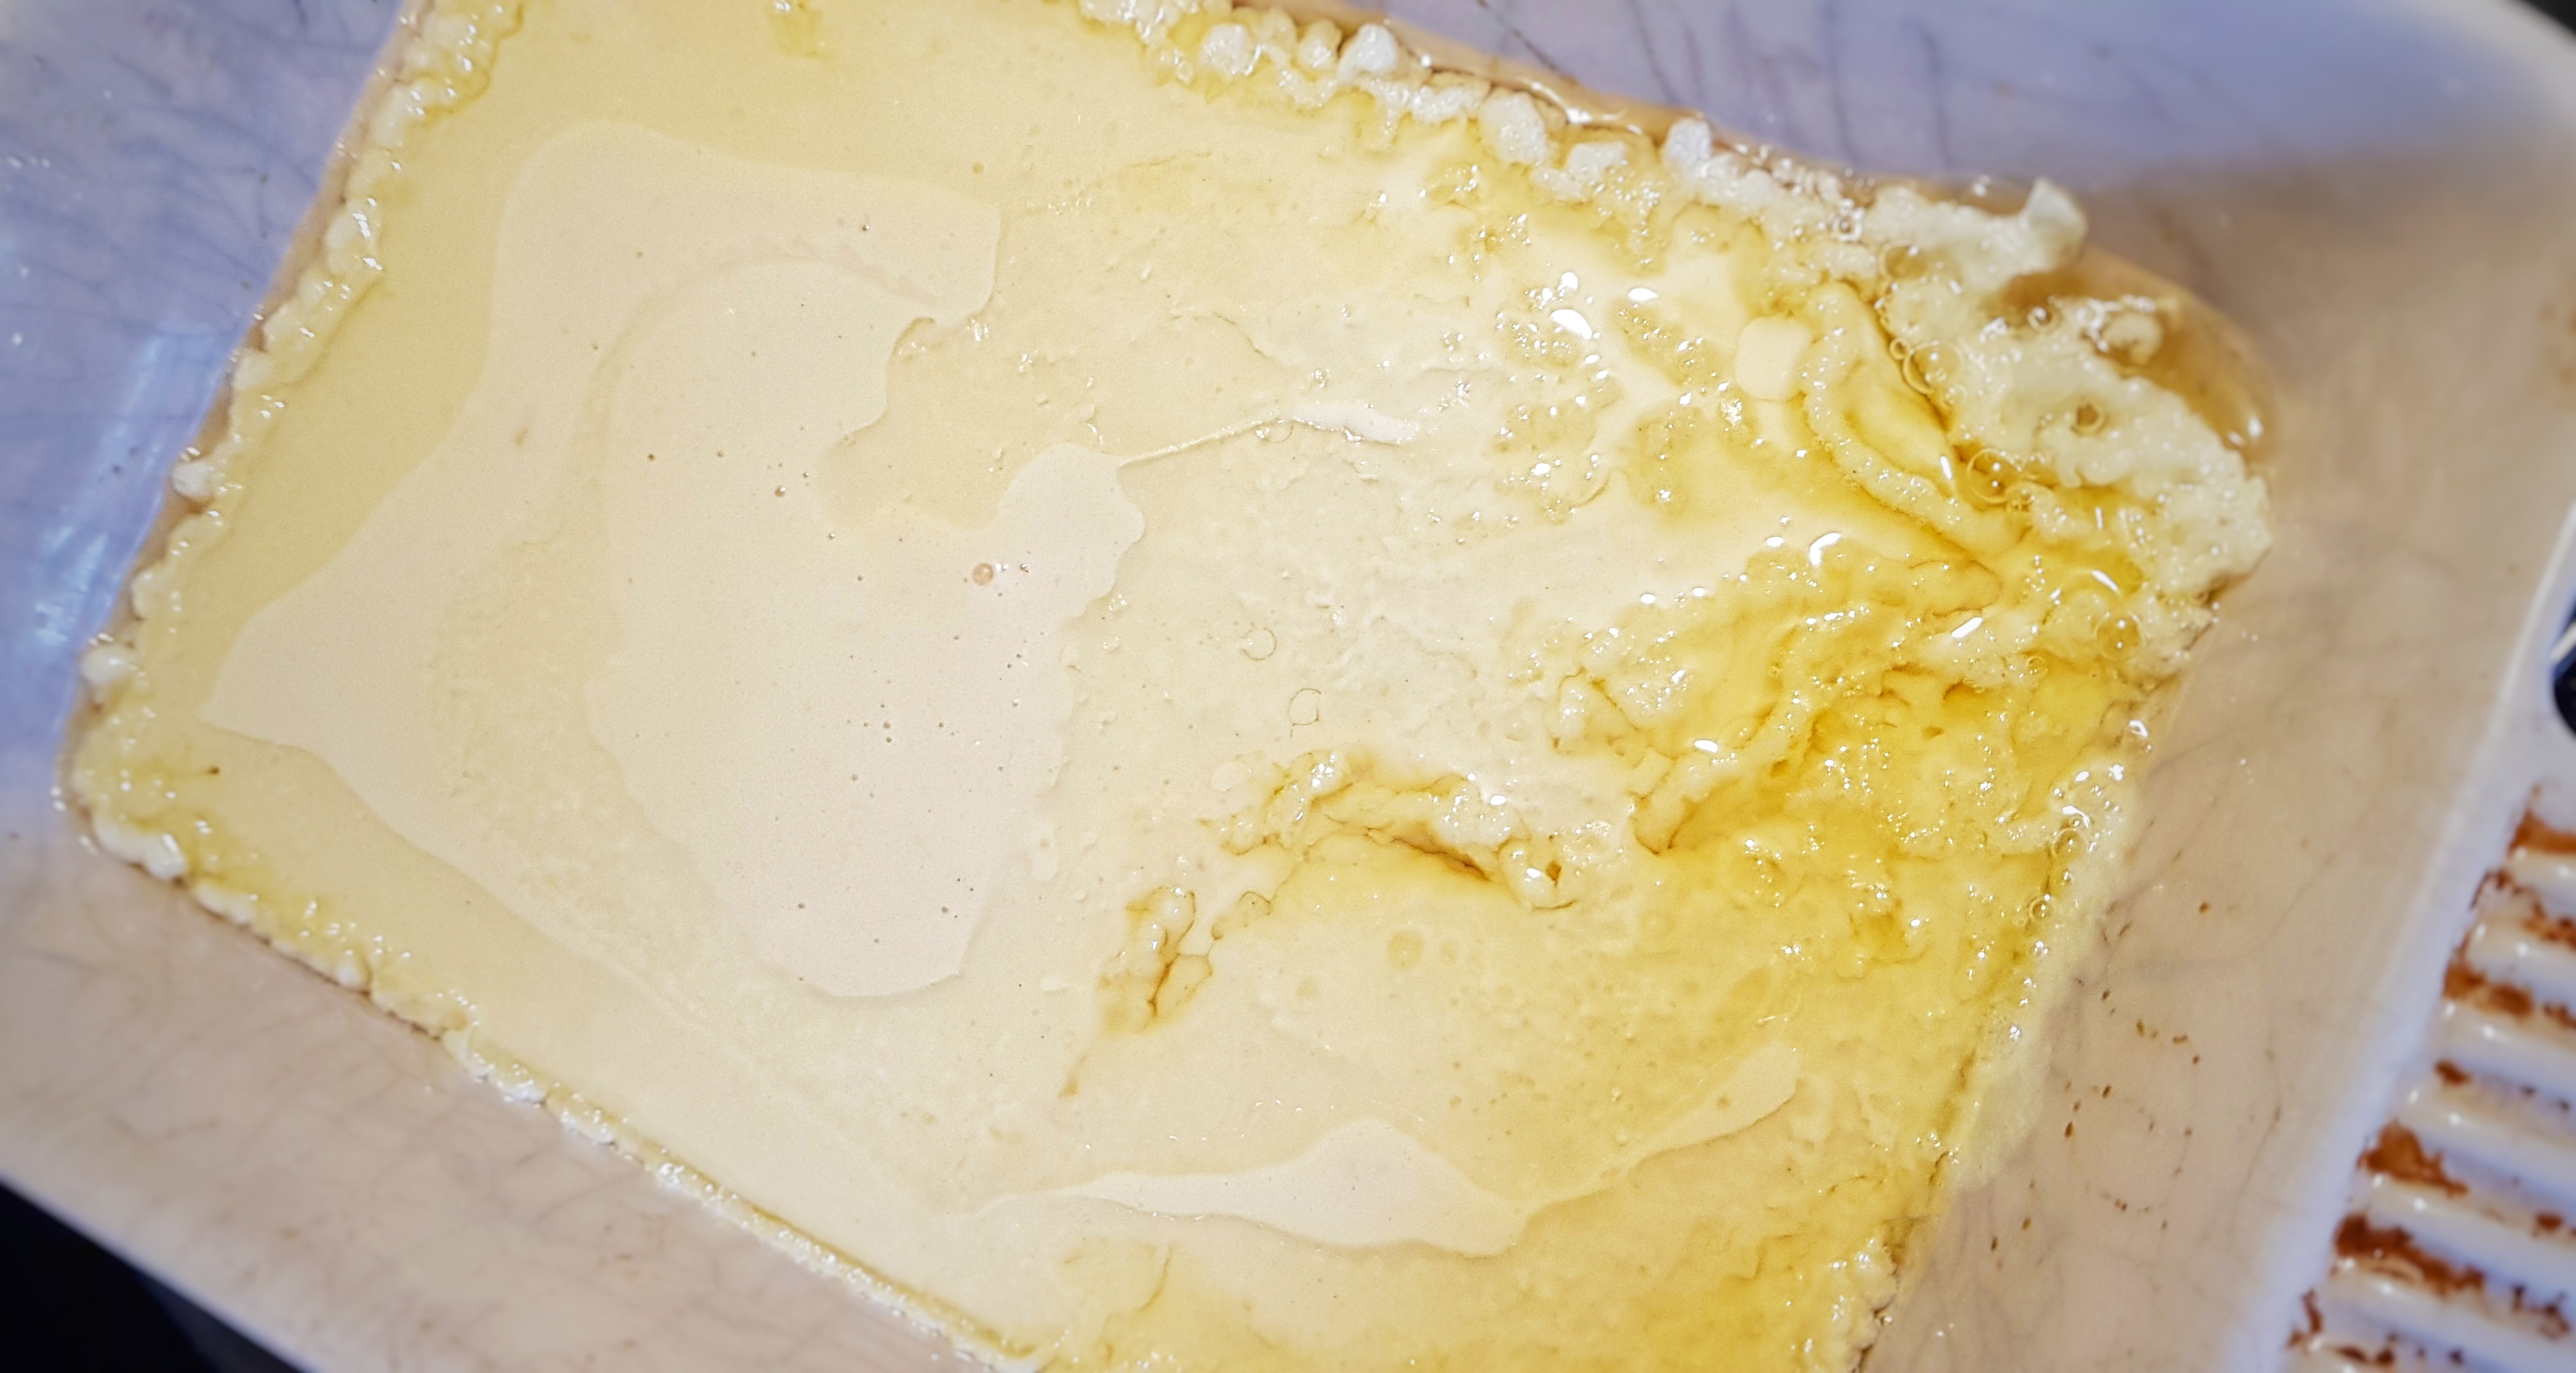
Now give the batter a final good whisking, quickly (but carefully) open the oven door, pull the shelf of the oven out slightly so that you can pour in the batter. The batter should sizzle and frill up in the fat.
Quickly push the shelf back into place and close the door. Do not open the door until 25 minutes have elapsed.
Bake for 25 to 30 minutes, depending upon how dark you like your risen crispy edges.
Remove and slice into squares, serving it up with your roast dinner.
To Roast a Chicken
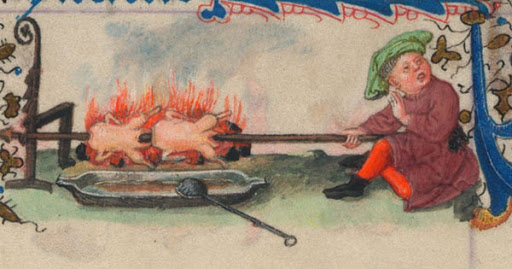
For centuries, the British were famous for their roast meat, attached to a spit before being hand-turned by some poor soul in front of a devilishly hot fire. We no longer do this, today we cook them in the oven, so technically they are baked meats not roasted ones. Searching for historical recipes for roast chicken is rather tricky: they were rarely roasted – they were a dependable source of eggs after all – so only chickens that stopped laying were eaten, those so-called ‘old boilers’. Instead, capons provided tender meat; these castrated cockerels were put to good, being otherwise surplus to requirement. Unfortunately, in today’s mass production of eggs, male chicks are killed as soon as they can be sexed.
When you do find a recipe, there is little focus on the roasting itself. Check out this recipe for ‘Chicken Endored’ from around 1450:
Take a chicken, draw it and roast it; let the feet be on and take away the head. Then make a batter of egg yolks and flour, and add to it ground ginger and pepper, saffron and salt, and spread it over until it is roasted enough.
By the eighteenth century, there is little more instruction, but we do at least get a cooking time:
To roast young chickens, pluck them very carefully, draw them, only cut off the claws, truss them, and put them down to a good fire. Singe, dust and baste them with butter, they will take a quarter of an hour roasting. Then…lay them on your dish.
We can only assume that the roasting part of the process was already in the readers’ skill set.
My recipe is below, but there are a few things I should mention first: First, never wash your chicken! It’s unhygienic and it will stop the skin crisping up. Second, do not overcook and don’t fear the salmonella; follow the times and temperatures precisely and you will be grand. Thirdly, use plenty of butter and bacon to season the bird and keep moist. I make a flavoured butter for the roasting, but using just butter will still produce great results.
If you like the blogs and podcast I produce, please consider treating me to a virtual coffee or pint, or even a £3 monthly subscription: follow this link for more information.
1 free-range chicken
100 g butter, softened
Salt and pepper
Any flavourings you like: e.g. 1 to 4 finely chopped cloves of garlic, 1 tsp chopped thyme or lemon thyme, truffle trimmings, chopped rosemary, grated zest half a lemon, chopped olives, anchovies or capers, ½ tsp smoked paprika. The list really is endless.
8 rashers of dry cured bacon, smoked or unsmoked
100 ml white wine
300 ml chicken stock
1 tbs cornflour
Remove the chicken from the fridge and hour before you want to roast it. Untruss it and preheat the oven to 190°C.
Mash the butter with the salt and pepper using a fork and stir in the flavouring ingredients, if using. Set aside.
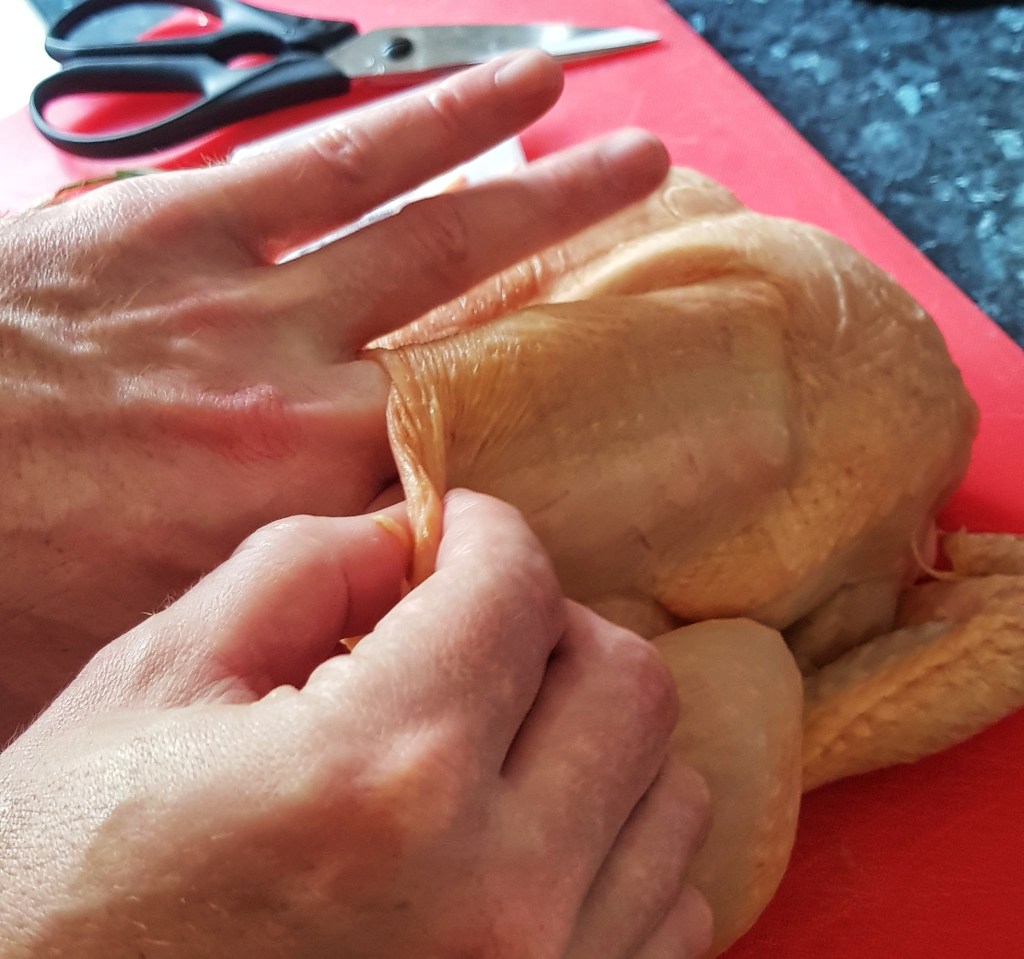
Sit the chicken on a board, untruss it and turn it so that the cavity is facing you and carefully lift the skin away from the breasts. The technique is to insert the tips of your middle three fingers gingerly underneath the skin lifting it away from one breast, using your other hand to keep the skin taught, lest it tears. Repeat for the other breast
Next, place the flavoured butter under the skin, massaging it so to evenly distribute it over the breasts.
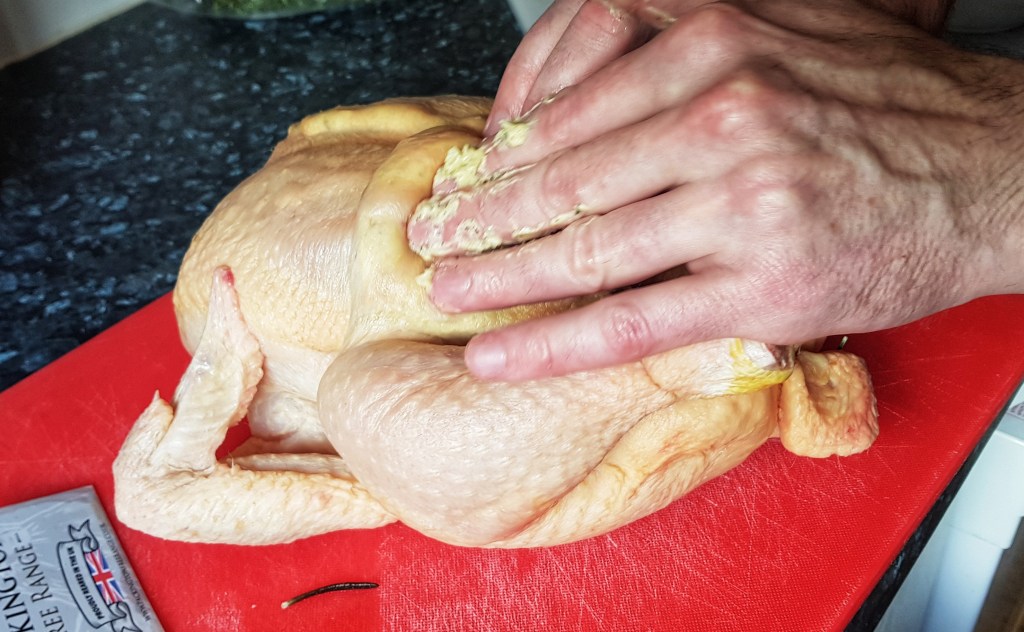
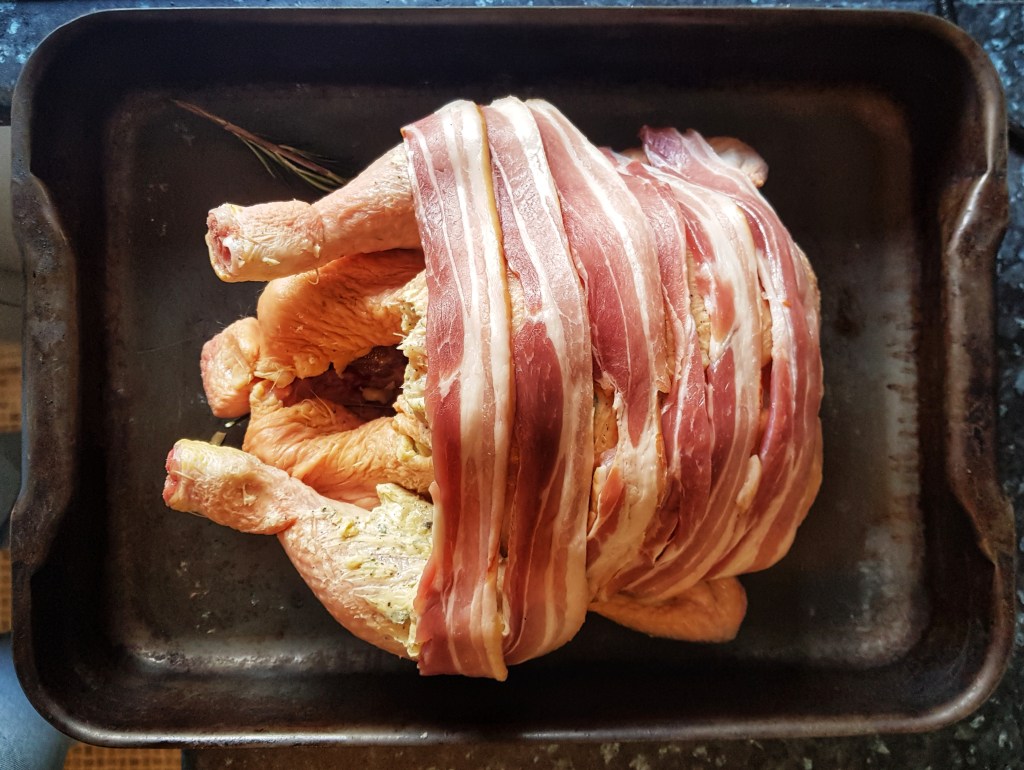
Make sure there is plenty under there, but reserve around a quarter of it to spread it over the legs. Next, lay the rashers of bacon over the bird so they overlap only slightly.
Weigh the chicken then pop it on a roasting tin. Don’t be tempted to truss it. Calculate the cooking time: 45 minutes per kilo plus 15 minutes and place in the oven.
Leave undisturbed for 30 minutes, and then baste with any butter that has melted and leaked from the bird. Tip to one side, so that buttery juices come out of the chicken. Baste with the juices every 20 minutes or so, and when the bacon is sufficiently crisp, remove it and let the bird roast without its porky jacket for the remaining time.
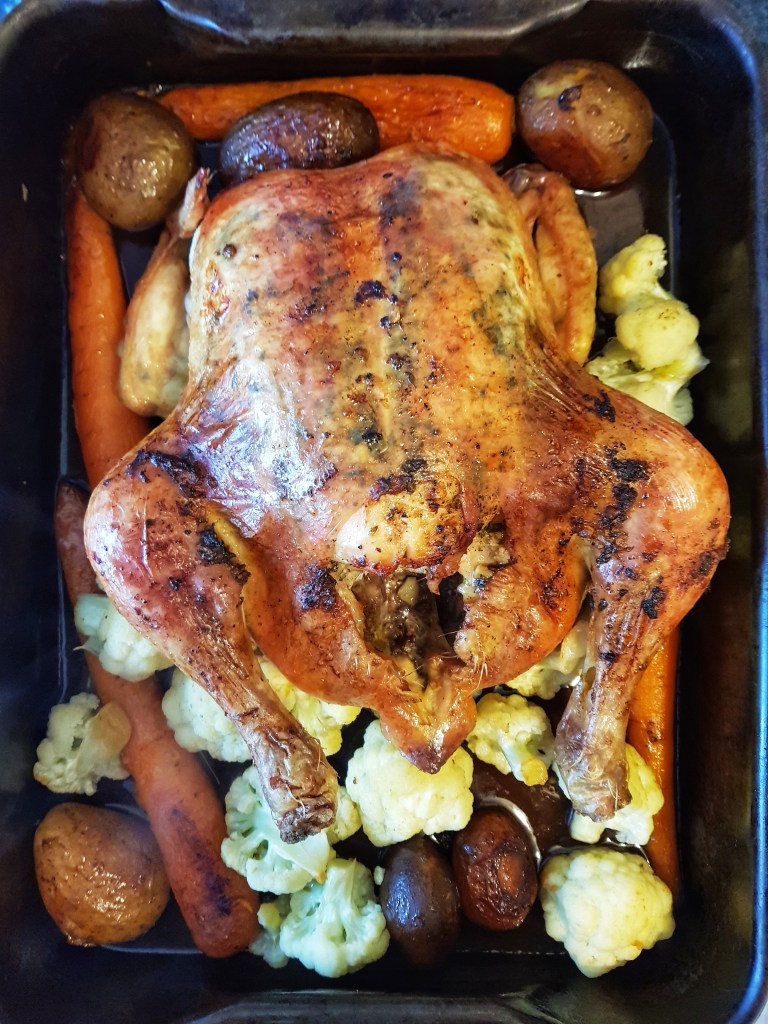
Remove and check its cooked all of the way through by easing the leg away from the body, it should be filled with delicious, clear juices. If unsure, use a sharp knife to test the juices are clear in thickest part of the leg. If they are tinged with pink, roast ten more minutes.
Remove the tender chicken – be careful it may start to collapse a bit, so be swift and use a fish slice and a pair of tongs to help you guide it to a board safely and all in one piece. Cover with foil to rest while you make the gravy.
Tip the juices into a jug and allow to settle for a few minutes. Place the roasting tin over a medium-high heat and brown any delicious detritus that remains in the roasting tin. Deglaze with the wine, scraping off any brown bits with a wooden spoon, then tip the whole lot into a saucepan and bring to a simmer. Meanwhile skim away most of the fat from the chicken juices and pour them into the pan along with the stock. Bring to a boil and let it bubble away for ten minutes so it reduces a little.
Now slake the cornflour with a few tablespoons of cold water and whisk it briskly into the gravy. Give it a couple of minutes to thicken, and if it seems on the thin side, slake a little more; it’s all down to preference, I prefer a thin gravy.
Check for seasoning and leave on a low heat whilst you get everything ready.
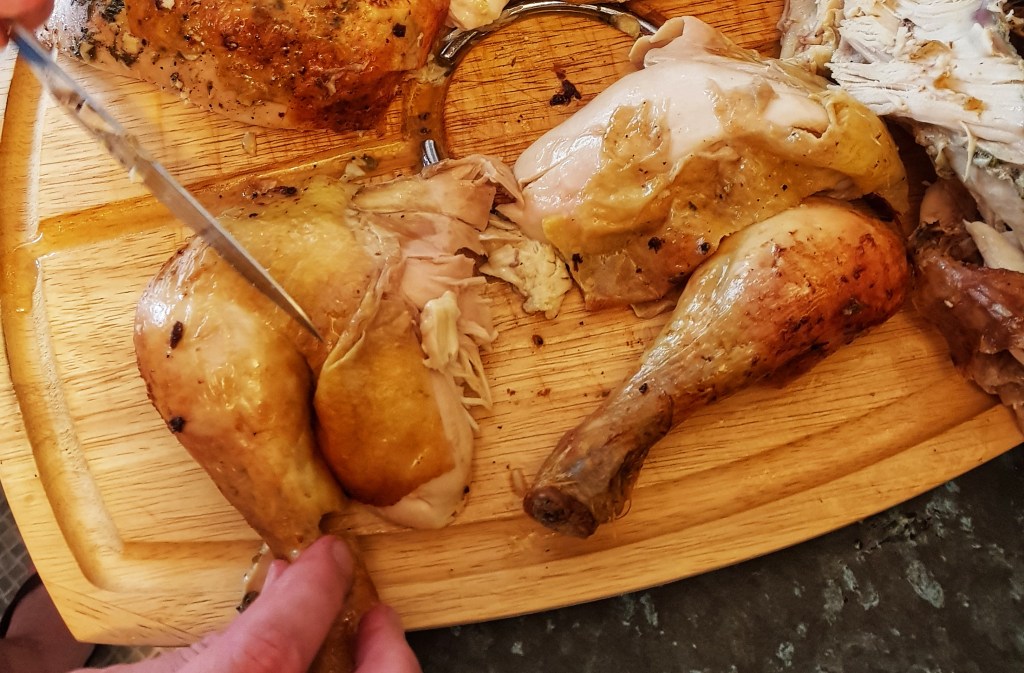
To carve the chicken I find it easiest to remove the legs first, cutting them at the knee to give two thighs and two drumsticks, and then cutting each breast away in one piece, cutting them into four or five thick pieces.
Arrange them on a warmed serving plate and don’t forget to serve the bacon.
References
The Culinary Recipes of Medieval England (2013) compiled and translated by Constance B Hieatt
The Experienced English Housekeeper (1769) Elizabeth Raffald
Snipe
Last week I was very excited to hold of some snipe, a very rare treat indeed. I roasted them and got them on my menu. To eat them in the traditional way is, by our modern standards, rather macabre; they are cooked and roasted completely whole. Guts and brain are eaten. It’s not for the faint-hearted, but, as is often the case, they make delicious eating. I was worried I had gone a little too far, but the people of Levenshulme did me proud.
So here’s a post all about snipe and how to roast and eat them in the traditional way.
A while back I wrote a general entry about game. Read it here.
Snipe in brief:
Season: 12 Aug – 31 Jan (England, Wales & Scotland); 1 Oct – 31 Jan (Northern Ireland)
Hanging time: 2-3 days
Weight: 150g
Roasting time: 10-15 minutes at 230⁰C
Breeding pairs in UK: 80 000
Indigenous?: Yes
Habitat: Mainly marshes and wetlands, but also heathland, moorland and water meadows
Collective noun: wisp (when in flight); walk (when on foot)
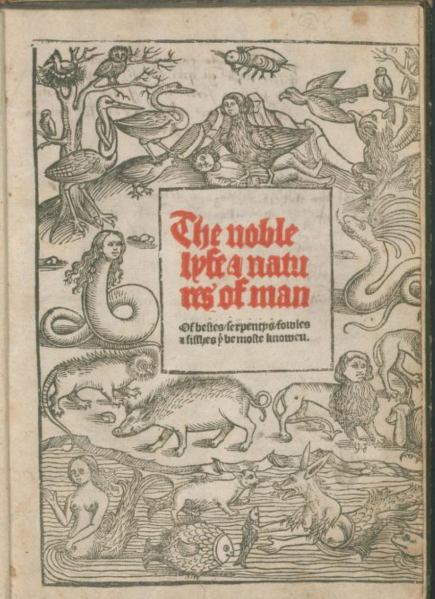
What is a snipe? Well Laurence Andrew, writing in his tome The noble lyfe and natures of man of bestes, serpentys, fowles and fishes… (c. 1527) has a pretty good stab and describing it (though I’m sure the snipe does not get its bill stuck in the mud Natural Selection would have something to say about that!):
Snyte [Snipe] is a byrde with a longe bylle & he putteth his byll in the erthe for to seke the worms in the grounde and they put their bylles in the earthe sometyme so depe that they can nat get it up agayne & thane they scratche theyr billes out agayn with theyr fete. This birde resteth betimes at nyght and they be erly abrode on the morning & they have swete flesshe to be eaten.
Weighing in at an average of 150g, the snipe is our smallest legal game bird. They are not an introduced species like the pheasant, red legged partridge or rabbit, but indigenous to the UK and Ireland (where most reside). There are around 80 000 breeding pairs in the UK, but these numbers increase substantially when around one million individuals flock to the country to overwinter.
Normally, shooting indigenous species holds up a red light for conservation – and rightly so, it should always come first, but in this case the snipe have the upper hand because they are so damn tricky to shoot.
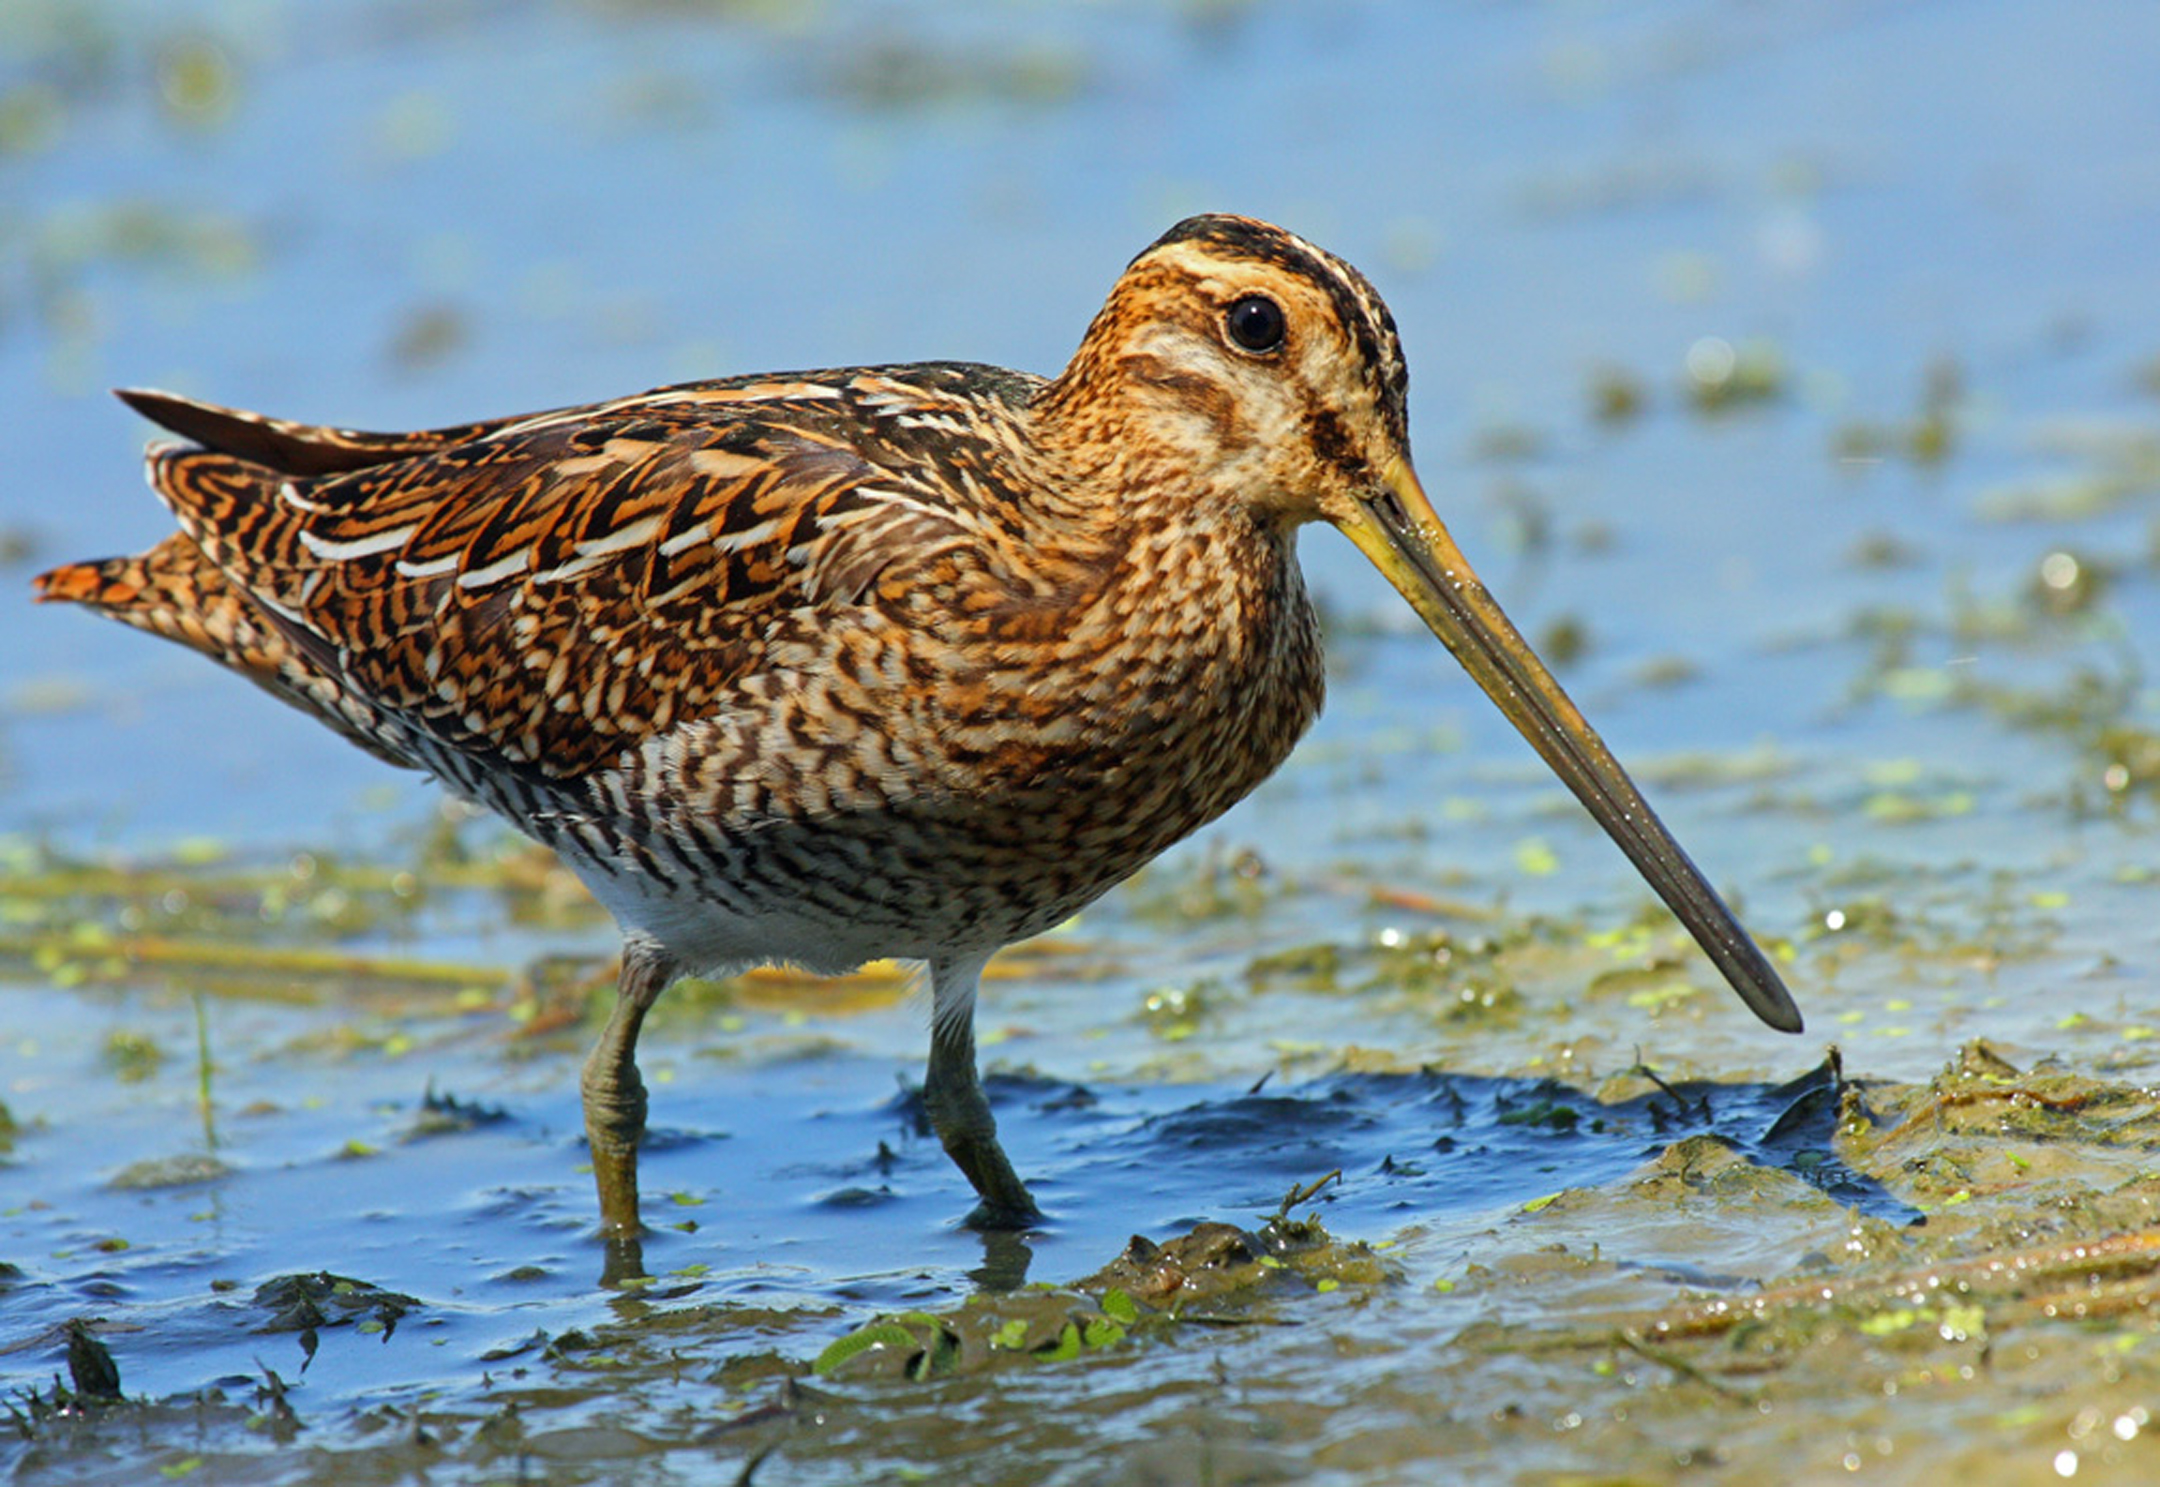
They are secretive, highly camouflaged birds that use their very long bills to probe mud and sand flats for tasty creatures to eat. When driven at a hunt they fly in zig zags and are quickly gone again, this is why a group of them is called a wisp. (It’s no surprise, then, that especially good sharp shooters in the armed forces became known as snipers.) These birds are almost self-managing in their difficulty to hunt!
As a food they are delicious, indeed they are considered the finest eating. They are wonderfully rich and tender, and although they are small, a little goes a long way. Winston Churchill once demanded ‘a brace of snipe washed down with a pint of port’ as a hangover cure whilst on a transatlantic flight to Washington DC. Their carcasses make excellent stock.
Not just the leg and breast meat are eaten, but also the brain and the trail – in other words, the innards of the bird, usually scooped out and spread on the slice of toast it was roasted upon.
Don’t be repulsed by this! Your first worry is probably that the guts will be full of the bird’s faeces, well worry not, the snipe (and its larger cousin, the woodcock) evacuates its bowel as soon as it takes flight. Your second worry, presumably, is that you are eating gory intestines, liver, heart etc. Again, nothing to worry about here either! It is all very soft, rich and tender like a lovely warm pâté.
The head is cut in half lengthways so that the brain can removed or sucked out.
This is ancient finger food.
Sourcing snipe
As you will have guessed, finding snipe for the table is tricky. I’ve only ever seen snipe three times in butcher’s shop windows so my advice is to make friends with someone who shoots, because only a few will have been shot on any single hunt, and therefore it’s unlikely there will be any surplus for the butcher to pick up. The chances are you’ll probably have to finish the business of hanging the bird(s) yourself.
Most game birds are sold in ‘braces’, i.e. pairs, usually a cock and hen, but snipe actually come in threes, or ‘fingers’, so-called because that’s how many you can hold between the fingers of one hand.
These tiny birds do not need to hang for long, just 2 or 3 days. If it is unseasonably warm or being hung indoors 1 or 2 days should do the trick.
Preparing snipe for the table
You are to observe: we never take anything out of a wood cock or snipe
James Doak’s Cookbook, circa 1760
Snipe are extremely easy to prepare if you are roasting them:
- Pluck away the leg and breast feathers. If you like, remove the skin from its head.
- Truss the snipe with its own beak, by pulling its head down to its side and spearing the legs with its long bill.
Some recipes as you to remove the trail before you cook it (sometimes to be fried up with butter and smoked bacon). To do this, make a small incision in its vent and use a small tea or coffee spoon to remove the entrails.
Snipe can also be cooked just like any other bird if you prefer (but you are missing out on a real treat). Pluck the whole body, or peel away the skin, and cut away legs, head and feet.
If you like the blogs and podcast I produce, please consider treating me to a virtual coffee or pint, or even a £3 monthly subscription: follow this link for more information.
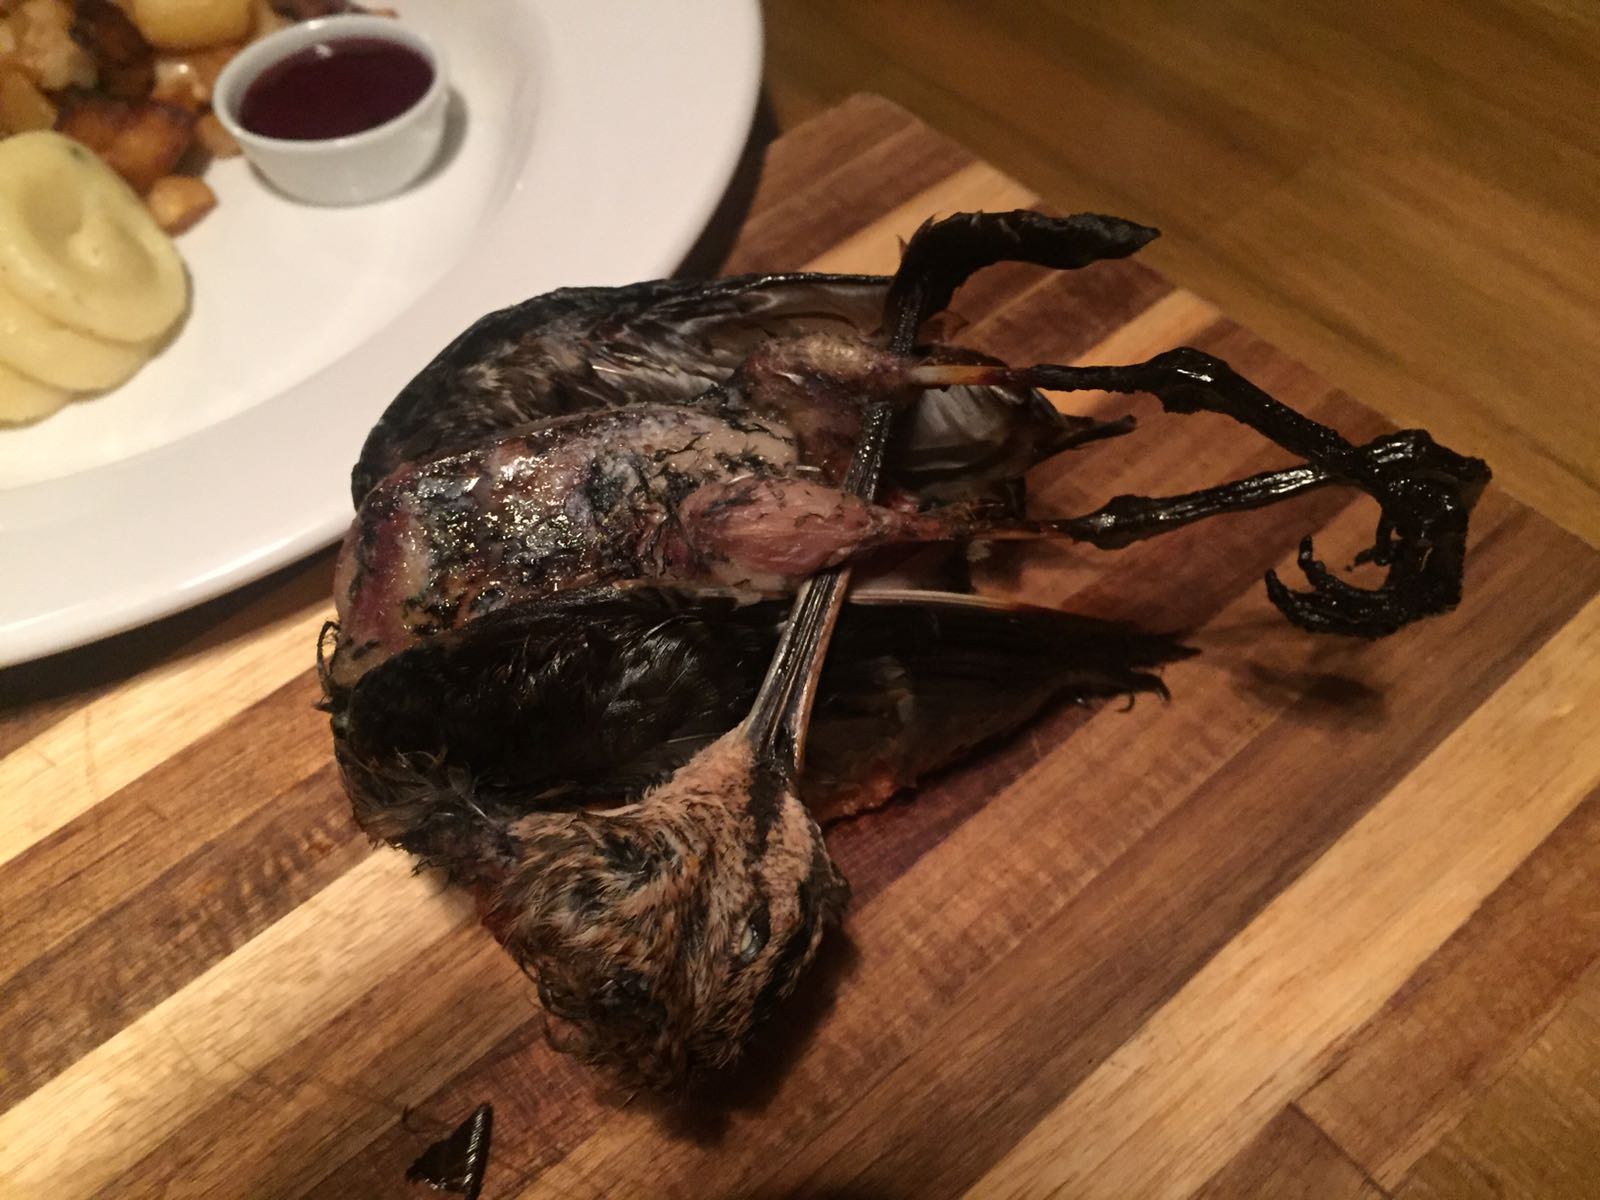
Roast snipe, and how to eat it
Per person:
1 or 2 oven-ready snipe
1 or 2 pieces of toast, as large as the snipe
Butter
Salt and pepper
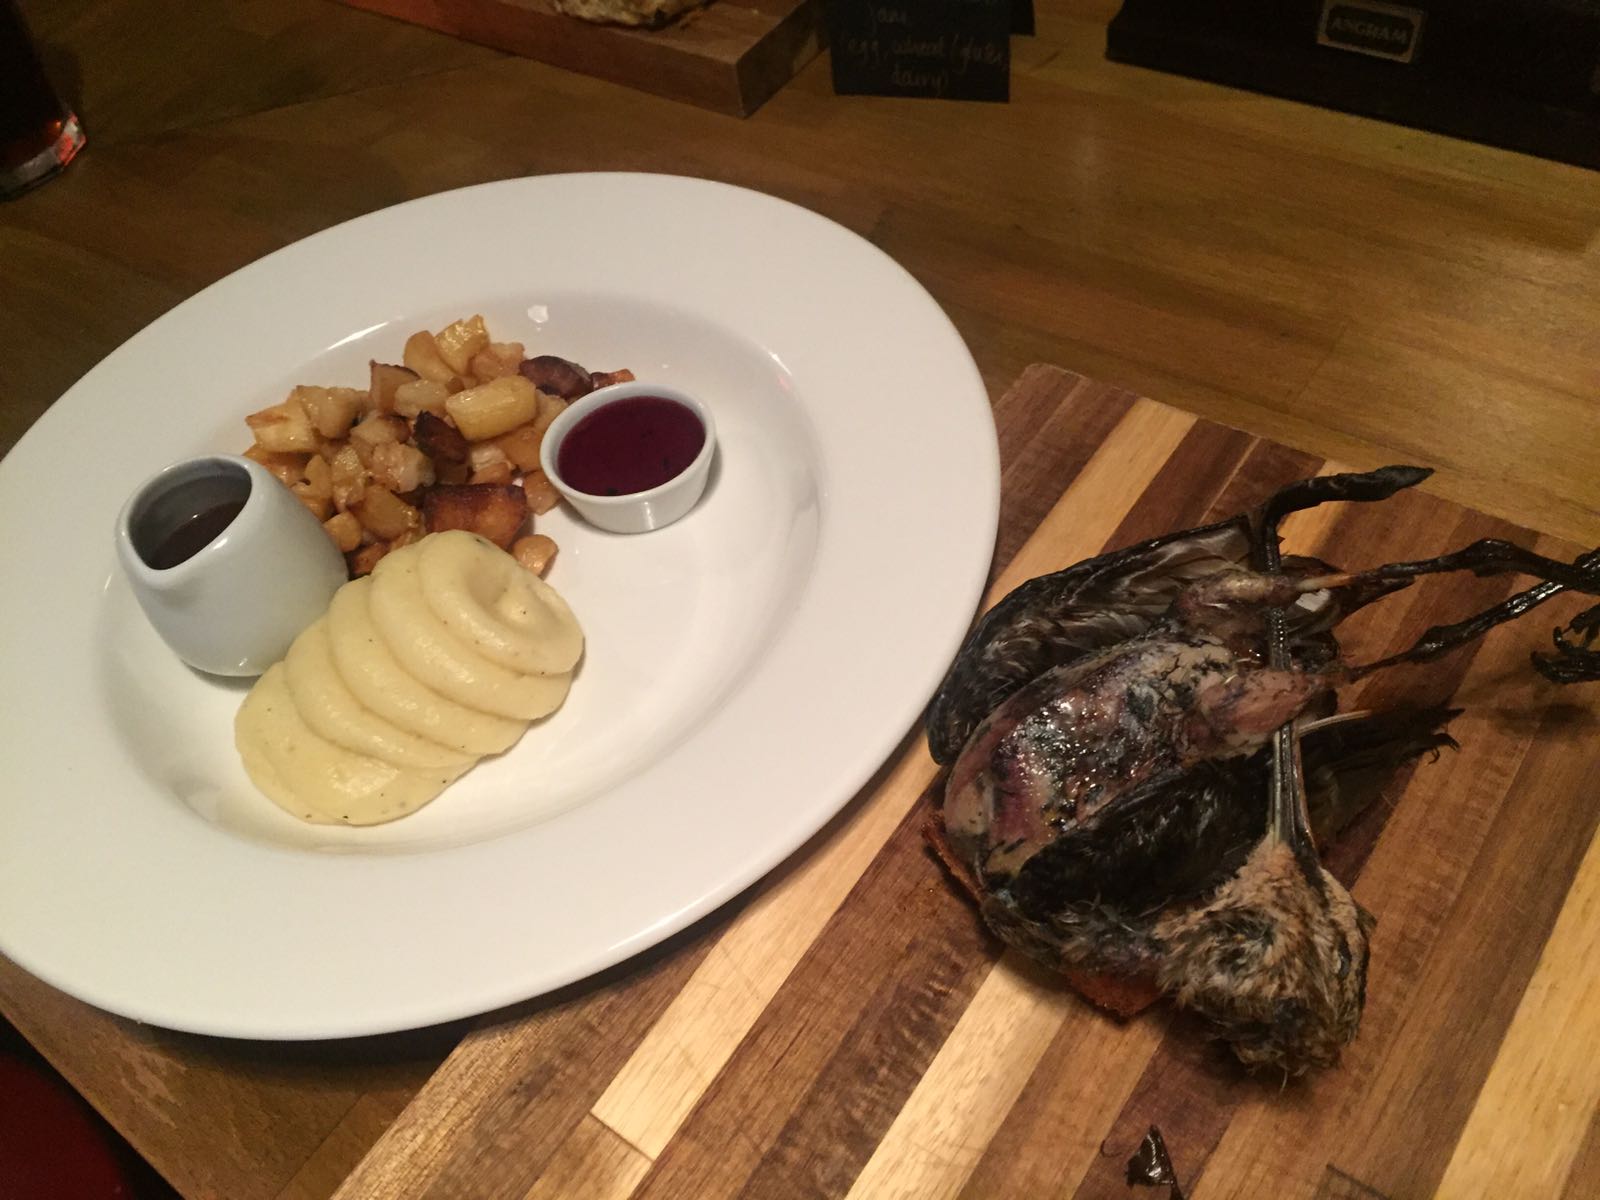
To accompany:
Mashed potatoes or game chips
Roast vegetables
Gravy made from game stock
A sweet jelly such as redcurrant, quince or medlar jelly
- If your snipe have been kept in the fridge, remove them and let them get to room temperature, about 30-40 minutes.
- Preheat your oven as hot as it will go, 230⁰
- Spread a good knob of butter on the toast and lay the snipe on top. Smear two more small knobs over the snipes’ breasts. Season with salt and pepper.
- Place the snipe on a roasting tin and roast for 10-12 minutes for medium-rare birds. If you are roasting several, make sure that you leave a good gap between each one so that heat can circulate around them.
- Remove from the oven and allow to rest for 5 minutes or so.
- The snipe can then be served to each guest with various accompaniments. I think it’s best if each guest carves their own snipe.
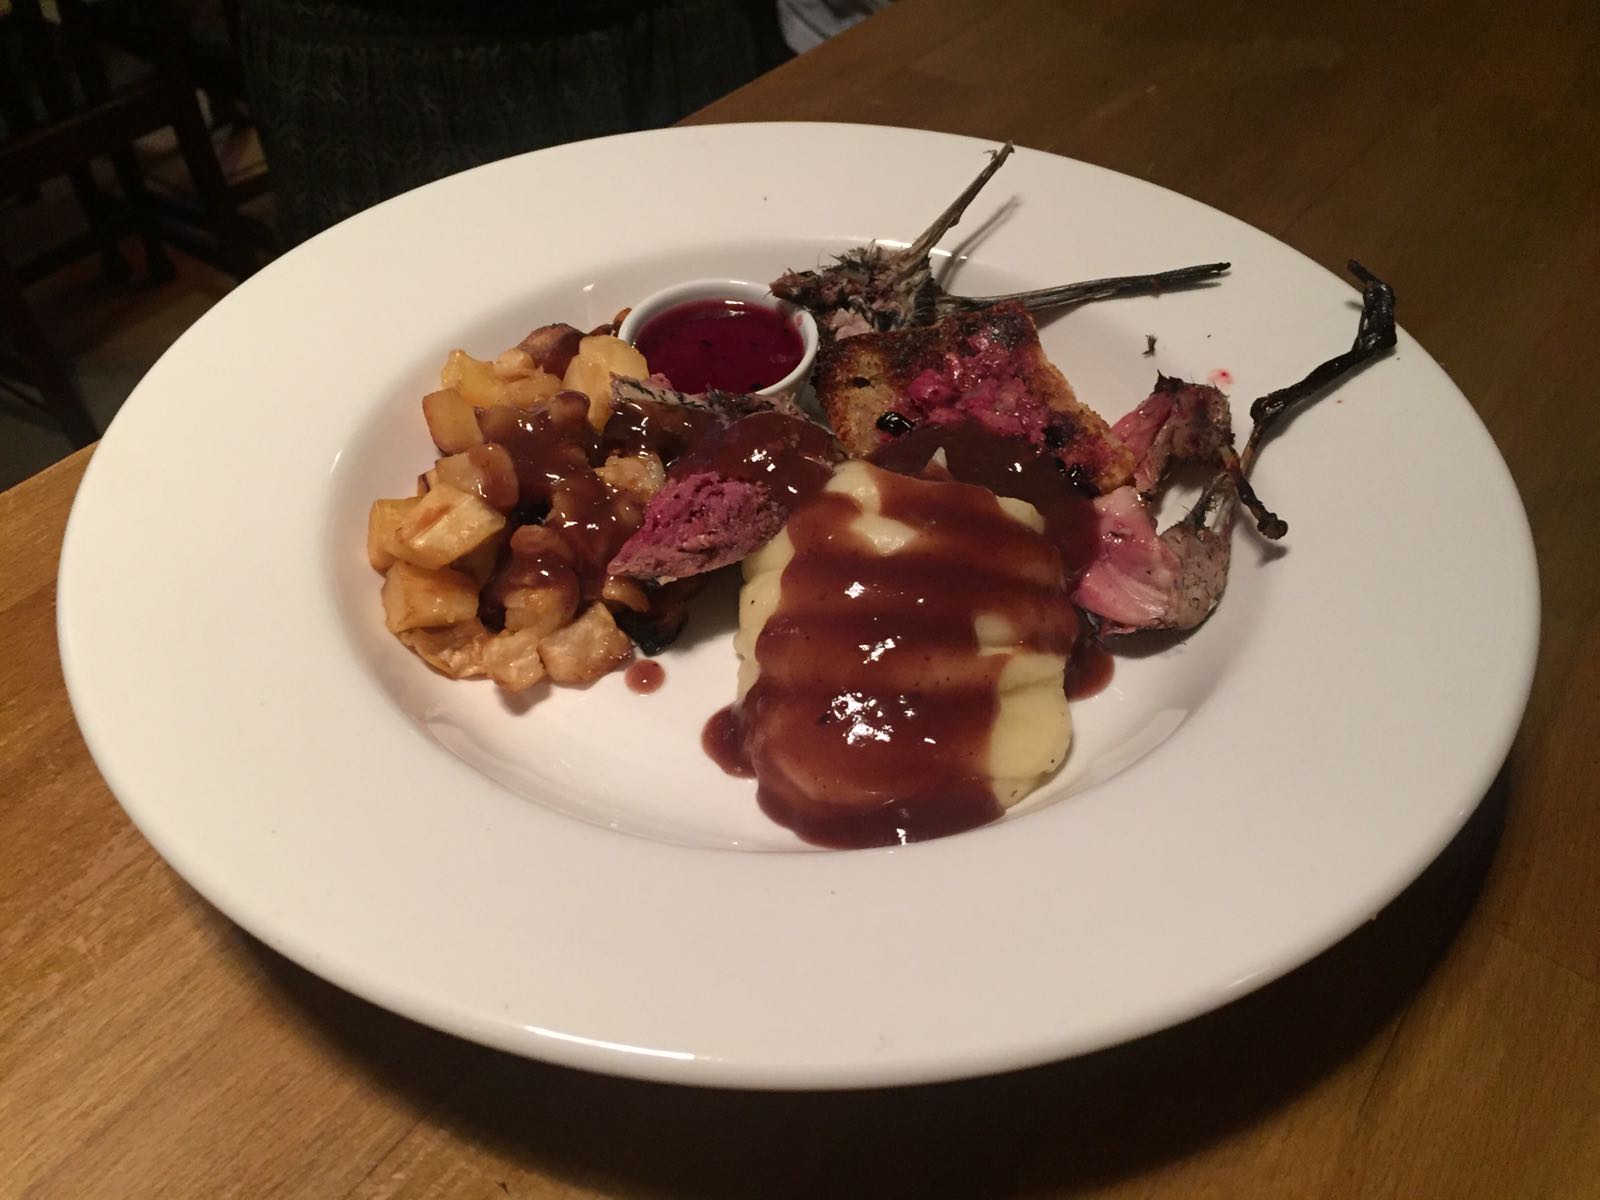
- Take the snipe off its toast and cut of its head. Use a chef’s knife the cut its head in half lengthways.
- Next, scoop out the snipe’s trail with a teaspoon and spread it over the toast.
- Remove the legs and cut away the breasts using a steak knife.
- Eating is fiddly, so use your fingers to get every piece of meat from the carcass.
- Don’t forget the brain – pick up the two halves of the head and use the beak from one half to extract the brain from the other half, then swap. Alternatively, suck the brain out.
Filed under Britain, food, Game, General, natural history, nature, Recipes, Uncategorized
Second Course: Hashed Chickens with Turnips and Roast Quinces (1660)
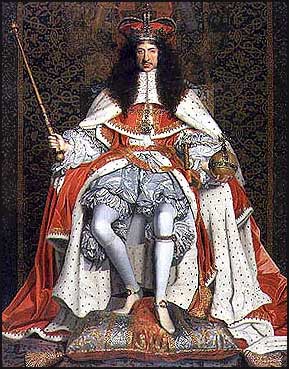
“It’s all back on again!”: Charles II
So, it’s the next course in my Dinner Party Through Time and we have moved up to 1660. It’s the year of the Restoration of the British Monarchy after that to-do with Oliver Cromwell.
Now this recipe has turned out to be a bit of a mystery because as I write it up for you from my notebooks, dear reader, I cannot find out which seventeenth century cook book it is from! My notes say the year, but nothing else. Those of you that like historical cook books will be thinking “the idiot! It’s the Accomplisht Cook by Robert May that he is looking for.” But no, it’s not there. I have looked and looked; through my own collection as well as the internet and I cannot find these blessed chickens or turnips anywhere. If anyone can help me out here, I’d be most grateful.
Anyway, let’s get on with the recipe. Poached chicken is served here with turnips in a creamy and tart sauce. Many things are served as a hash in old books as well as new. In this case, a hash is essentially meat served with some vegetables. As we go on through time, a hash becomes more of a left-over dish, such as the famous corned beef hash.
Along with the hashed chickens, I served up some quinces roasted up with butter, sugar and honey; a typical way of cooking them in the mid-seventeenth century. I couldn’t do a dinner party through time without including the delicious quince.
One last thing before I give you the recipe – use good quality truly free-range chickens. A mass-produced supermarket bird (even a free-range one) will not cut the mustard. I got my chicken, via my local butcher, from the very excellent Packington. Ask your butcher for the nearest similar supplier to you. They do cost quite a lot more, but it is well worth it, and you can certainly tell by the quality of the cooking liquor from poaching the chickens. It makes the base of a delicious soup, so on no account throw it away!
Right, on we go…
For the chickens:
2 free-range large chickens, e.g. from Packingham
2 onions, quartered
2 carrots, peeled and coarsely chopped
4 sticks celery, coarsely chopped
1 fennel bulb, coarsely chopped
bouquet garni of bay leaves, thyme, rosemary
1 tsp black peppercorns
blade of mace
2 tsp salt
For the quinces:
6 good-sized quinces, peeled, cored and quartered
6 knobs of butter
1 tbs sugar
1 tbs honey
For the turnips:
1 kg turnips, peeled and cut into 2cm/1 inch cubes
100g butter
chicken or vegetable stock
75ml white wine or cider vinegar
1 tsp salt
2 tsp sugar
¼ tsp each ground black pepper and ground ginger
2 egg yolks
150ml double cream
Garnish: thinly sliced toast
It looks quite a list of ingredients here, but it’s actually pretty straight-forward. Don’t worry if some things are ready before others – everything can be kept warm under foil or in a low oven.
Start by placing all of the ingredients for the turnips, except for the cream and egg yolks, in a saucepan, adding just enough stock to almost cover them. Cover, and cook on a bare simmer for around 2 hours until very tender. Next, strain the cooking liquor into another saucepan over a low heat. Beat together the yolks and cream and pour into strained liquor, whisking all the time. The sauce with thicken as you whisk. Whatever you do, do not allow the sauce to boil. Return the sauce to the turnips.
During the 2 hours the turnips cook, get on with the other elements of the dish. Lower your chickens, which you might like to quarter first, into a deep stock pot. Get them tightly-packed and snug. Tuck in the vegetables, herbs and spices. Pour in enough water so that it almost covers everything. Pop on the lid and slowly bring to a simmer; let it plop and gurgle only a little. Check a leg after 35 minutes, if it’s nice and tender, you are done. If you are using a really free-range chicken, it may take a little longer.
As you wait for the chicken and turnips to cook, you can get on with the roast quince. Arrange them in an ovenproof dish and coat them in the sugar and honey. Place knobs of butter between the quince pieces. Roast in a moderate oven, around 180⁰C, until tender; around 20-30 minutes. Make sure you turn them every now and again. When ready, keep warm under foil.
Arrange the chicken meat on or off the bone as you prefer with the turnips and quinces all around. Pour over some sauce and tuck in the toast. Serve extra sauce is boats or jugs.
If you like the blogs and podcast I produce, please consider treating me to a virtual coffee or pint, or even a £3 monthly subscription: follow this link for more information.
Filed under Britain, cooking, food, General, history, Meat, Recipes, Seventeenth Century, Uncategorized
