Tag Archives: history

Asparagus

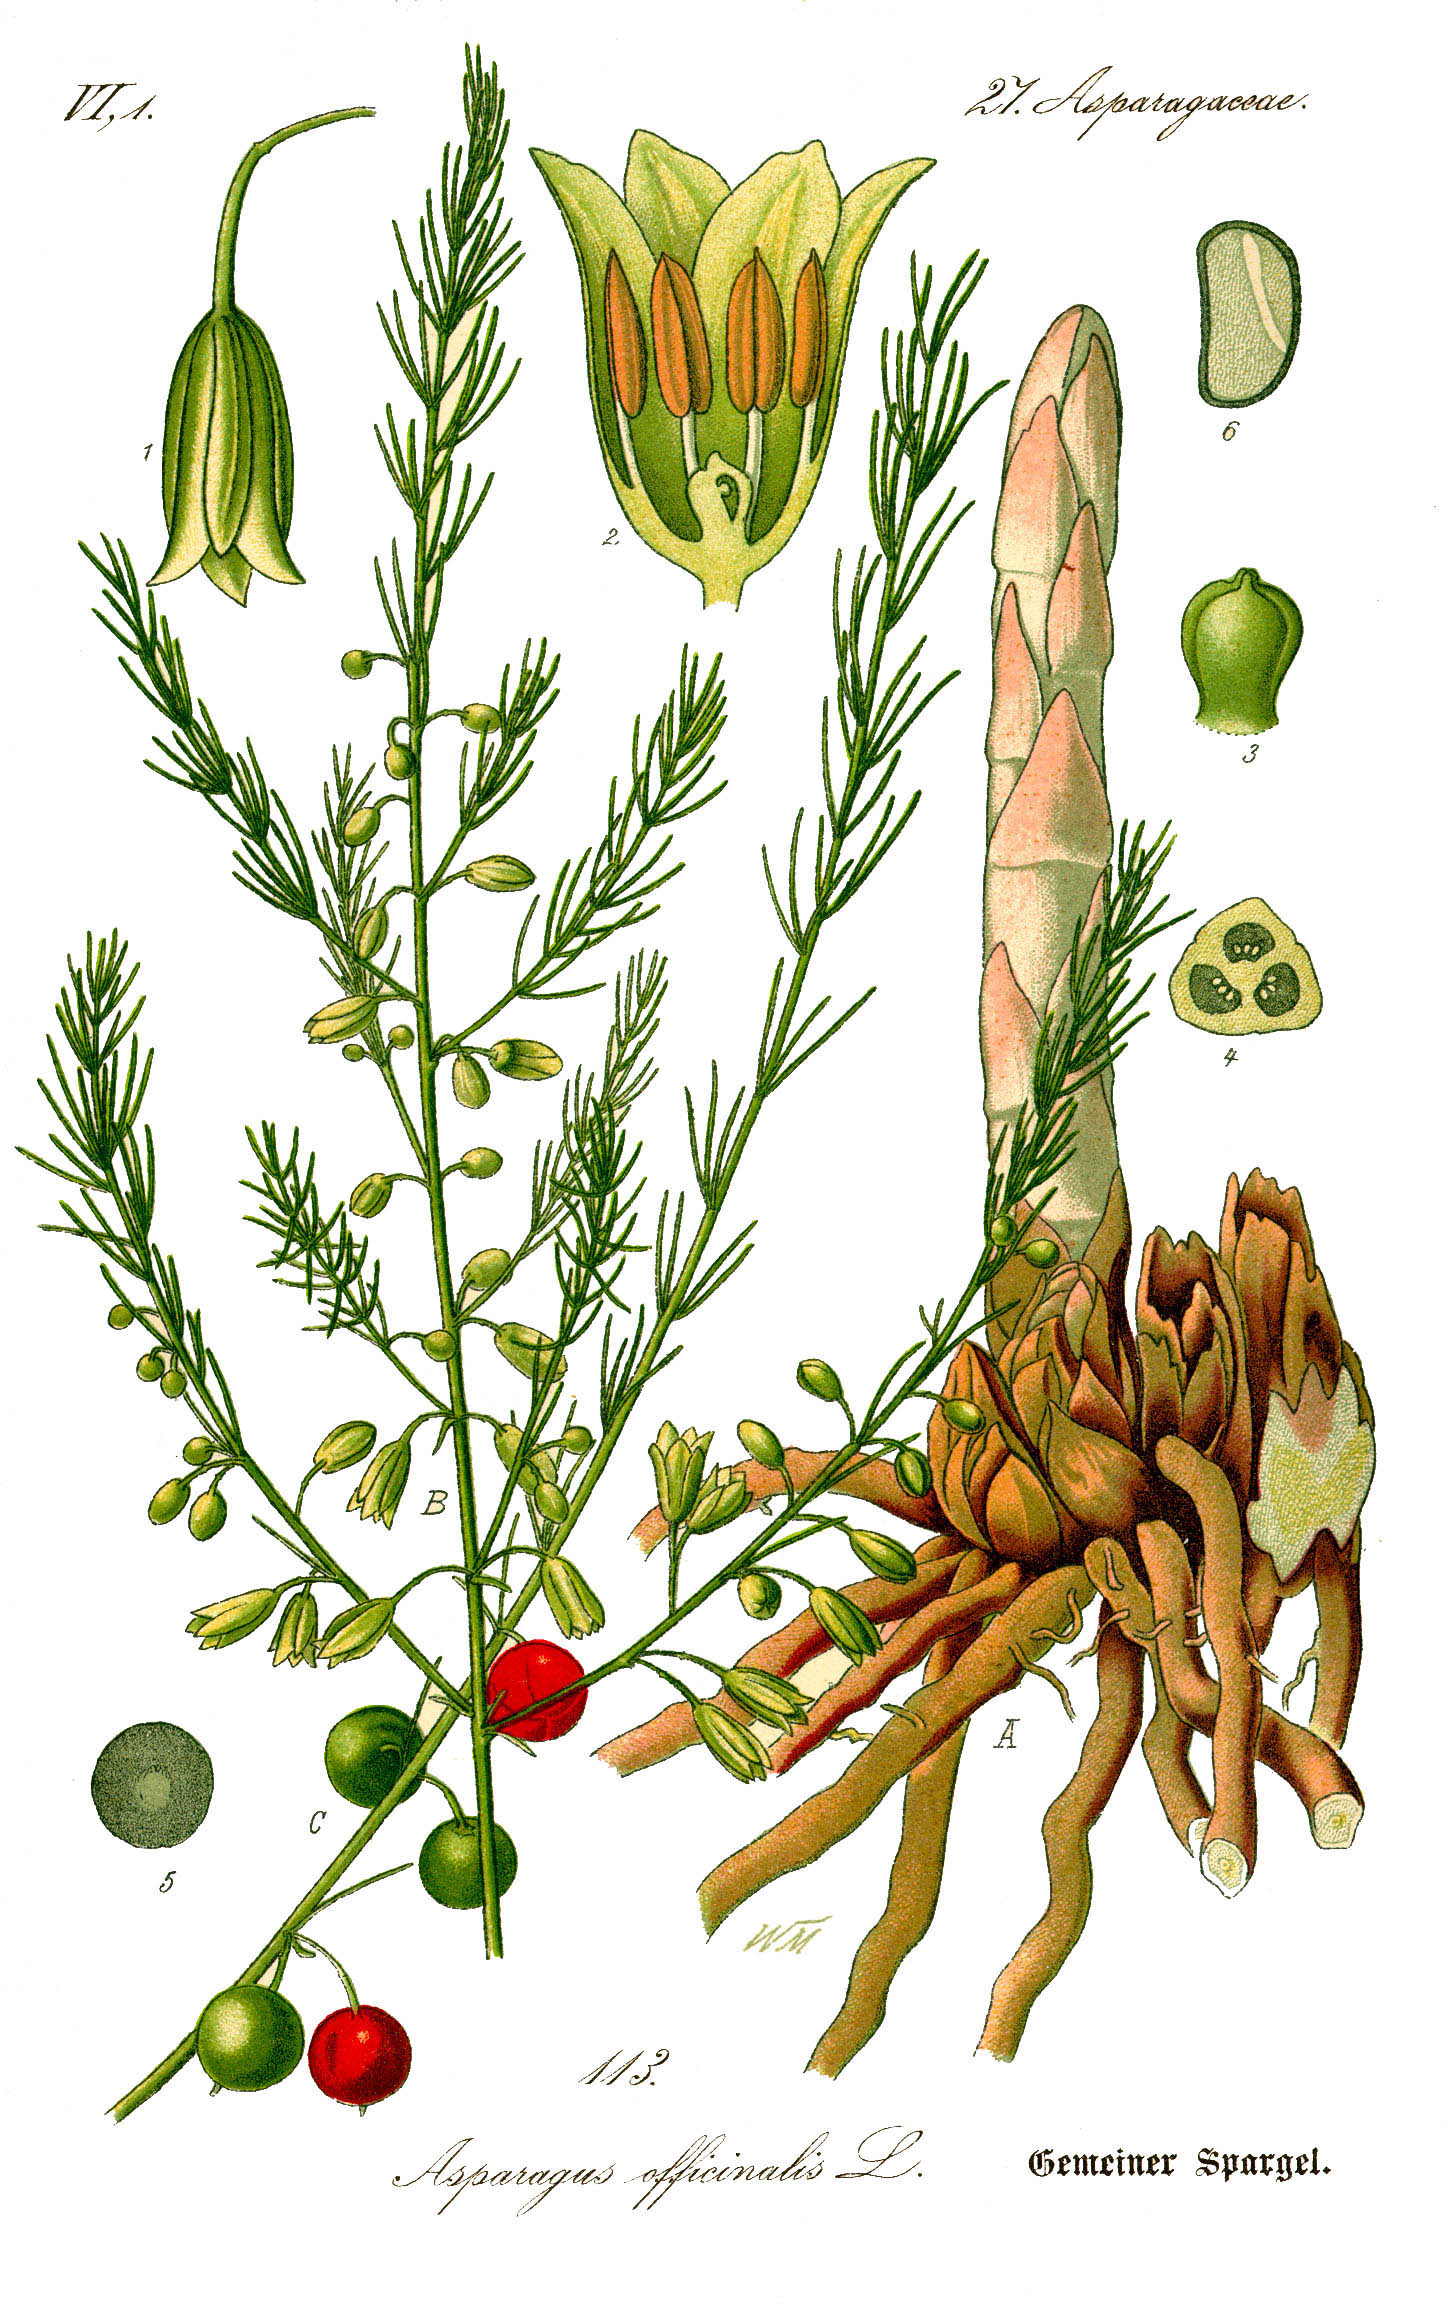
asparagus plate

A botanical plate showing the life cycle of the asparagus plant

Asparagus season in the UK very short, going from only May until June. Of course, these days we are no longer a slave to the seasons and can have fresh asparagus that has been grown in Peru or Kenya whenever we like. I love the stuff, but I do feel that our food loses some if its magic when seasons no longer matter. It is for this reason I only buy British asparagus.

Asparagus has been eaten in Ancient Egypt, Greece and Rome and has been loved in France for many centuries, and it is the carefully cultivated and selected French type of asparagus that made its way to Britain in the seventeenth century, a time of great ‘vegetable improvement’, and it is still grown here today. This does not mean that prior to this date we did not eat it or try to cultivate it.

The etymology of asparagus is interesting – many people think that it was called sparrow grass, but the upper class thought it a vulgar term and subtly changed its name to asparagus to make it sound more posh. This is not quite true: it actually began life as asparagus coming from Mediæval Latin, then it was shortened to sparage in Late Old English and then further modified to asperages in Middle English. It was anglicised to sperach or sperage in the 16th century, but strangely it was officially spelled as asparagus to be in line with Latin. The word asparagus became associated with “stiffness and pedantry”, and the “folk-etymologi[s]ed” sparrow grass arose in reaction to these Latin throwbacks. All this information came from the wonderful Online Etymological Dictionary. I love the Old English word – eorðnafela – sounds like some kind of elf queen from a Tolkien book.

There are three main types of asparagus which all come from the same plant: there are the common all-green tender spears that have very good flavour, and then there is white asparagus, made by ‘forcing’ the spears to grow in the absence of light by earthing up around and over tips. These are not typically grown in Britain, though you do spot them from time to time, though they have usually come from Holland or Belgium, where white asparagus is popular. Lastly, there is lavender-tipped asparagus which is simply white asparagus that has been allowed the see the sun again and just colour slightly. White and lavender-tipped are much more fibrous than the green but have a much more delicate flavour.

Asparagus is also infamous for a certain side-effect after it has been eaten and digested: the distinctive smell it leaves in our urine, which is liked by some, but hated by others:

[Asparagus] cause a filthy and disagreeable smell in the urine, as everybody knows.

Louis Lemery, Treatise of All Sorts of Food, 1702

all night long after a dinner at which I had partaken of [asparagus], they played (lyrical and coarse in their jesting as the fairies in Shakespeare’s Dream) at transforming my chamber pot into a vase of aromatic perfume.

Marcel Proust, In Search of Lost Times, 1913

[Proust always overdid things – have you ever read his description of madeleines?]

The chemical in question is called asparagusic acid, though not everyone has the ability to produce it (though most do) and not everyone has the ability to smell it (though most can).

Proust

Big ponce: Proust


If you like the blogs and podcast I produce, please consider treating me to a virtual coffee or pint, or even a £3 monthly subscription: follow this link for more information.


Preparing Asparagus.

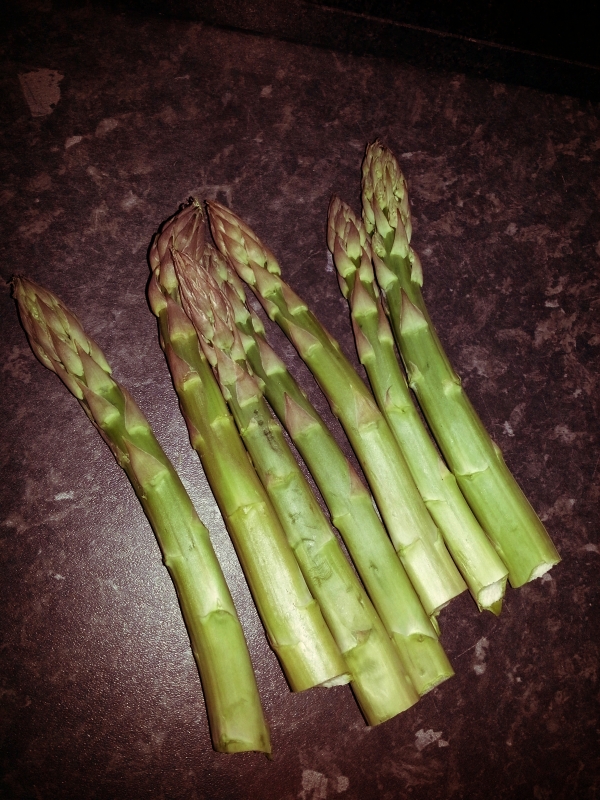
It is very straight-forward to prepare asparagus. You first need to remove the woody part at the base of the stem. You can do this with a knife, but this involves guess-work, so it is easier to break the spears one at a time because they have a natural snap point where the woodiness lessens. You can trim the ends of course if you want to be fancy. If you have very thin young spears, you may not have to snap them at all. Along the stem of the plant there are strange little leaves that lie flat against the stem; you can remove these if you like, but I tend not to unless the spears are particularly thick.

Asparagus and Eggs

Asparagus needs little cooking: just a few minutes steaming is required. Traditionally it is cooked in a tall asparagus pan so that the spears can be boiled upright. Here’s how I like to cook mine – it shows off the flavour of asparagus cooked simply.

Prepare your spears and place them in a pan in just a few tablespoons of water and a knob of butter. Cover so that the asparagus part-boils and part-steams. Check if they are cooked by probing the thickest part of a spear – it should be nice and tender. Asparagus spears of a middling thickness will take no longer than four minutes, and will most likely be done in three. Once cooked, season with salt (if needed) and black pepper.

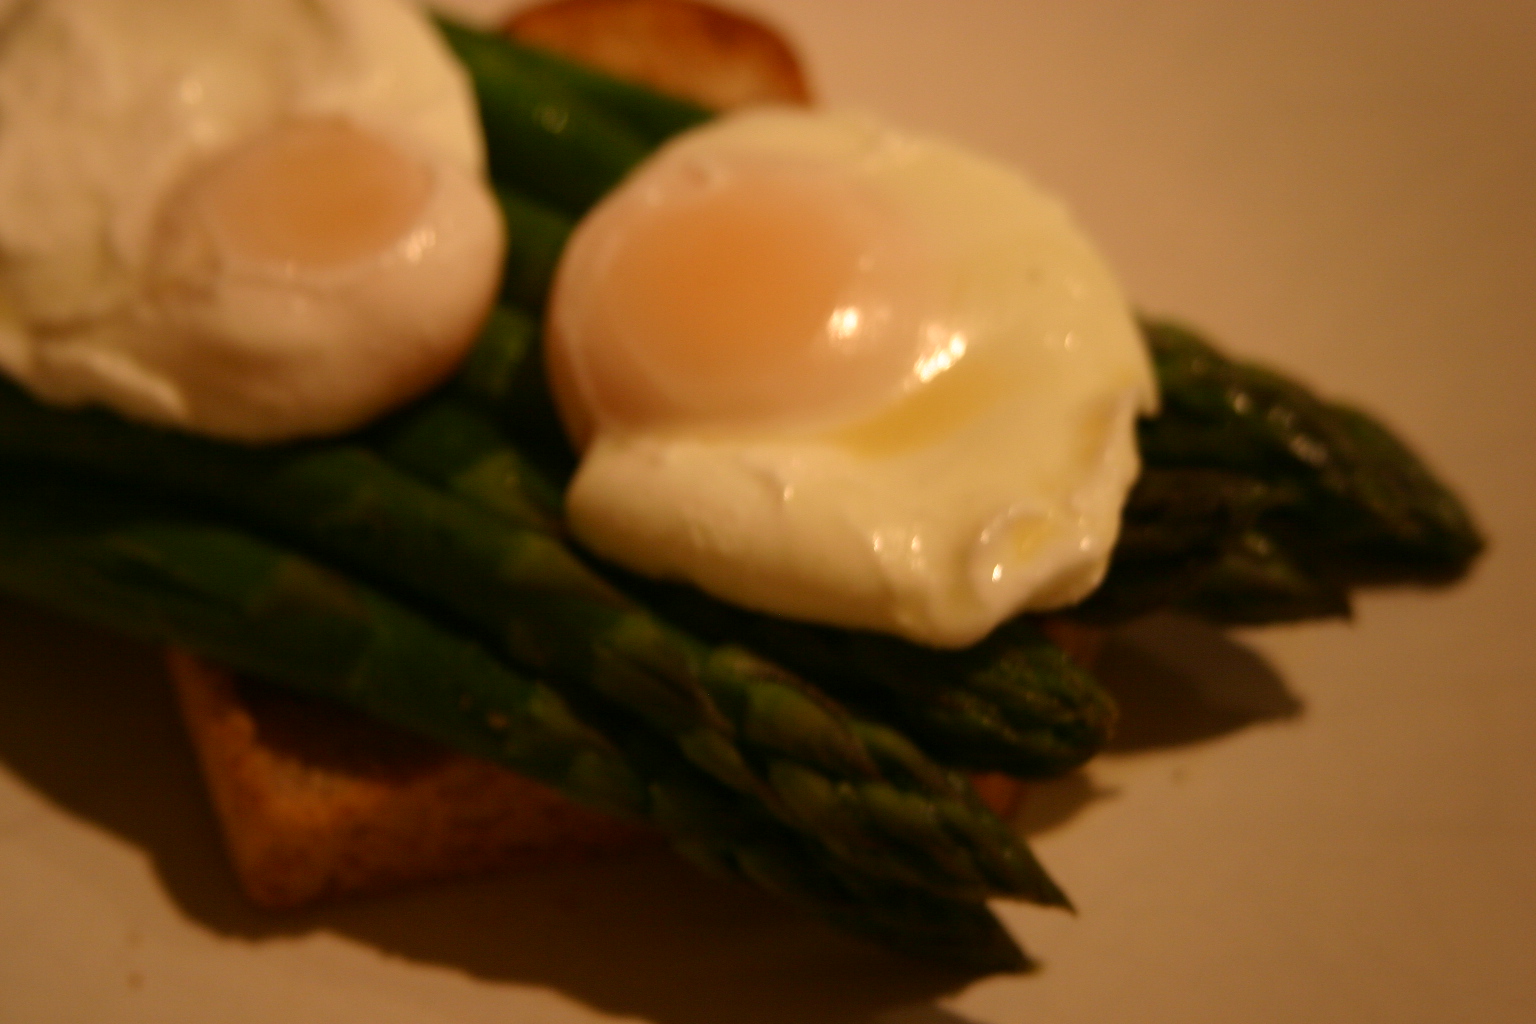
Serve on toast with some of the asparagus-flavoured butter and poached eggs.

8 Comments

Filed under Britain, cooking, food, General, history, Recipes, Uncategorized

Pompion (Pumpkin) Bread

I was recently bequeathed a lovely home-grown organic pumpkin from my good friends Simon and Rachel Wallace – they are slowly but surely building up a small-holding on a farm in the Derbyshire country. They are living the dream, and I am more than a little jealous. Anyway, I wanted to do the lovely pumpkin justice and make some nice meals. I remembered a recipe for pumpkin bread that appears in English Bread and Yeast Cookery by Elizabeth David. She takes it straight from the original manuscript, an 18th century periodical called The Family Magazine. Back then pumpkins were more commonly called pompions, and it is more like some advice rather than a recipe:

Slice a pompion, and boil it in fair water, till the water grows clammy, or somewhat thick; then strain it through a fine cloth, or sieve, and with this make your Bread, well kneading the dough; and it will not only increase the quantity of it, but make it keep moist and sweet a month longer than Bread made with fair water only.

The Family Magazine, 1741

It funny that the British have always had a thing for bread that stays ‘fresh’ for as long as possible; the French, for example, expect the opposite and buy there’s once or twice daily . It goes back to the days when the old brick bread ovens were lit but once a week so the bread – and other goodies – had to last. This love for bread with a long shelf-life is also often blamed for our love of the moist mass-produced packaged breads that go mouldy before they go stale, but I digress.


If you like the blogs and podcast I produce, please consider treating me to a virtual coffee or pint, or even a £3 monthly subscription: follow this link for more information.


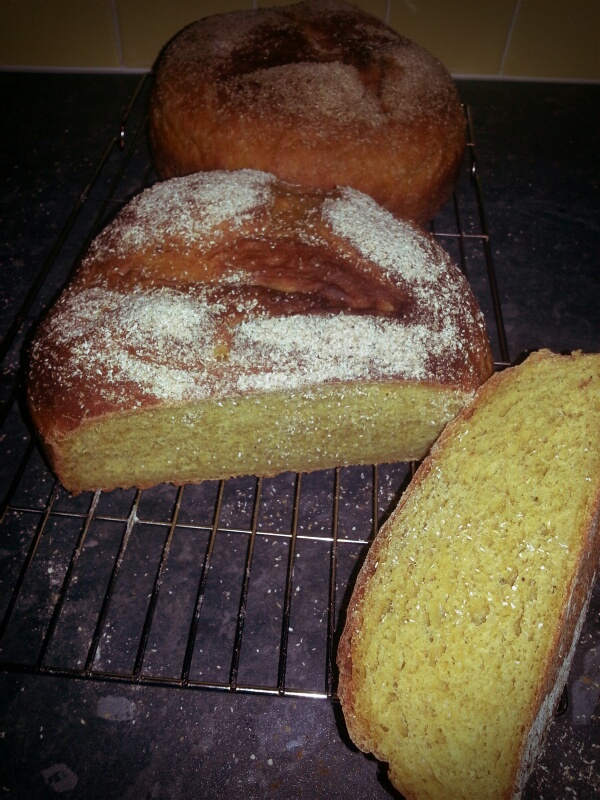
I thought I would give this pompion bread a go, but I felt that boiling the poor thing to death was a bit wasteful, and I wanted the bread to have some pumpkin flavour so I roasted it, mashed it up and added it to a basic bread dough along with a little sugar and some mixed spice. It turned out to be delicious so I thought I’d give you the recipe to try. I don’t think it resembles the original recipe, but it certainly inspired me to make it. By the way, it doesn’t stay fresh for a month, but it is very much moist and edible five days later. It goes great with soup and stews or with jam or just butter spread on it.

This recipe makes 2 good-sized loaves.

What you need:

600g piece of pumpkin or other squash, deseeded weight

500g (1 lb 2 oz) strong white flour

50g (2 oz) fine oatmeal

1 ½ tsp mixed spice

25g (1 oz) fresh yeast, or 1 tsp dried instant yeast

2 tsp salt

50g (2 oz) sugar

25g (1 oz) softened butter or olive oil

225g (8 oz) warm water

olive oil

extra flour

extra oatmeal


What you do:

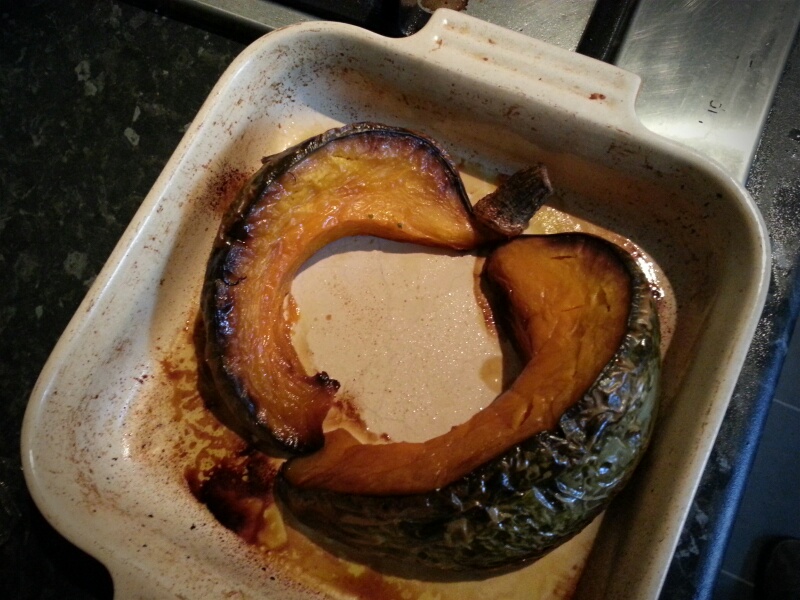
Begin by roasting the pumpkin in a little olive oil until soft – around 30 minutes at 180⁰C (350⁰F). When cooked, remove from the oven, cool, remove skin and mash to a pulp.

FxCam_1360684693650

Mix the flour, oatmeal, mixed spice and sugar in a bowl, then crumble the fresh yeast on one side of the bowl, and spoon the salt one the opposite side. Make a well in the centre and pour in the water along with the olive oil. Notice that I have given the weights of liquids here – I’ve taken to doing this with all my baking recently; you can be much more accurate that way. (For most water-based liquids one millilitre weighs one gram. You can thank Elizabeth David for that one.) Lastly, add the cool pumpkin.

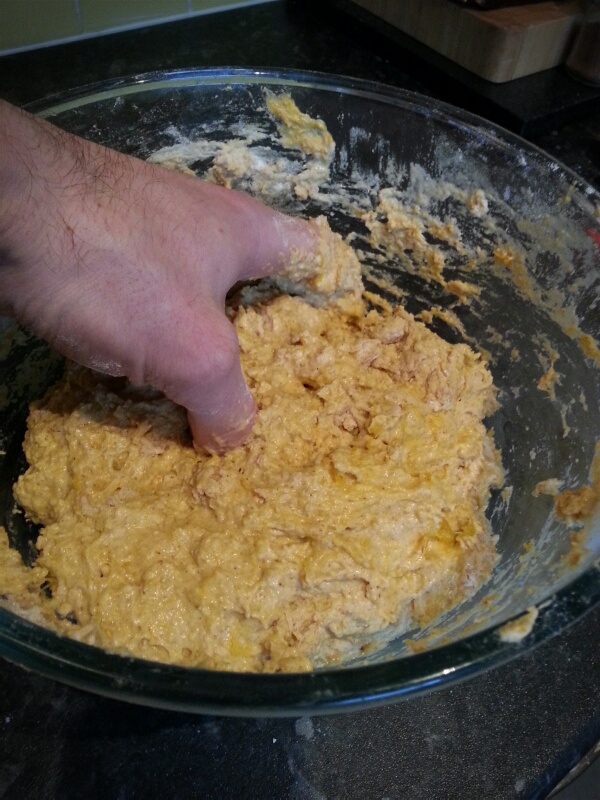
Using you hand, mix everything to a sticky dough – it will be very sticky but don’t worry.

FxCam_1360685406730

Rub a teaspoon or two of olive oil on your work surface and turn out your dough onto it; the oil makes it easier to knead without it all becoming a hideous sticky mess. Keep kneading and adding more oil if need be. If all this seems like too much effort and mess, use the dough hook on a food mixer instead.

When the dough is smooth, do a final kneading on a little flour, then pop into a clean bowl that has been lightly coated with oil to prevent sticking. Cover with Clingfilm (other plastic wraps are available) and allow to ferment away until it has at least doubled in size.

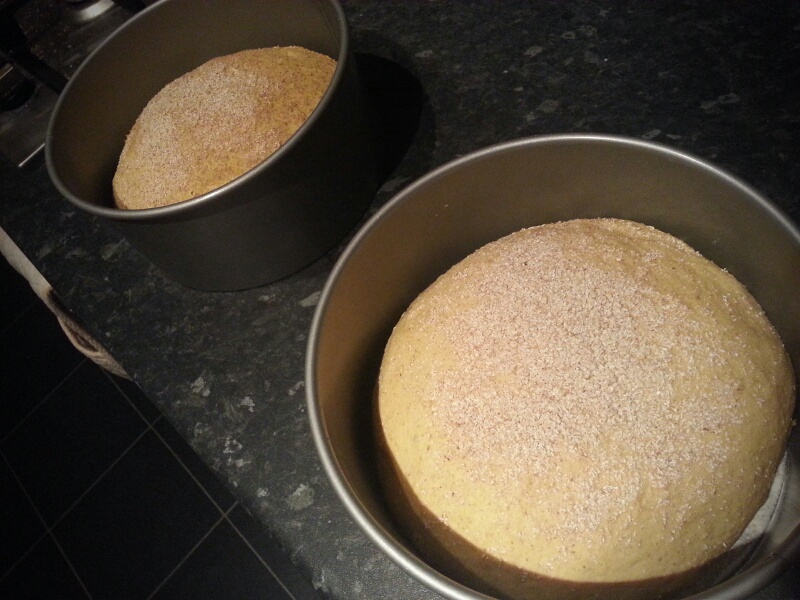
Knock back the dough and shape into two loaves – you can do round cobs on a greased baking sheet or in greased tins, whichever you prefer. i used two cake tins so that my cobs would keep some shape.

FxCam_1360697841988

Cover and allow to prove. Make appropriate cuts and dustings of flour or oatmeal. When doubled in size put into a cold oven. Set the temperature to 220⁰C (425⁰F) and leave for 15 minutes. Turn the heat down to 180⁰C (350⁰F) and bake for a further 15 minutes. Allow to cool on a rack completely before breaking into it.

FxCam_1360707421659

6 Comments

Filed under baking, bread, Britain, cooking, Eighteenth Century, food, history, Recipes, Vegetables

Elvers in the Gloucester Style


Want to know more? This podcast episode complements this blog post:


As promised on the last post on eel conservation, a recipe for a dish that on no accounts must you make unless the elver (glass eel) population has reached at least somewhere close to their population size in days of yore.

elver fisherman

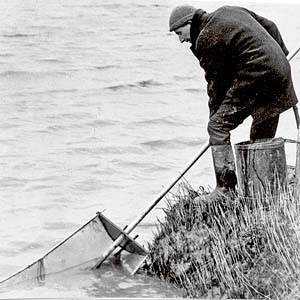
An elverer on the River Severn

This is a recipe that I think I remember Keith Floyd cooking elvers still wriggling as he scooped them straight out of the River Severn in a pillowcase and  tipping them straight into a hot frying pan. I’ve tried to find the clip on the web, but alas it is nowhere to be found. I did find, however a clip of Gordon Ramsay cooking freshly-caught elvers on the banks of the river. I should warn you that elvers are cooked live, so if you are at all squeamish you might not want to see the video:

www.youtube.com/watch?v=07_IkrNy4cU

Elvers in the Gloucester style is essentially scrambled eggs with elvers and it comes from Jane Grigson’s English Food and it is one recipe that I will probably never cook for my other blog Neil Cooks Grigson where I’m trying to cook every single recipe from the book. She points that back in the years of elver plenty, ‘several tons of elvers are caught between Sharpness and Tewkesbury on the Severn’. Also, interestingly, ‘elvers are the only fish fry which may be legally caught as food.’

Well that probably won’t be true for very long.

Jane Grigson

Jane Grigson

Jane’s recipe asks for 500g of elvers so if you are a little evil and know where to get them prepare to pay – they’ll cost you at least £100!

It must have been very exciting going down the banks of the river at night to see a huge dark swathe of elvers migrating upstream safe in the knowledge that there’ll be a delicious dinner in store.

‘For 4

500g (1 lb) elvers

8 rashers fat streaky bacon

A little bacon fat or lard

2 eggs, beaten

Salt, pepper

Wine vinegar

‘When you go to buy elvers, take along an old pillowcase so that the fishmonger can tip them straight into it.

‘At home, add a handful of kitchen salt to the elvers and swish them about, still in the pillowcase, in plenty of water. Squeeze them firmly to extract as much water as possible, then repeat the washing process again with some more salt. This gets rid of the sliminess. You may need to rinse them again and pick out any tiny twigs, leaves and pieces of grass.

‘To cook the dish, fry the bacon until crisp in a little bacon fat or lard. Remove it to a serving dish, and turn the levers into the bacon fat which remains in the pan. Stir them about for a few seconds until they become opaque, then mix in the beaten egg and cook for a few seconds longer. The important thing is not to cook for too long. Taste and add seasoning. Put the elvers on top of the bacon, and sprinkle with a little vinegar. Serve very hot.’

We we’ll just have to take her word for it, I suppose.


If you like the blogs and podcast I produce, please consider treating me to a virtual coffee or pint, or even a £3 monthly subscription: follow this link for more information.


17 Comments

Filed under Britain, food, history, Recipes, Uncategorized

The Eel Paradox


Want to know more? This podcast episode complements this blog post:


Around a year ago I wrote a post about jellied eels and eel, pie and mash houses in London and I have been meaning to write a sequel on the subject of eel fishing and conservation for a while, as well as looking at some traditional recipes for the slippery fish.

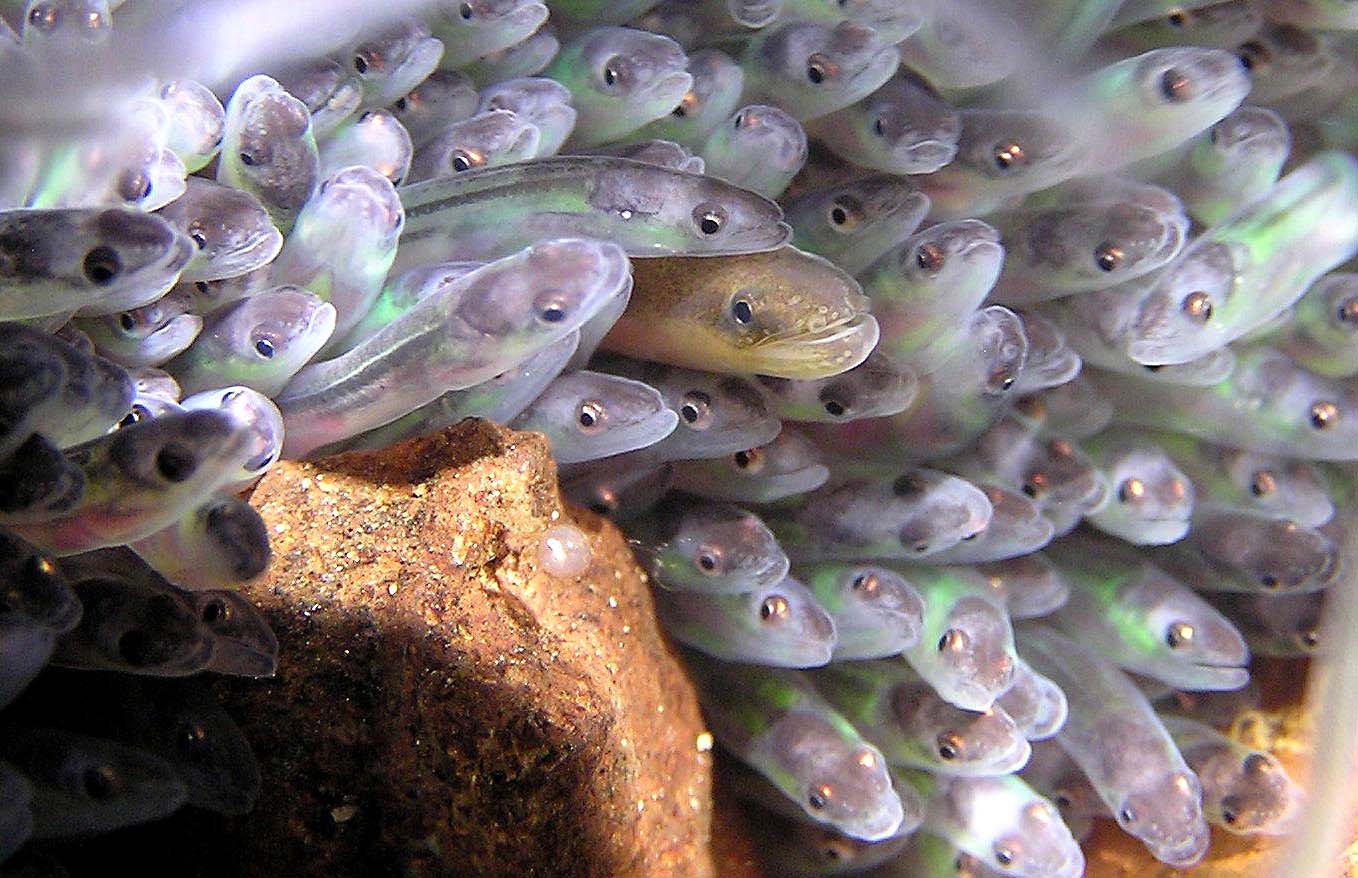
The European eel Anguilla anguilla is a threatened species; the IUCN has put it on its Red List as a Critically Endangered animal, yet it is perfectly legal to eat them – and fish for them if you have a licence – the funny thing is adult stocks of eel has remained stable for the last few decades. So why has the eel been given this Critically Endangered status? Well it is because the young eels – known as elvers in Britain, but more commonly known as glass eels – have had the drastic drop in population. Some of these populations have crashed by 95% in some areas. The paradox is: how can the adult population be stable whilst the young have diminished in number so much?

german eel

Well the short answer is that we don’t know! Elvers resupply our rivers of stock eels after a long migration from the Sargasso Sea where they were born. Understandably, this part of the life cycle is poorly understood, and all scientists and conservationists can do is count the number reaching our estuaries and rivers and monitor them carefully.

In Britain, the main inlet for elvers is the River Severn; indeed there are still a decent number of elvers swimming into its mouth every year. However, the population has dropped overall in Europe by 75% and so the spectacle of the great migration is no longer what it was:

In the month of April; the shores of the Severn are annually darkened with innumerable quantities of elvers, which are seen fringing the sides of the river a black ascending line, which appears in constant motion…When the elvers appear in the river they are taken in great quantities with sieves of hair cloth, or even with a common basket, and after being scoured and are offered for sale. They are either fried in cakes, or stewed, and are accounted very delicious.

Illustrations of the Natural History of Worcestershire, Dr Hastings c.1830

Elvers were an essential food source in more ways than one according to Andrew Kerr of the Sustainable Eel Group: ‘entire communities would live on them; indeed … they were even used to fertilise the fields.’

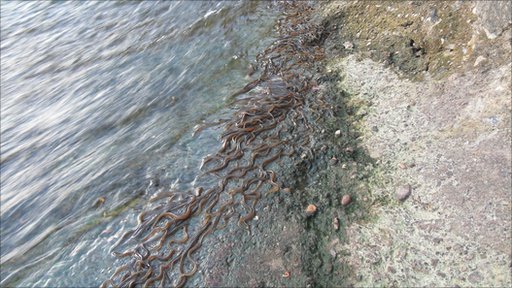
elvers in the Severn

A smaller-scale version of what Dr Hastings saw on the River Severn

See the story and video here: http://news.bbc.co.uk/local/gloucestershire/hi/people_and_places/nature/newsid_8864000/8864173.stm

The UK ‘elvering’ season is from February to May with its peak in April and it is legal to fish for them if you have the appropriate license; and it can be big business when they sell for £200 a kilo. They go for these huge prices because they are snapped up by the Chinese in order to restock their fisheries.

Elver fishermen have an obligation to fulfill if they want to go fishing for glass eels – 35% of their catch must be relocated upstream. Tiny elvers entering estuaries are often impeded from reaching rivers because of flood barriers. By physically moving them upstream they can do as nature intended and live their lives in British freshwater before slipping back to the Sargasso to breed. This seems to be working – numbers of elvers in the River Severn are on the up, though this could just be population fluctuation.

elver net

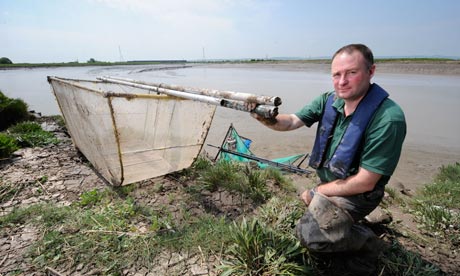
The Environment find a poacher’s oversized elver fishing net (from The Guardian 2010)

The ethical elverer after relocating a third of his catch, then sells the remainder to eel farms. The nearest ones to Britain are in Ireland and Holland. This is what the people at the Sustainable Eel Group say is the sustainable thing to do. Unethical elverers sell their catch on to people that have a penchant for elvers. He also uses huge oversized nets and trawlers – some nets can be up to 18m; compare this to the legal 2.5m net. (Amazingly trawling for elvers is still legal in Britain, though the number of eel fishing licenses are restricted.)

Have a look at this BBC report about elver poaching:

http://news.bbc.co.uk/local/gloucestershire/hi/people_and_places/nature/newsid_8708000/8708514.stm

So what do we conclude here? Well jellied eels are not to be consigned to the history books – with careful monitoring there should be well-stocked eel fisheries. It’s simple: only buy farmed eels, not wild, and on no account never buy elvers.

The following two posts will be some eel recipes (some you should try and some you should not!)


If you like the blogs and podcast I produce, please consider treating me to a virtual coffee or pint, or even a £3 monthly subscription: follow this link for more information.


elvers


15 Comments

Filed under Britain, food, General, history, natural history, nature, Uncategorized

Seville Oranges and Seville Orange Marmalade

The weather outside may be miserable and the evenings still long, but luckily there is a little fleeting  sunny surprise popping up in grocers around the country that can perk us up no end; at least if you know where to find them. It is Seville orange season and a small window of just a few weeks is all we have to cook with this delicious fruit.

FxCam_1357492834789

The Seville orange is very bitter and is only really grown in Spain for us British to make our Oxford marmalade. What a treat home-made marmalade is; oranges, water and sugar that is all that are needed to produce such a delightful, very British preserve. If you have never made your own, have a go before they are all disappear again.

Like all citrus fruits, the Seville orange comes originally from China. It was imported on trade routes via Italy, to the Mediterranean countries of Europe. All of these original orange trees were bitter in flavour like the Seville. In the first half of the 17th century, sweet orange trees were delivered to the Portuguese coast by ship. These sweet oranges quickly superseded the bitter ones, that is for that small area of Spain that still grows them.

The flowers of Seville oranges are also used to make orange flower water, another of my favourite ingredients.

Seville and game painting

Rabbit with Red Legged Partridge and Seville Orange by Jean-Baptiste Chardin 1728-29

Below is a recipe for  Seville orange marmalade, but it is useful to know that the zest and juice of these oranges go very well with game and some shellfish such as scallops as the above painting shows.


If you like the blogs and podcast I produce, please consider treating me to a virtual coffee or pint, or even a £3 monthly subscription: follow this link for more information.


Seville Orange Marmalade

Oddly enough, marmalade was not made from Seville or any other orange at first, but quince (a knobbly cousin of apples and pears). It did come from Spain though, in fact the Spanish word for quince is marmalada. Every day’s a school day.

This recipe is Jane Grigson’s and it is a good strong bittersweet ‘Oxford’ style marmalade.

Ingredients

3 ¼ litres water

1 ½ (3 lb) Seville Oranges

3 kg (6 lb) granulated sugar

Give your oranges a good scrub and place them in a preserving pan or large stockpot with the water. Bring to a boil and simmer for about 1 ½ hours until the oranges are tender.

FxCam_1357499871481

Take them out with a slotted spoon. They will probably collapse in on themselves, but don’t worry about that. Let them cool a little, then halve them and scoop out their innards. Tie up the scooped-out pulp in a piece of muslin. If you want a soft set, just put the bag of pulp straight into the pan, if you want it well set, give it a good squeeze to get as much pectin out of the pith and into the liquor as possible (I’m a soft set man).

FxCam_1357502382790

Next, shred the peel, you can be as careful as you want, and you can cut them as thick as you want. You can do this by hand or in the food processor by blitzing them using the pulse setting – be careful though, you don’t want a load of slurry. I’m usually dead against using food processors for this sort of thing, but I quite like the irregular pieces you get with this method. Tip them into the pan along with the sugar. Over a medium heat, stir until the sugar dissolves.

FxCam_1357505465756

Now you need to be brave and bring it to a full rolling boil for at least 15 minutes , you need it very hot so that the marmalade can set. You have several options to test for a set, but I use a combination of a sugar thermometer and the wrinkle test. Pectin – a chemical that essentially glues plant cell walls together – will set to a gel at 105⁰C (221⁰F), so a thermometer is crucial if you want to know if you are getting close. It can take a while because water needs to evaporate to get five degrees above boiling point. Keep a close eye on it and when it gets close do the wrinkle test. For this test put a side plate in your freezer a little while before you want to make your marmalade, and when you’ve achieved 105⁰C (221⁰F), turn off the heat and spoon out a little of it onto your cold plate. Return it to the freezer for a couple of minutes. Push the jelly; if it wrinkles up, your pectin is set. If not, boil up again and retest after 10 minutes.

FxCam_1357586951956

When ready, turn off the heat and allow it to cool for 15 minutes – this important step will stop your peel from floating to the top in a single layer – then pot into sterilized jars (bake them and their lids for 25 minutes at 125⁰C or 250⁰F).

IMG_2702

33 Comments

Filed under cooking, food, Fruit, General, history, Preserving, Recipes, Uncategorized

Syllabubs

Today the syllabub is rather an unfamiliar dessert but from the 17th and early 20th centuries it was a pudding staple. It has gone through some minor changes along its way but its essence has remained the same. Originally milk was sweetened and mixed with cider sack – a sweet fortified beer not unlike sherry – and left to curdle and treated as a drink served hot or cold. At the same time at more solid version was being made with cream and wine and spirits. More recently less alcohol and more cream was used producing a dessert that could stand in a cool place that would remain delicious, soft and fully whipped – this was known as an ‘everlasting syllabub’.

The Sense of Taste Philip Mercier (1680-1760)

Detail of The Sense of Taste by Philip Mercier (1680-1760) showing a salver of syllabubs

The word syllabub comes from the name Sille, an area in the Champagne region of France that made the eponymously named wine, and the word bub, an Elizabethan slang word meaning a bubbling drink, hence Sille bub – wine mixed with a frothy cream. In fact it was a case of the frothier the better, and the best way to achieve this is to spray milk straight from the udder (which has a natural froth) into the wine, this kind of syllabub was also called ‘Hatted Kit’ and a recipe appears for it in Elizabeth Raffald’s 1769 book The Experienced English Housewife:

“To make a Syllabub under the cow

Put a bottle of strong beer and a pint of cider into a punch bowl, grate in a small nutmeg and sweeten it to your taste. Then milk as much milk from the cow as will make a strong froth and the ale look clear. Let it stand an hour, then strew over it a few currants well washed, picked, and plumped before the fire. Then send it to the table.

elizabeth raffald

 Elizabeth Raffald

Charles II found this sort of syllabub so delicious that he kept cows at the palace in case he got a hankering for some Hatted Kit – he would walk up to one and squirt some milk into his flagon of wine, sack or cider.

If you are a tee-totaller, don’t worry because Sir Kenholm Digby, writing in 1669, gives recipes for syllabubs flavoured with plum juice, cherry syrups and Seville orange.

By the 19th century, the syllabub was generally made from whipping cream together with sweetened wine. The wine was flavoured with lemon and fortified with a little brandy, and it is a recipe for one of these everlasting syllabubs that I give below. It comes from Elizabeth David’s 1969 pamphlet Syllabubs and Fruit Fools (which can be found in her book An Omelette and a Glass of Wine).

Elizabeth David’s Everlasting Syllabub with Almond Biscuits

Elizabeth David

The ingredients of a syllabub, we find, are simple and sumptuous. The skill demanded for its confection is minimal, the presentation is basic and elegant.

Elizabeth David


If you like the blogs and podcast I produce, please consider treating me to a virtual coffee or pint, or even a £3 monthly subscription: follow this link for more information.


These syllabubs were the original topping to trifles before plain whipped cream took over. They are often served with jellies or with sweet biscuits so I’ve given a recipe for some simple crisp almond biscuits too.

The most important ingredient here is the wine; you can use any sweet or dessert wine, by personal favourite being a nice Muscat. I managed to get hold of an excellent and very reasonably-priced organic free-trade one from Case Solved Wines in Manchester.

2012-12-29 20.42.01

This recipe makes between 4 and 6 servings

Ingredients for the syllabub

8 tbs sweet or dessert wine

2 tbs brandy

pared rind of one lemon

60g (2 oz) sugar

300ml (½ pint) double cream

freshly grated nutmeg

The day before you want to serve the syllabub, mix the wine and brandy in a bowl, add the lemon peel and steep overnight.

Next day, strain the wine into a large bowl and stir in the sugar until dissolved. Pour in the cream and whisk until thick. Be careful not to over-whip the cream. Spoon into glasses and scatter a few raspings of nutmeg over them.

For the biscuits:

100g (4oz) butter

50g (2oz) caster sugar

150g (6 oz) plain flour

50g (2 oz) ground almonds

Cream the butter and sugar together and then mix in the flour, and finally the almonds. Bring the mixture together with your hand to form a dough – it’ll be very ‘short’, i.e. crumbly, but it will come together – don’t be tempted to add any water or milk because it will result in a biscuit that is not crisp, and you don’t want that. Roll out the mixture to the thickness of a pound coin (about 3mm) and cut into rounds.

Bake for 8-10 minutes at 200⁰C (400⁰F) until tinged with golden brown. Cool on a wire rack and store in an airtight tub.

4 Comments

Filed under baking, Biscuits, Britain, cooking, Dairy, Desserts, food, history, Puddings, Recipes

On a Mushroom Hunt

The British crops have been failing left, right and centre because of the all the warm and very, very wet weather we have had over this growing year. The fields and orchards have been chock full of mouldy, diseased-ridden peas, beans, apples, plums and pears. It’s been a great year for mould.

Mould is caused by fungi and luckily, this year has also been great for the fungi we like to eat: the mushrooms, so as long as they are doing well, we shall always have a good meal.

Tricholoma scalpuratum or yellowing knight

I am pretty new to mushroom hunting, but there are a few species that I already know and love, but faced with 120 000 species worldwide, of which 1841 are recognised as edible (though not necessarily by all). Luckily, I have a background in ecology and evolutionary biology and so I’m okay at identifying and classifying. However, the obvious problem here is that being okay is not good enough when it comes to mushrooms, as you may be rushing down to A & E with the family in an ambulance clutching your Collins Fungi Guide in your clammy palms.

Shaggy ink cap

Mushrooms have been held in high regard throughout history because, except for a few European species, they cannot be cultivated in any consistent way. There is no evidence that prehistoric man ate mushrooms, but they were certainly enjoyed in Ancient Egypt and Rome, indeed the Romans were the first to cultivate them. This art seemed to die out with them and it wasn’t resurrected until Victorian times. It’s strange to think that mushrooms were such an expensive ingredient that often had to be exchanged for oysters in many dishes. How times have changed.

Because mushrooms are notorious for their often narcotic and poisonous qualities, there were considered magic during the Middle Ages. Many an alchemist pored over the life cycle of fungi in an attempt to discover the secret of life itself – mushrooms had the amazing ability to create life from decay.

I could go through all the edible species of mushroom in Britain, but that would be rather boring so instead I thought I’d mention the ones I have found so far in this post and then add to it in further posts whenever I come across them.

Identifying Mushrooms

As I said, I am certainly no expert in fungus ID, but it is for this very reason that I take appropriate precautions.

First of all you need at least two good fungus guides: there is such variation within single species that there can be a lot of overlap between them and therefore potential misidentification. More than one book covers more variation. I think it is best to have one book with drawings and one with photographs. The two I use are the Collins Fungi Guide – which is very in-depth – and River Cottage Handbook No. 1: Mushrooms – which is much briefer but is full of hints and tips.

Aside from the mushroom you are interested in, you need to look for other things: are they single or in clumps, or even patterns? Where are they? Fields or woods? If they are in woods, are they on trees, if you what kind? Therefore it is very important that you know some of the trees: the main players are oak, beech and birch, so make sure you know them, or take along a tree guide with you too.

If I am not really sure at all, I take a photo of them where I found them and pick them with their bases intact so I can classify them later when I have time.

Jew’s ear or jelly fungus grows almost exclusively on elder

Do not be tempted to take any advice from old wives’ tales as they are almost always wrong. However, most poisonous species have three features that are worth bearing in mind: scales beneath the cap, a ring and a small sac at the stem’s base. Not all will have all three qualities, so not take this advice as read either. The important thing to remember is that if you are not completely sure, don’t eat it!

Over the last week or so I have come across shaggy inkcap, shaggy parasol, wood mushrooms, the rather anti-Semitically named Jew’s ear fungus and a huge host of , commonly called yellowing knight (though the one’s I found were not particularly yellow).

Two mushroom recipes

I cooked several dishes with our mushroom crop, but I shall just report two here.

Creamed mushrooms on toast

Simple, fast and will show off your mushrooms to their finest. It’s not for dieters.

Ingredients (per person)

1 double-handful of wild mushrooms

2 ounces of salted butter

1 garlic clove, finely chopped

1 tsp of chopped thyme leaves

salt and pepper

5 or 6 tbs double cream

freshly-grated nutmeg

one thick slice of hot buttered toast

Pick over the mushrooms, wiping away any soil with a damp cloth. Melt the butter in a frying pan and when it stops sizzling add the garlic and thyme and fry until the garlic is soft. Tip in the mushrooms and season with salt and pepper. Stir and fry until the mushrooms given up then evaporated their juice. Add the cream and stir, adding a little nutmeg. Serve immediately on toast. Poached egg is optional.

Dried Mushrooms

When you have a glut of mushrooms, it’s a good idea to preserve them in some way. This is a recipe from Elizabeth Raffauld’s 1769 book The Experienced English Housekeeper that turns mushrooms into a delicious, rich and dark seasoning. I’ll leave it to her to tell you how to make it (I have added the odd note in parentheses).

Mushrooms before drying

“Take the thickest large buttons you can get, peel them, cut off the root end but don’t wash them. Spread them separately on pewter dishes [or on baking trays] and set them in a slow oven to dry [around 60-70⁰C]. Let the liquor dry up into the mushrooms, it makes the powder stronger, and then continue in the oven till you find they will powder [they will snap easily].

Mushrooms after drying

Then beat them in a marble mortar [or a blender] and sift them through a fine sieve with a little Chyan [Cayenne] pepper and pounded mace. Bottle it and keep it in a dry closet.”

Mushrooms powdered


If you like the blogs and podcast I produce, please consider treating me to a virtual coffee or pint, or even a £3 monthly subscription: follow this link for more information.


1 Comment

Filed under Britain, cooking, food, foraging, history, natural history, nature, Recipes, Uncategorized

Know Your Onions

It is an exciting time for those that grow their own onions because onion season is in mid-flow. It was probably a while ago that the onions themselves were picked, but they generally grow through a short period of drying before they are used in the kitchen or put into storage over the wintertime.

I’ve never grown them myself, but I feel that when it comes to cooking and eating onions, I really know my, er, onions. (Funny saying that; there is one theory that it was invented by etymologists working on the Oxford English Dictionary who coined it in great admiration of one of the best and most knowledgeable grammarians of the day, a certain C T Onions. How I wish it were true, but it seems that is actually American. Oh well.)

I love onions and they are one of the most loved vegetables, they are certainly the most used vegetable in the world – there is not a single cuisine I can think of that doesn’t use them. In Western cookery, onions make up one of the trinity of stock vegetables alongside carrots and celery; and there are countless recipes that begin with slicing or chopping an onion before browning in butter or oil. They are a universal seasoner of foods, a ubiquitous seasoning that is not always detectable, but if it were to be omitted you would miss them.

And I do, for I recently found out that I have an onion ‘intolerance’, or at least my alimentary canal does. Finding a replacement has been tricky, but I have recently adopted using the finely sliced green parts of a leek along with a clove of garlic. It is strange that I essentially turn myself inside out after eating a cheese and onion sandwich and yet I can happily tuck into the remainder of the onion family: garlic, leeks and chives and not suffer even the mildest discomfort. Anyway, you don’t want to know about all that – I sound like an old woman!

Allium, the Onions

There are around 500 species of plant that belong to the Genus Allium, and botanically speaking they are all members of the lily family, though only a score are important as foods worldwide, and even fewer that are important to the British, though the onion, garlic and leek were all eaten in Ancient Egypt and even appear in the Old Testament of The Bible.

Below is a lovely illustration from the wonderful book Food in England by Dorothy Hartley showing the ‘Most Common or Garden Onions’. Chives and leeks have been omitted as they are suitably different to be considered standalone vegetables/herbs. There are familiar and unfamiliar onions here, and some that have been omitted, like mild white onions. Two that I have never sampled are the Welsh Holtzers and the strange Egyptian, or tree, onion.

I am going to stick to the familiar brown onion that we all know and love in this post. At the foot of the above drawing it is mentioned that onions, bread and cheese ‘are spoken together as Field Fare in our earliest manuscripts’. These three food items would have been bagged up or kept in the pocket of a ploughman or other farm worker for much-needed sustenance throughout the long working day. The original ploughman’s lunch that dates to not too long after the first century when onions were first introduced to Britain by the Romans.

Two Onion Recipes

So many recipes use onions, but so few of them show them off as the star of the show and we forget that onions can be served as vegetables in their own right. Here are two recipes that I think do them justice.

Baked Onions, or Orbs of Joy

This is a very old recipe that has recently been given a second wind by Fergus Henderson the great ‘nose to tail’ chef at St John in London. Looking at his recipe and one written in 1954 by Dorothy Hartley, there is only one difference and that is the type of onion used – a stoic brown onion or a prettier red onion. Use whichever you grow or prefer. Serve with roast game, chicken, goose or beef, using the appropriate stock.

Ingredients

butter

one good-sized onion per person

chicken, beef or vegetable stock

salt and pepper

Smear some healthy knobs of butter on the bottom of a deep ovenproof dish. Peel your onions, cut off the rooty part and sit them in the dish. Pour in enough hot stock almost to cover. Season the tops with salt and pepper. Bake uncovered in a moderate oven, around 160⁰C, until the onions are tender within and caramelised without. Test their doneness with a skewer. If you only have a little stock, cover the dish and only remove it toward the end of the cooking time so they can ‘brown becomingly’.


If you like the blogs and podcast I produce, please consider treating me to a virtual coffee or pint, or even a £3 monthly subscription: follow this link for more information.


Onion Marmalade

I imagined that onion marmalade had been around for ages but only seems to date back to the latter half of the last century. Who knew? This is a recipe of my own concoction and is a top-seller on my stall. There are plenty of dark sweet flavours as well as tart vinegar. I use cider or wine vinegar as well as Balsamic vinegar in mine. Feel free to alter the ratio of the two to your own liking. It makes about 1 litre (2 pints) of marmalade. Have it in a cheese sandwich, with bangers and mash, or with some nice potted chicken livers.

Ingredients

2 kg (4.5 lbs) onions, halved and thinly sliced

5 tbs olive oil

100 g (4 oz) granulated sugar

100 g (4oz) soft dark brown sugar

1 tbs chopped thyme leaves

4 bay leaves

1 ½ tsp salt and ½ tsp ground black pepper

250 ml (9 fl oz)  cider or wine vinegar (red or white)

50 ml (2 fl oz) balsamic vinegar

Heat the olive oil in a large pan. Turn up the heat and add the onion. Using a wooden spoon, coat the onions well in the oil. Add the sugars, thyme, salt and pepper, then turn heat down to medium and mix until the sugars have dissolve. Simmer uncovered for at least 50 minutes on a medium-low heat, until the onions have become deliciously brown and mushy. Take your time, be as slow as possible. If you don’t have 50 minutes or more to spare, wait for a time you do!

Pour in the vinegars and simmer for a further 30 minutes until the liquids have reduced to about one-quarter and are good and syrupy. Let the marmalade cool for 10 minutes then jar as normal.

8 Comments

Filed under Britain, cooking, food, history, Preserving

Forgotten Foods #2: Verjuice

Having a crabbed face of her own, she’ll eat less Verjuyce with her mutton

T Middleton, Women beware Women, 1657

Verjuice was a very popular cooking ingredient from the Middle Ages onwards. Many old recipes ask for it and they seem to hit a peak during Tudor times. It is essentially the juice of either sour grapes or crab apples; Britain might not be the best place to grow delicious sweet grapes, but we can certainly excel in growing sour fruit! It took the place of fresh lemon juice in recipes for salad dressings, desserts like syllabubs; it was added to stews, soups and sauces as a seasoning, as well as an ingredient in marinades. It was also believed to have medicinal properties; for example, it was mixed with olive oil and blown up horses’ noses to treat colds! It was basically a necessary piece of kit in any kitchen, seeming to drop out of favour by the end of eighteenth century when lemons became more accessible.


Crushing the grapes for verjuice

The word verjuice comes from the Old French verjus, with ver-  meaning green or unripe and –jus being juice. The earliest written mention of it in British literature comes from around 1302, so we are talking old. It must have been such a useful ingredient in a place where fresh lemons will have either have been impossible to get hold of or terribly expensive.

I expected never to taste verjuice, but then as I was wandering around the excellent Global Foods Market in St Louis minding my own business, I happened upon a jar of it in the Middle East aisle of the shop. Naturally I bought some and thought I’d try some original recipes where verjuice was a main ingredient rather than just a seasoning.

17th century verjuice vinaigrette

In the 1897 volume of Good Housekeeping the subject of using verjuice in salad dressings inexplicably crops up. It takes quotes from the 17th century cook book The English Huswife by Gervase Markham. Anyway, it says that if you want to make a simple sallet then make a dressing of verjuice, sallet [olive] oil and sugar. Use it with sparagus, camphire, cucumbers, leeks, blanched carrots, purslane, with a world of others too tedious to nominate. He must have been in a bit of a mood the day he wrote that part.

It was a pretty brief recipe. Although verjuice is very tart, its underlying flavours are rather subtle so it needed quite a high ratio of verjuice to oil (much more than vinegar or lemon juice dressings).

I mixed together 4 tablespoons each of verjuice and extra virgin olive oil. To offset the sourness, I added a teaspoon of soft dark brown sugar, stirring until it dissolved. Lastly I seasoned it with a little salt and pepper. Easy and surprisingly subtle. Any leftover dressing can be stored and blown up your horse’s nose should it ever get a sniffle.


If you like the blogs and podcast I produce, please consider treating me to a virtual coffee or pint, or even a £3 monthly subscription: follow this link for more information.


Sweet verjuice ‘scrambled eggs’ with brioche toast

I recently wrote a post about fruit curds, and I seem to have found a possible source of the preserve when looking for verjuice recipes. There is a recipe in Le Patissier François (published around 1690) that has helpfully been translated into English by Harold McGee where verjuice and salt are added to eggs in order to make them coagulate at a lower temperature, tenderising them:

Break four eggs, beat them, adjust with salt and four spoonsful of verjus, put the mix on the fire, and stir gently with a silver spoon just until the eggs thicken enough, and then take them off the fire and stir them a bit more as they thicken. One can make scrambles eggs in the same way with lemon or orange juice.

It is of Mr McGee’s opinion that a sweetened version of this recipe could be the origin of the fruit curd. Notice that fresh lemons or oranges can be used, suggesting that they are less common than verjuice.

Below is my interpretation of that recipe. I add plenty of acidic verjuice and a large pinch of salt, meaning that the ‘scrambled eggs’ actually end up thickening more like a custard. I have to say it was delicious, so if you ever do come across some verjuice have a go at this recipe:

Ingredients (for 2 people)
A good knob of butter
2 eggs
6 tbs verjuice
good pinch of salt
2 level tbs sugar
2 slices of brioche

Melt the butter in a saucepan on a medium heat. Whisk together the eggs, verjuice, salt and sugar until there is no trace of white left. Pour the egg mixture in the saucepan and carry on whisking over a medium heat. Meanwhile toast the slices of brioche. When the eggs have thickened and are just about to boil, pour them into two small pots and serve with the brioche.

13 Comments

Filed under Britain, Desserts, food, French Cookery, history, Seventeenth Century

Potted Chicken Livers

Now I know you’re thinking that I am dressing up something French as British by saying ‘potted chicken livers’ instead of pâté but the British have been potting meats like beef, game and salmon, and also liver, for a long time now. Potting helps preserve meat if covered with an airtight layer of clarified butter and kept in a cool place. I am going to write a post very soon on potting meats as well as some other methods of meat preservation soon; the point of this post was for me to write a little diatribe about how the word pâté has the same roots as pot so I could feel a little smug and say that I was right. You know like those people who say raspberry coulis, when they just mean sauce. It turns out that I was a little wrong: my French is worse than pidgin and I just assumed the two words had the same root. I am blaming Elizabeth David for this gaff: she talks of potted chicken livers as though that’s what everyone calls them down her way.

Pot or pâté? Ms David knew which side of her toast was buttered

So as it turns out that the word pâté has the same roots as the words pastry and pasta, coming from Greek words meaning ‘small particles and fine textures’ according Harold McGee in his tome On Food and Cooking. So potted livers have a fine texture as they are a mixture of butter and liver, and pastry is made up of particles of flour and butter. Actually, pâté started life more as a chopped assemblage of meats, rather than the refined smoothness we think of today. Oddly enough pâté and pie eventually became interchangeable words in medieval times because chopped meat was often cooked in pastry on both sides of the English Channel. As I have said before, the food histories of Britain and France blend so much there is sometimes no point in trying to discern between the two.

Anyway, I have chuntered on enough now so I shall give you two recipes for potted chicken livers. First, a couple of mentions on preparation and storage: in this recipe the livers are fried in butter until pink, about 4 or 5 minutes on a high heat. It is very important that they should be cooked through and only slightly pink, not just seared and bloody and rare. I don’t want you coming down with Campylobacter or some other nasty food poisoning microbe. The other thing is to cover your potted livers with a good layer of clarified butter along with a lid or a covering of cling film, especially if being kept in a cold larder. The butter isn’t necessary if you are keeping them in the fridge, but they should be covered with something; butter is best though as it stops the livers from oxidising and turning from rich brown to muddy gray (oxidising is harmless, they’re still good to eat).

To make clarified butter, slowly melt some butter in a saucepan over a low heat. Skim off any froth or foam with a spoon and then decant the butter into a jug making sure none of the butter solids get poured out with it.


If you like the blogs and podcast I produce, please consider treating me to a virtual coffee or pint, or even a £3 monthly subscription: follow this link for more information.


Potted chicken livers with brandy and peppercorns

This is the classic recipe for potted chicken livers, though I find that there is never enough brandy. I use quite a lot compared to many recipes because I like to be able to taste it; brandy is very rich and it can be a bit too much, especially with all that liver and butter too. To counteract this is I add a good dose of piquant pickled green peppercorns which are available at delicatessen’s shops or online. You can of course omit the peppercorns and reduce the amount of brandy if you’d rather.

Ingredients

8 oz chicken livers

6 oz butter

2 to 4 tbs brandy

3 tsp rinsed and drained pickled green peppercorns

salt and black pepper

clarified butter (optional)

Pick over the chicken livers, removing any large pieces of gristle, carefully removing any little green bile ducts that may be left on them. Get a frying pan nice and hot and add 2 ounces of the butter. When the butter stops foaming, add the livers and fry for a total of 4 or 5 minutes, turning them half-way through.

The idea is for the livers to be cooked, but still a little pink, so cut inside one to check after 4 minutes of frying. Tip the livers and butter into a blender or food processor and return the pan to the heat whilst you deglaze it with the brandy. Tip the brandy and burnt bits into the blender along with the rest of the butter and blitz until the required smoothness (I like mine very smooth). Mix in the peppercorns and the seasoning before potting in one large earthenware pot of several smaller ones. Pour over the clarified butter to form an airtight seal.

Potted chicken livers with gin, rosemary and thyme

My attempt at a recipe rather more Scottish in its flavours, which I think works very well. These livers are much more savoury and less rich than in the recipe above: a good shot of gin provides a subtle aromatic bitter hit of juniper, and the fresh herbs mellow it nicely.

The method is exactly the same as the above except 2 teaspoons each of finely chopped rosemary and thyme are fried along with the livers. Of course exchange the brandy for the gin and omit the pickled peppercorns.

10 Comments

Filed under Britain, food, French Cookery, history, Meat, Preserving, Recipes